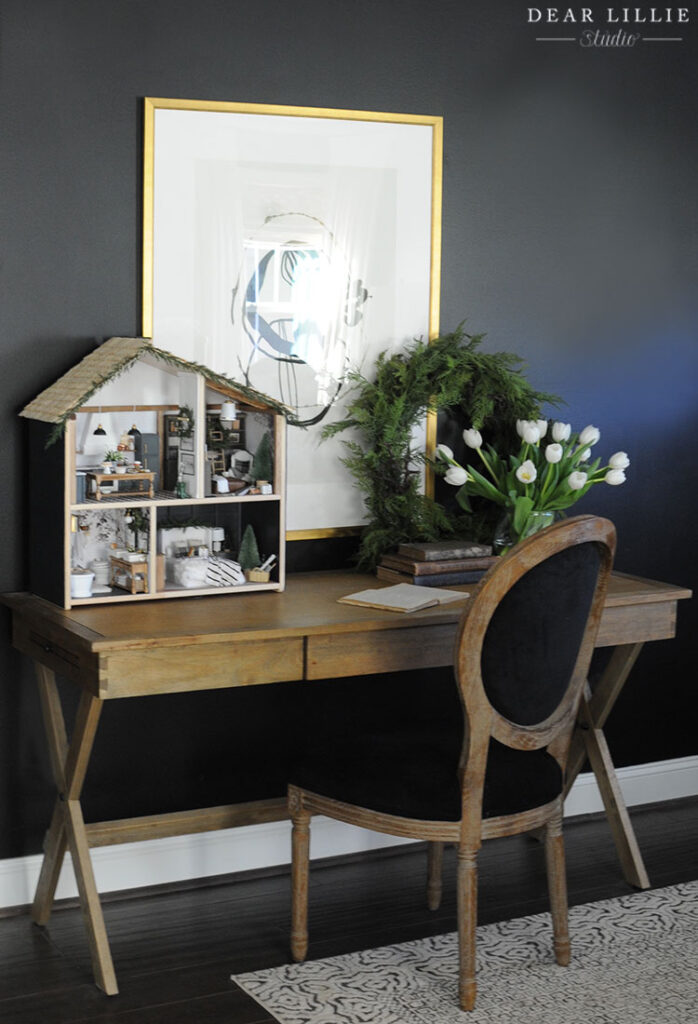
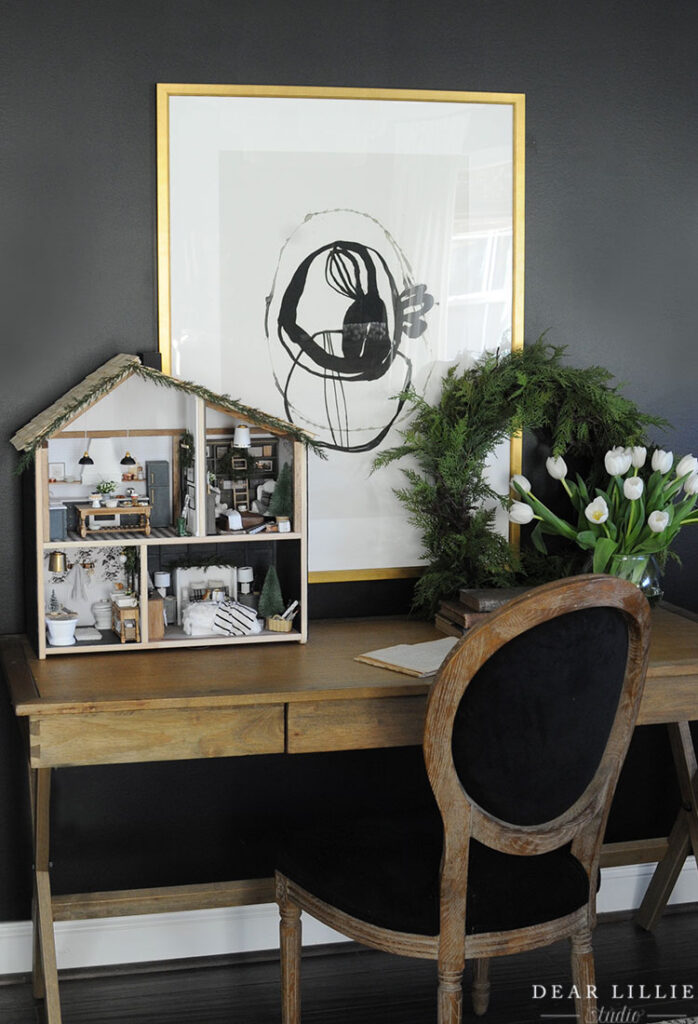
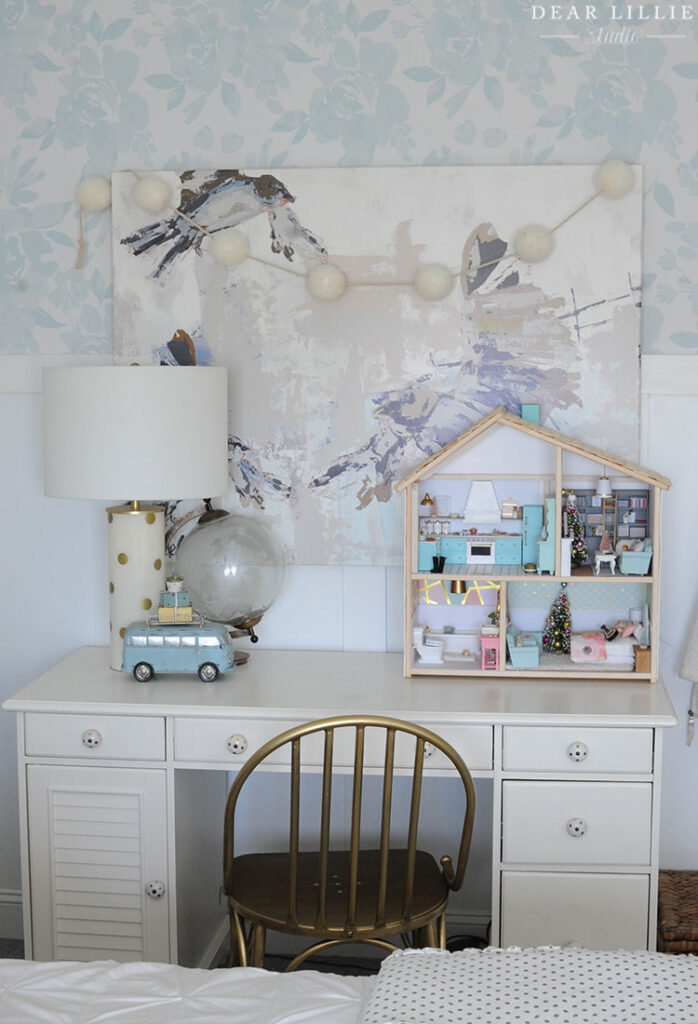
Good morning and Happy Sunday! I shared pictures of Lillie’s dollhouse in her room a couple of weeks ago (you can see it here at the bottom of this post) and today am going to share some pictures of the Christmas decorations I added to mine. And yes, the dollhouse is sitting on the desk in our bedroom, which as a 38 year old woman makes me feel really quite embarrassed – haha! I’ve been meaning to carry it up to our bonus room since we finished them but somehow it is still sitting in here. Don’t make too much fun of me…actually never mind, you can! If you missed it you can read all about the dollhouses themselves here in this post.
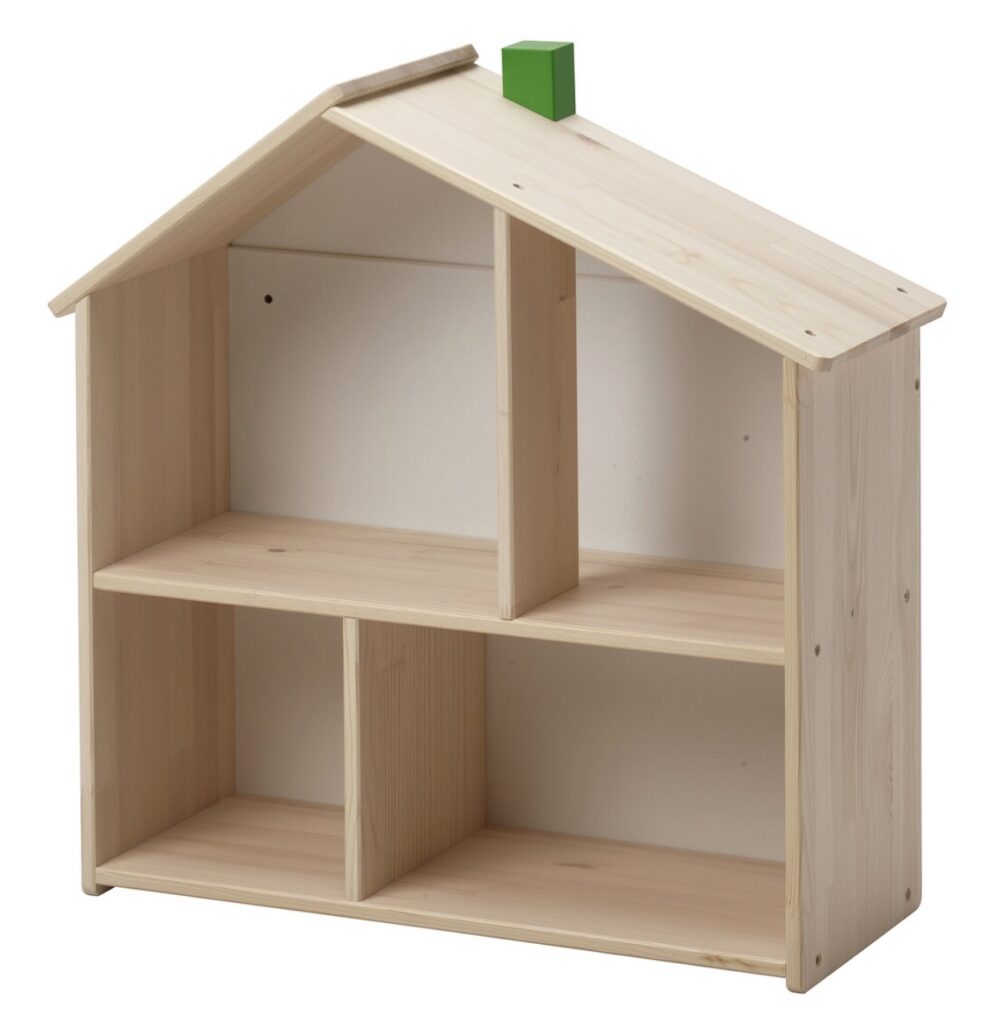
And here is a little reminder of what they looked like when we purchased them from Ikea for $34.99.
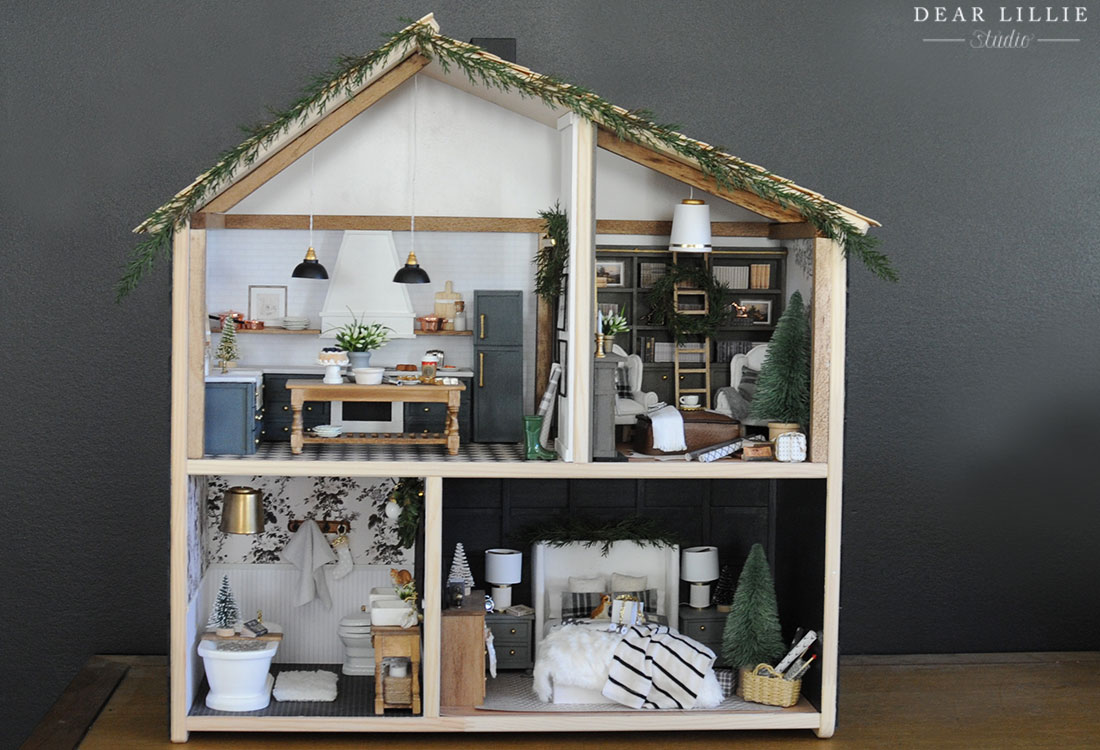
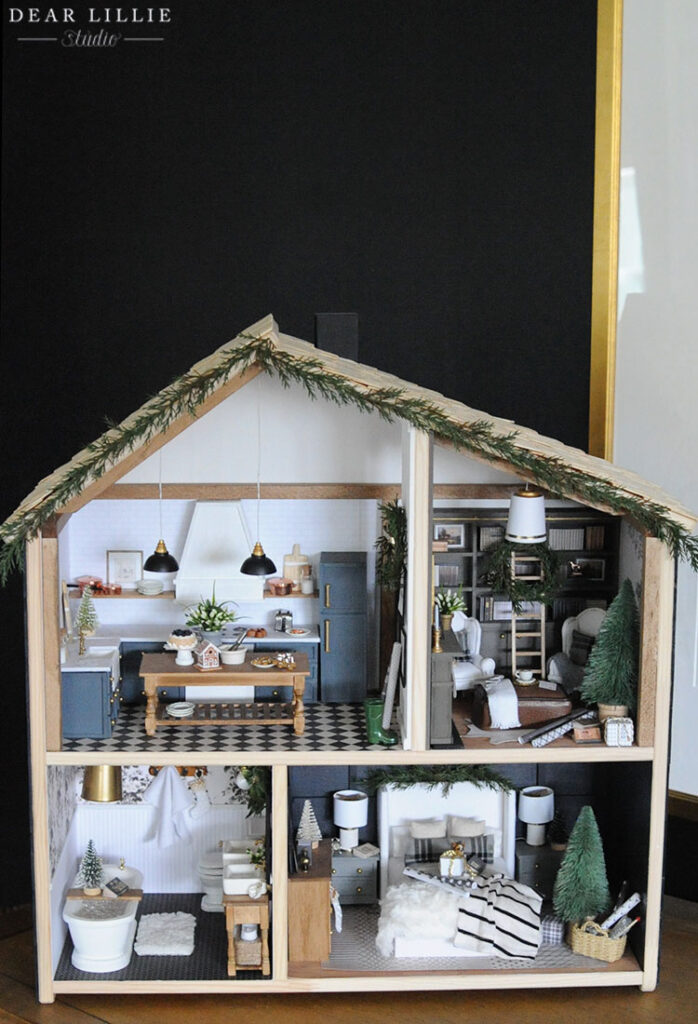
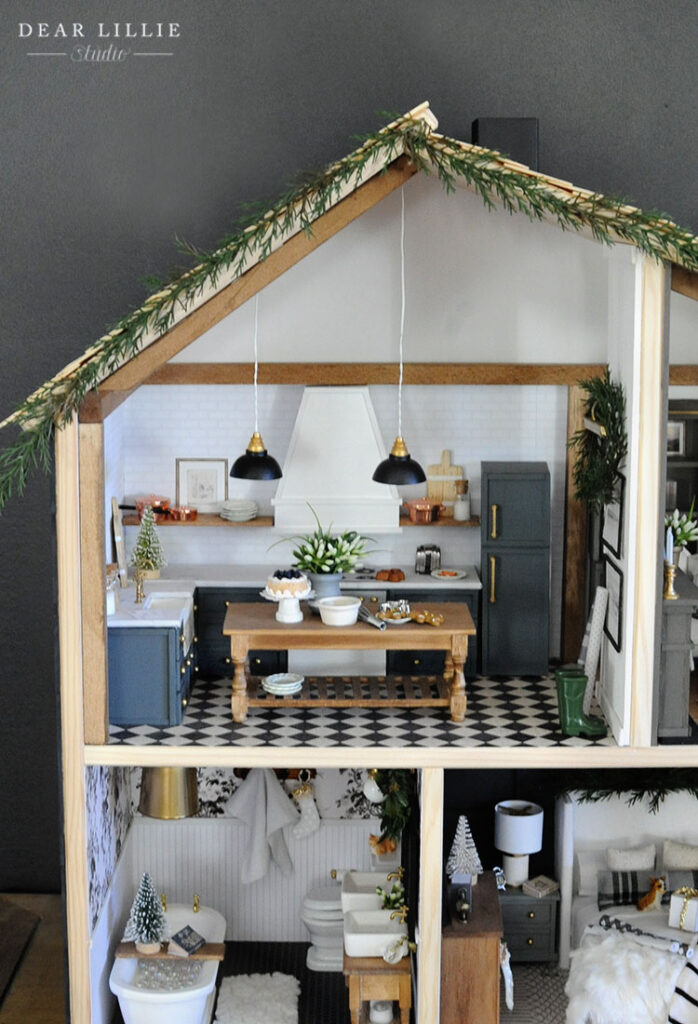
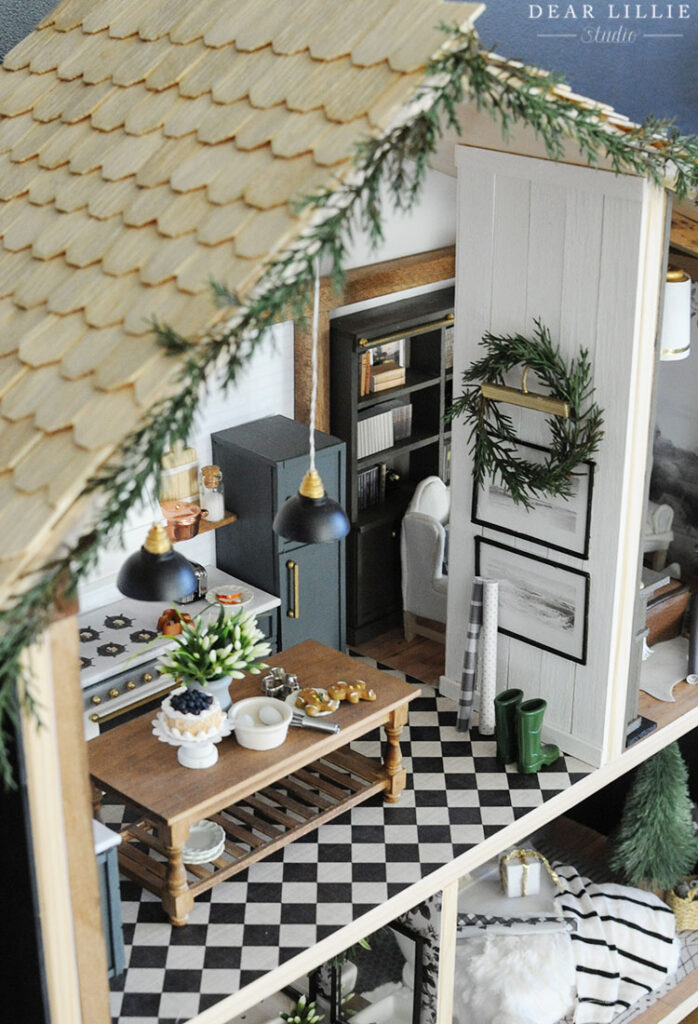
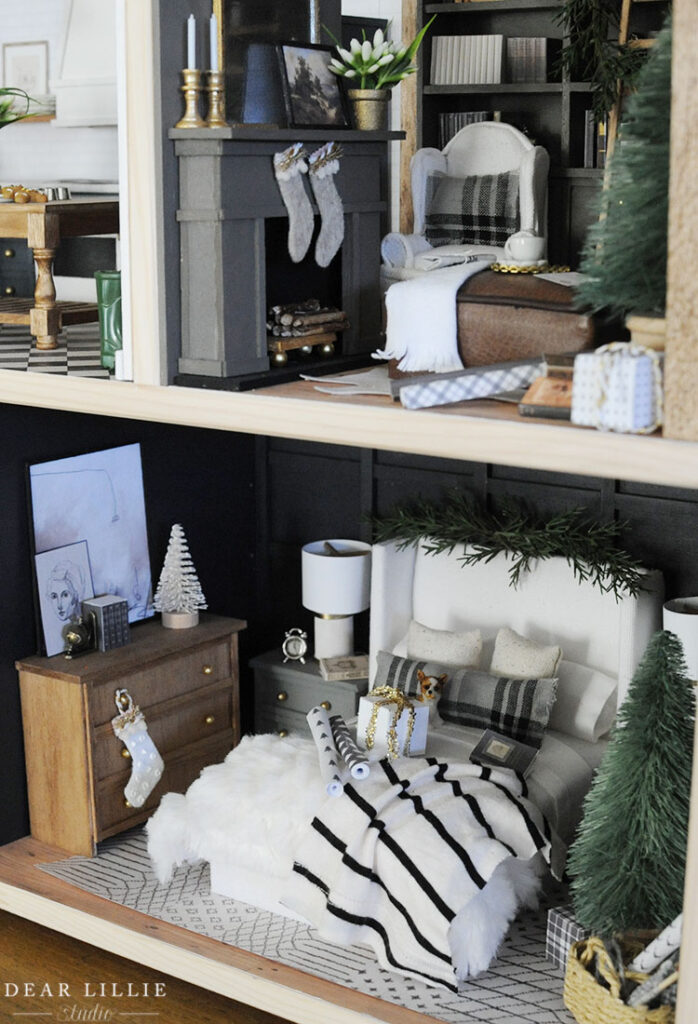
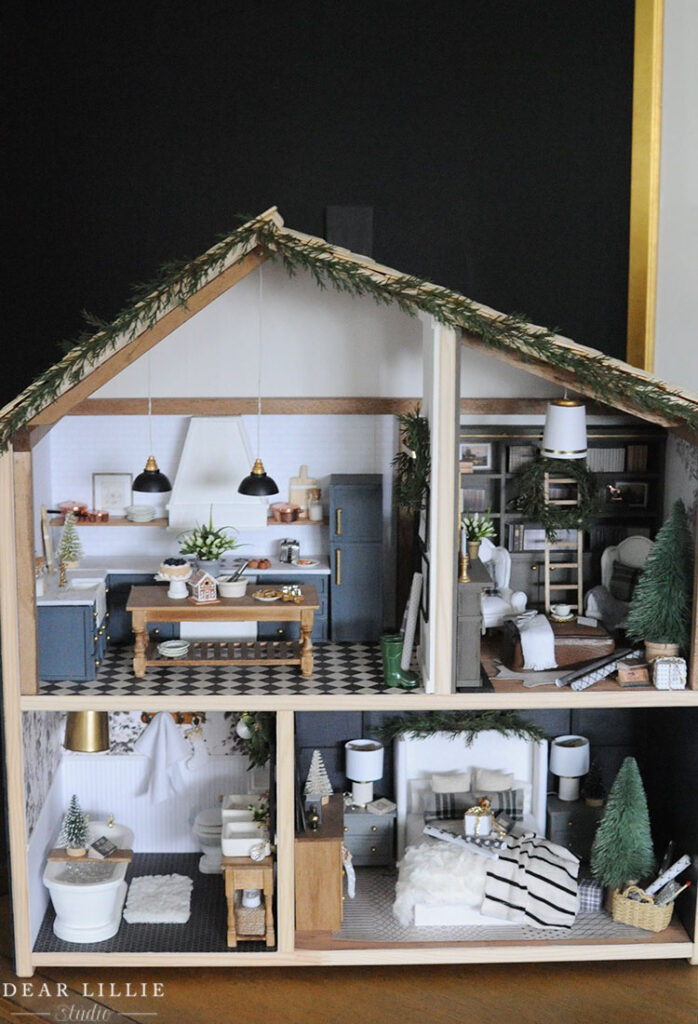
And here it is now all decked out for the holidays:
I’ll share a full shot of each room first. And then I will share more detailed shots of each room after that. Sorry – this is a VERY picture heavy post! I’ll include where I got all of the Christmas decor or if I made it explain that too here in the text of the post and then at the bottom of the post is a source list that details where we got everything else or if it was something we built ourselves.
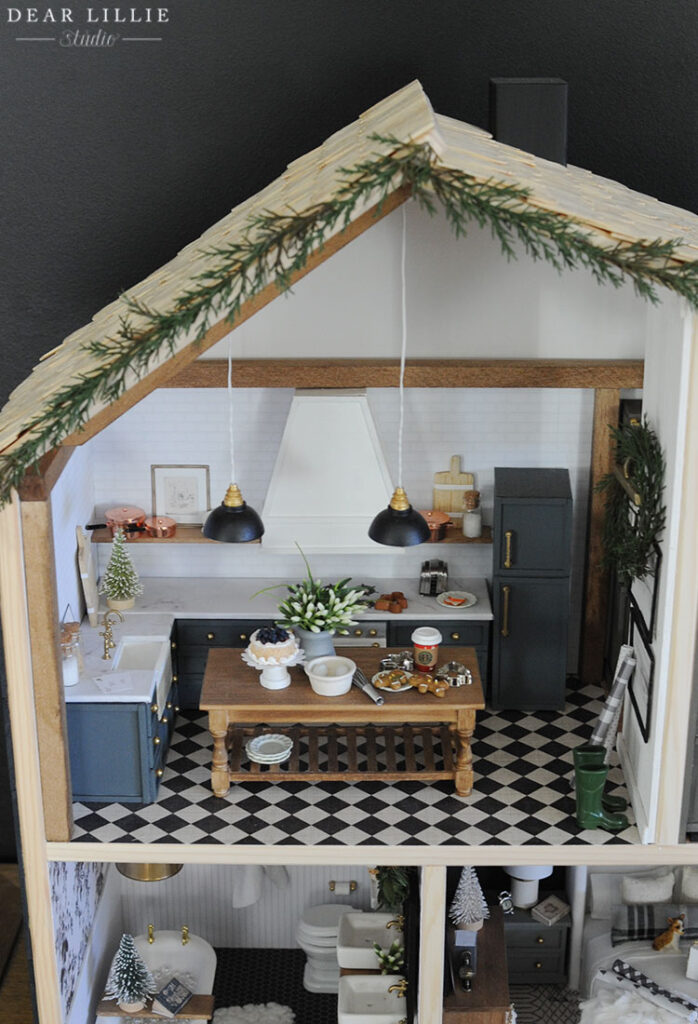
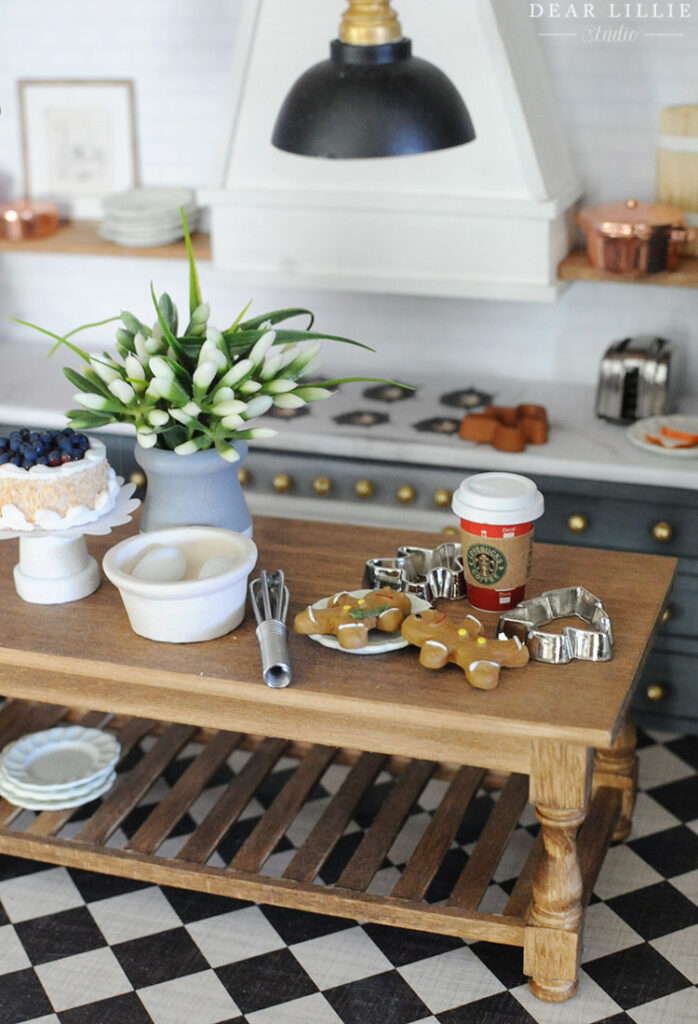
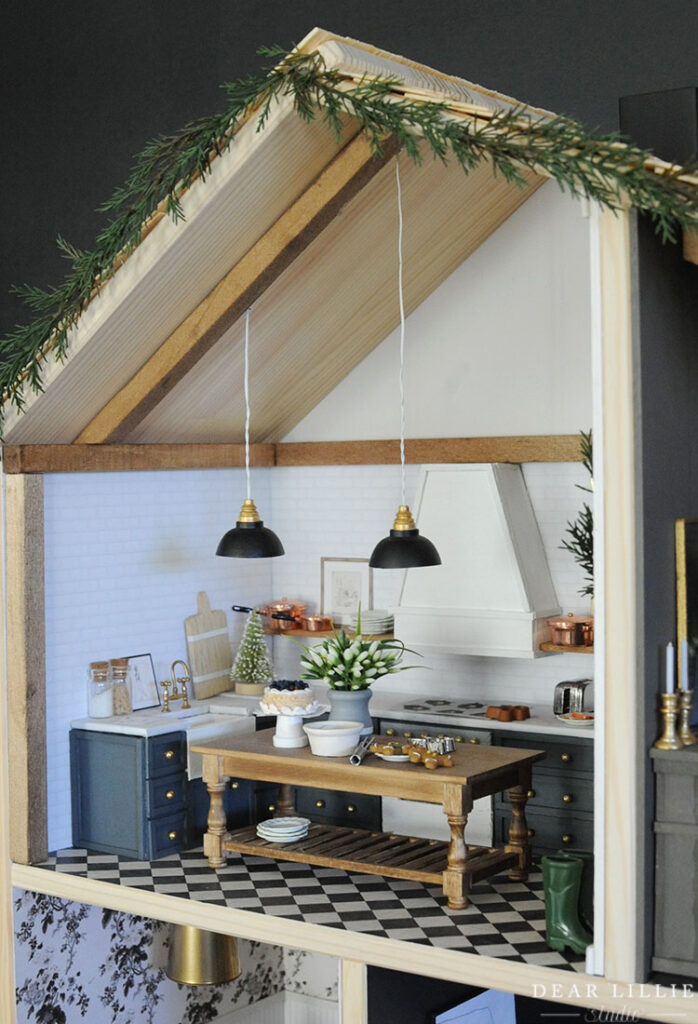
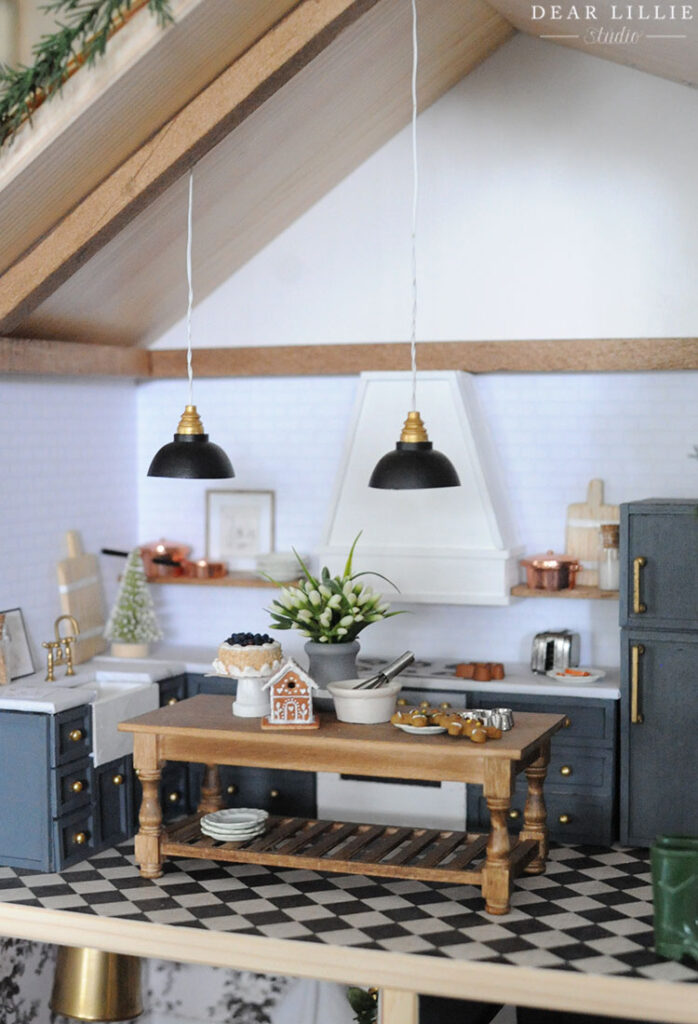
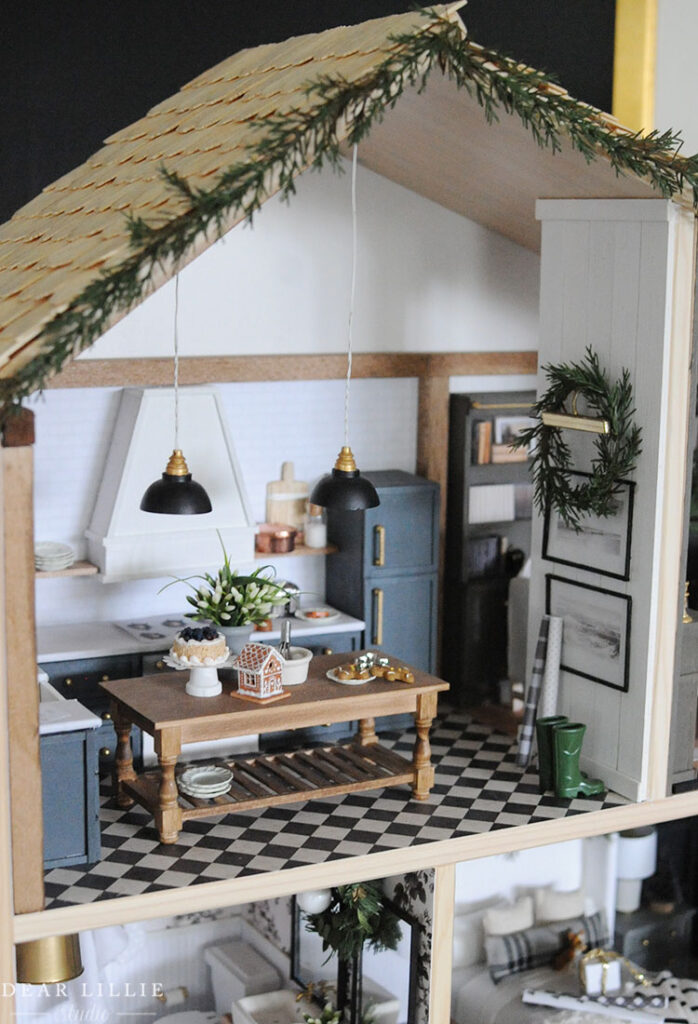
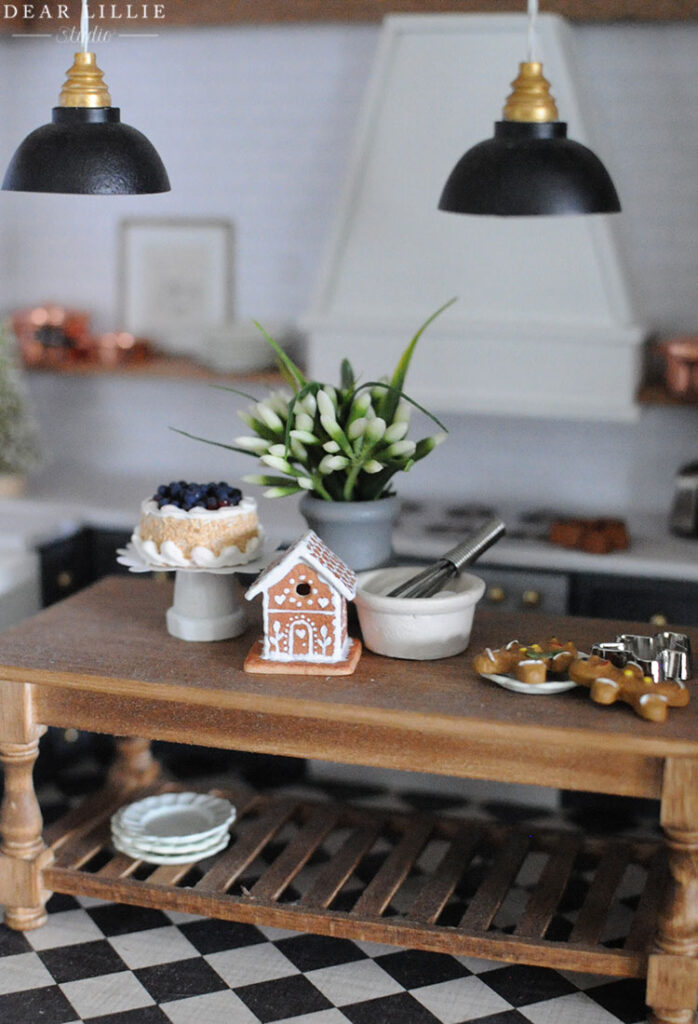
So first up is the kitchen:

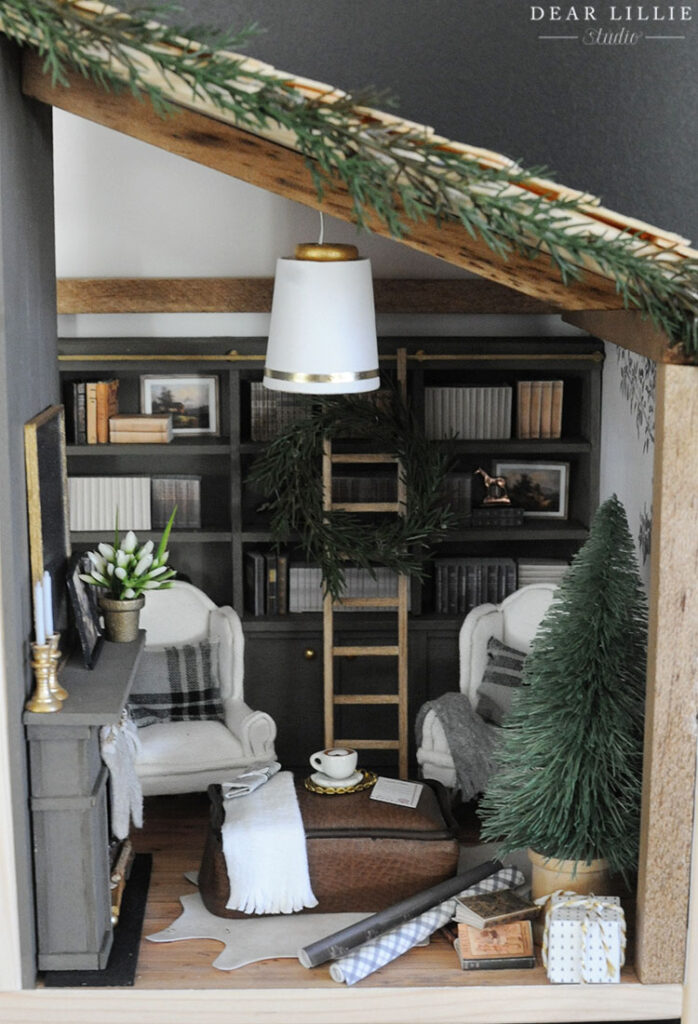
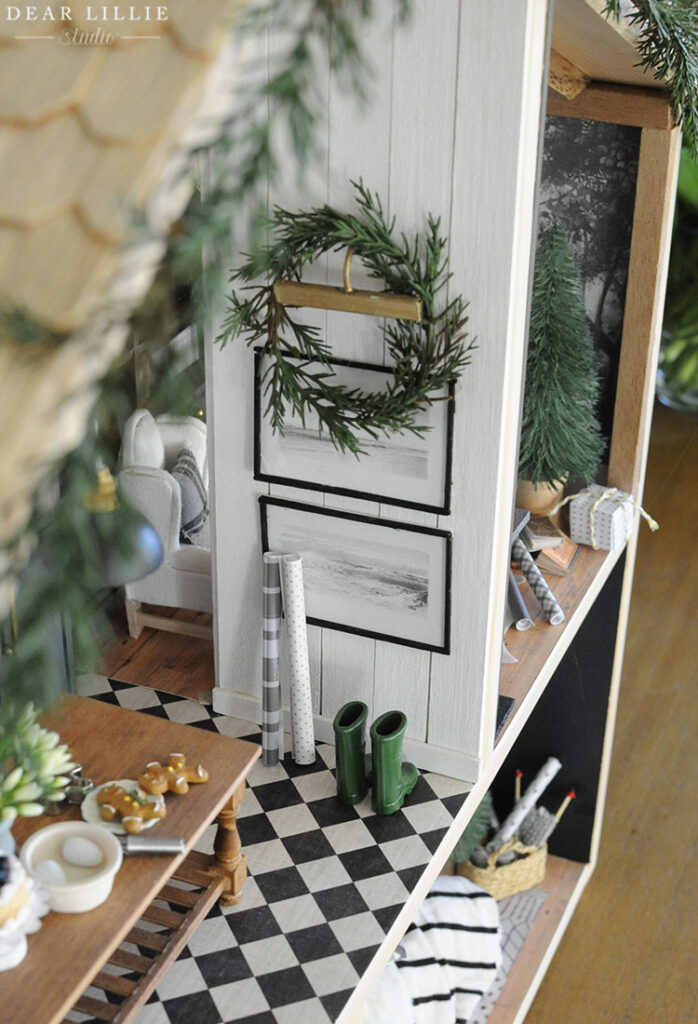
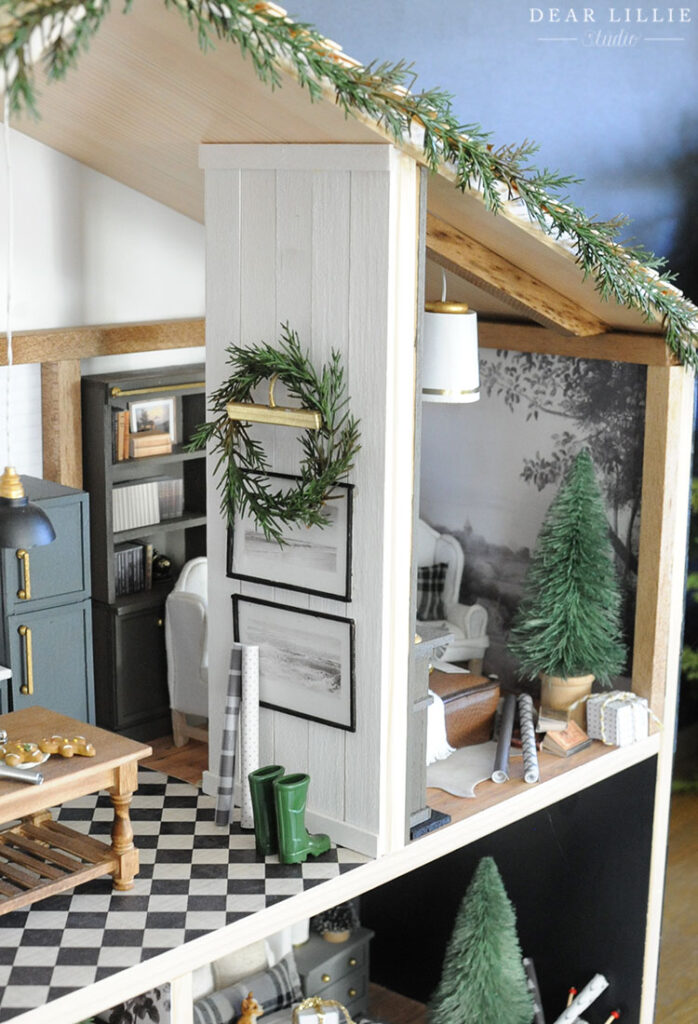
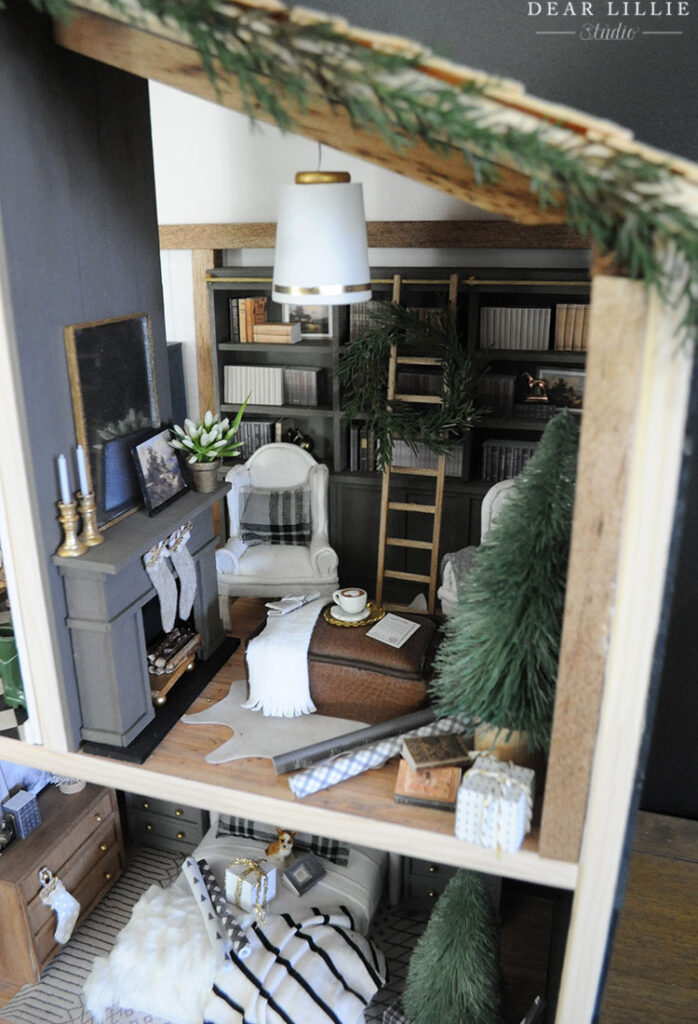
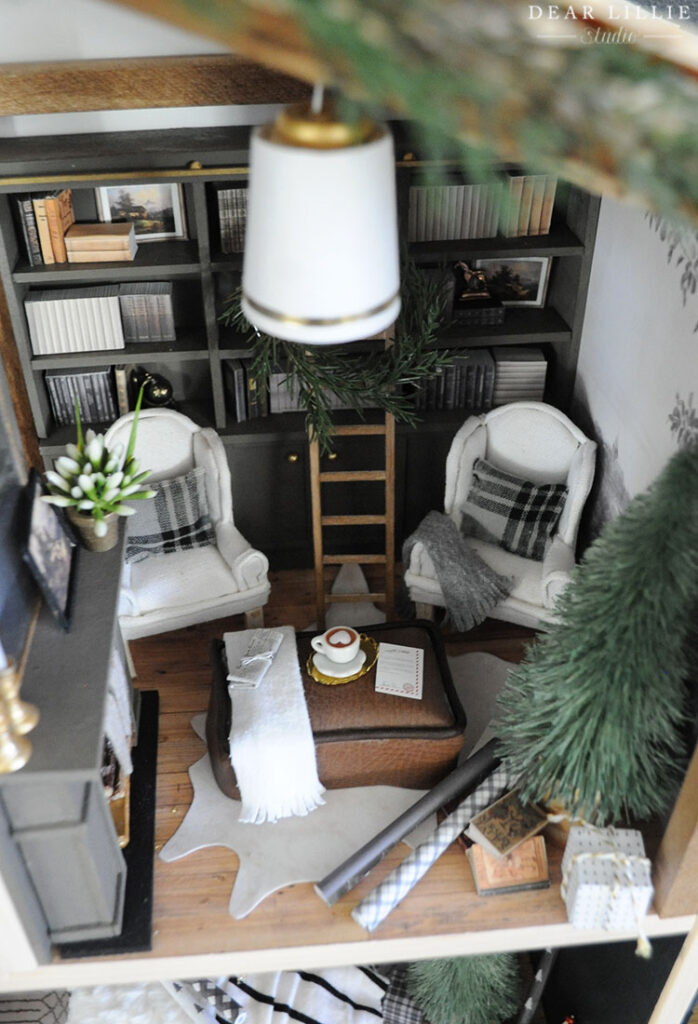
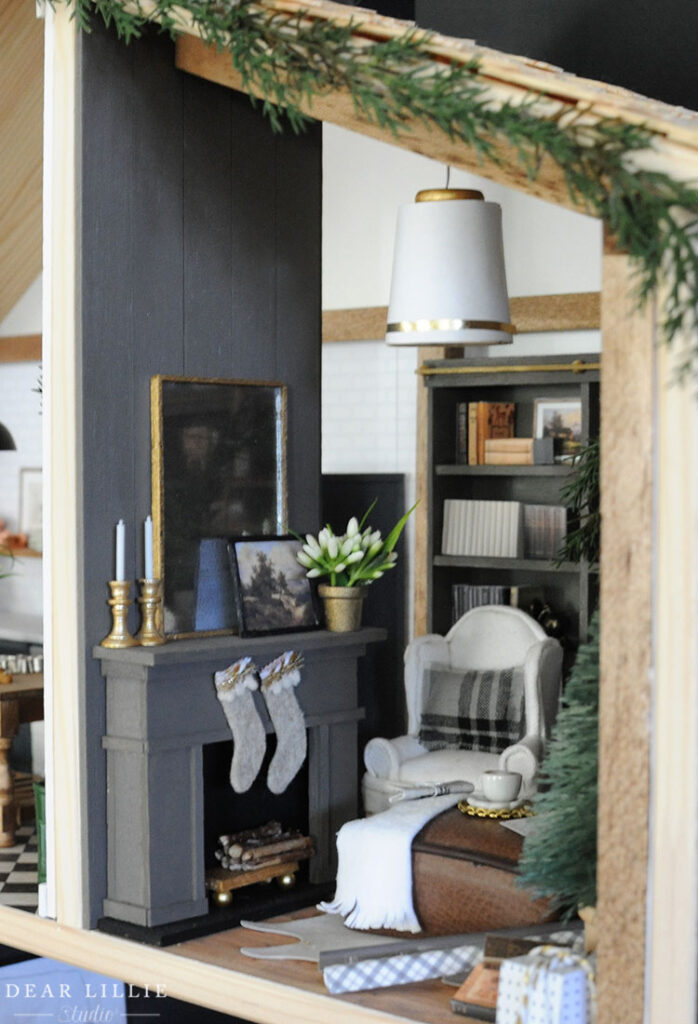
Then we have the “study”:
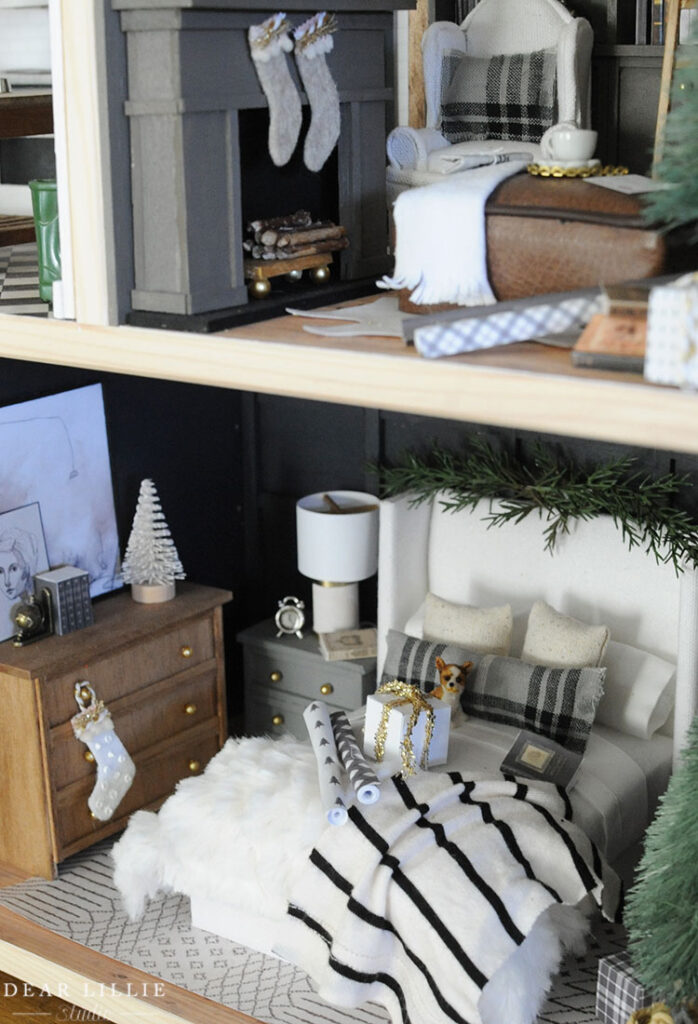
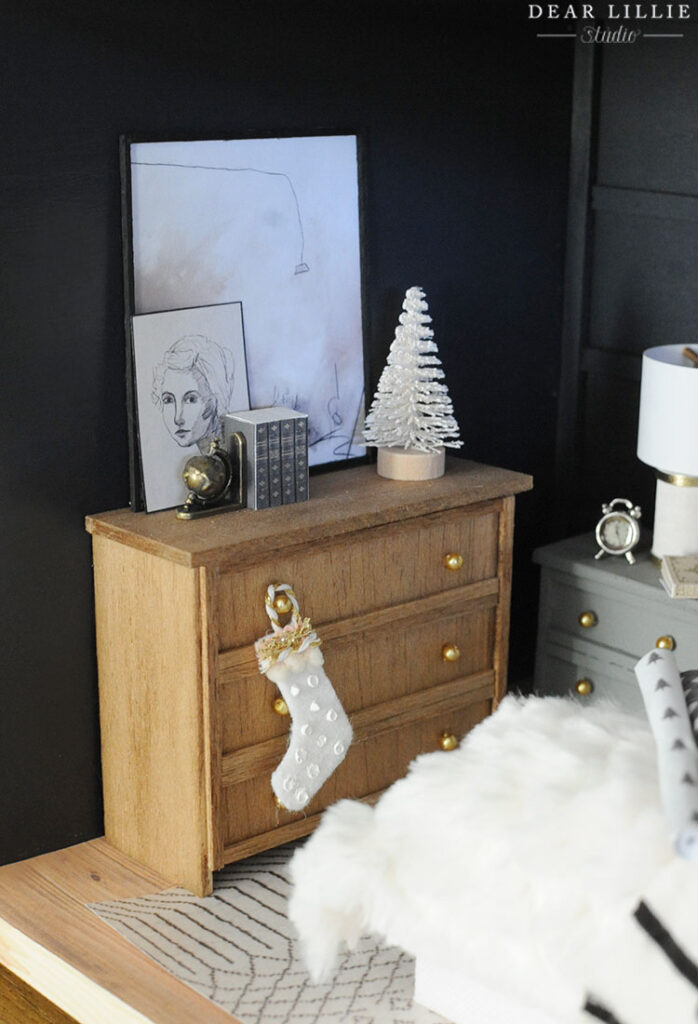
and then we have the bedroom:
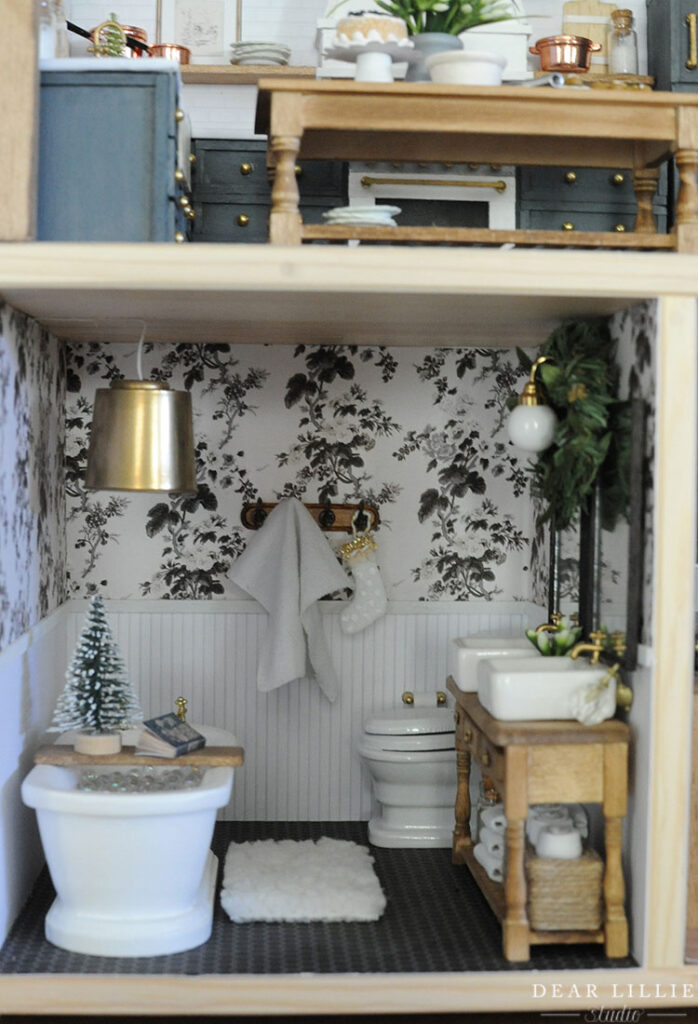
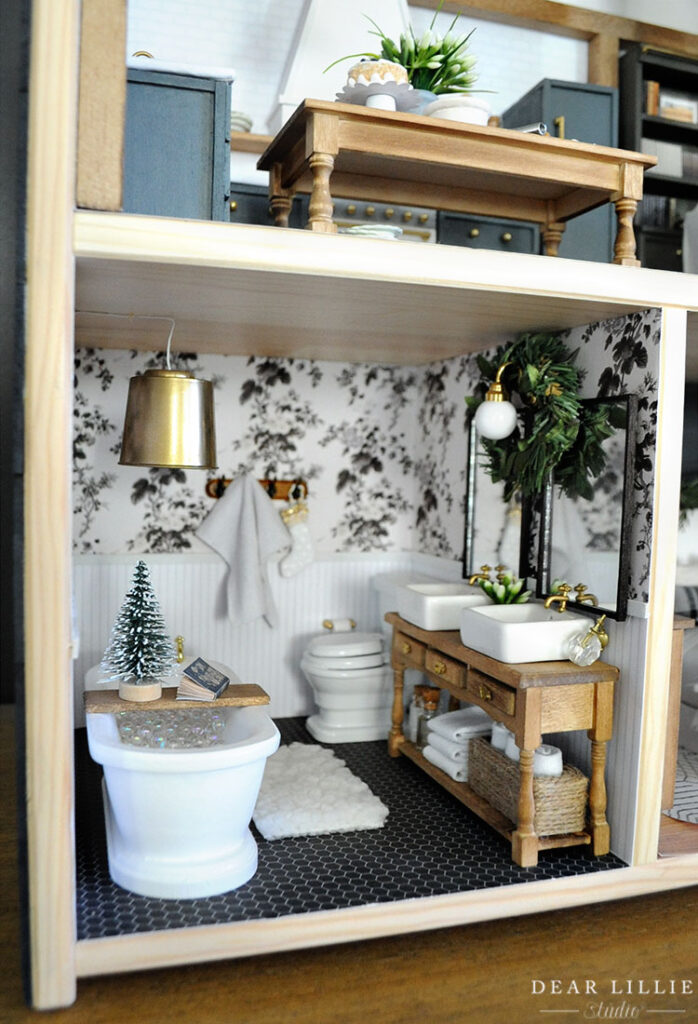
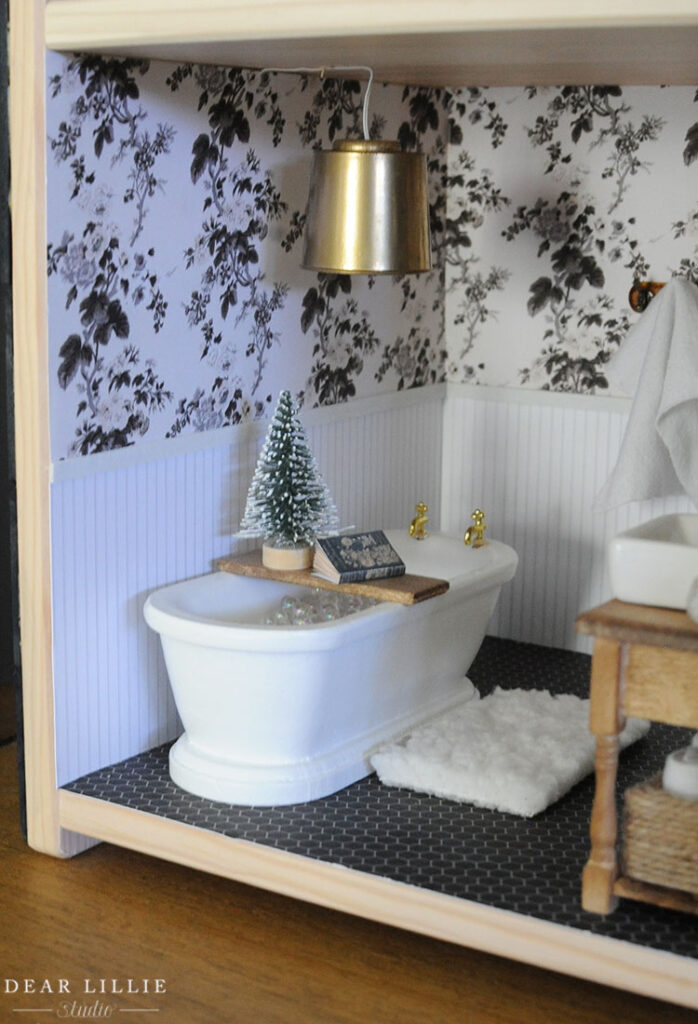
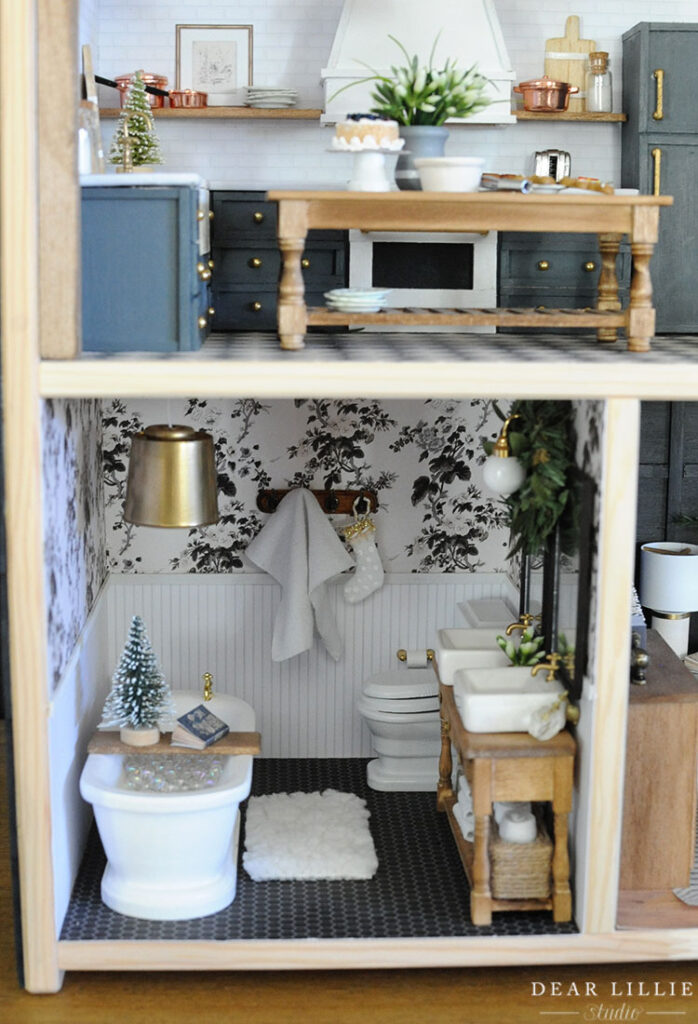
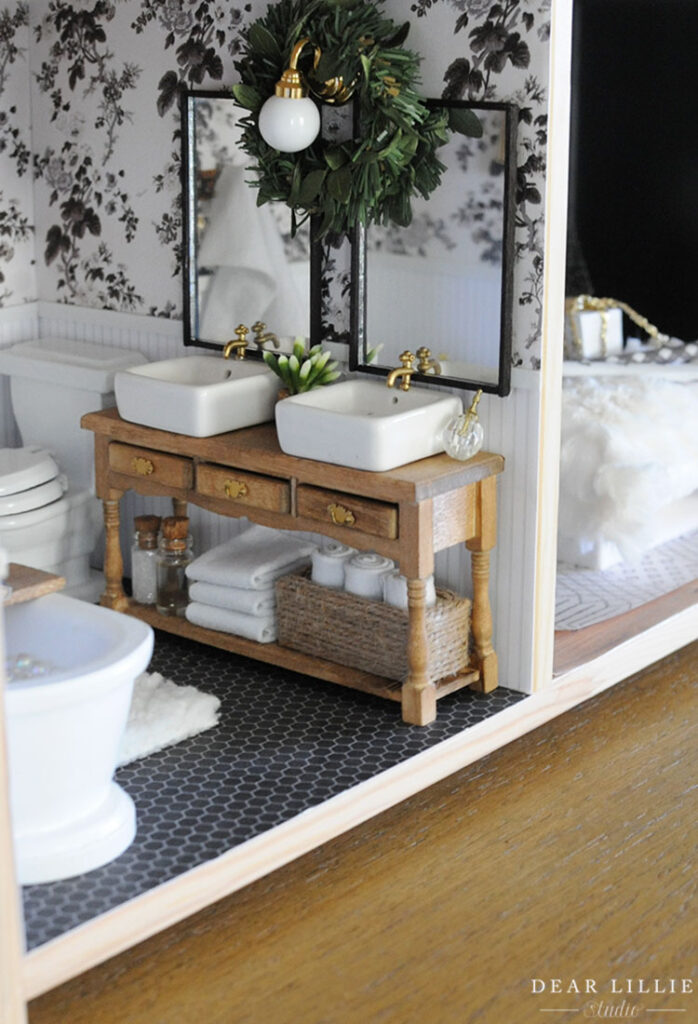
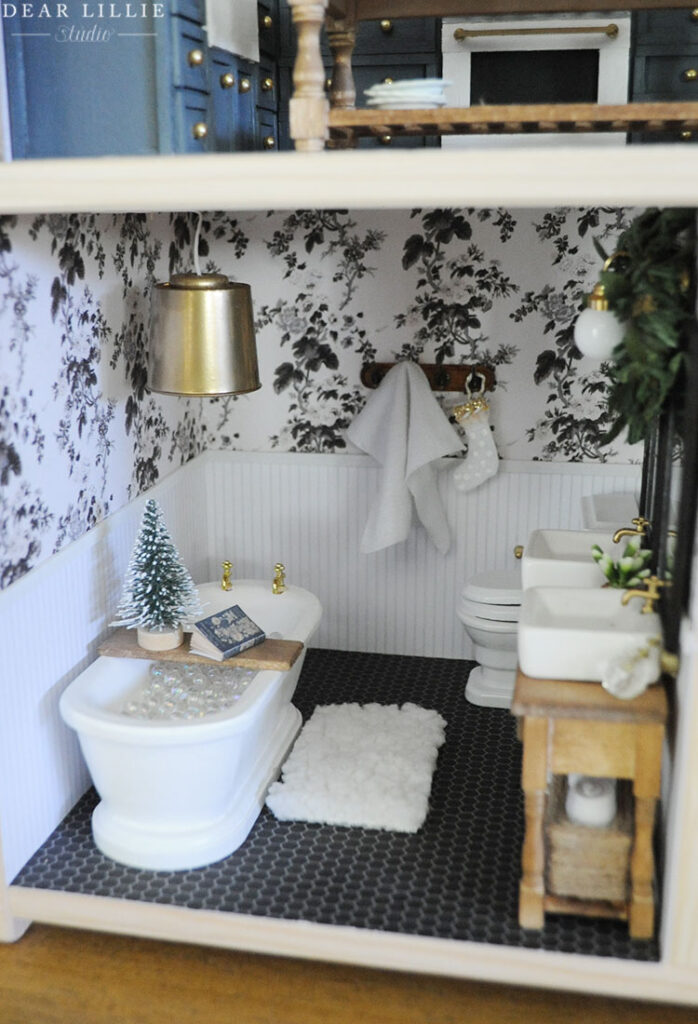
And finally we have the bathroom:
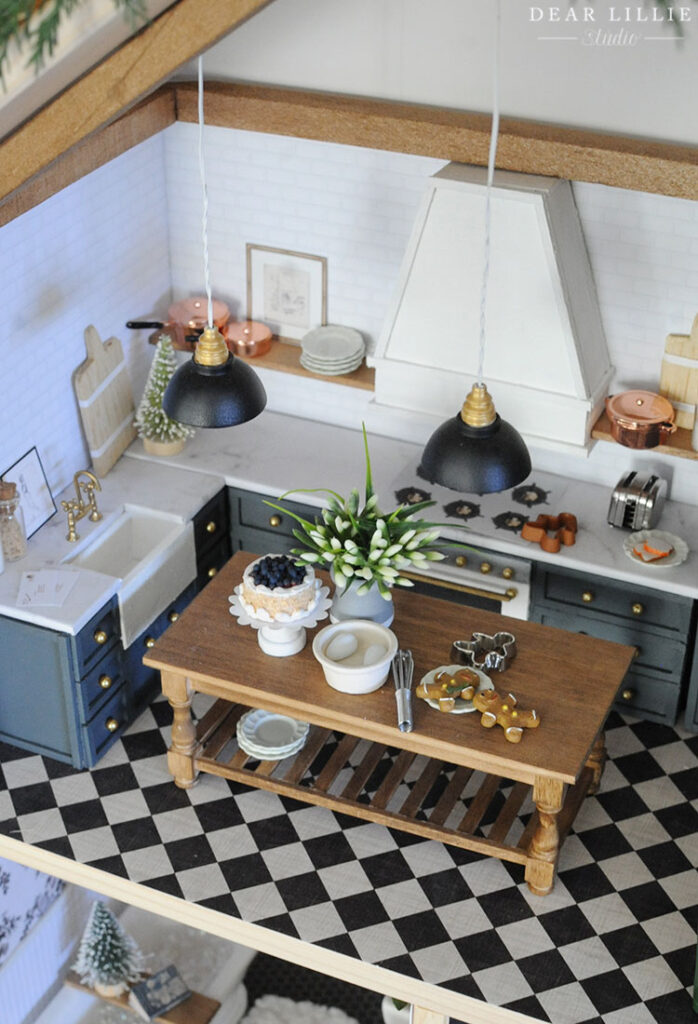
Okay so here are lots and lots of photos of the kitchen! Sorry, there are by far the most shots of this room because I shot it twice. I had been waiting on a little gingerbread house to arrive but finally ended up taking the photos on Friday knowing I was running out of time and then of course it arrived late yesterday afternoon. It was really too late in the day and was getting too dark to get decent photos but I still went ahead and retook the kitchen ones because the gingerbread house was just too cute not too include! So that is why it is in some of the photos and not in others.
First, all of the garland and the wreaths you see in the dollhouse were made from an old garland I have had since before Lillie was born! I just pulled some of the tiny little branches off it it and then glued them together as a garland for the top of the house and also in the bedroom and then also glued some pieces into a little round shape for the wreaths you see in several of the rooms. For the garland I just VERY lightly hot glued three little dots (on on the top and one on each corner) to attach it to the roofline that way I could just pop it off with my fingernail after the holidays.
Although I tried to make as much as possible myself with supplies on hand I did order a few things like this Christmas Starbucks cup. Unfortunately the sizing on this is a bit off (I ordered the 1/6 scale instead of the 1/12 on accident) so I didn’t include it in most of the pictures. I think it was Lola’s favorite part though and it is really cute.
The little gingerbread men and cookie cutters were from Hobby Lobby. If I remember correctly I think they were from the crafting section and not the dollhouse section but I might be wrong on that.

The little miniature Christmas tree over on the corner of the countertop came in a little pack of 8 from Hobby Lobby and Lillie and I each took 4. She took the ones that were pastel colored and matched her dollhouse decor and I took the four that were green and white that matched with mine. They are hard to see in most of these pictures but there also are a couple of little envelopes over on the counter stamped and ready to be mailed. I just found some images online and printed them out tiny.
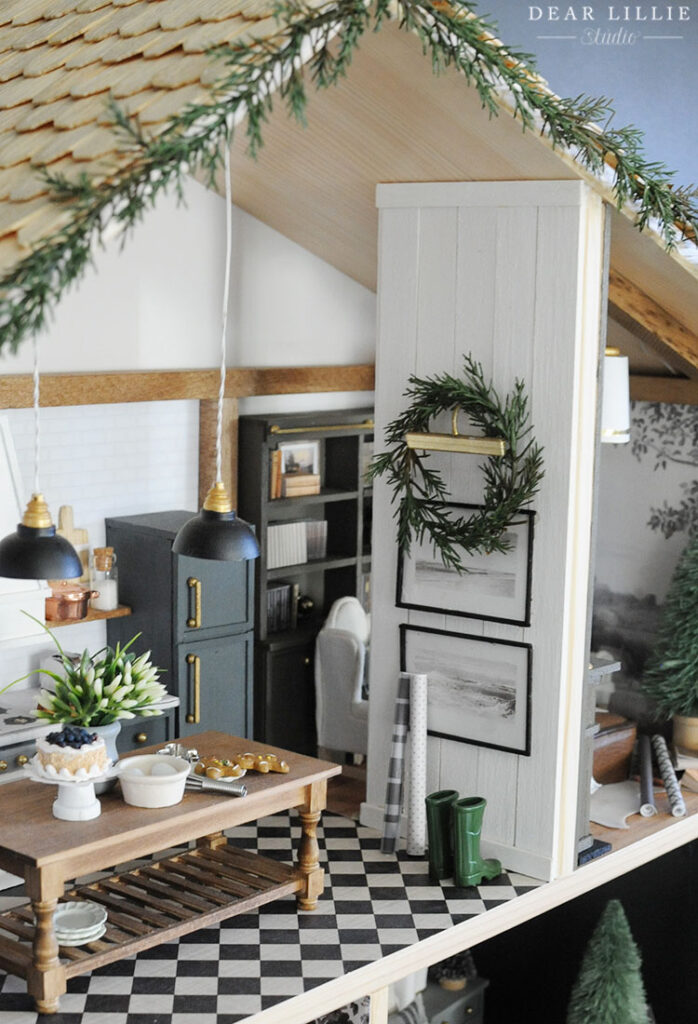
One of my two favorite purchases for this dollhouse were these little green boots! They are the cutest! (And the other was the gingerbread house.) Next to the boots are some rolls of wrapping paper. Those were really easy to make. I just found some patterns I liked online and then sized them down to about 3 inches wide by make 7.5″ long and then cut them and just rolled them nice and tight and then secured the roll with a tiny bit of tape.
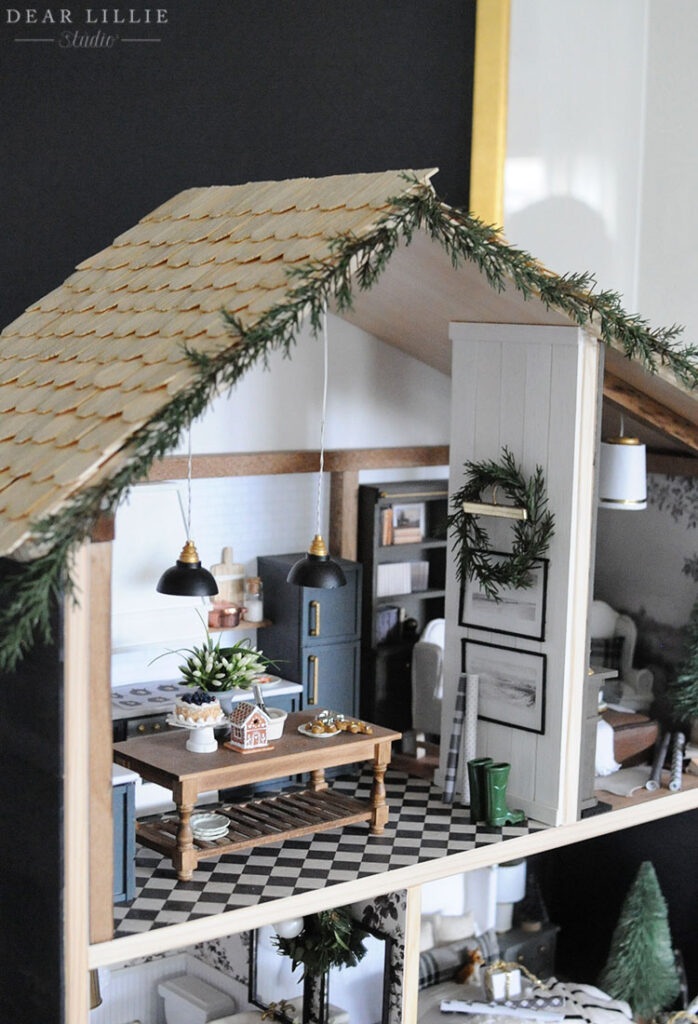
And seriously how cute is the little Gingerbread house?!? I got it from this cute little Etsy shop.
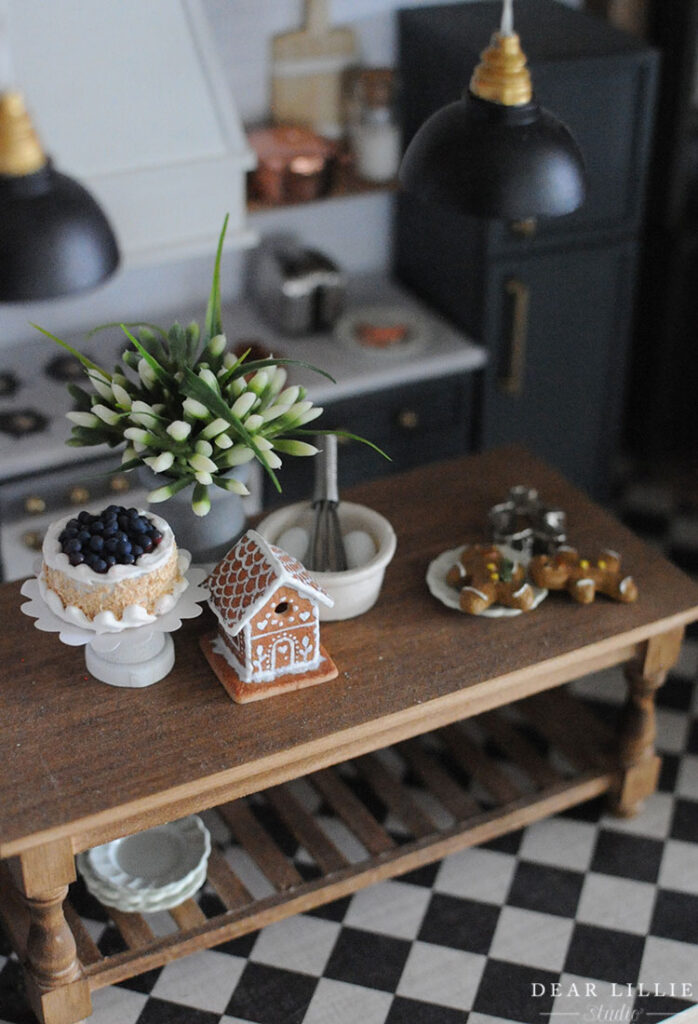
Also, let’s pretend it’s flour from baking all over the island top! Hahaha! As I was editing these pictures I realized I probably need to give the dollhouse a good dusting. Hahaha!
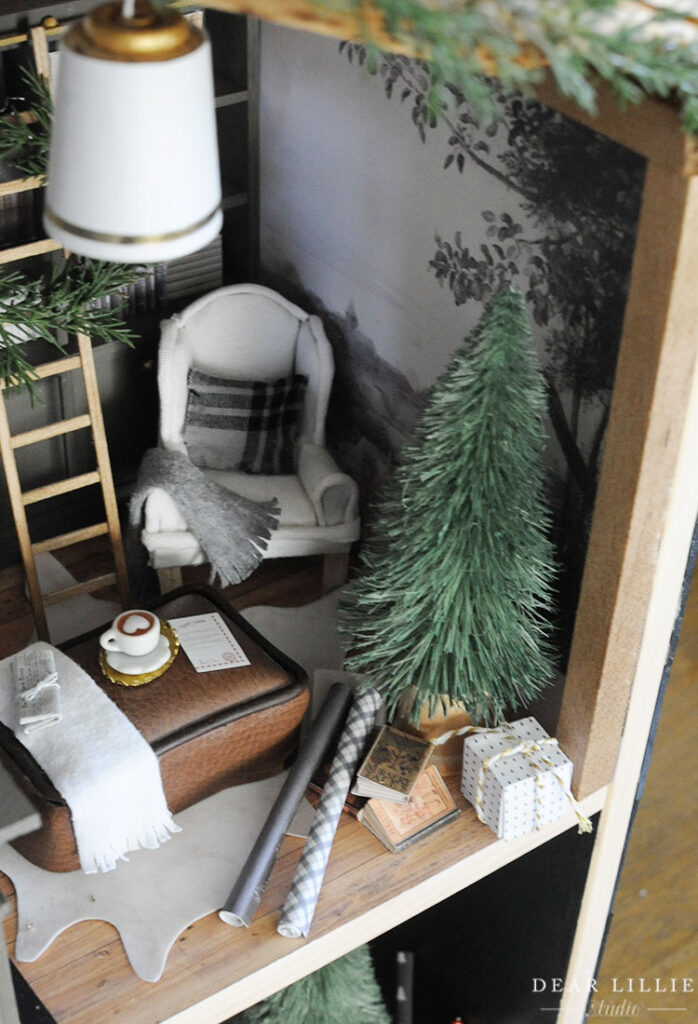
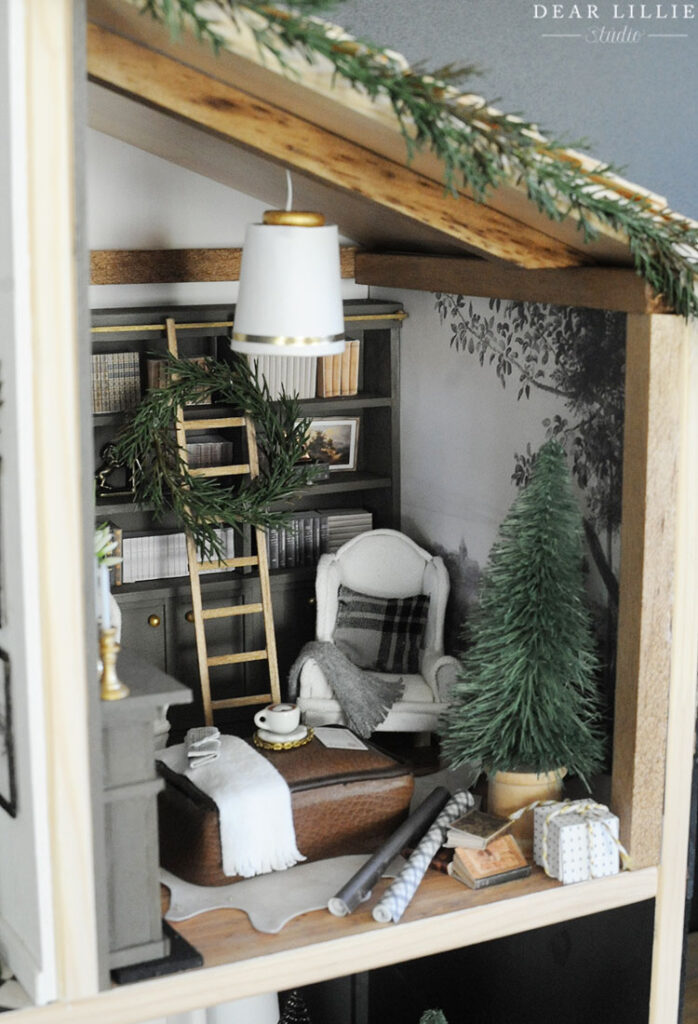
Now onto the study! The tree came in a little pack of three from Hobby Lobby. I used one here in the study and one in the bedroom. And then I made some more rolls of wrapping paper and also a little gift box. I made that from cardstock that I folded into the shape of a box (if you look online you can find some templates to work off of to help make the folds right) and then I added a little piece of twine for the ribbon.
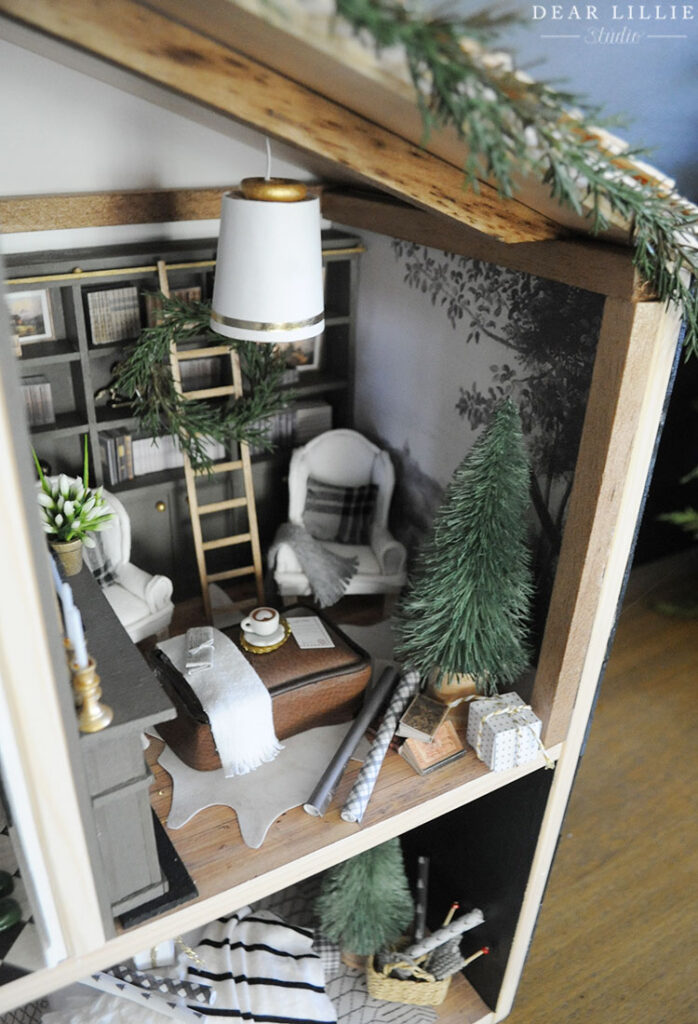
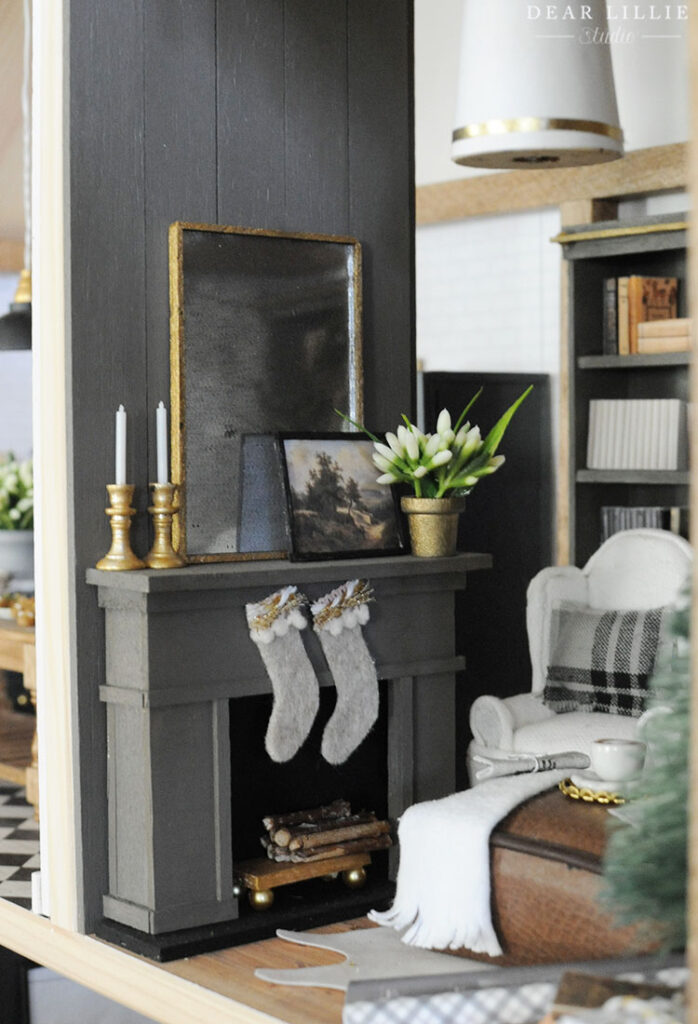
Over on the mantle I added some little stockings. I just cut those from felt and then added on a little bit of trim to the top to give them a more finished look. And then I printed off a little “letter to Santa” that is on the ottoman next to the cute little coffee cup.
Here’s a close-up of the stockings:
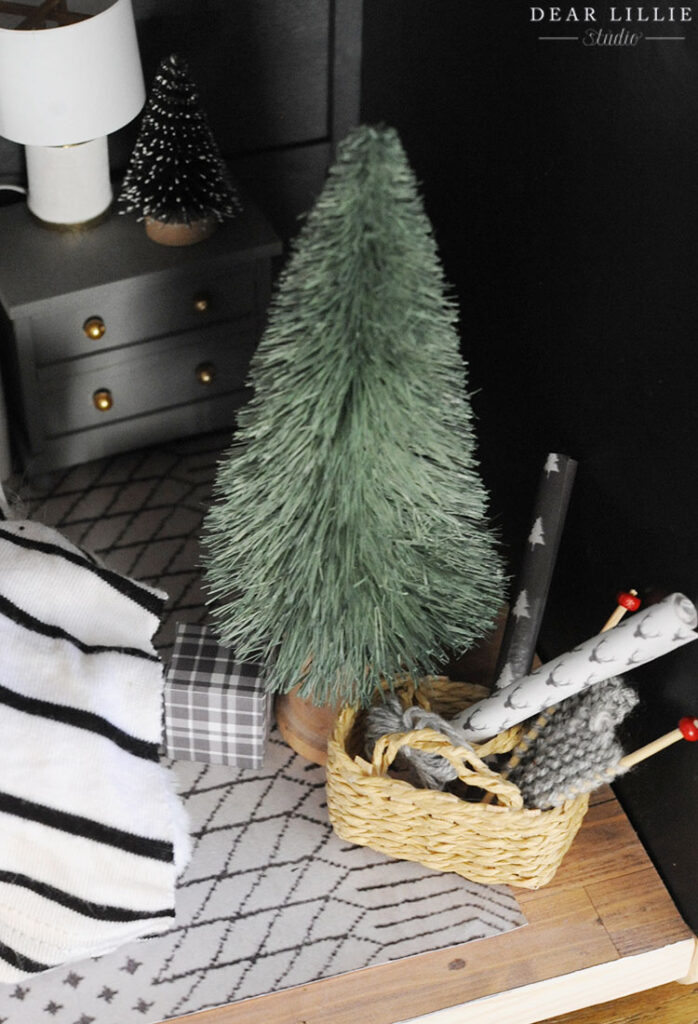
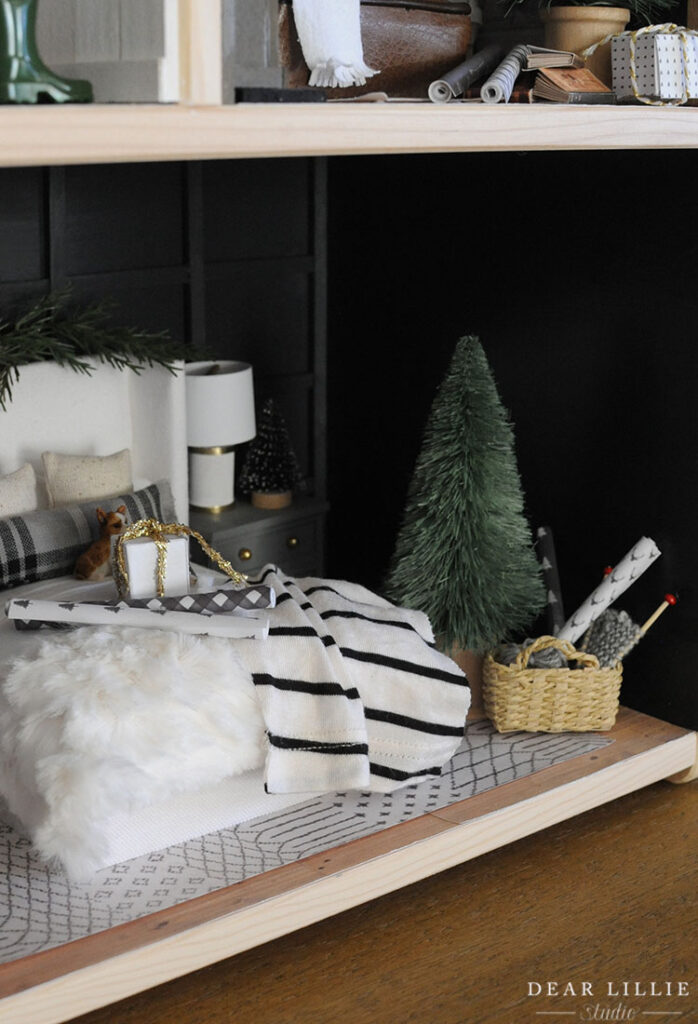
And now for the bedroom. In here we’ve got another one of the baby trees that came in that same set I mentioned above as well as another larger tree that also came in a set. I also made several more rolls of wrapping paper for this room and a couple more gift boxes (one is on the bed and one is down by the tree).
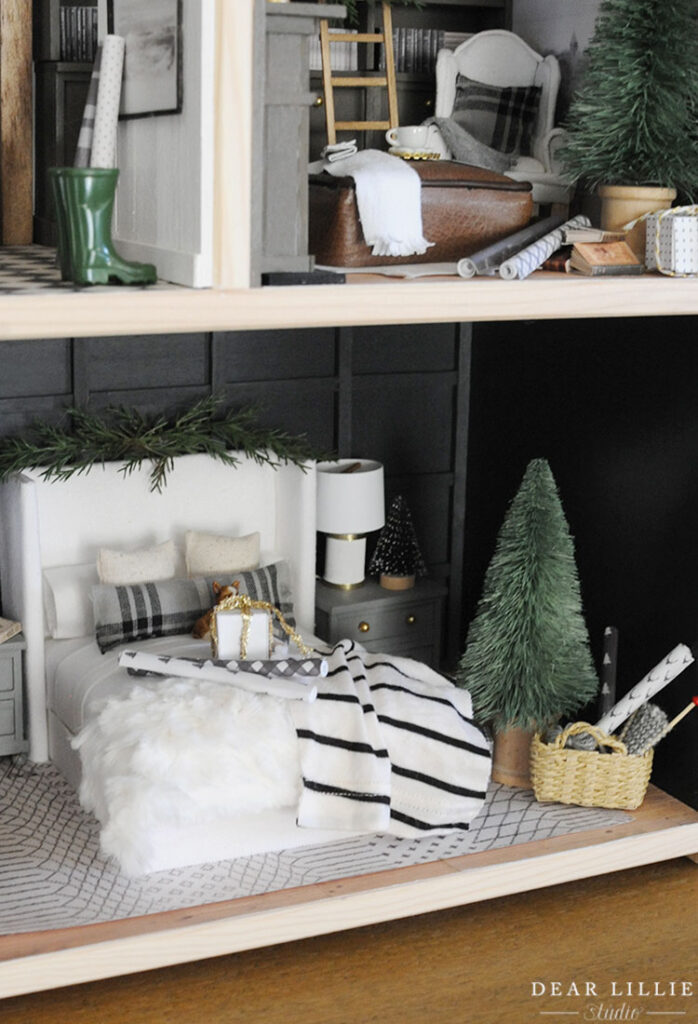
In this little basket (I got it on Etsy but isn’t no longer available) I added this tiny little knitting set and then a few more rolls of wrapping paper.

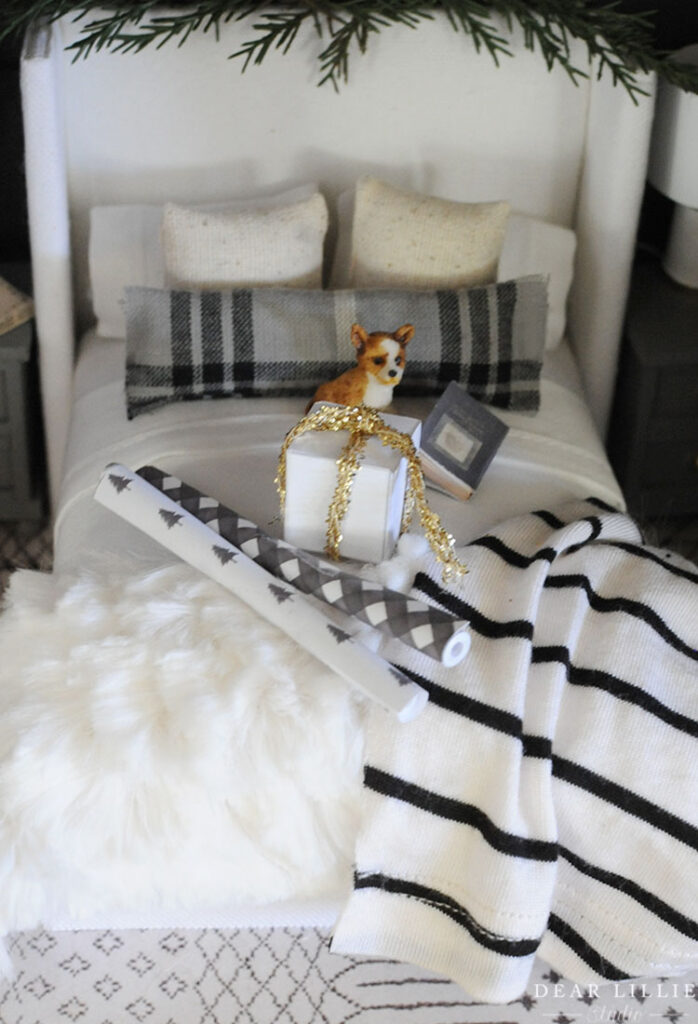
I made this little stocking the same way I made the ones in the study but then added a few little dots with puff paint to finish it off.
And now finally for the bathroom. In here I added a wreath. I made this one from some weird greenery I had found but I didn’t like it as much as the other greenery I used and now after looking at these pictures wish I hadn’t bothered to use it – hahaha! Oh well.
And over on the tub tray I added the fourth little tree.
And then I added a matching stocking in here to the one in the bedroom on the dresser.
And there you have it. A little dollhouse decorated for Christmas!
And if you haven’t already be sure to check out Lillie’s in this post:
For a detailed post about our kitchens you can click here.
For a detailed post about our studies you can click here.
For a detailed post about our bedrooms you can click here.
For a detailed post about our bathrooms you can click here.
Sources for My Dollhouse Kitchen:
Cabinets, sink, fridge, hood and stove – We built them ourselves from scratch using Balsa Wood that was 1/8″ thick and trim pieces that were 1/16″ by 1/8″ balsa wood – will have a full tutorial up at some point in the next week or two
Cabinet Color: Grays Harbor by Sherwin Williams (just used leftovers from a $3 sample I bought last year)
Counters – Balsa Wood covered with marble we found from a google image search, resized and printed on regular computer paper and glued on (similar here)
Beads on Cabinets and Stove used as Hardware and Knobs – Hobby Lobby – Color Gallery by Bead Treasures we used the 4mm size that came in the pack
Subway Tile Backsplash – Etsy (we sized ours down a tiny bit more once we downloaded it)
Flooring – 12 by 12 Craft paper found at Hobby Lobby
Beams – 1/2″ by 1/2″ Balsa Wood Stained Early American by Minwax
Pendants – Hobby Lobby painted black and gold
Shelves – 1/8″ by 3/4″ Balsa Wood Stained Early American by Minwax
Faucet – Etsy – then we spray painted it with this gold finish
Island – Etsy then Stained Early American by Minwax
Plates – Hobby Lobby
Copper Pots and Pans – Hobby Lobby
Mini Cake – Hobby Lobby (was a cherry one and I painted the cherries blue to look like a blueberry cake)
Cake Stand – from a mini pack of flower pots from Michael’s painted and tipped upside down
Bowl with Eggs and Whisk – Hobby Lobby
Cutting Boards – just cut from extra scrap Balsa wood and then used a tiny stripe of craft tape to add the line
Dog Bowls – wood beads from Michael’s painted and then used a tiny stripe of craft tape to add the line
Vase – wood beads from Michael’s painted and then used a tiny stripe of craft tape to add the line
Flowers – cut from a 70% off bouquet from Michael’s
Artwork – Favorite images from Studio McGee
Frames – Built with super thin Balsa Wood Strips
Clear Canisters – From Jewelry Making Section and filled with real sugar and brown sugar
Source for My Study:
Bookshelves and Fireplace – We build them from Balsa Wood. Will have a tutorial for them up in the next week or two. Mine is painted Porpoise from Valspar
Ladder – built from Balsa Wood – mine is stained Early American by Minwax
Rows of Books – Made with foam board and printed out pictures of books glued to them
Books that open – Covers were downloaded from this Etsy shop, book pages were from here (and sized down quite a bit more to fit inside book covers we were using)
Wingback Chairs – made from cereal box, fabric, batting and balsa wood using this tutorial from Rina Vellichor
Light Fixture – Made from a cork with white printer paper wrapped around it, skinny gold tape and this bulb inserted into the middle of the cork once I had cut a hole through the center of the cork.
Ottoman – made from balsa wood, batting, faux leather fabric and leather cording from jewelry section of craft store
Mural – Anewall Decor
Rug – image found online and printed on this velvety paper (just using a regular home printer!)
Wood floors – Jessica Cloe
Mirror – 2 by 3″ mirrors from Hobby Lobby – lightly dusted with spray paint to look antique and trimmed in balsa wood
Flowers – tiny flower pots and discounted floral arrangement which I have been clipping off of were both from Michael’s
Throws – old t-shirts cut to add “fringe”
Pillows – made from scrap fabric and batting
Cat – Hobby Lobby
Logs – cut from outside
Log stand – scrap of balsa wood with beads glued to the bottom
Newspaper – Etsy
Coffee – Etsy
Candlesticks – Etsy
My Dollhouse Bedroom Sources:
Wall Color – Soot by Benjamin Moore (leftover from real house projects)
Feature Wall – Made from thin strips of Balsa Wood
Floor – Download from This Etsy Shop
Headboard – Made using foam board, batting, white fabric and gorilla glue
Bed Frame – Made using balsa wood and fabric
Mattress – Made using foam board, batting and an old T-shirt
Bed Sheet and Pillow Cases – Made using an old pillow case
Square Pillows – Made using scrap fabric and batting
Round Lumbar Pillow – paper glued over a wood dowel and then just painted the ends of the dowel a coordinating color
Plaid Lumbar Pillow – just sewed using scrap fabric and batting
Gray Quilt – cut from an old pair of sweatpants
Fuzzy Quilt – cut from a fuzzy scrap of fabric
Black and White Striped throw – cut from an old shirt of Lola’s
Dog – Etsy
Glasses – Etsy
Nightstands – Made using Balsa Wood, Wood Glue and Beads
Lamps – Made using spools from Michaels, this wiring, basic paper, tiny strips of balsa wood and thin gold tape
Books – we made them ourselves – you can read more about them in this blog post
Alarm Clock – Etsy
Flowers on Nightstand – made from tiny flower pot found in a pack at Michael’s and glued tiny flowers into it
Dresser – Made from Balsa Wood, Wood glue and beads and then stained Early American by Minwax
Large Artwork on Dresser – Made from a printout of this artwork from Studio Mcgee and framed with tiny strips of Balsa Wood
Smaller Artwork on Dresser – Made from a printout of this artwork from Studio Mcgee
Books – We made (you can read more about them here)
Globe Bookend – Etsy
Flowers on Dresser – Tiny flower scraps glued into a tiny cork
Neutral Rug – Printed out copy of this rug
Black and White Rug – printed out a copy of this rug
Source List for My Dollhouse Bathroom:
Wallpaper – I created it from this paper although a similar downloadable version can be found here and attached it with Mod Podge
Beadboard – we created on our own in photoshop but I recommend this Etsy shop’s download, then we painted a thin white piece of balsa wood to act as a chair rail and glued it where the two papers met
Flooring – we created on our own in photoshop but I recommend this Etsy shop’s download
Bathtub and Toilet – Melissa and Doug
Bubbles – Etsy
Toilet Paper Holder – Etsy (think it’s sold out)
Sconce – Etsy
Vanity – Etsy stained Early American by Minwax
Sinks – Etsy
Mirrors – 2 by 3″ mirrors from Hobby Lobby trimmed in balsa wood
Basket – Balsa wood covered in twine
Towels – Cut up old T-shirt
Jars – From Jewelry Making Section of craft store
Vase on Vanity – same jar as the ones with corks
Bathmat – scrap fabric
Hooks – Etsy
Pendant – Plastic medicine cup spray painted with this paint and wired with this wire
Book – Cover was downloaded from this Etsy shop, book pages were from here (and sized down quite a bit more to fit inside book covers we were using)
Coffee – Etsy (think it’s sold out, here is a similar one)
Bath tray – Made from scrap balsa wood and stained Early American by Minwax
Flowers – made using tiny flower pot from craft store and clippings from faux flowers I had
Perfume Bottle – Etsy
I hope you all have a fabulous rest of your weekend!
Warmly, Jenni


