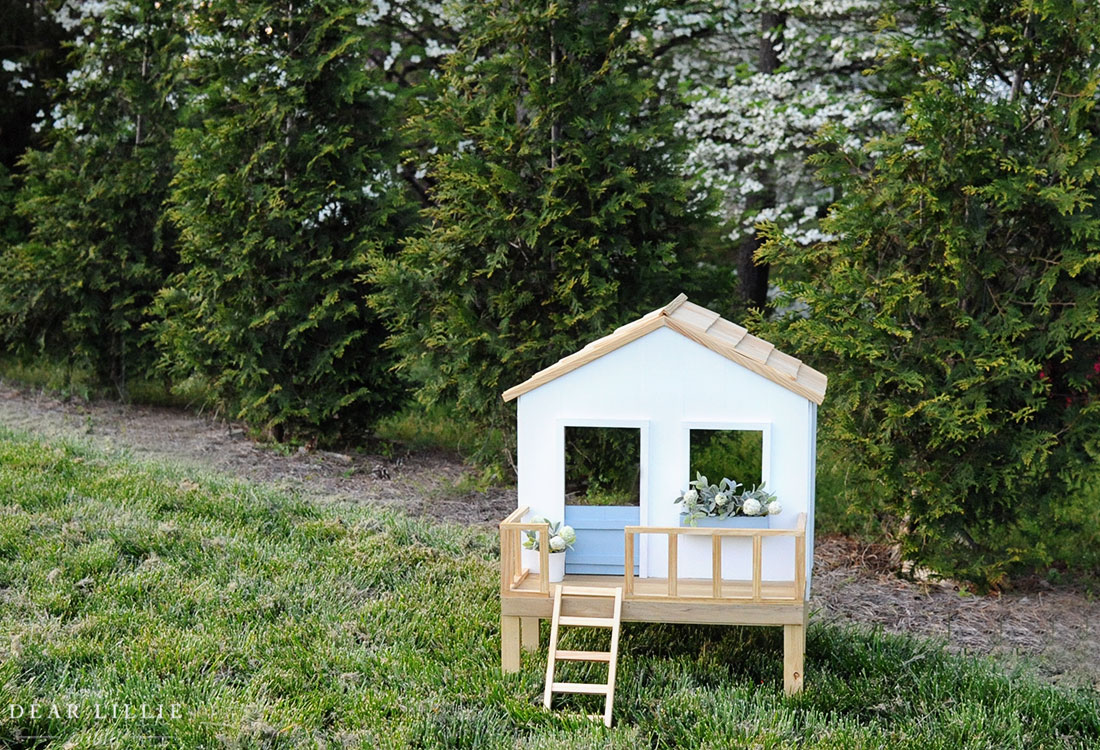
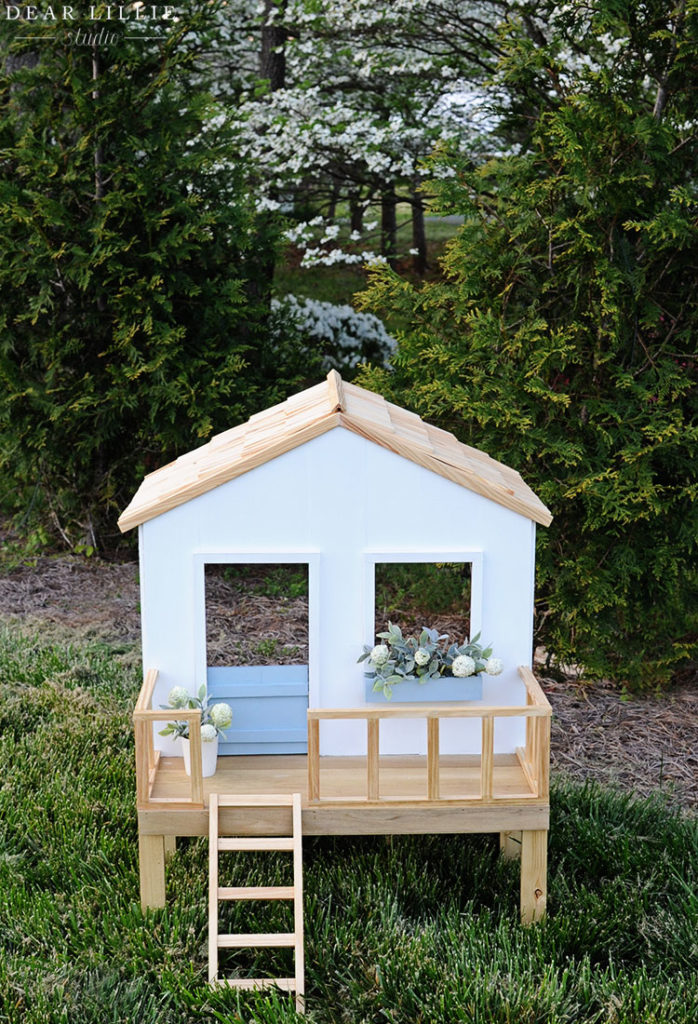
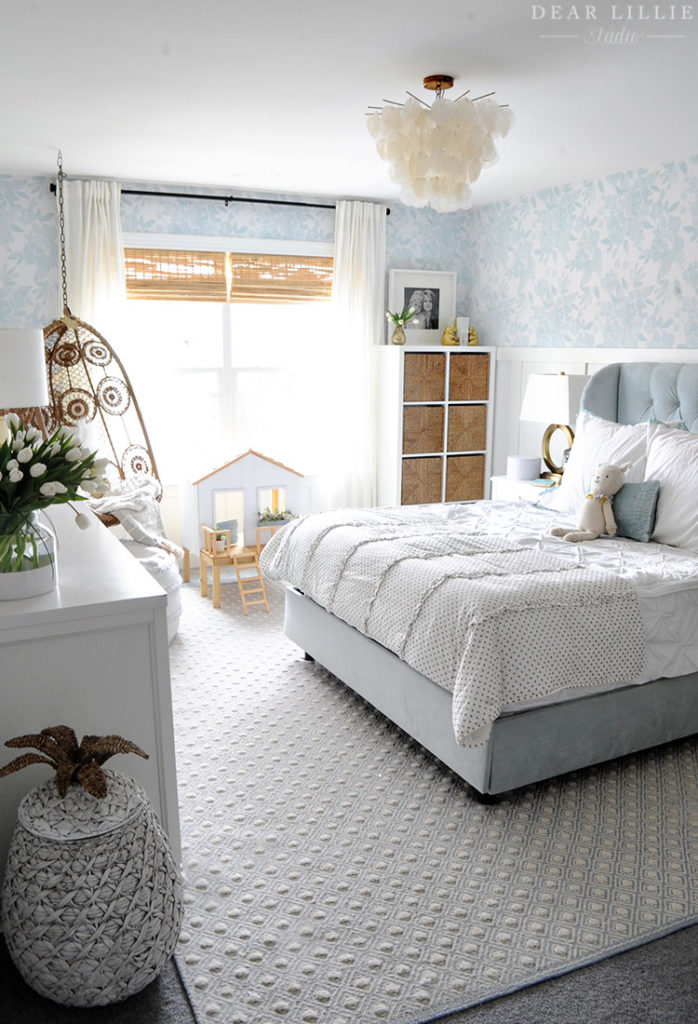
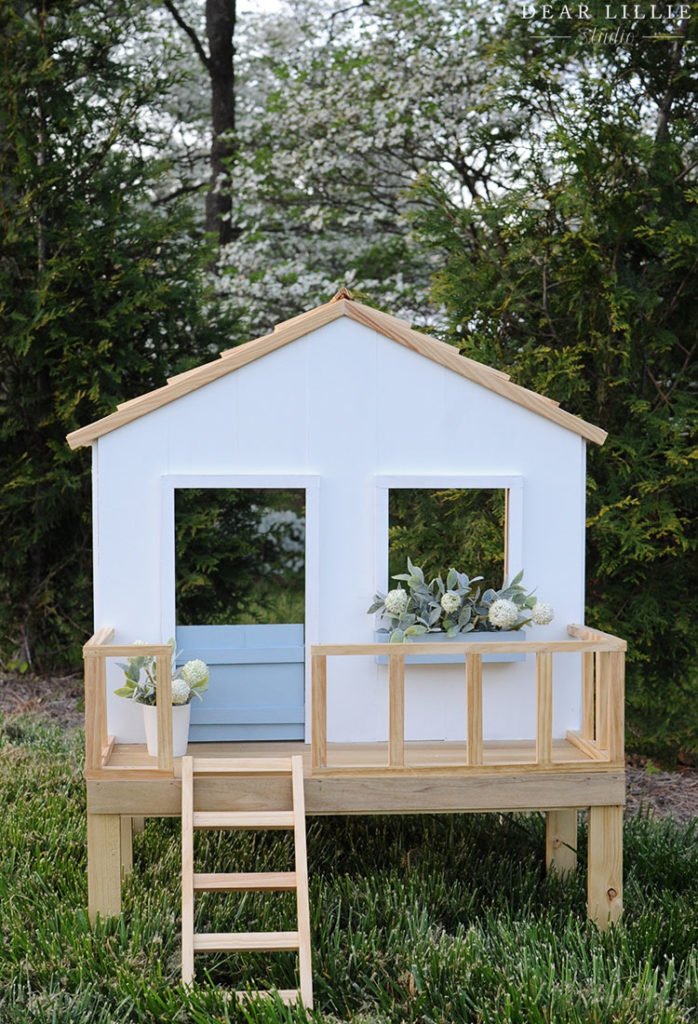
Good morning! Today I am going to share some step-by-step photos of the doll “treehouse” I built for Lola and share the wood and tools I used. It isn’t a true tutorial because I am far from any kind of wood-worker and have no idea on the correct terminology and am not sure how to properly describe most of the steps, but I figured it would be helpful if I at least shared the cuts of wood I used and step-by-step photos. First, we searched Pinterest to find a tutorial and we based our treehouse off of this one we found from 100 Things 2 Do. It’s based off of that but we made some alterations based on the wood we could find (we made a quick trip to Lowe’s the weekend before we started “homeschooling” in preparation for the fact it looked like we would be sheltering in place, which turned out to be the case!) and stuff we had leftover from other projects. We also decided to paint ours and add a little Dutch door, window box and ladder to dress it up a bit because we were planning on keeping ours indoors. Here it is in Lillie’s room:

I have checked and double checked and think I’ve got everything here that you will need although I am nervous I may have forgotten a wood piece or two!
TOOLS
Miter Saw (I have a pretty basic Kobalt compound miter saw but I’ve had it for years now and it isn’t sold anymore – here are some similar ones)
Nail Gun
Drill
Screws (I used mostly wood screws I had leftover from other projects so it was a random mix of sizes – some smaller and some longer but no idea on actual sizes)
Nails (I used a mix of these also based on different things I had on hand and I know I bought a pack of the shortest ones I could find at Lowe’s for the roof and some of the trim, I think those were 5/8″ but not positive)
Stain (Minwax Golden Oak)
Paint (I used Extra White Semi-Gloss from Sherwin Williams that I had leftover from painting all the board and batten I’ve done in the house so far)
FRAMING (I used all 1 by 2’s for this)
4 – 1 by 2’s cut to 9″ (porch framing)
2 – 1 by 2’s cut to 11″ (porch legs)
4 – 1 by 2’s cut to 27″ (house framing)
5 – 1 by 2’s cut to 21 5/8″ (cross bracing)
9 – 1 by 2’s cut to 13 1/2″ (house bracing)
4 – 1 by 2’s start at 16″ but will be trimmed and angle for roof
2 – 1 by 2’s cut to 12″ (for behind window bracing – this is after the flooring is put down)
1 – 1 by 2’s cut to 3″ (for behind window bracing – this is after the flooring is put down)
FLOOR (I used all 1/4 by 3 1/2″ poplar pieces for this)
7 – 1/4 by 3 1/2’s cut to 24 5/8″
SIDES
8 – 1/4 by 3 1/2’s cut to 17 1/2″
2 – 1/4 by 2 cut to 17 1/2″
7 – 1/4 by 3 1/2’s cut to 24″ to start but will be trimmed and angled for front of house and you will cut the window and door from this too so you’ll have some leftover
ROOF
8 – 1/4 by 3 1/2’s cut to 15 1/4″ (I’m not 100% sure on this measurement, I have 15 1/8 in one of my one of my notes and 15 1/2 in another so I split the difference here)
2 – 1/4 by 2 cut to 15 1/4″ (I’m not 100% sure on this measurement, I have 15 1/8 in one of my one of my notes and 15 1/2 in another so I split the difference here)
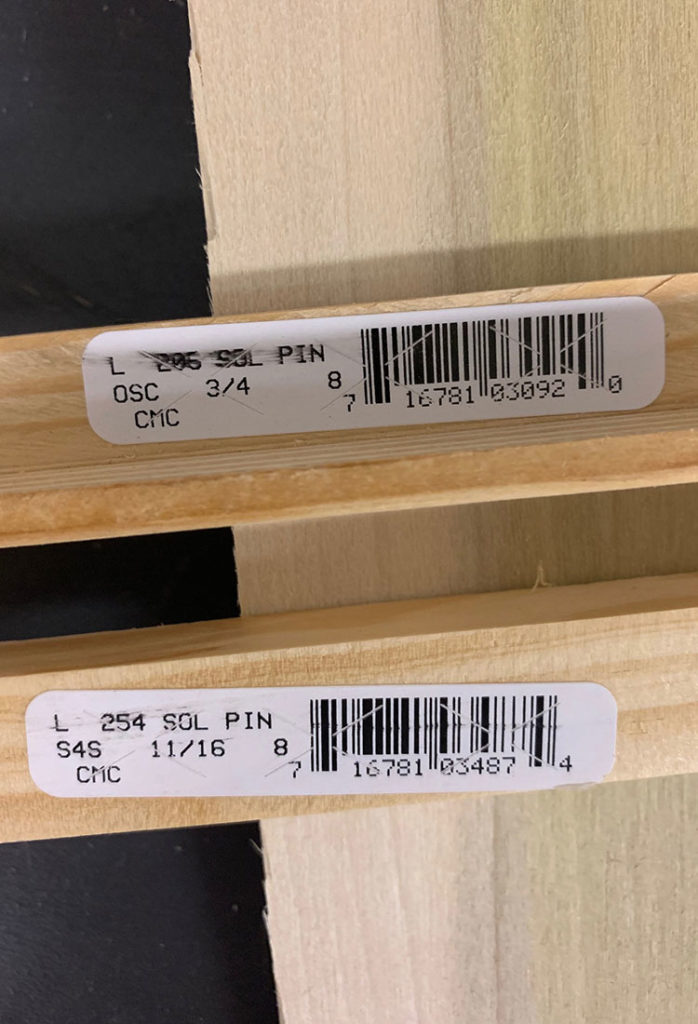
RAILING, LADDER, WINDOW, DOOR, and ROOF TRIM (For this I used wood that I found back in the trim section of Lowe’s – it didn’t have any real info on it on the sticker but I will include a photo when I get to that part of the sticker and it says it’s pine and 11/16″, the ACTUAL measurements of it were 1/2″ by 5/8″)
Railing:
2 – cut to 14 1/2″
4 – cut to 9″
2 – cut to 4″
11 – cut to 5″
Ladder:
2 – cut to 13 3/4″
5 – cut to 4 1/2″
Door Trim:
2 – cut to 13″
1 – cut to 8″
Window Trim:
2 – cut to 7 1/2″
2 – cut to 6 1/2″
Roofing Trim:
2 – cut at 16″ to start then trimmed down and angled
CORNER PIECES FOR ROOFING TRIM (Says 3/4 and pine on sticker, I will show a pic further down in the post but think this is it)
1 – cut roughly to 16 1/2″
2 – Start at 16″ then trimmed down and angled
SHIMS
110 Shims (Show the exact ones in a photo below)
DOOR and WINDOW BOXES:
I just used scrap wood leftover for those so don’t have measurements
Okay so let’s get started. First, I laid the wood I was planning on using for the sides and floor out on the ground and played around with how I wanted the front to look. I roughly sketched out the roof and the door and window. This picture doesn’t clearly depict that, but unfortunately it’s the only one I have of from the beginning of this project so it will have to do.
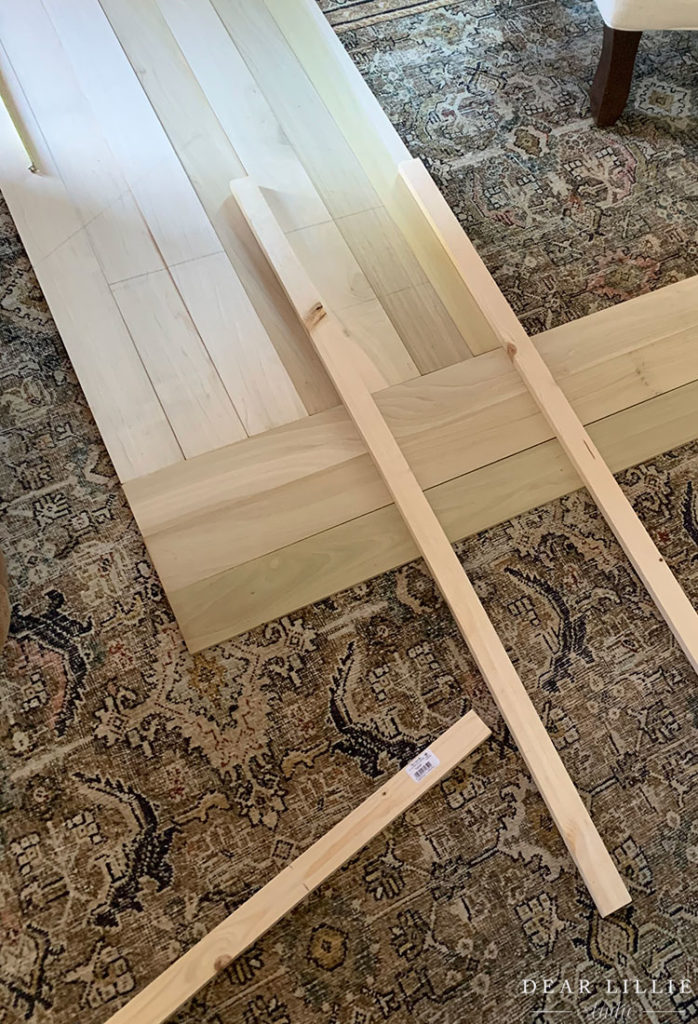
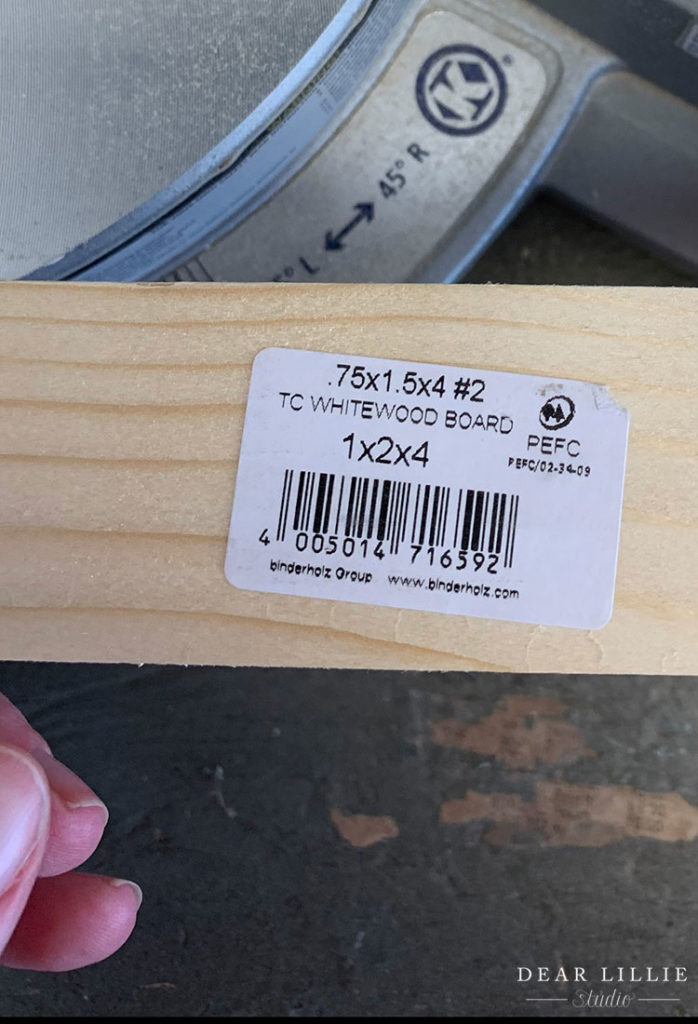
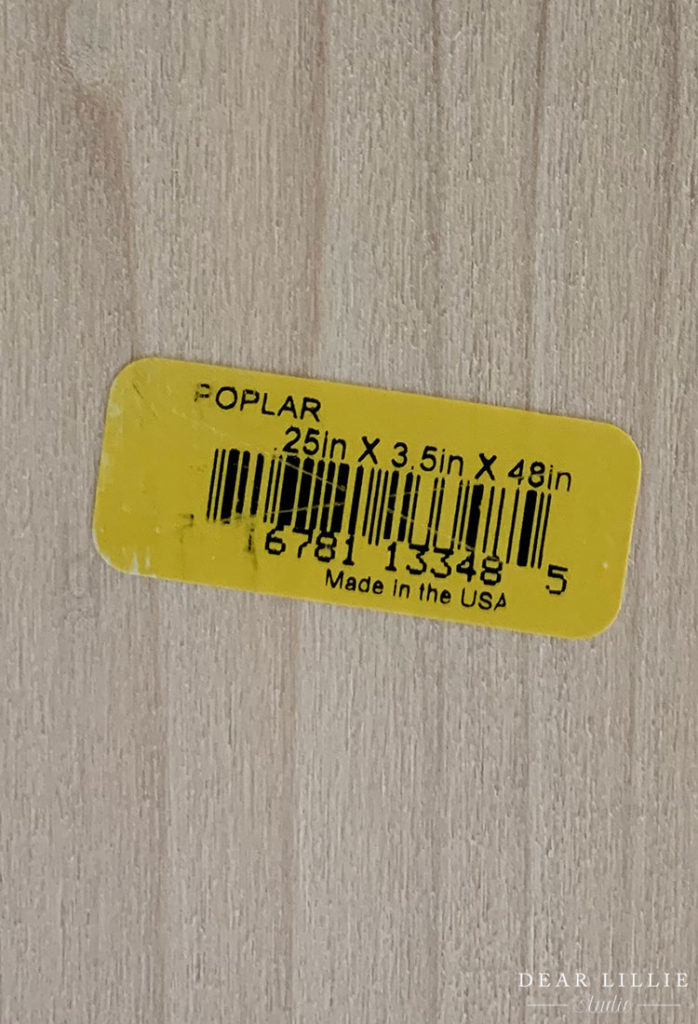
Once I had that figured out I started working on the frame. For that I used 1 by 2’s. Here is a sticker from the exact wood I used from Lowe’s:
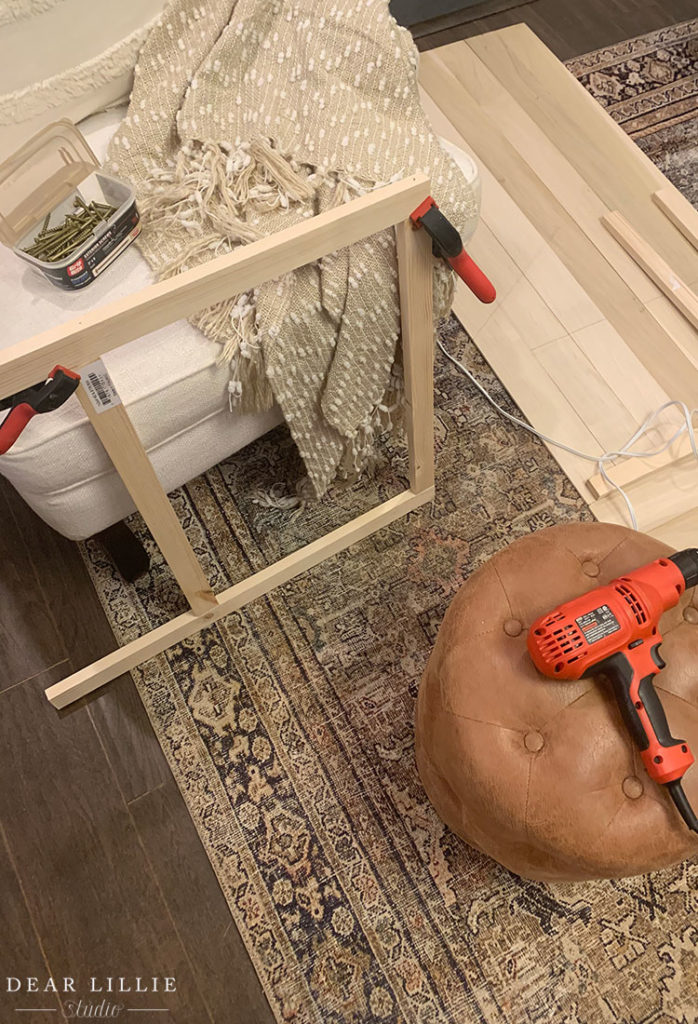
Using wood screws I built two of these like this:
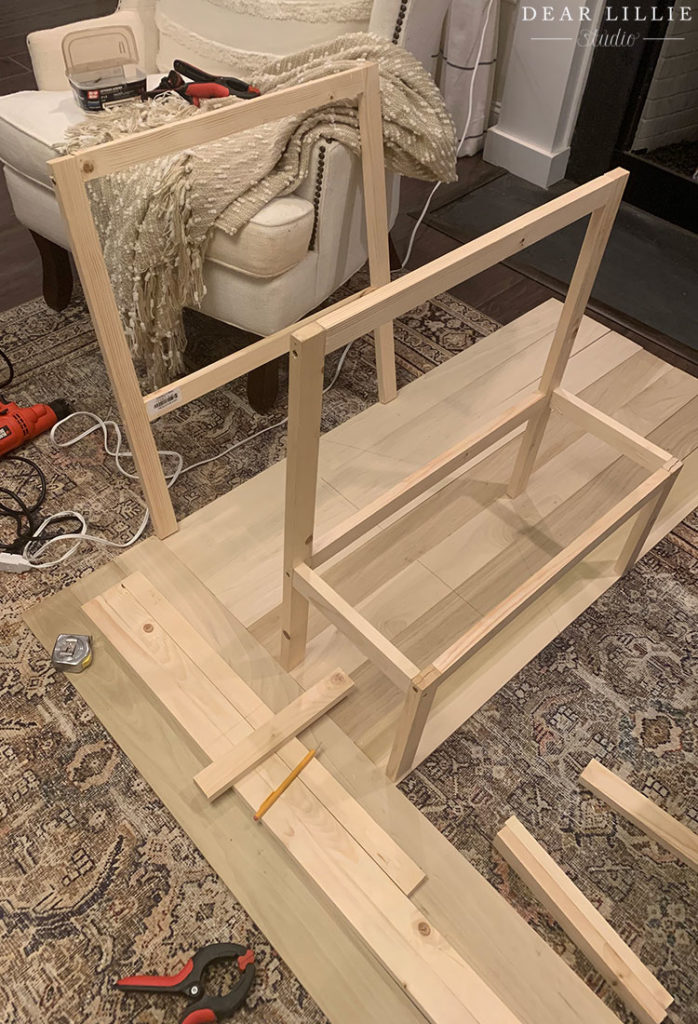
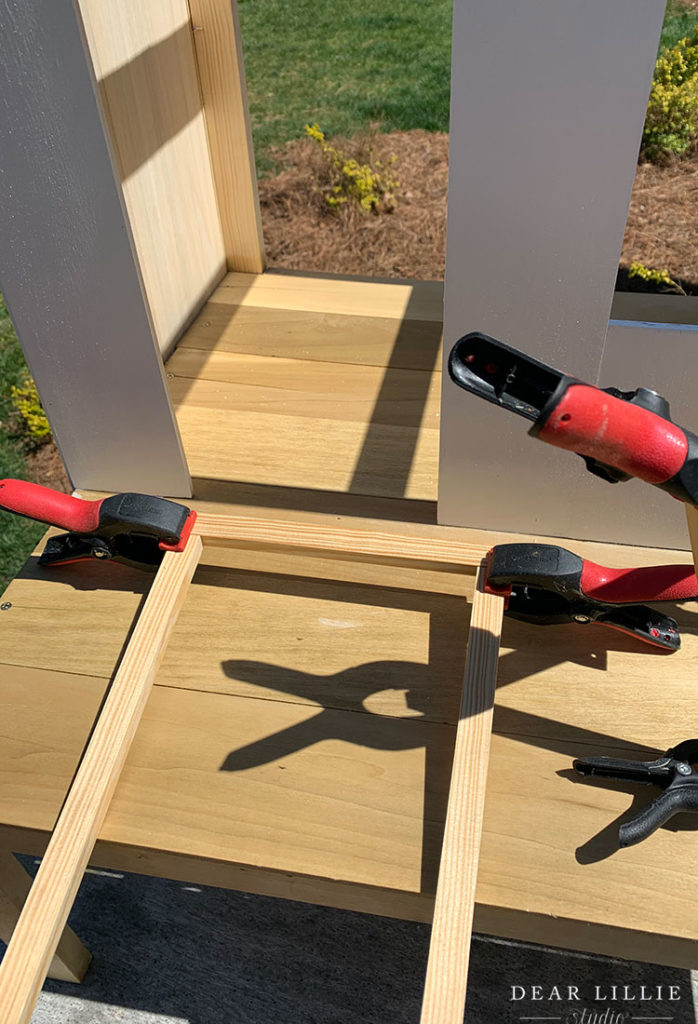
Then I framed out the front porch on one of them:
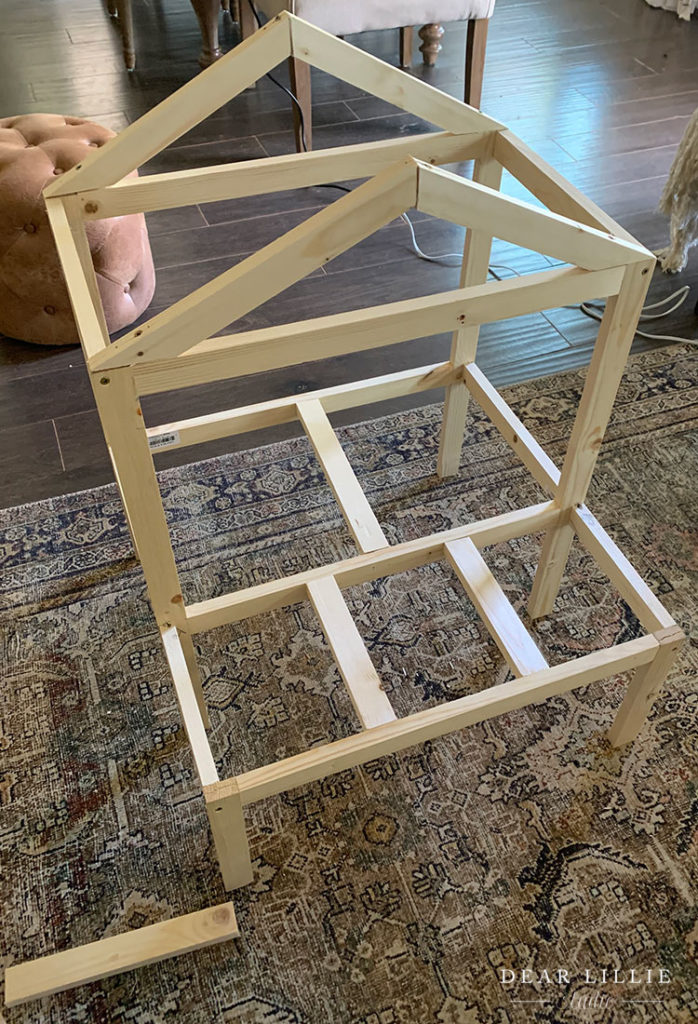
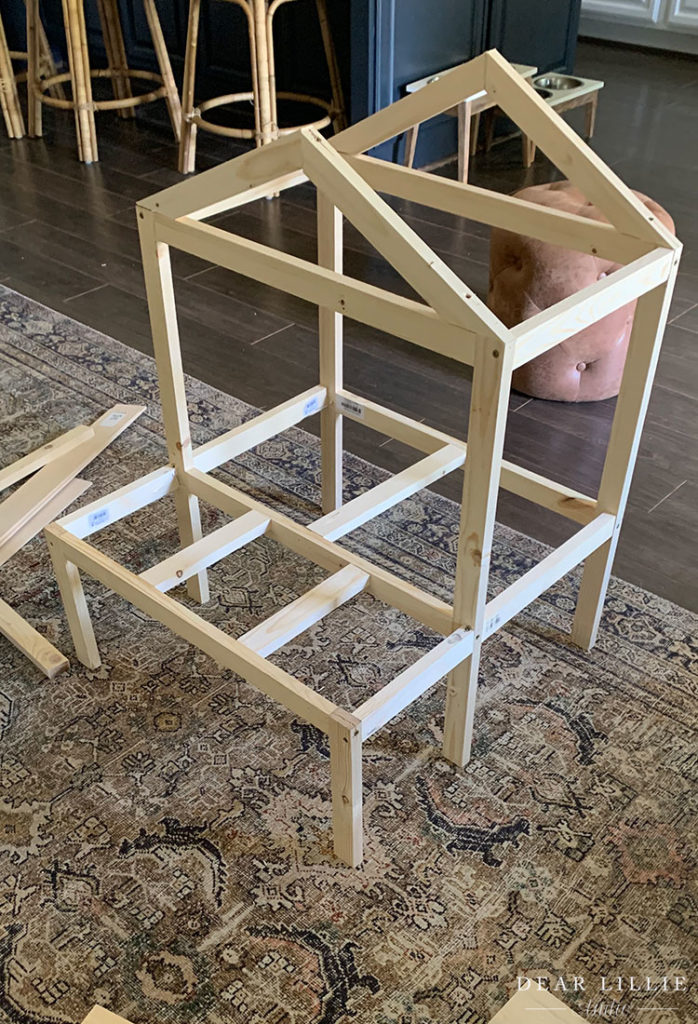
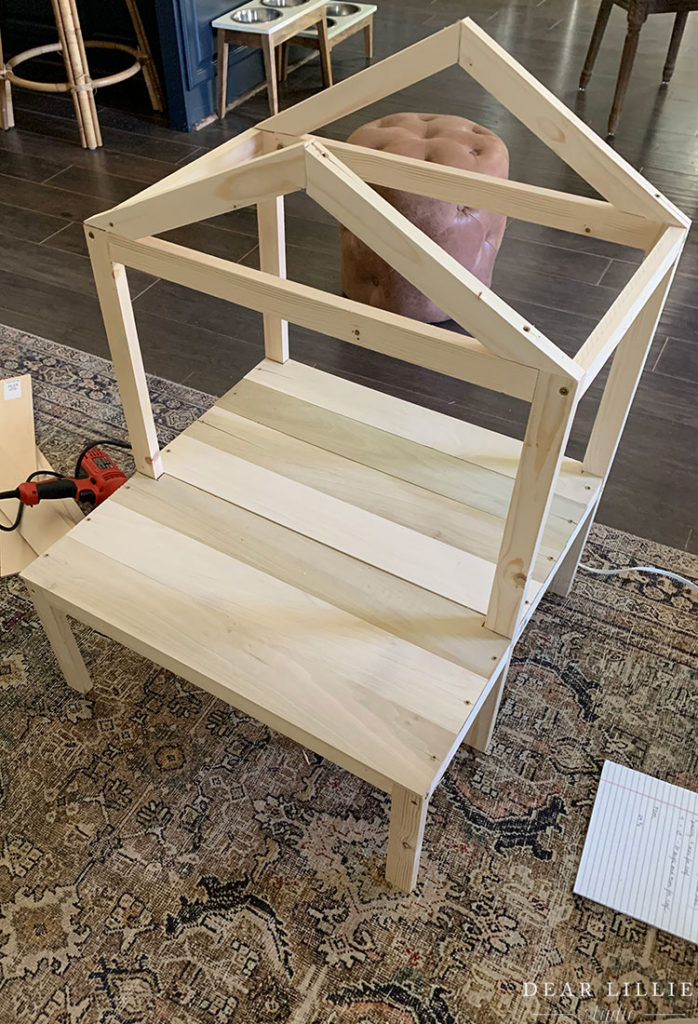
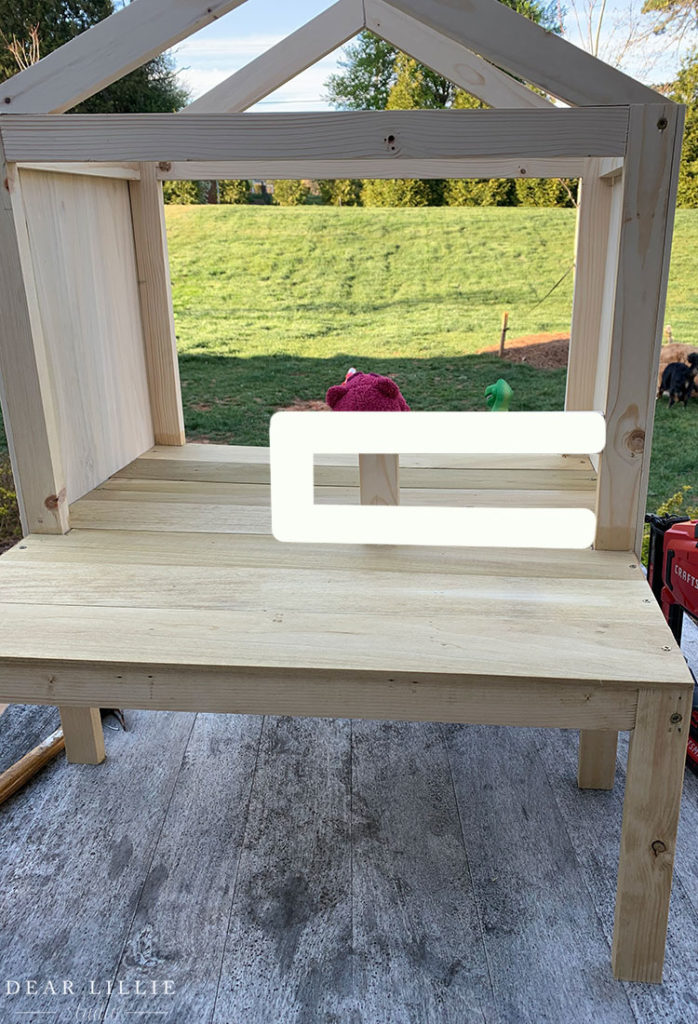
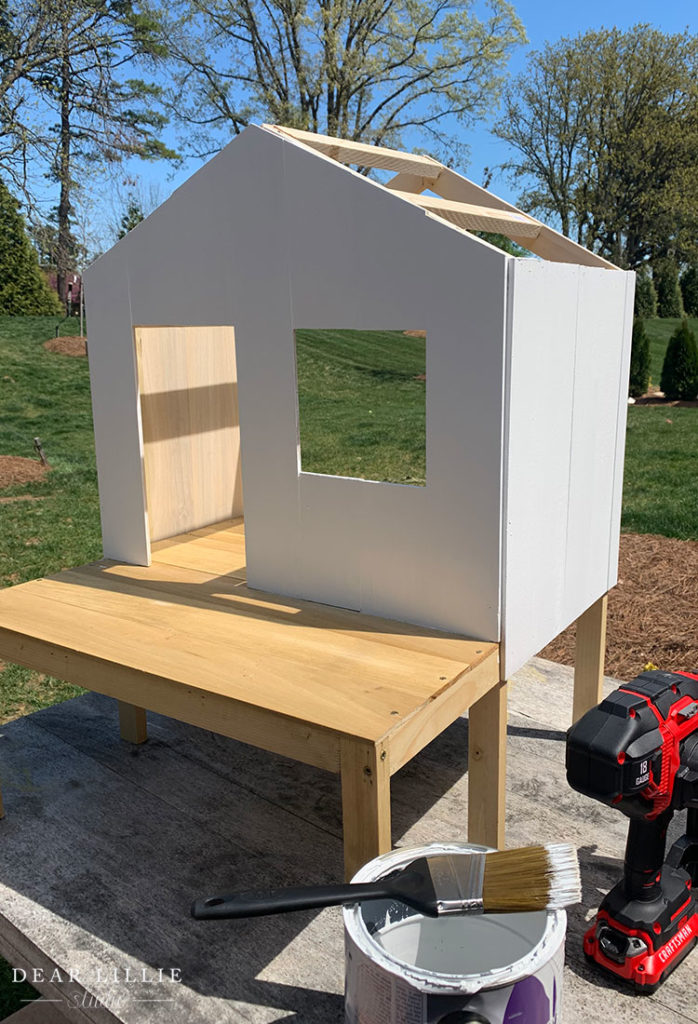
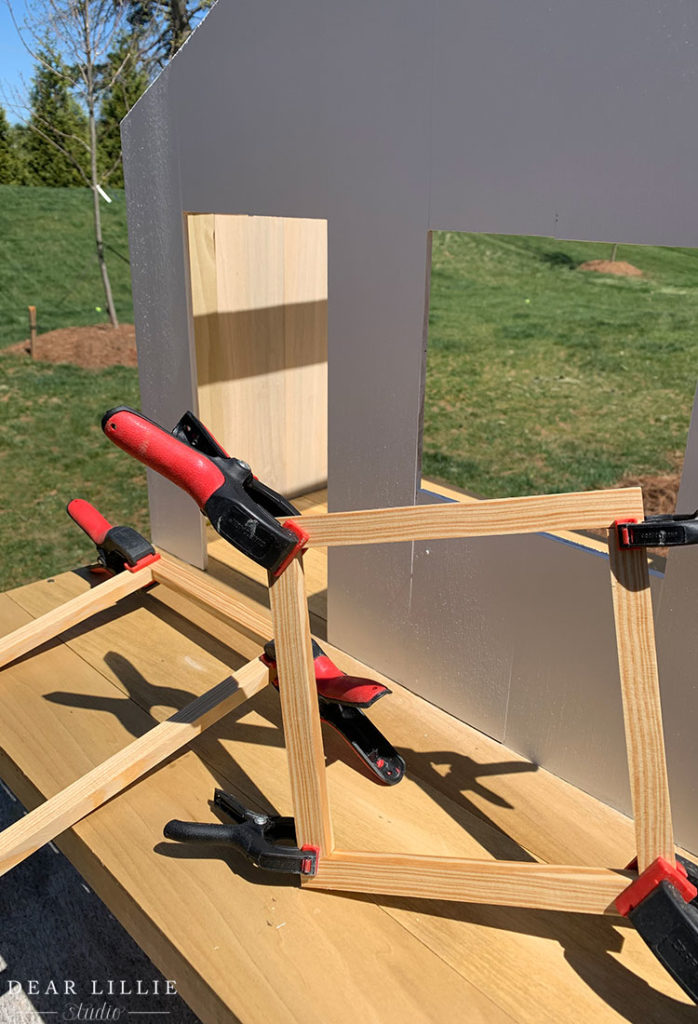
Like I said this isn’t really a true tutorial because I have no idea how to properly explain some of the steps but ultimately this is what the frame looked like once it was all attached. Also the angles on the roof were LOTS of trial and error so honestly not sure what they ultimately ended up being. Sorry! I also ended up adding some bracing pieces for the roof a little later although in retrospect I should have done that at this point and probably would recommend it be done now:
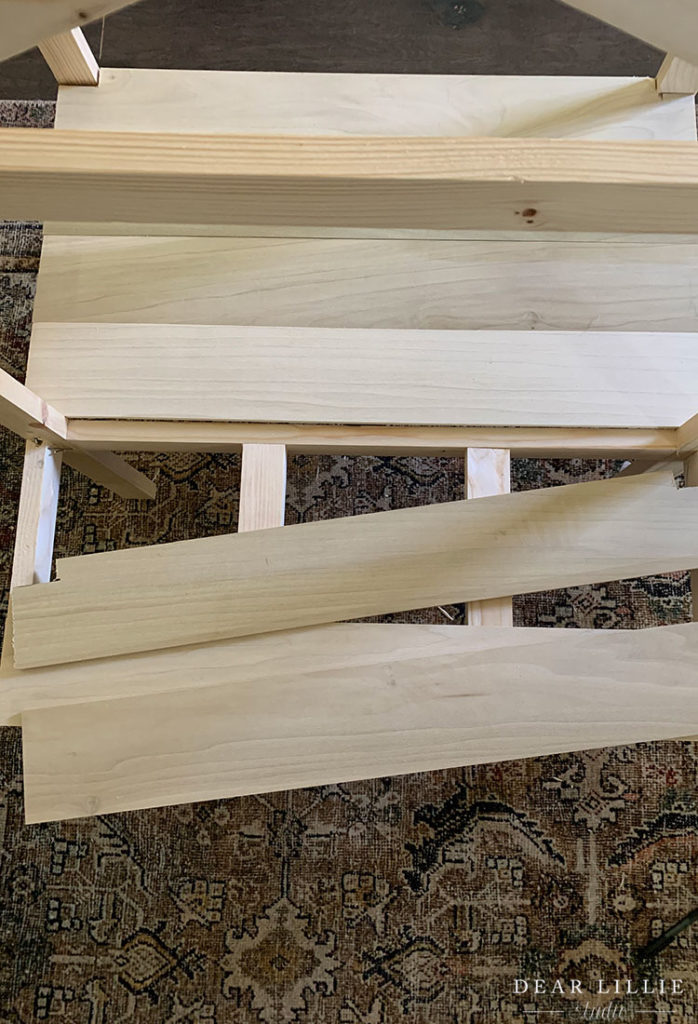
So once I had the frame it was time to start on the flooring and the sides. This is the exact piece of wood I used for the flooring. And then for the sides I used this same wood as well, along with one narrower piece on each side so that the sides were fully covered.
On two pieces of the wood I had to notch out little spots to fit around the framing. This was a little tricky with the type of saw I have and so not even close to perfect look but it still worke:
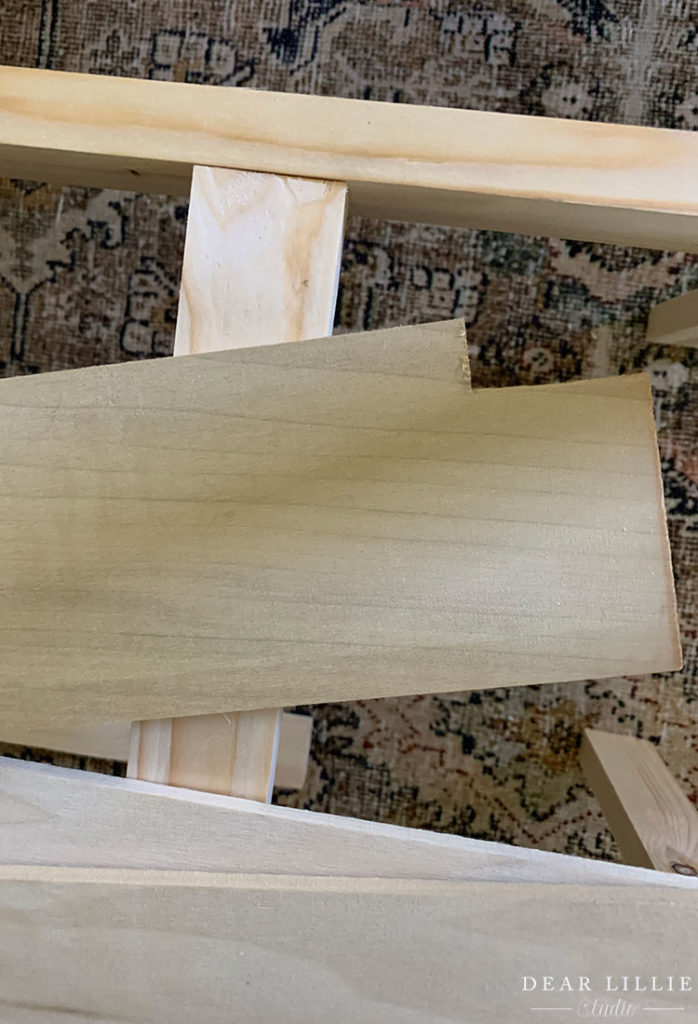
Here you can see how once you’ve cut the notches out it works. I used screws to attach each board at each end but then just used the tiny nails to attach them to the bracing pieces that way they wouldn’t be as noticeable.
 Then I moved it outside to stain the floor and the lower half of it. (The upper half would be covered by the siding so I didn’t bother to stain that. You can see the first three boards stained in this picture:
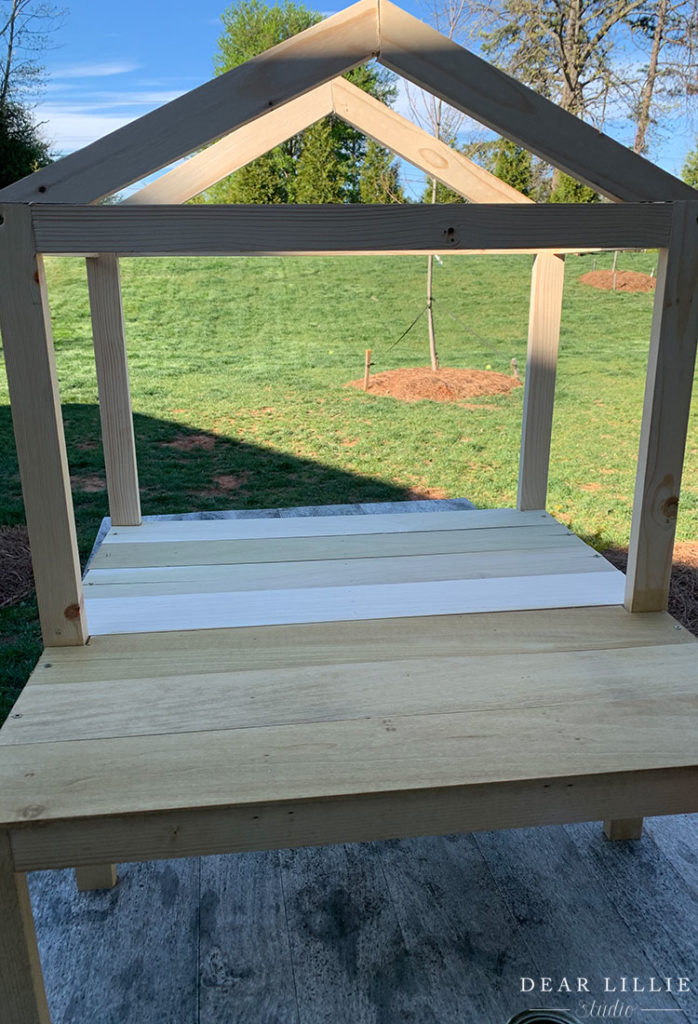
Then I added the siding – the sides each took four pieces of the 1/4 by 3 1/2’s and then one piece of 1/4 by 2. This extended it a bit further back than the back from but as I mentioned I was mostly working with what I had and it was fine.
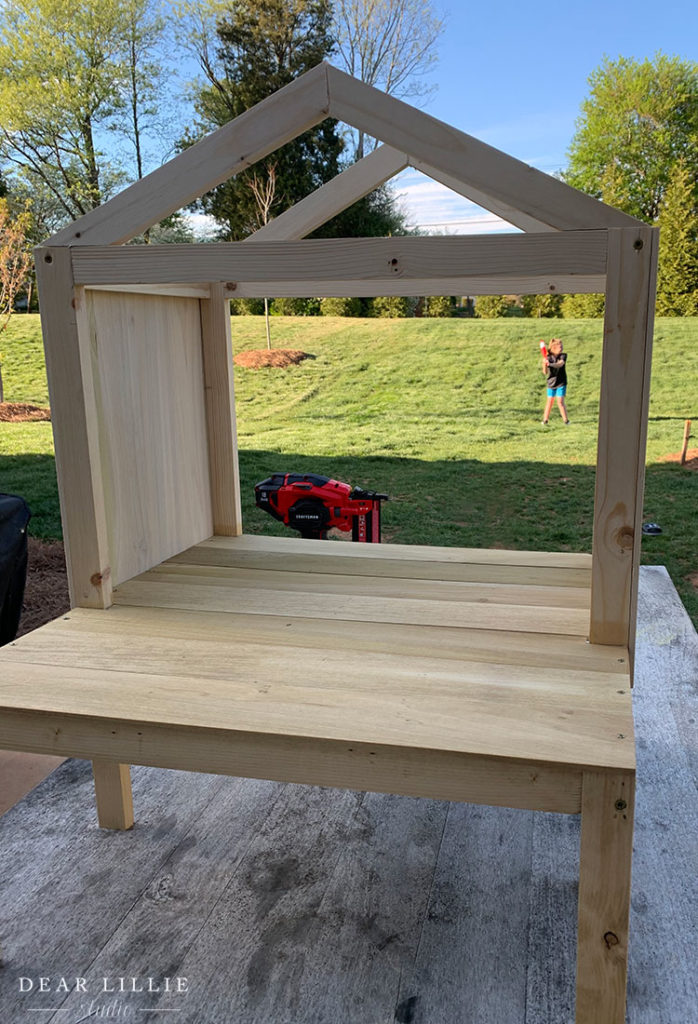
Now for the tricky part. This how I first decided to build a little more framing so I would have something to attach the front siding below the window to. However once I got to that part I ended up adding a lower bracing piece as well and honestly I wish I had extended the whole thing a bit further. However this is what mine looked like at this point so here is the photo:
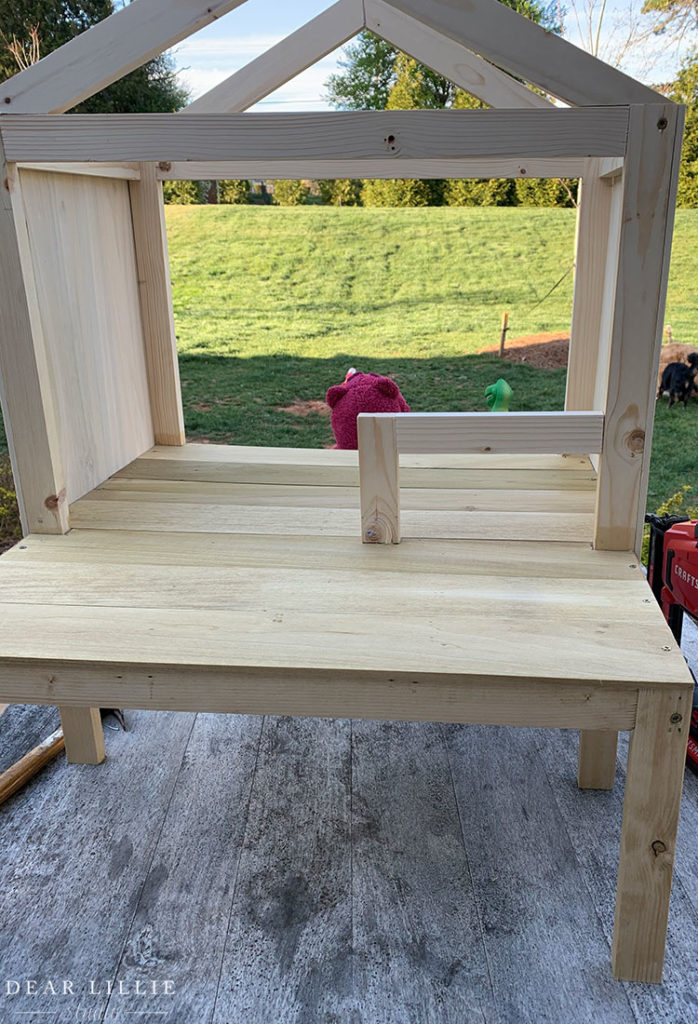
And here is a super messy sketched on image of how I wished I had braced it. This is what I gave the measurements for in my measurement listing because this is much more sturdy:
Then I used painter’s tape to tape the boards together for the front of the treehouse. You can see the messy sketching I had done for the roof and the door and window. I ended up taking more precise measurements for the door and window at this point and then cut them according to those lines.
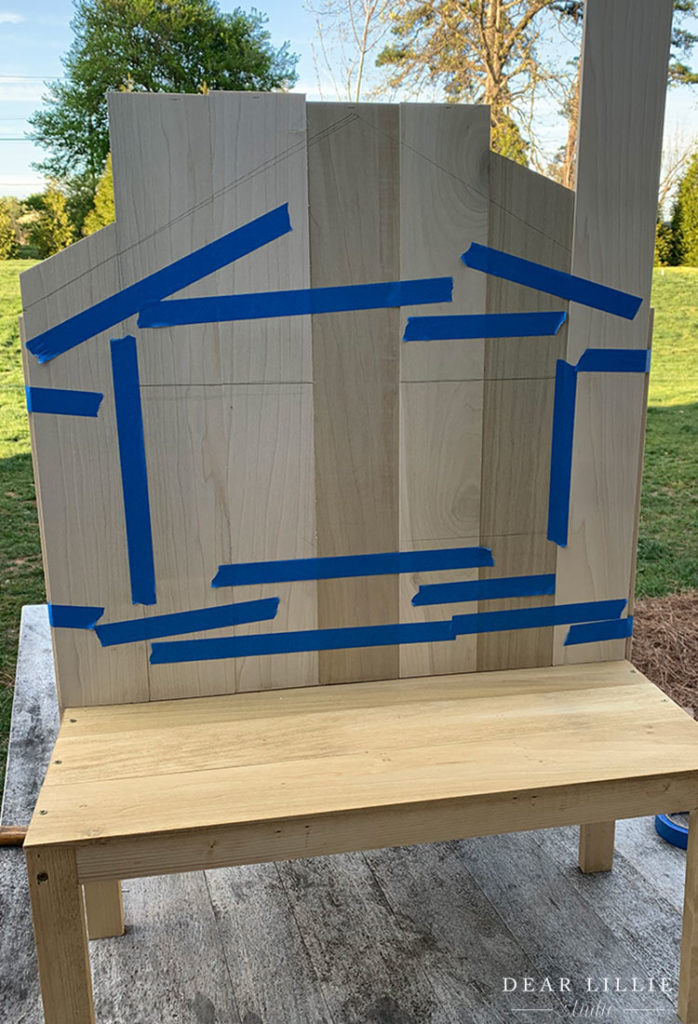
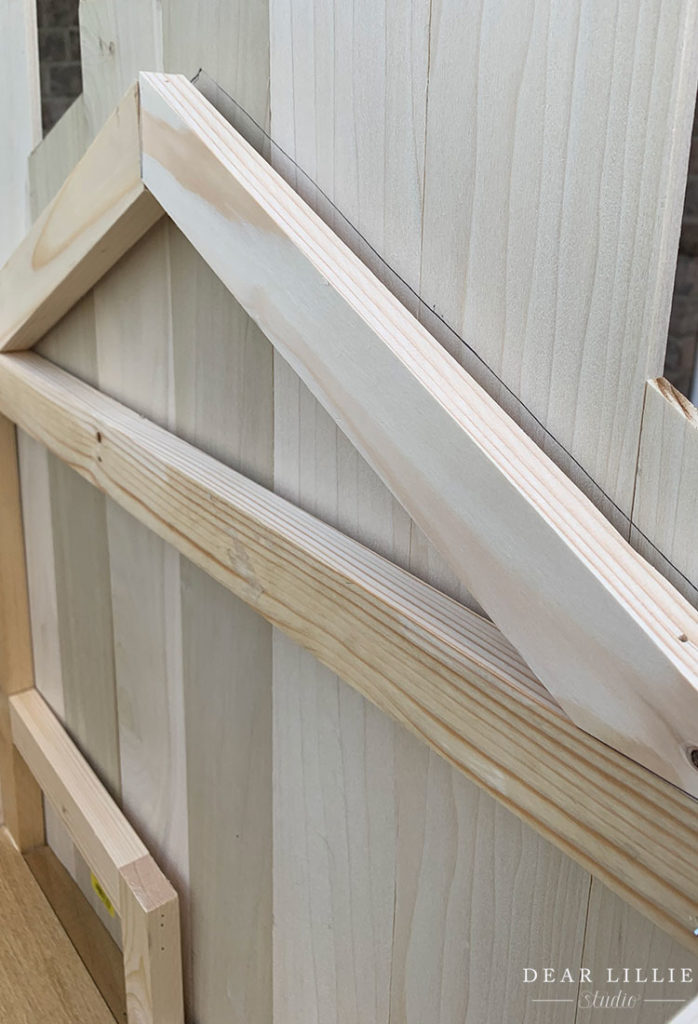
For the roof though I didn’t use my initial sketch. I traced along the back of the framing and then used that marking at my guide when I cut the angles:
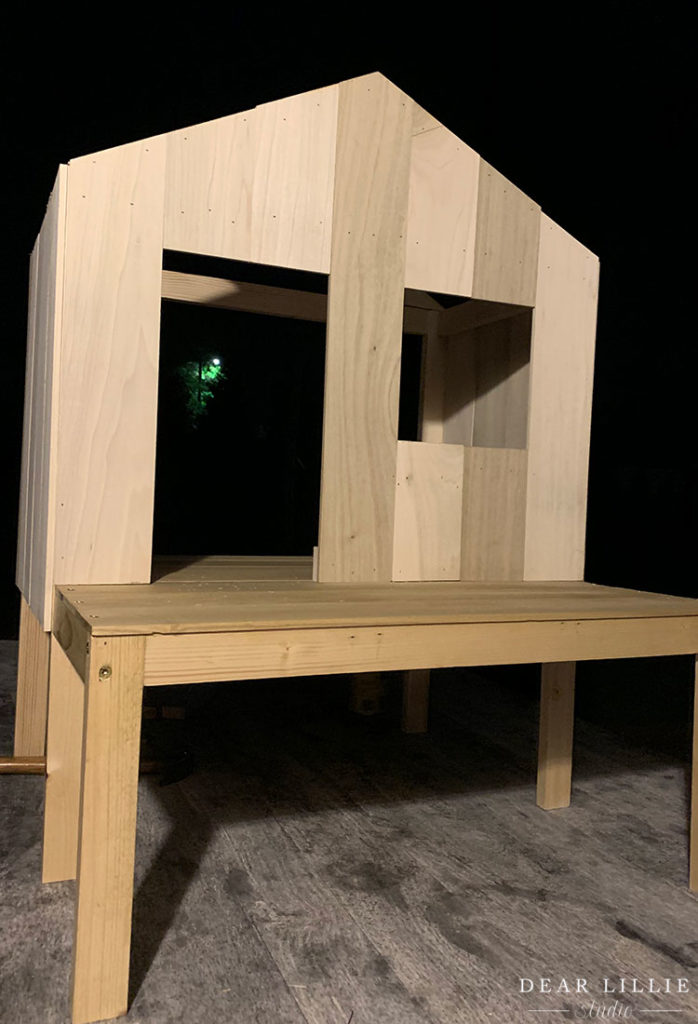
I used nails to attach the siding that way the holes would be easy to fill and be hidden once I painted it. Here is what it looked like at that point:
Then I painted the siding white:
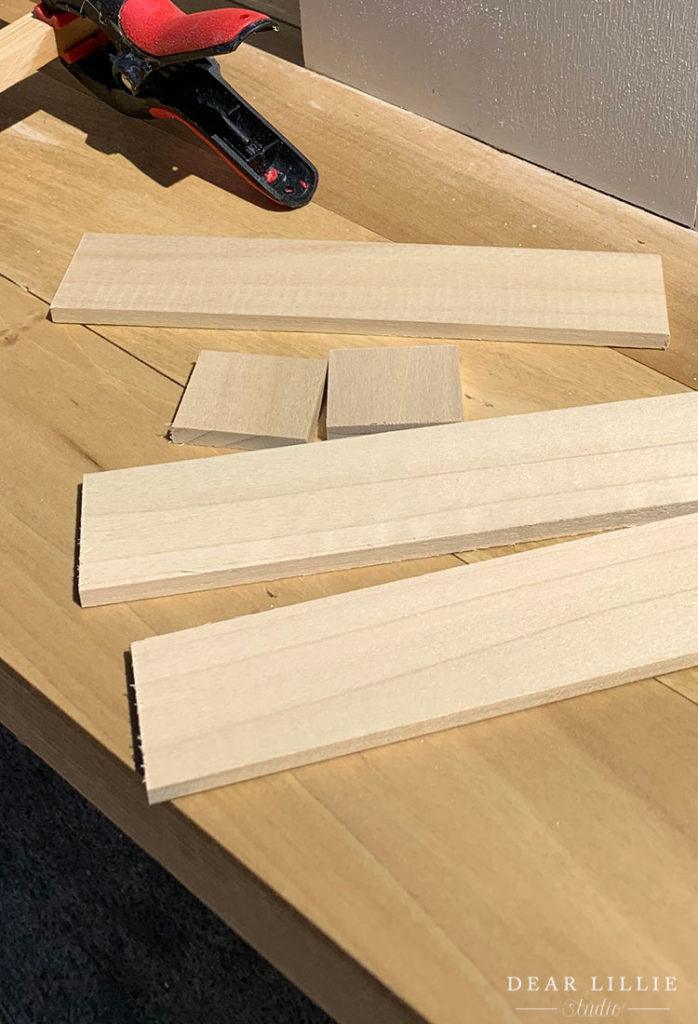
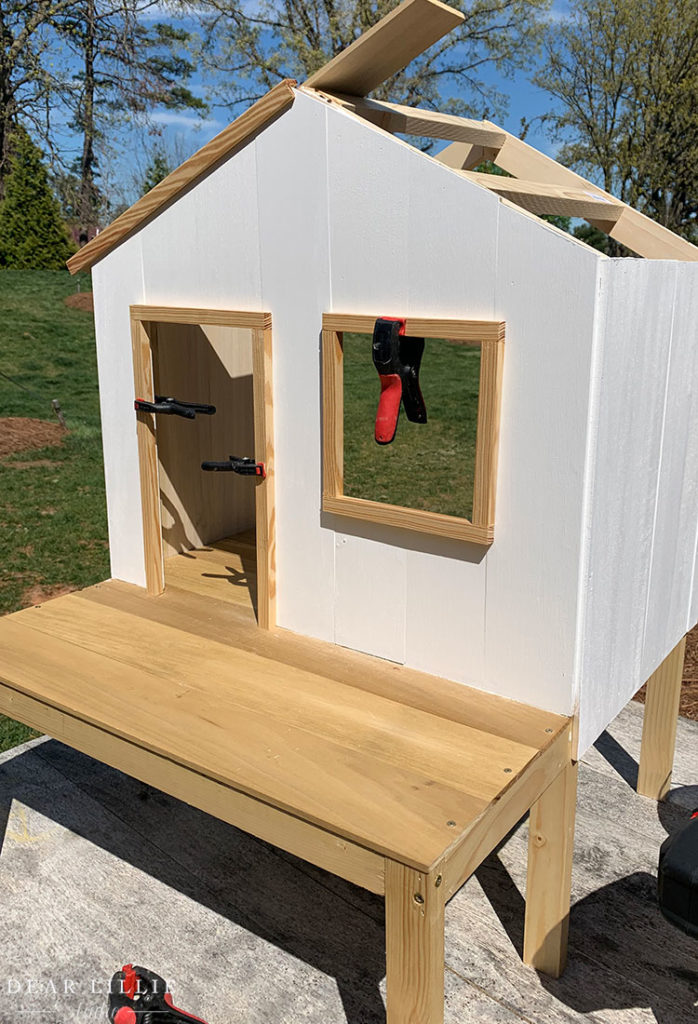
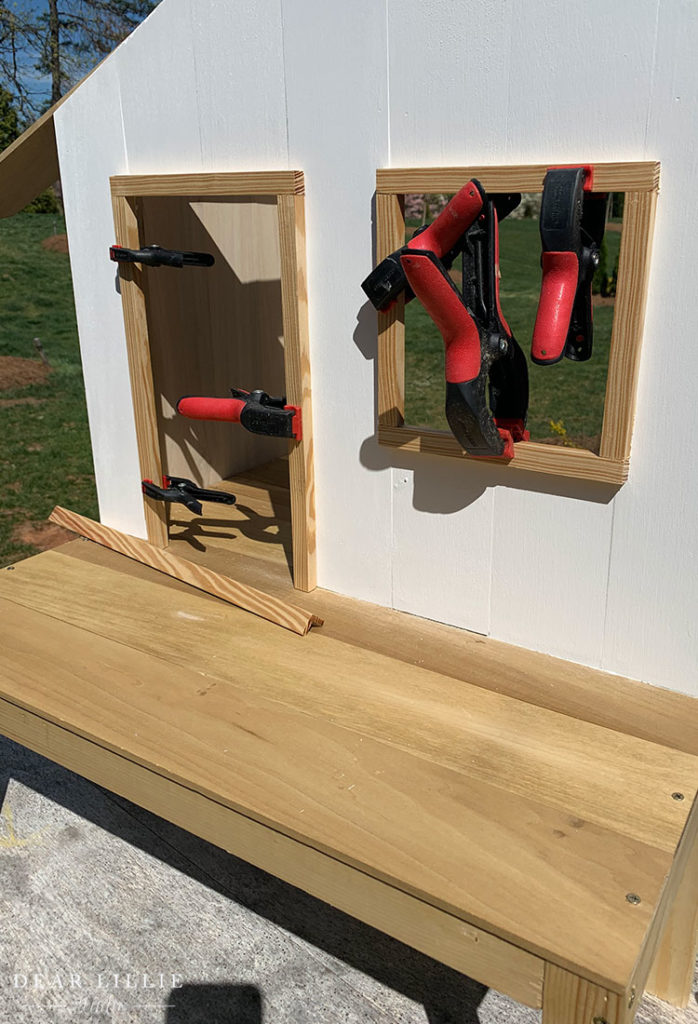
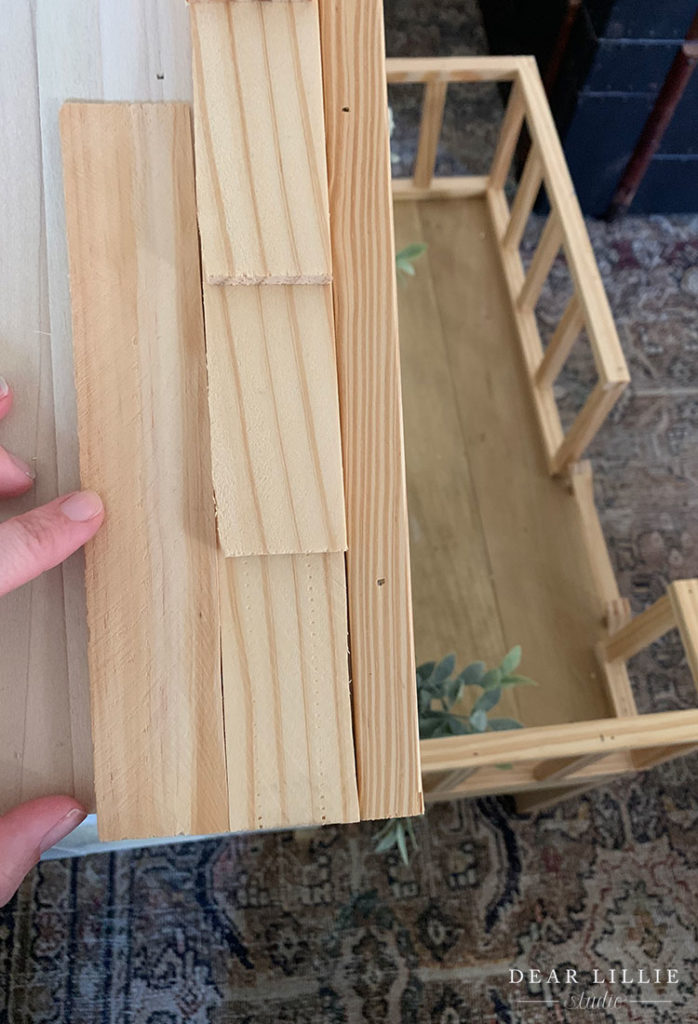
Next I moved on to building the trim for the door and window. I had cut my window a hair larger then wanted to so I ended up trimming it so it would look a tiny bit smaller (and the measurements I shared for the cuts are all the exact ones I used). The lower piece of wood in the photo below is what I used for the trim, ladder and railing (the upper piece is the corner piece I used to cover the front of the roof and the seam on top).
I used wood glue and nails for the trim:
While that was drying I used some scraps to build a little window box. I don’t have this in the wood cut list because I just used some scrap wood and it should be pretty easy to figure out.
Then I attached the trim to the side with glue and nails:
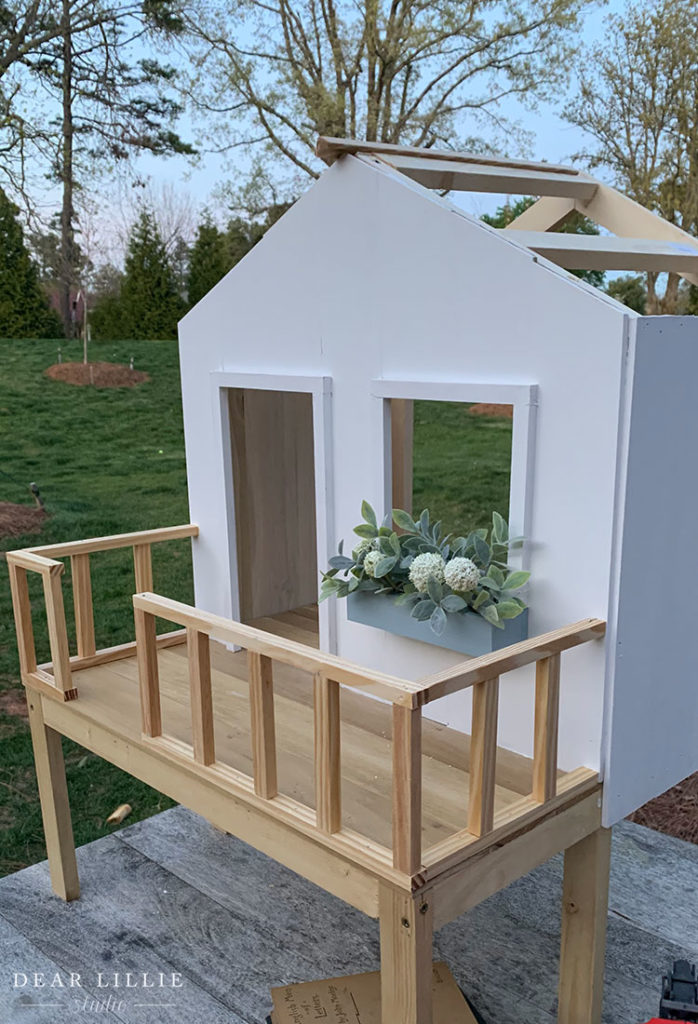
Then I painted it to match the siding and attached the window box:
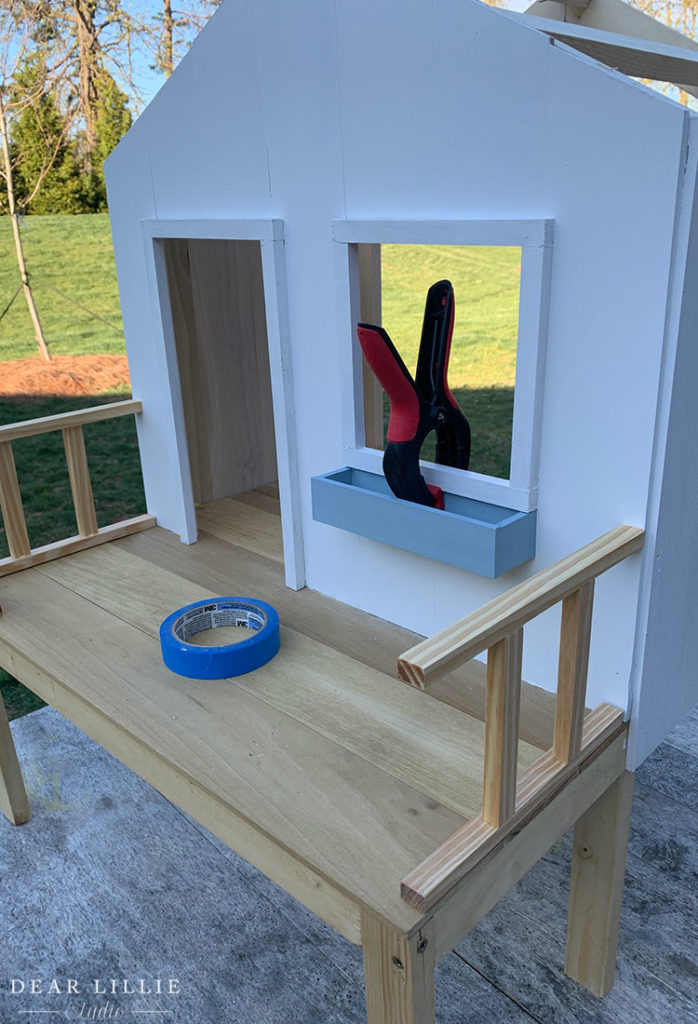
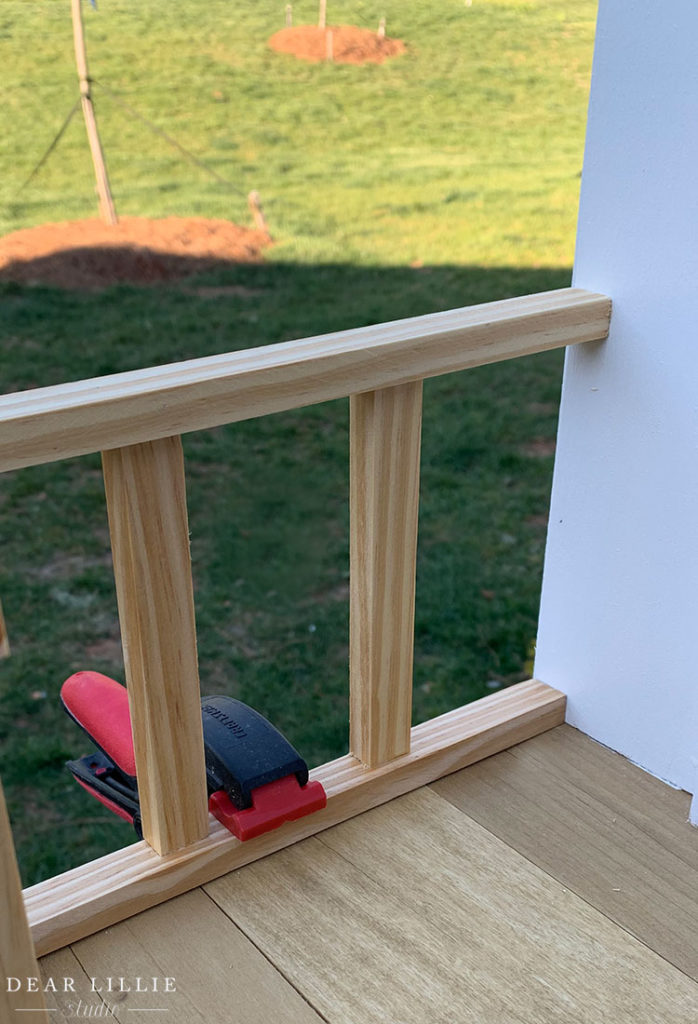
While that was drying I worked on the railing:
I could see the end in sight – haha!
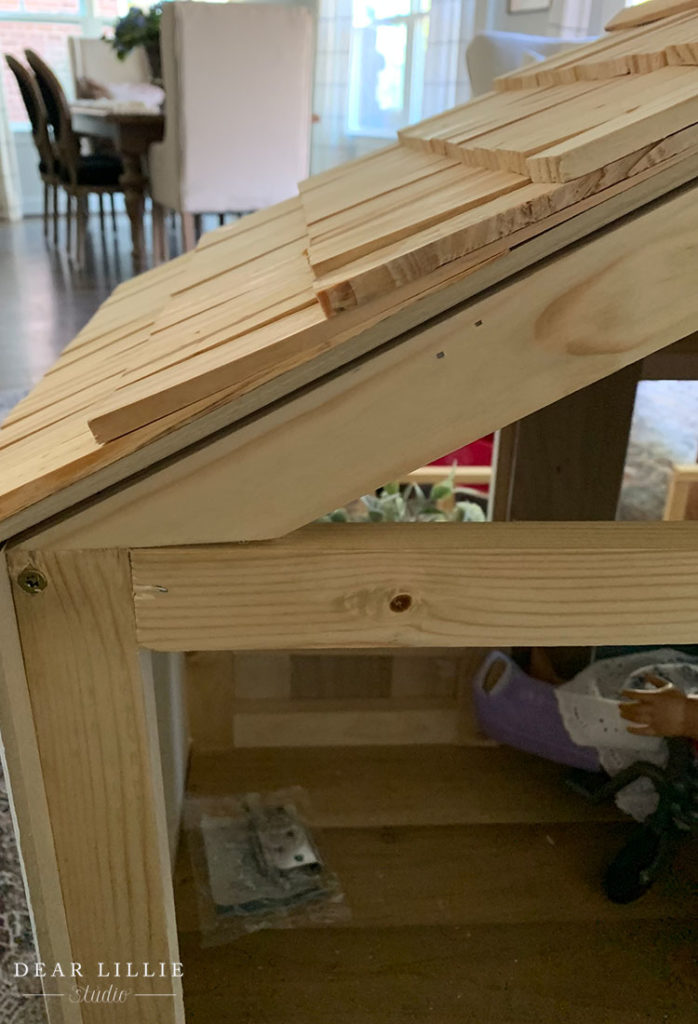
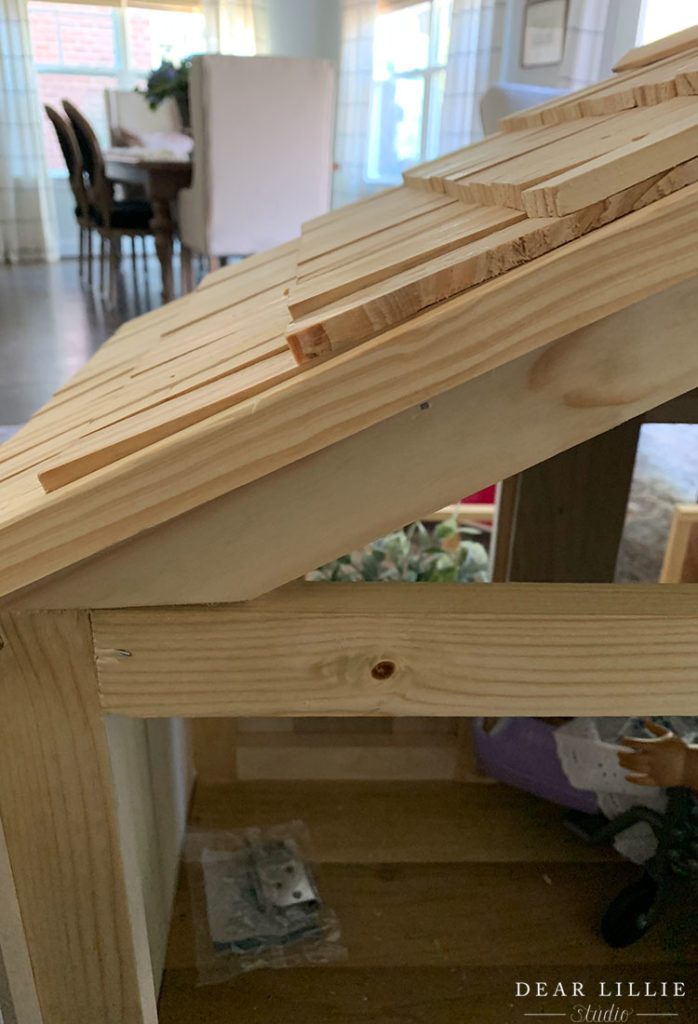
Now for the roof. First I attached the same wood I used on the siding to the roof so I would have a base for the shingles. Once I had attached that wood I added piece of corner trim to the front of it to help cover all the imperfections. Once that was done I started playing around with the shingles. In this photo the shingles aren’t attached yet. I was just playing around with them trying to decide how many I wanted to use and how I wanted to space them.

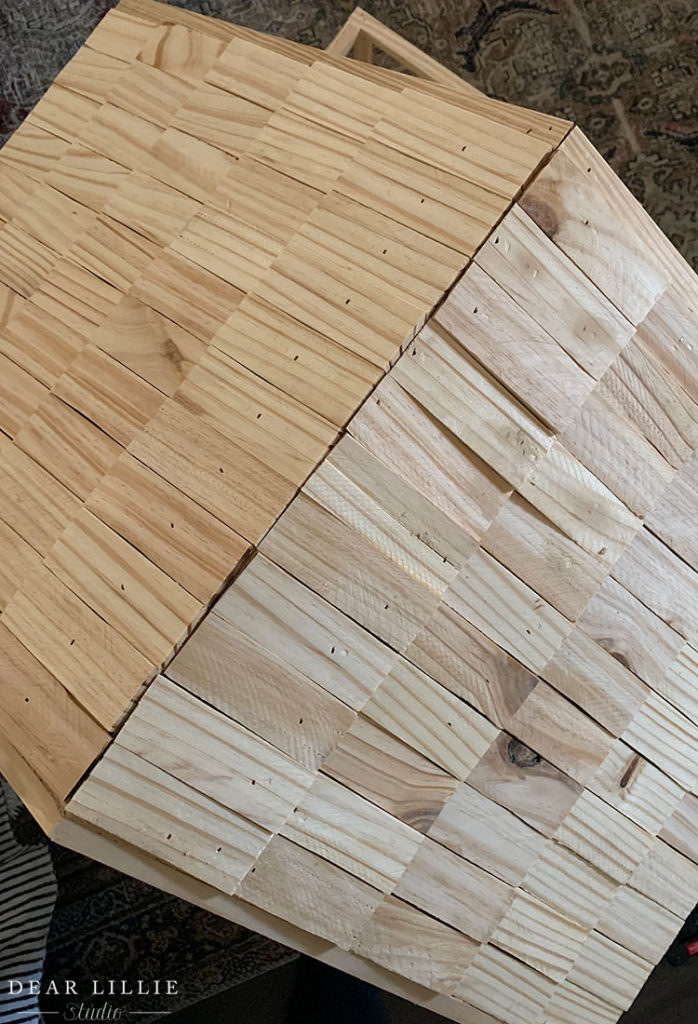
This is what I used for the shingles. I recommend buying a couple of extra packs because there are a lot of them that are not in good shape (which is to be expected). I ended up having to use quite a few that I would have preferred not to but I had only purchased ten packs so had to go with what I had. I wish I had purchased 12 packs though and that way could have been a little pickier about which ones to use. I ended up doing 11 rows of 5 on each side of the roof.

Make sure you start from the bottom and go up when attached them. I recommend glue and nails for this:
Once I was done it looked like this on the back:
So to help hide some of the messiness of that I used some extra wood left over from the railing and covered that up and it looked so much cleaner:
And the top certainly didn’t look perfect either. I wasn’t worried about that thought because I knew I was going to add a piece of corner trim there to help hide that.
Here you can see how the corner trim piece helps hide that:
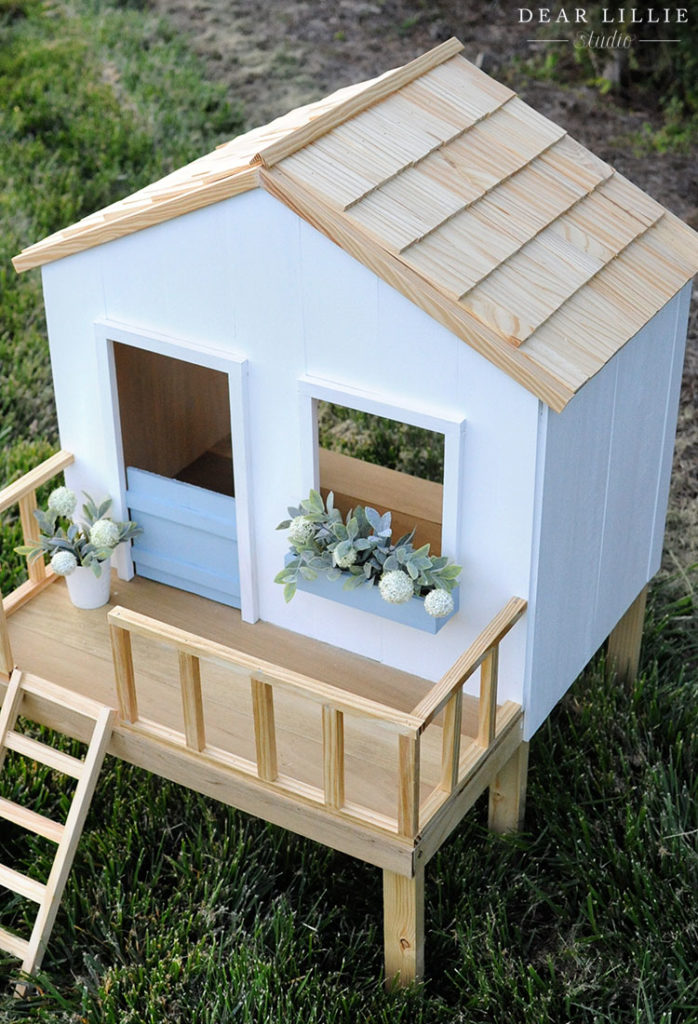
Lastly I added the little Dutch door. I don’t have any real instructions for that. I basically just used some of the scrap wood and a tiny hinge. I painted the door and window box a blue I mixed up with some craft paint I had to try to match a color on a swatch card that I liked.
Here you can see the backside:
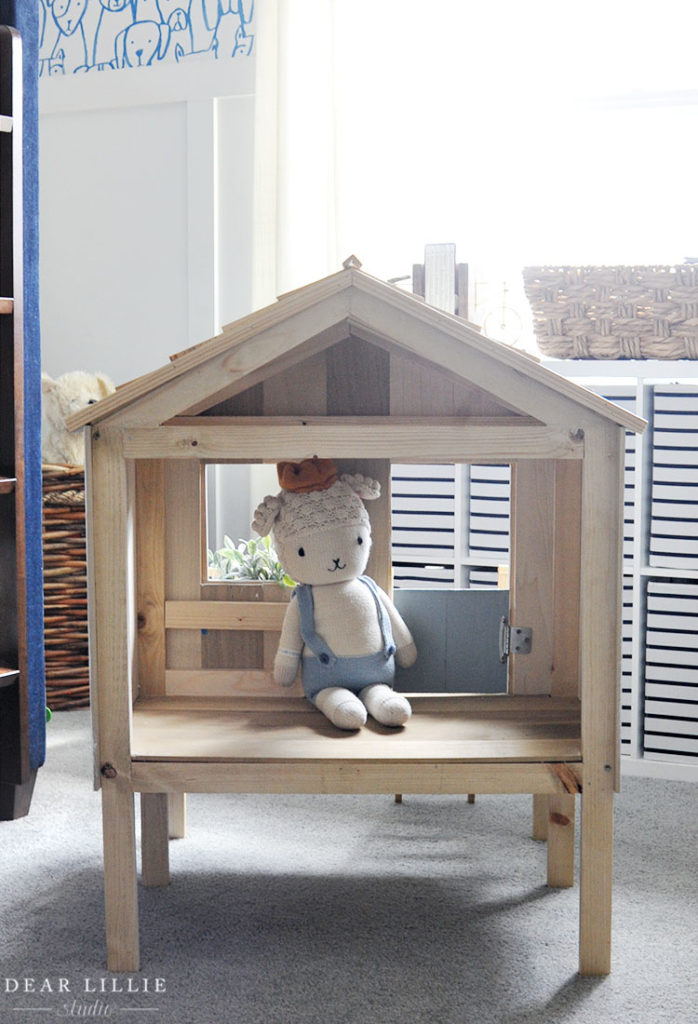
And these are the lovely toys of Lola’s that now call this treehouse home (because if you know Lola, you probably realized we weren’t building this for typical dolls – haha!):
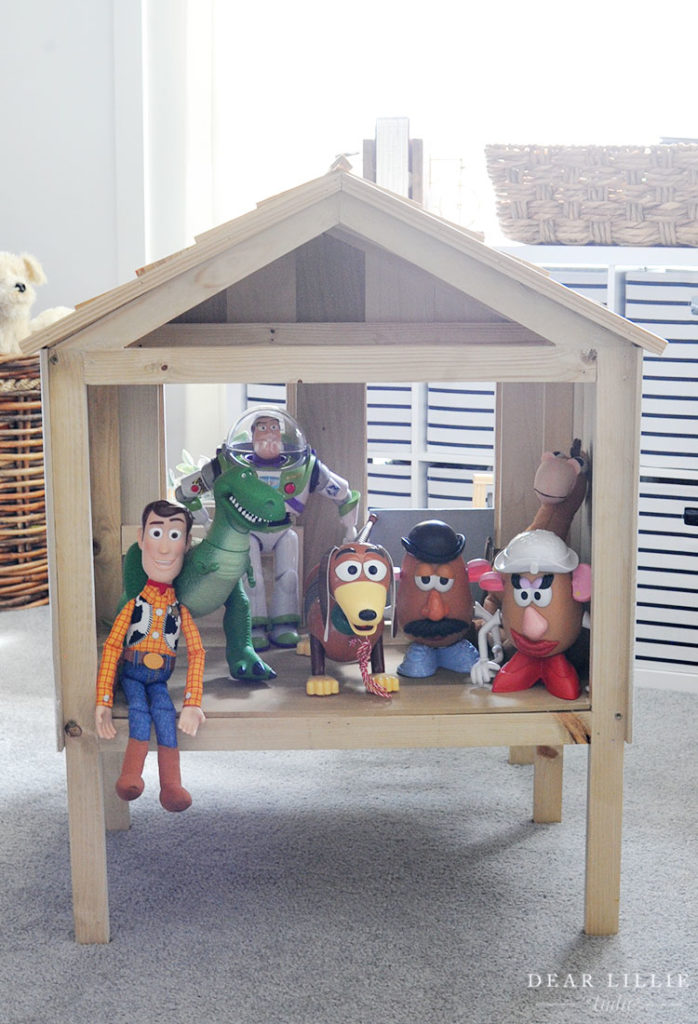
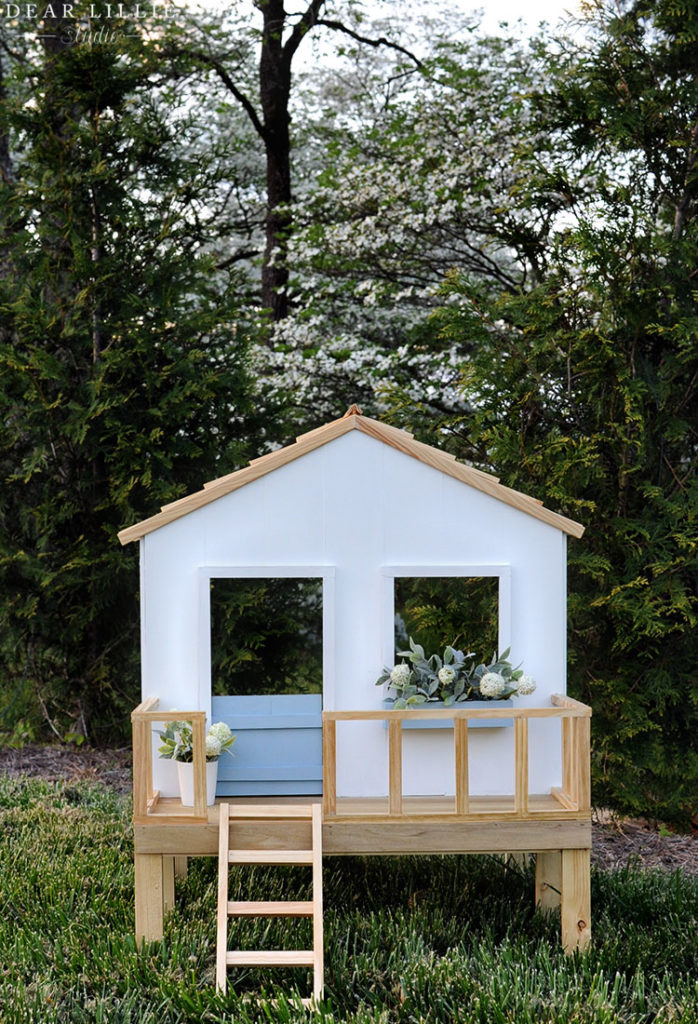
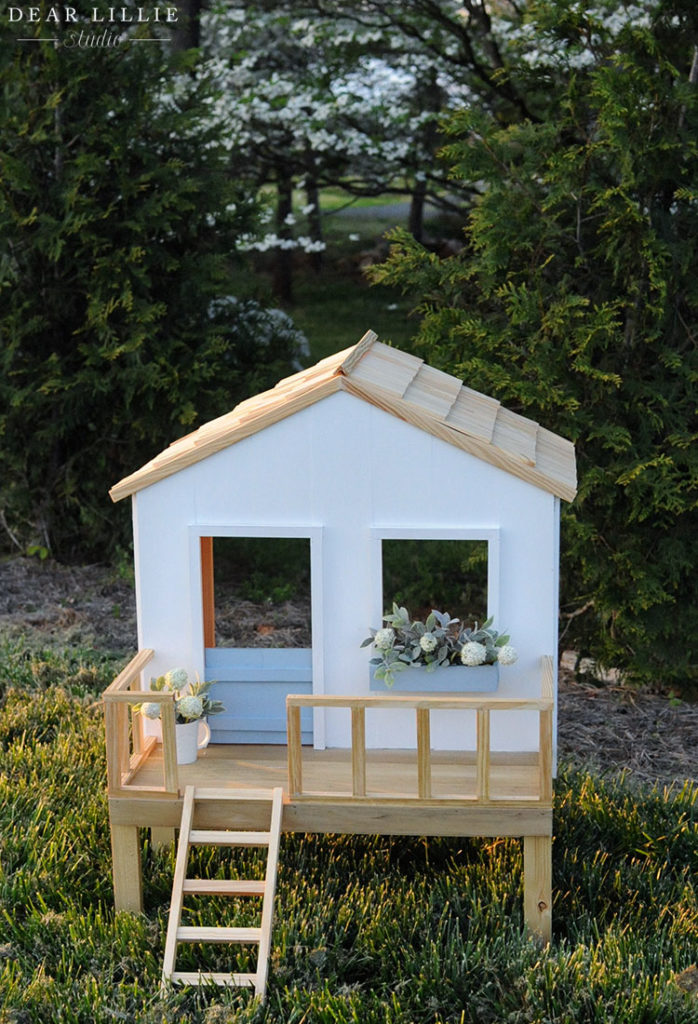
And here it is! Far from perfect but a fun little treehouse that Lola was very pleased with:
I hope you all have a wonderful week as we head into week six of our quarantine! Oh and the rug in some of the beginning photos can be found here, and the flowers we used in the window box can be found here. The faux greenery I have had for years. The little “outdoor planter” is a mini Starbucks mug. And for all sources for Lillie’s room you can click here.
Warmly, Jenni


