I had planned on writing this post a couple of weeks ago but of course just now am getting to it. It’s a little late but I figured it might still be worth it if any of you have any parties or gatherings coming up and are looking for a few tips and tricks on hiding power cords or adding some depth to your mantels or vignettes. They might all be things you already use in your own homes or maybe not.
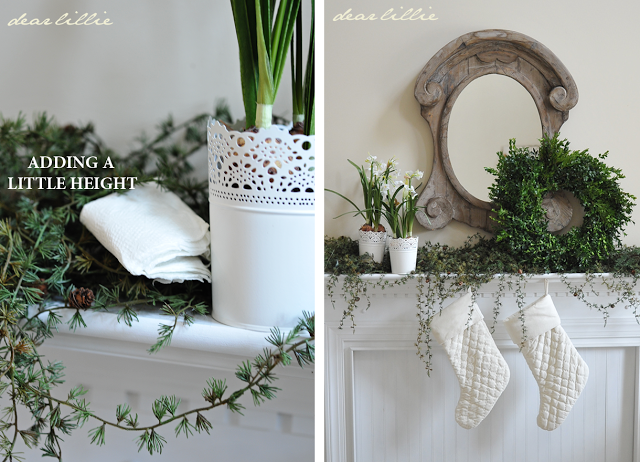
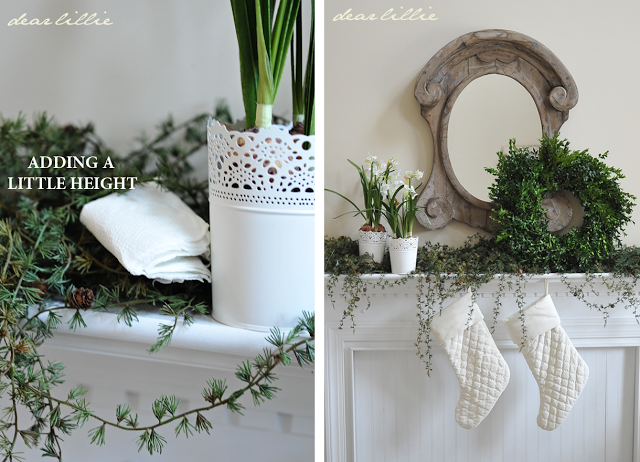
First, here are a couple of tips for adding height. This is the easiest time of year to add height to your vignettes because you can use just about anything – even something really unattractive and then all you have to do it hide them with some greenery. When I had the two paperwhites on my mantel side by side it looked okay, but not quite right. I added two folded napkins (for the picture I put them on top so you could see but they are actually folded and laying right on the mantel) and then placed the paperwhites on top of them and then placed the greenery nicely around it so you can’t see any white from the paper towels. That added just enough height to make the proportions looks better.
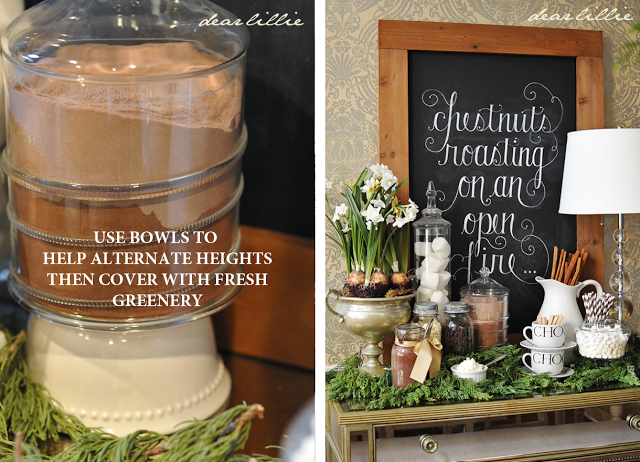
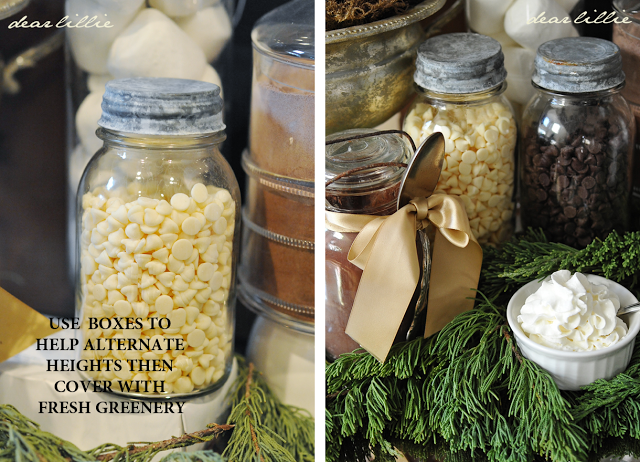
For our hot cocoa bar four of the jars on the left were all the same height. (The tall one with the marshmallows is HUGE – I wish I could shorten it a bit, but the other four are all the same). To add visual interest I put the hot cocoa one on top of an upside down bowl -and yes, there are two different types of cocoa in there seeing how we started to run low and needed a refill =).
And then I just placed the jars filled with chocolate chips on top of an old check box. Then I covered the box and the bowl with fresh cut greenery. It was nice and easy and makes the whole vignette look so much nicer by having different levels.
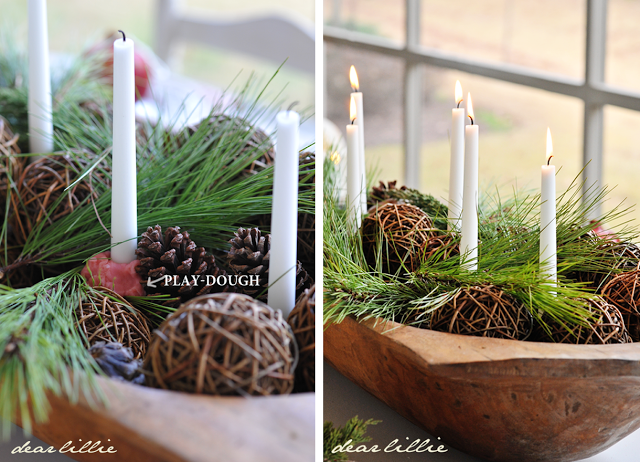
Here’s another little trick. For my dough bowl filled with candles I used homemade playdough (thank you Mrs. Shaver) and that helped keep the candles secure. And then once again I just placed fresh cut greenery around it and you would never know! (Of course I had to return the playdough to Lillie once I was done!) =)
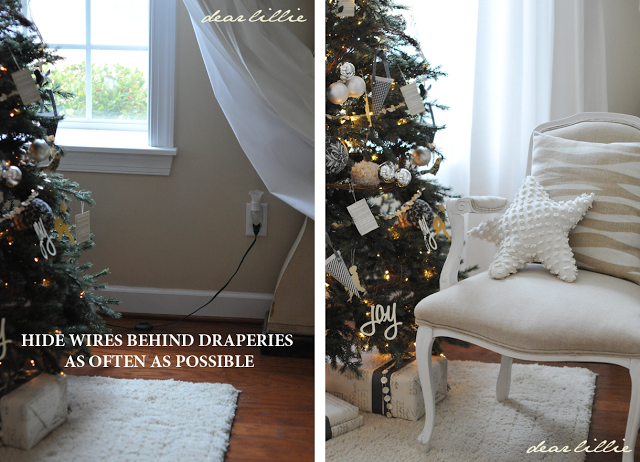
This one probably goes without saying but one of the easiest ways to hide cords is to run them up to a wall and then hide them behind long draperies.
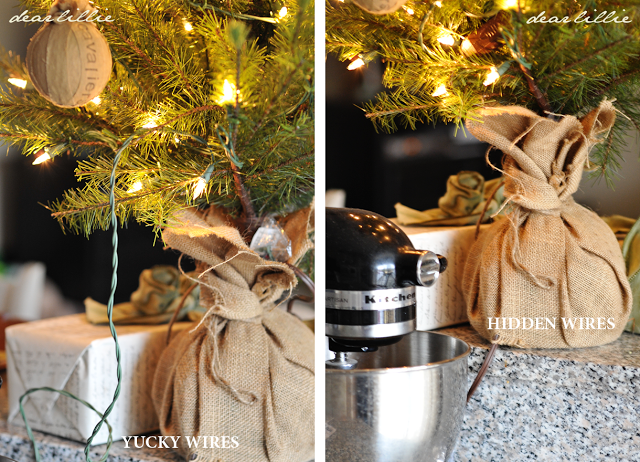
For this prelit tree that we had on our kitchen counter area the cord was coming from up above the burlap sack. I simply added an extension cord and then untied the burlap and stuck the cord through it. Then I cut a hole at the base and pulled the cord through. That way all you saw was an inch or two of cord instead of a foot of dangling cord.
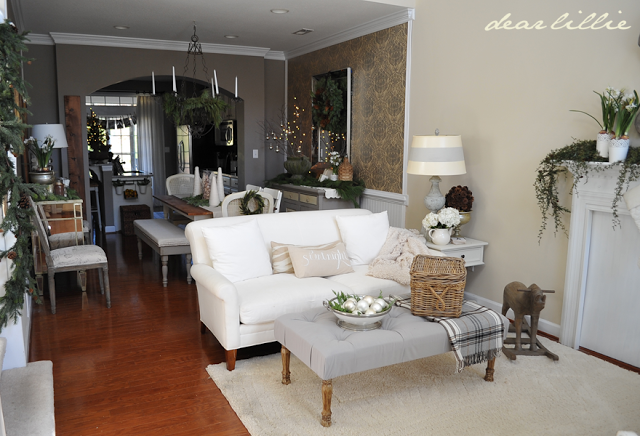
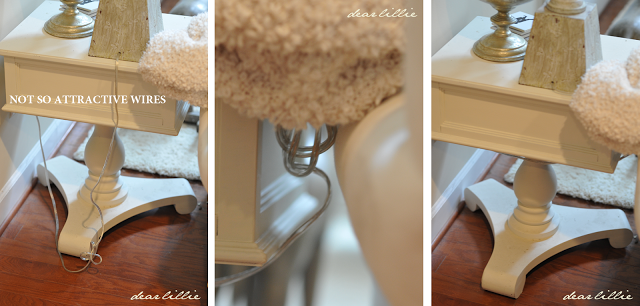
In this picture you can see we have a lamp on our end table to the right of the sofa.
From the back side if I didn’t tie the cord up in a knot and then run it directly underneath the flat bottom of the table (you can secure it with tape if need be) it would dangle like the photo on the left. Being able to see the knot would annoy me so I have a little throw that rest on that arm of the sofa and hides the knot.
And my last tip I don’t have a photo of but I have painted my cords at times to match the wall color or baseboard so that they are less noticeble. It doesn’t make them disappear but it does help make them not so glaring.
I hope you all are having a lovely Thursday!



Great tips! I hope you & your family have a wonderful Christmas, Jen
Thank you for the tips! So helpful! 🙂
Fabulous tips Jennifer. You give new meaning to a dough bowl with it actually containing play'dough'!
-Lisa
Thanks for these great tips. Merry Christmas to YOU!!!
Blessings,
Linda
Hi Jenni…such great tips!…using a bowl is so much prettier than cans, which is what I use..haha…I just wanted to take this opportunity to say how much you brighten my day with your beautiful photos. You are my inspiration and I appreciate that you take so much time and care to show us your beautiful ideas and home week after week. I know it takes a lot of work. So …thank you my sweet friend ! May you and your beautiful family have a blessed Christmas…talk to you soon…oxoxo Lu
I have also stuck command removable hooks to the back or side of a table to hold excess electrical cord. Works like a charm!
Thank you for taking time out of your busy schedule to share these helpful hints and tricks with us. I admire you so much Jennifer. Thank you for the daily inspiration & for offering wonderful pieces for our homes. I look forward to reading/staring at your beautiful blog posts everyday. It is the best way to start the day. I appreciate you and your team for all your hard work and time. Wishing you a long winters nap… Zzzz
Have a magical Christmas and a blessed New Year. Hugs
i was feeling a warm christmas when i saw your pics
These simple ideas make such a big difference.
Fondly,
Glenda
Love this tips? Doing the cord one today!
Great tips! Again, your home is very beautiful 🙂
Oh my goodness Jennifer…you have a lot of spam. Yikes!!
I just wanted to say, I feel better knowing I'm not the ONLY one who has painted their cords to match the wall!!! I love your tips! You are an amazing stylist and I feel like I'm always a student. You truly have a gift!! Thank you!!!
Wish you and the whole family the most blessed and joyous Christmas!
Wonderful tips Jennifer! I just got through stashing a bunch of cords behind the drapes! The play dough is a fantastic idea and one I will be doing tomorrow for my centerpiece. Thanks for sharing these. I'm scrambling around trying to finish up decorating and get lots of baking done this weekend. Christmas seems to have come quickly this year. Enjoy your weekend.
Lots of good tips! Thanks for sharing.
~ Darlene
Great decorating ideas! I'm with you on the cords. I prefer them to be hidden! I wrote a post last year on how to wrap a cord. Might be helpful for future decorating!?
http://athomeinthenorthwestblog.com/2011/12/how-to-wrap-cord.html
Jen
athomeinthenorthwestblog.com