Whew! My internet is finally working again. It started acting up Monday and would work for a few minutes and then cut off. I was able to get some things done but didn’t get to finish this blog post because blogger wasn’t loading at all and only got through a few e-mails and convos because it kept cutting out on me. Then when I came downstairs last night after putting Lillie down I couldn’t get online at all – arghhhhh! I had so much to do and wasted over two and a half hours trying to “fix” it but finally just gave up. I found out, though, it wasn’t just our internet so at least I feel better knowing I didn’t do anything to mess it up. Anyway, it just now finally came back on – yay! I am praying it will stay on long enough for me to quickly get this post up and then focus on printing all of the shipping labels that I would have printed last night and maybe even start in on e-mails before Lillie wakes up. That might be pushing my luck, though! =) As always I was horribly behind on e-mails, convos, etc. and two days with little to no internet access just pushed me back further so please bear with me and I will try to get back to everyone as soon as I can.
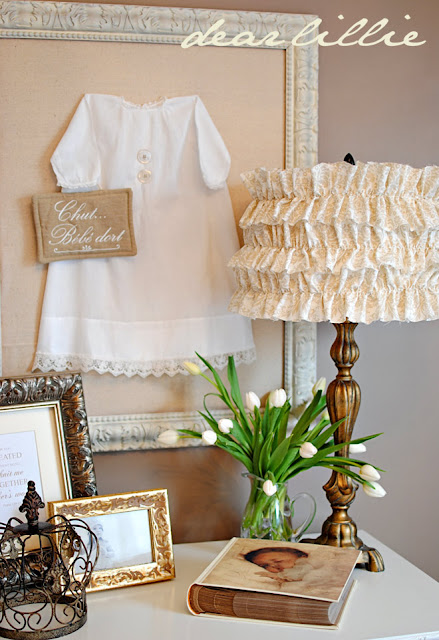
Here is the first ruffled lampshade I did for the nursery a couple of weeks ago. I did it spur of the moment without any real plan but liked how it turned out so ended up making a couple more. This one is still my favorite, though! To see more photos of the nursery click here.
And here is the one I made for our master bedroom.
To see more photos of that room click here.
And here is the one I made Sunday evening for Lillie’s room. This one is just temporary, though as I really want to make one like this for her room so as soon as I have some time. This one was made ridiculously quick and I made a couple of mistakes on it but, oh well. Here it is:
Here is what you need:
ruler
scissors
glue gun
sewing machine OR needle and thread
a lampshade (I am a big fan of drum shaped shades)
fabric (for all three of mine I used extra fabric from other projects so it was free!)
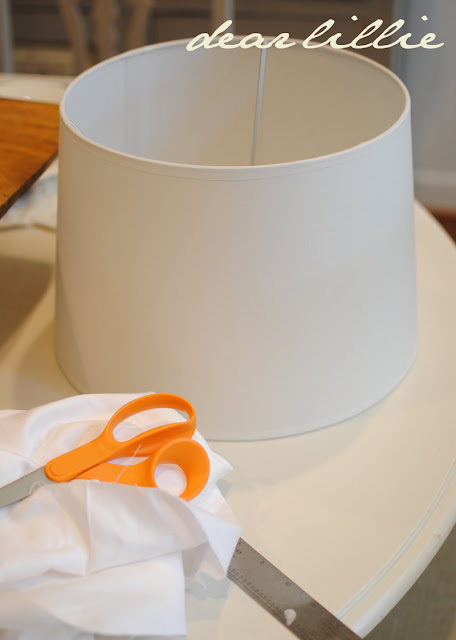
1) First measure your shade. Mine was nine inches high.
2). Now divide that by three if you want to do a shade with three ruffles. (If you want to do more just adjust). Once you have divided it by three (which for mine was 3″) add 1″ to that number for the width of each strip of fabric you will cut. This is where I messed up on making Lillie’s. I couldn’t remember if I had added 1/2″ to each strip or 1″ to each when I had made the other two. That’s what happens when you have pregnancy brain. I made both of those other shades just a couple of weeks ago so I should have been able to remember. I decided to go with 1/2″ and when the time came to glue it onto the shade was kicking myself because it definitely was 1″! Now start cutting three long strips. Because I was just using fabric that I already had I cut it the longest way I possibly could. I didn’t end up having enough to go around though once it was ruffled so I ended up needing another one and a half strips to add to the ruffles. I recommend starting with three but you may need to cut more. Also, I did not hem these but wish I had of. I love the frayed look of the fabric on the one in the nursery because I think it helps dress it down a bit but don’t really like the frayed look as much in Lillie’s room. If you are going to want to hem each ruffle than make sure to add a little more so you have room to hem them down to 4″.
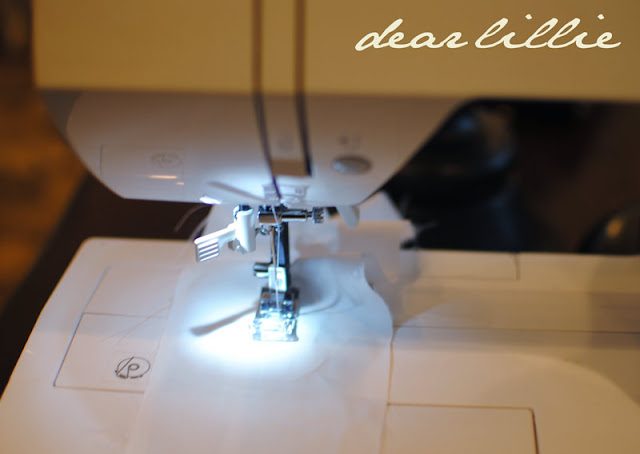
3) Next I started sewing. Here are the settings I put my machine at
so it would “ruffle” the fabric for me.
4). Then I just started at the top and stitched down the middle of each strip!
***** Note: You do NOT need a sewing machine for this project. You can simply hand stitch a straight line down the middle as well and then pull the thread once you get to the end and “ruffle” the fabric yourself. Or if you do have a sewing machine but can’t get this to work you can just set the stitch to the longest possible setting (seven on mine) and when you get to the end just pull the string and ruffle it yourself. It is a bit embarrassing to admit but I owned this sewing machine for FOUR years before I figured out it ruffled on it’s own. I used to just sew with it on seven and ruffle it myself. Also, I have been asked several times if I have a special “foot” or anything else that I add to my machine to make it ruffle. No, I don’t. I just put the settings as shown above and sew away.
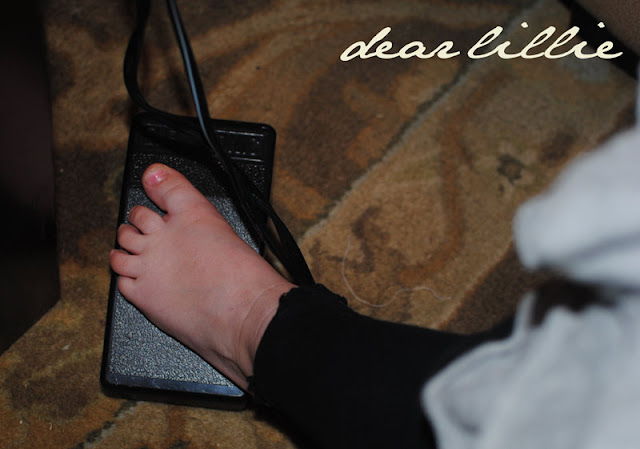
As with just about all house projects, my little helper felt the need to be very involved so she got to do her special part of “pushing the pedal” to make the machine go! She’s actually getting pretty good at it. When I first started letting her help me back in November when we made those Silent Night pillows it was a VERY bumpy ride =).
5). Now it’s time to glue. I didn’t use a ton of glue for any of these lampshades because I always love trying new projects and know that in a few months I may want to do something new with them so I used the glue sparingly so I could easily pull the fabric off.
6) I started with the middle ruffle because then it was easier to make sure it looked uniform on the top and bottom. I think I used about 4 or 5 drops of glue on my way around the shade and then just pressed the fabric down onto it.
7) Now add the top ruffle and bottom ruffle and that’s it! You are done!
We also added the mirror in here a couple of weeks ago when we started switching everything around for the nursery and I stole the frame that was in here (that was way too small!) and put it in the nursery and we moved the mirror in here.
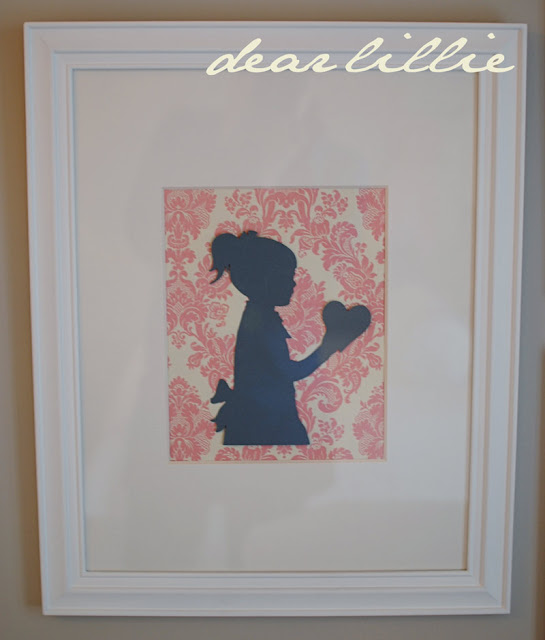
I also added the pictures to the empty wall next to the bed Lillie sleeps in so her room is now officially done except for one thing I want to do with the window seat area, but that is below about ten other projects on my list so it may be a while before I get to it.
If you want to see the rest of Lillie’s big girl room click here.
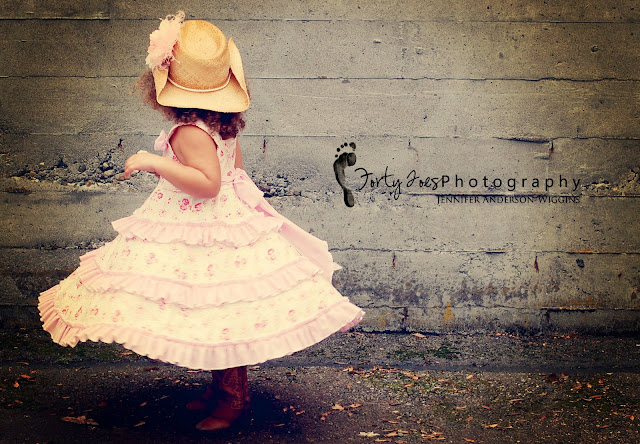
On another note, our friend, Jenn is hosting a HUGE giveaway on her blog Forty Toes for over $1000 worth of items, including our Je T’aime Dress! She is one the sweetest people in the world and has four of the most beautiful children I have ever seen. I have written about her here on our blog before as she has become such a sweet friend and is so talented. Here are a few photos by her of her gorgeous little girl, Stella Marie:
Be sure to head on over and check it out
and come back Friday as we will be hosting a
giveaway for one of our tutus!
Have a fabulous Wednesday!
Linking up to Savvy Southern Style.











Lillie's lampshade caught my eye and I figured I was going to try and make one before I realized you would do a tutorial. Looks like I thought…I love the frayed edge, it does give it a casualness that goes with the ruffle. Cute idea, thanks!
So cute, going to try it with our living room lamps. Thanks for sharing!
What a great little lamp! Love it!
Great idea! I am going to make one for my niece's birthday!
I really hate to sew, but I love your ruffles lampshades so much I may have to drag my sewing machine out of the back of the closet! Each on is different and yet each one so very lovely!!
Lillie's so beautiful,going to try I love to sew. Thanks for sharing!
XOX
Blessing
Isora
Your designs are amazing!
Just Better Together
this is a great project. do you use a ruffle foot? or ruffle them yourself? i'm so new to sewing, it's not even funny. lol
i have party going on right now, i would love it if you shared this.
http://typeadecorating.blogspot.com/2011/03/anything-goes-party-8.html
Thanks everyone! Tammy – all of the info is right there in the post.
Jennifer, love those lampshades. Great photos as always and that little girl is so cute with her curls. Love Lillie's room. I didn't see a link to the party. I so appreciate you joining. I know you are very busy.
Love the lampshade Jennifer. I wonder if you could make those ruffles with elastic then you could just take it off if you wanted to change it. I've never done anything with elastic so that's just me talking outloud 🙂
Kim – Sorry! I just added it. When I went back to add it after I joined it was acting up on me again. Nothing is more annoying than the internet not working when you want it to – huh? Arggh! Anyway just read your comment and thought I would try again seeing how tonight it's been at least going in and out me and I got it in!
Tricia – that would be a great idea. I haven't ever used elastic either but I keep saying I am going to try it.
Everything about these rooms are just GORGEOUS. can you come to my house and help decorate. Like its just stunning! I am getting so many ideas from your pictures….and i think I need to do that lamp shade. like now!
thank you!
i want to be your kid!!!! that, or have you come over to my house and redo EVERYTHING! i love how you decorate! seriously, it is like breathtaking!!!
jen's giveaway is awesome! someone is going to be a very lucky winner!
LOVE, LOVE, LOVE!!! I totally did the same thing to my chandelier's shades a while back (http://westermanfam.blogspot.com/2011/03/ruffled-chandy-shades-tutorial.html). So easy, and major impact. What a beautiful little girl's room 🙂
BTW, I am sooo jealous your machine did that for you!
Shelley
The lampshades are all wonderful… if you want a fast edge on the ruffles and you have a friend with a serger ( or if you happen to have one).. using a rolled hem on them would give the edges wonderful ( I typed that as ~wonderuffle the first time..ha!) body and a nice finished edge.
Maddie
http://www.domesticanarchy.blogspot.com
Lovely lampshades and rooms!
Jennifer, oh how i love everything you do. the lampshades are stunning and i'm hoping to getting around to making one soon.
i never did tell you, i made "chocolate peanut butter balls" for Valentine's day and not only were they super easy (thanks to your recipe) but i felt like a cooking queen when everyone loved them SO much. p.s. i'm FAR from a cooking queen. 😉
thanks for the info on how you sew your ruffles. i ended up "youtubing" (is that a word?) a few ways to do so and i will be attempting to add one tonight to an ottoman slipcover i'm making following your tutorial. as soon as i get it done, if it's good enough to post about (first week using my sewing machine here, this could turn ugly) then i will most definitely be linking back to your tutorial because it's helped me tremendously!
i look forward to hearing from you about the design/decor question but am wishing you some time to relax amongst being a mama, a mama to be again, and internet issues. 😉
I'm so in love with this room! I want to see more of the branch & birds.
Warmly, Michelle
Oh Jennifer, your lampshades are just gorgeous!
You do everything so well. 🙂
I just want you to know that I truly do appreciate all your lovely comments on my blog…I think in "real" life we would be great friends!
Hugs and prayers for a happy pregnancy,
Anne
Shelley – I did my first lampshade back in the end of February. We got a lot of e-mails asking for a tutorial and I actually looked to see if there were any out there that I could just link to because I didn't know when I was going to get to it but couldn't find any. I just looked up yours now after reading your comment and was wondering how in the world I missed your tutorial but then saw that it was from about ten days ago so now I feel better knowing why it didn't turn up when I was looking for one. Too bad that you hadn't done your tutorial about a week or two earlier and then I would have seen it in my search and just put up a link to it! You did a great job with it and it sure would have saved me a bunch of time – haha! I love how your shades turned out! They are a great addition to your chandelier!
Amanda – I am glad you made them! That is why I love them so much – they are so yummy and so easy. I am a horrible cook so I need nice easy things to make! Have your e-mail saved in my inbox and even forwarded it to my other address so I can't lose it this time. May be another week or two before I get back to you, though. I am so incredibly far behind! Good luck with your ottoman. Can't wait to see how it turns out.
Michelle – Thanks! There is a link in this post to see the rest of Lillie's room where there are better pictures of the branch and birds. It's near the bottom of the post after all of the pictures of Lillie's room.
Anne – your comments and your blog posts always make my day. I am glad it is "spring" for you again!
Thanks so much for sharing your instructions. Your lamps are all adorable. I like Lillie's new mirror too! Just perfect!
Jennifer,
Oh I love these. I do not know how to sew but as I have mentioned here before…you make me want to learn (and I just might!)
I love both of the girl's rooms!! You can tell they were decorated with such love and attention to detail. Since we moved into this house, I did Kate's room and I love it but I have not put much time or energy into our master or the boys rooms. Life with 3 active kiddos is just so busy that we are not home enough to really focus in that lately. But this post has motivated me to add some special touches to the rest of the bedrooms.
I read your post below about answering e-mails and closing the shop this summer and wanted to respond. I respect you and your family starting this awesome business. I love your creativity and all the beautiful things you all offer. But you are SO right to put your family first. I don't know how you can function staying up so late doing your work and I have actually found myself worried about you. I am a type A person and try to be the best Mom I can possibly be but over the years I ran myself ragged. I ended up with adrenal and thyroid issues from not taking time to slow down. I was always trying to do too much. I have spent over a year trying to build up my adrenals (which control our adrenaline and all of our stress hormones). It has been a long road and I am not there yet. I only share this with you because I know how it feels to want to do it all and be great at it all.
You seem like such a sweet person and an incredible wife and Mom and I would hate for you to end up getting as sick as I did. As much as I will miss Dear Lillie this summer, I think you are doing the right thing. PLEASE get enough rest and just take some down time with your kiddos. Will is going to be 14 this summer an it feels like yesterday that I was bringing him home from the hospital. Those slow and lazy days of naps and afternoon walks have been replaced with soccer practice and swim practice and ballet classes and trying to squeeze family dinners in around it all.
All of this to say, please take care of yourself. If you are not rested and filled up emotionally and spiritually, you cannot serve your husband and children. I am sure you know all of this already.
Best wishes with the remainder of your pregnancy.
Blessings,
Kim
Jennifer, wow! You are so extrememly talented. I absolutely love your lamp shades and I saw that coffee filter lampshade and was also going to attempt to do it for my little girls' room. The huge pack of coffee filters are sitting on my kitchen counter this moment but now I'm really not sure which I like better?! and the mirror…I had my hand on one just like it at Homesense and didn't know how I would fit it in my house…but you make me wanna go back and grab it right now!! I know you've been told this gobbs of times…but your home is just BREATHTAKING! so glad i found you : )
~Stacey
I just adore these lampshades..they're the perfect amount of "dressiness" for a room! 🙂 Your tutorial is so wonderful and easy to understand! Thank you so much for sharing it with us and many thanks for being such a talented decorator!! 😉
All the best,
Terrell
This is so amazing! I cannot WAIT to do it myself!!
Your beautiful home has made me fall in love with ruffles! I want to make a ruffled bedskirt for our bed (we just finished an Ana White project). I don't have a sewing machine yet and am looking to get one. What kind do you have and what are your thoughts on it?
Thanks!
Thank you so much for the tutorial, I plan on making that shade for my living room. I did try with a couple of different kind of fabrics, but they did not work because they were too floppy. It does take a stiffer fabric, I found.
Your photographs are all beautiful! You are a great photographer.
Hugs, Cindy
I so need to make one of these lamps! They look gorgeous in your home. Thanks for sharing!
I love everything you do. I love your decor, your graphics, your creativity, and your gorgeous daughter. Everything you make/do impresses me like you wouldn't believe! You're incredibly blessed with an amazing eye for things, you're amazing at what you do.
Ps. This site reminded me of you. It has some vintage/antique/french inspired graphics that are such an inspiration! Check it out: http://graphicsfairy.blogspot.com/
I'm loving the ruffled shades. So cute, but not overly sweet.
Amanda – I have a Singer. I have one of the more "entry level" ones but it does absolutely everything I need it to and I have found it very easy to use! My mom got it for me about 5 years or so ago, maybe? I can't remember for sure and it was either $199 or $299…..am leaning towards $299 but my poor pregnant memory is awful -sorry!
Cindy – First – thanks! And second, that is weird about the fabric being too floppy. The fabric I used on the one in our bedroom was pretty thick but the other two were EXTREMELY lightweight. Especially the one in the nursery. It was an super cheep sheet actually and is so thin you can practically see through it. Do you think if you pull the ruffles tighter it won't flop as much. My ruffles are pulled quite tightly and I haven't had any trouble with them flopping.
That little foot pressing the pedal is adorable. I miss chubby toes. Your lamp shade is such a nice touch in this room, but I like the coffee filter shade too.
Beautiful! Love the ruffles, thanks for the tutorial. I'm a first time commenter, so I also must tell you that your daughter is GORGEOUS! 🙂
I adore the lamp shade! I may give it a try as I'm revamping my room this week a little (:
I always enjoy the posts! Looking forward to many more (:The things given are unanimous and needs to be appreciated by everyone.
Wedding Dresses
Not sure if you have answered this question already but I was wondering where the silver dresser came from??? Sorry if I am asking a repeat question, I went back and searched a few of your entries where I remember the dresser being in pics. Thanks in advance for the info…Love your blog and all of your ideas!!!
Hey Esme – the silver dresser was actually from TJMaxx. I got it about 2 years or so ago so I doubt they have it anymore =(.
I love these! I've been wanting to make over our bedside lampshades…and this is perfect! Thank you so much for the tutorial 🙂
P.S. I just found your blog. Gorgeous!
I went to your site in an effort to find information on how to make a slipcover for an ottoman. Your ottoman cover is perfect and just what I am looking for. Then, to my surprise, I find this absolutely adorable ruffled lamp shade. How fantastic and creative. Thanks for sharing your talent. I am definitely making one of these this week.
Those lamp shades are great and you rooms are absolutely gorgeous!!!
I'm following you now 🙂 If you get a chance sometime, I'd love you to stop by my blog.
jamie @ sewrockin.com
You completed a number of nice points there. I did a search on the subject matter and found a good number of folks will agree with your blog.
Power House Antibacterial Wipe Canister, 40 Count (Pack of 12)
THANK you for sharing this great tutorial for the ruffled lamp shade. I ruffled an old lamp shade to update my baby girls nursery. It's a beautiful idea! I used the link on my blog- i hope that's okay!
You have inspired me!
I have been looking for the perfect lamp, now I can just buy a stand and make a beautiful shade myself!
Thanks for the post. I had been looking for something related and found your web site in the process.. I will definitely be back for more.
Thanks for sharing this gem. You are so talented and inspire me to do more and to clothed my home environment in love from the things you make. I absolutely love this. I love your bed linens in your master bedroom. Did you make them as well?
Thanks! I made the large bolster pillow but that's it for the bedding. The rest was mostly from Target, I think.
Thanks a lot for your tutorial, I put it on my blog if you allow it to me.
Sandy