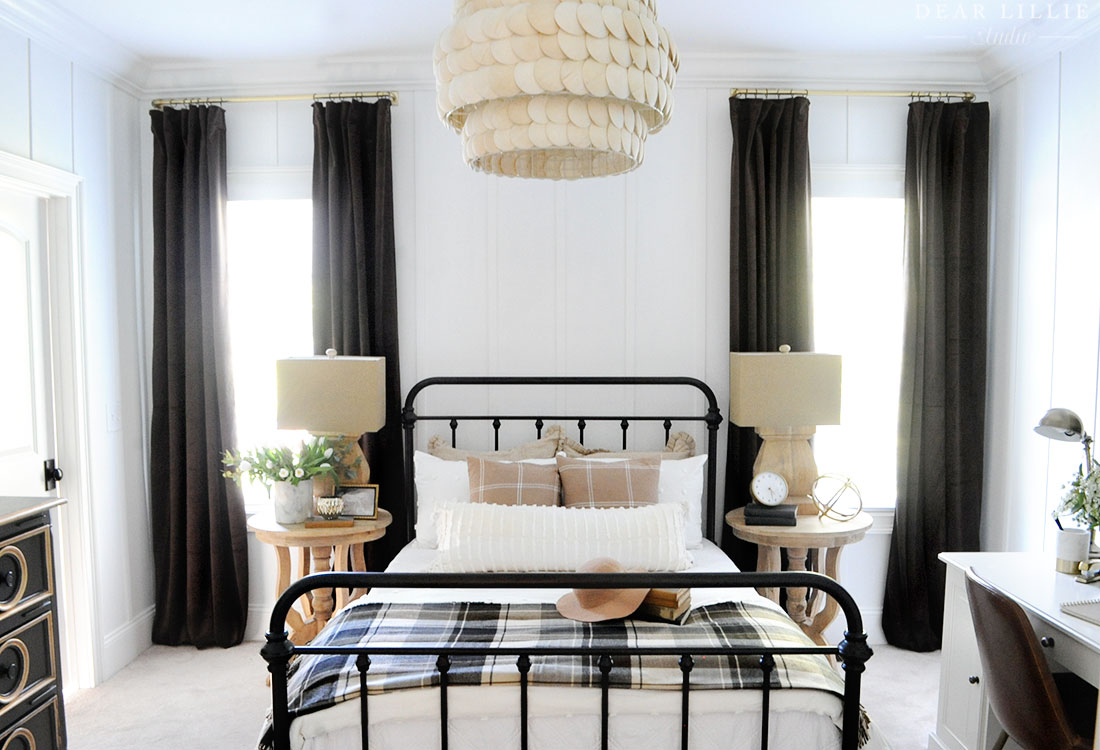
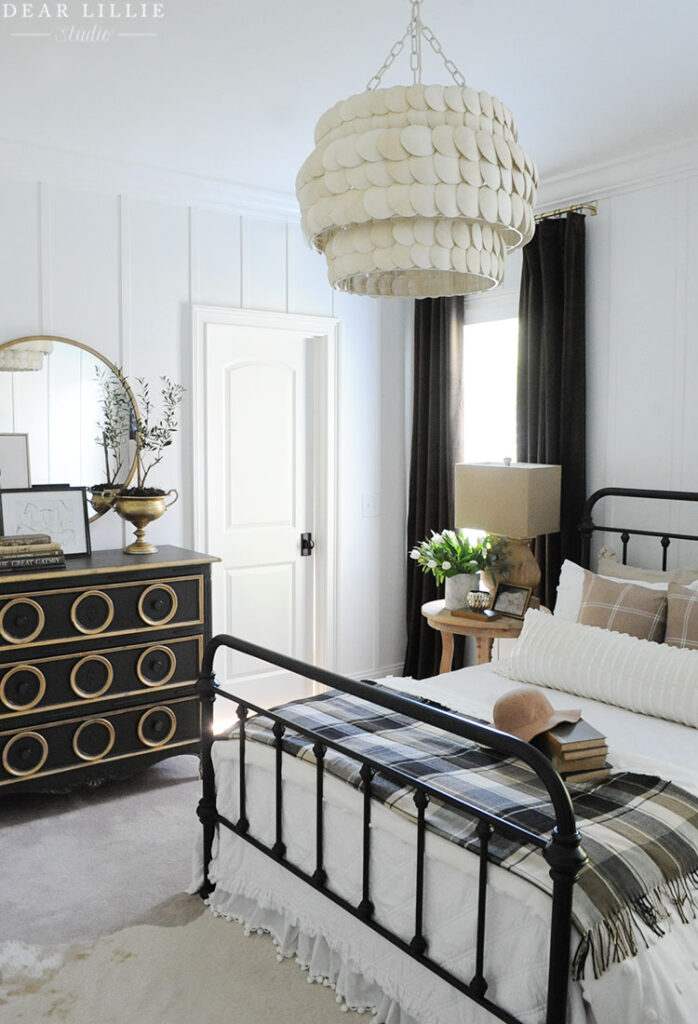
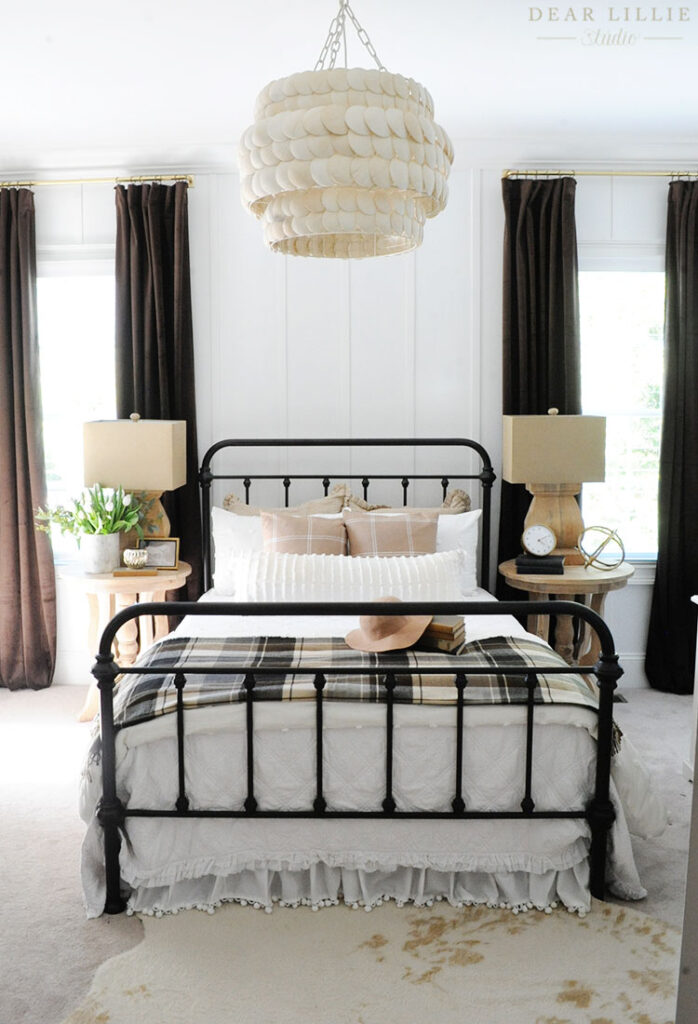
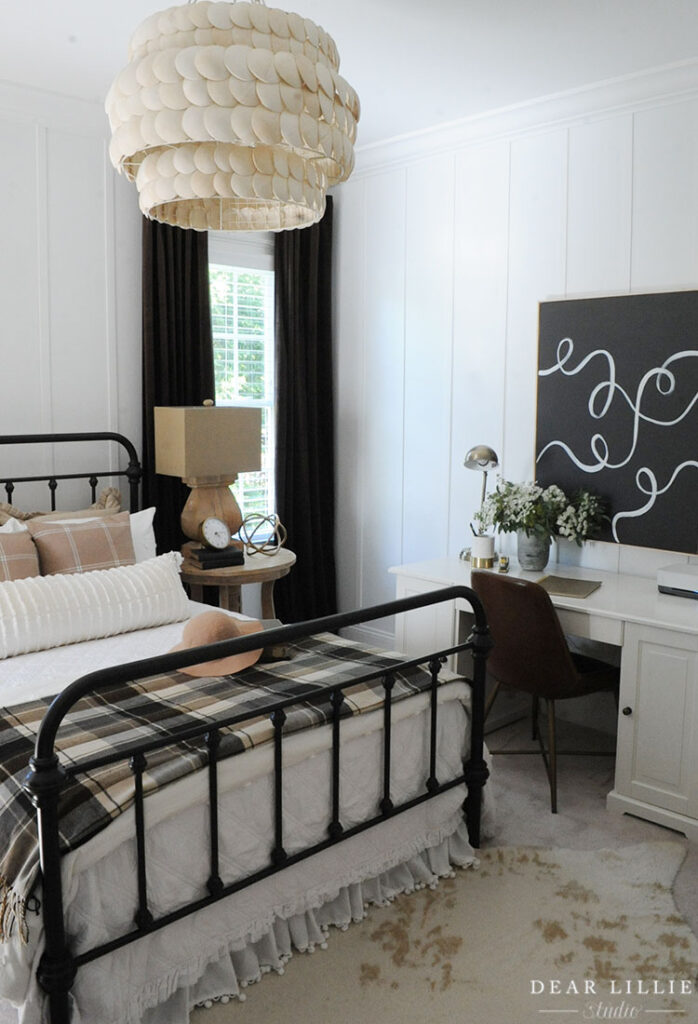
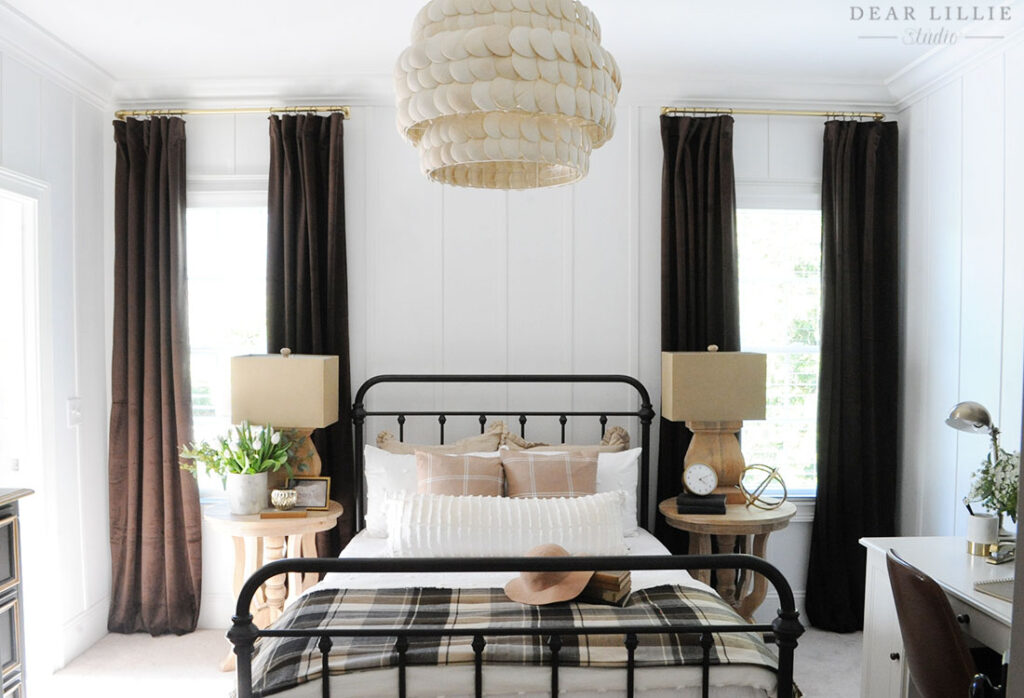
Good evening! I hope you all are having a lovely Tuesday! I have been plugging away on adding floor to ceiling board and batten to our guest bedroom and regular board and batten to our guest bathroom for the last ten days or so and am still working on the guest bathroom so won’t have that to share for another week or two but I am more or less finished with the guest bedroom so wanted to post those pictures now. We did not have a guest room at our last two houses and it was one of the things we missed. We don’t live near family so it is nice having a room for them to stay in when they come visit. And for the first time we have a guest bedroom that has it’s own attached bath which I think will be really nice for our visitors.
The room was a really nice size for a guest bedroom (you can see how we quickly decorated it the first week or so when we moved in here). Because we don’t have a dedicated office space we also decided to fit a desk in here to keep our printer on as well as a bunch of our crafting supplies and we more or less moved the stuff my office closet into this closet in here. The desk is bigger than I would go with if I were buying a new one and makes it a little tight if this were a bedroom used daily, but seeing how it’s just a guest room and for the most part we were trying to use all items we already owned and it works well enough.
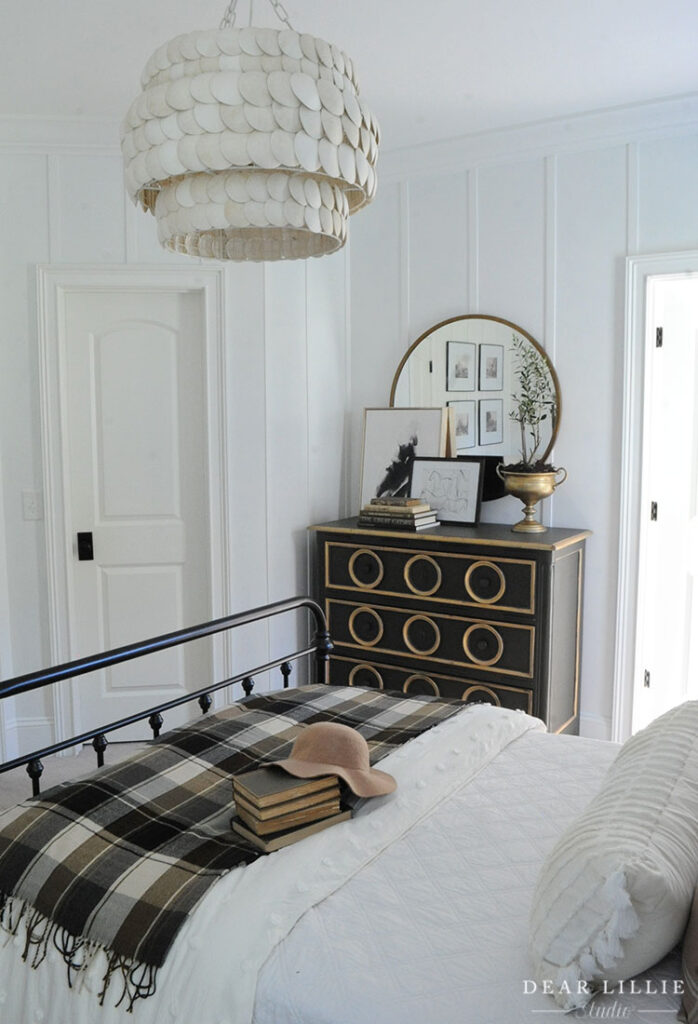
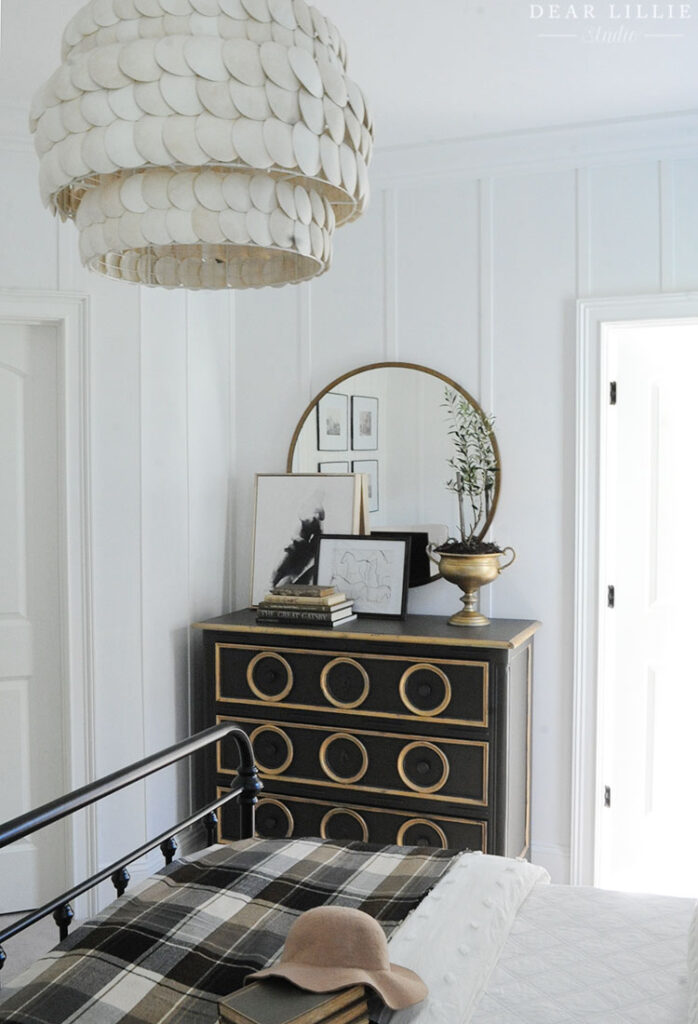
The room was pretty basic to start with and I wanted to add a little interest to the walls. I initially planned on either doing wallpaper or picture molding. I decided against wallpaper for a few different reasons and planned on going with picture molding. Well, after measuring out the walls based on the placement of the doors, windows and angled closet I couldn’t figure out how best to make it work. I probably could have if my brain was more in the mood for all that math but I was tired and decided to pivot and go with floor to ceiling board and batten. Although I am not sure if it’s technically still called that because I used the existing molding on top. But anyway, I decided to go that route. All in all it was a very easy project. Just quite time consuming. Mostly just because we had a lot of other things going on and I wasn’t able to fully focus on it and just worked on it in little increments of time.
I have done more traditional board and batten quite a few times (here in laundry room, here in our powder room, here in Lillie’s room and here in Lola’s room) but this was my first time doing it all the way up. When working with existing baseboards you can fudge a little bit with the vertical wood pieces coming out a bit past the baseboard without it being that noticeable but with the crown molding I knew that would not be the case. Because of that I had to use really thin wood and went with lattice strips from Lowes that came in 8 ft lengths. I did have to cut each one down a tiny bit and then obviously cut the pieces for above the doorways and window. I just used my miter saw for that. You can get all the details about the process here in our highlights. It shows the SKU number for the lattice strips along with the details on spacing and just the general process.
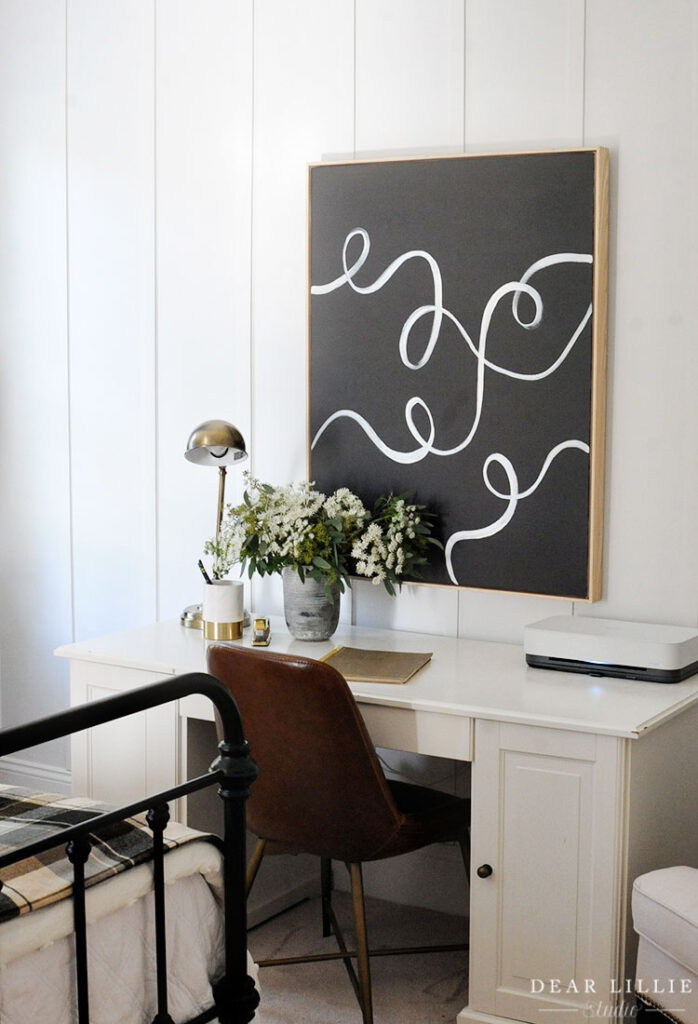
All in all I am happy with how the board and batten turned turned out and would do it again. The only thing is right now, the overall room feels more “farmhousey” than I would like. I typically prefer a more traditional, classic look. But I was using pretty much all items we already owned so I am hoping as I swap things out like lamps and add in some different accessories that I can get it looking less “farmhousey”. Also I haven’t painted the doors yet because I am still deciding on whether I am going to paint them black or the same Pure White as the the rest of the room and trim. So that’s why they look a little creamy compared to the everything else. And my last disclaimer is that I painted the art above the desk in literally five minutes because I wanted to take photos and didn’t have anything for that spot. Hopefully I will have some time soon to repaint something better over it in the near future.
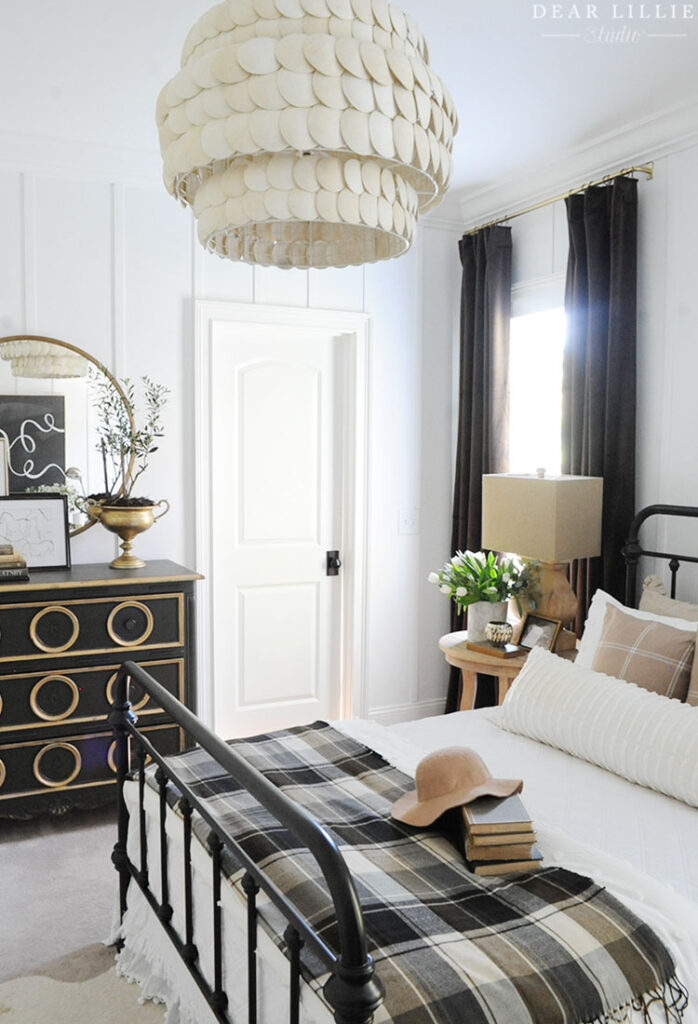
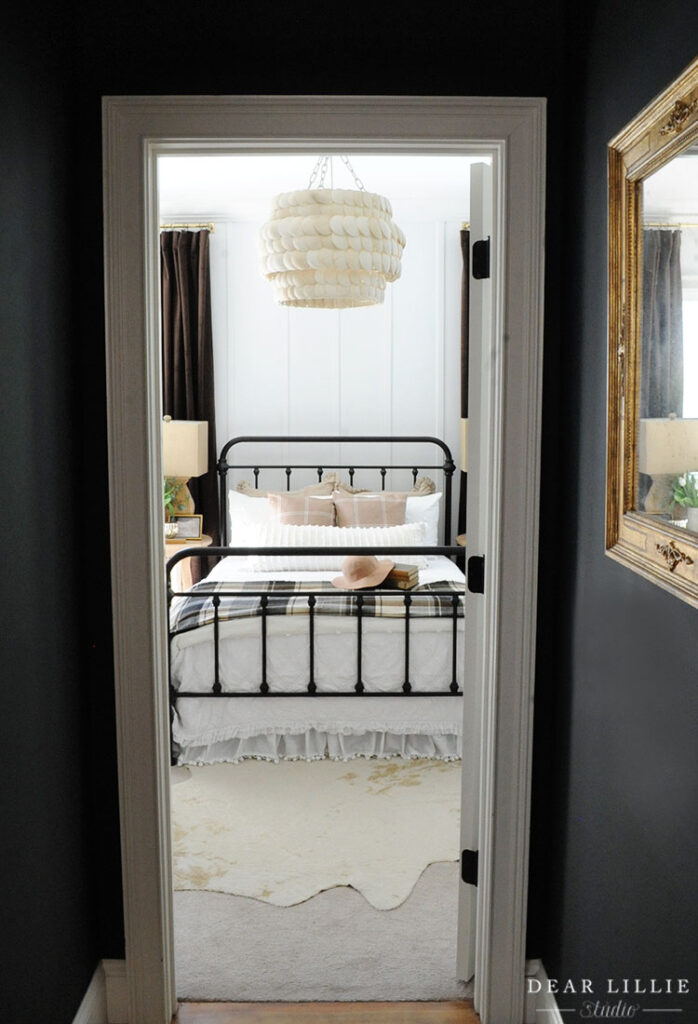
Here is the room now, ready for our first guests this weekend:


Here is all of the source information:
Wall and Board and Batten Color – Pure White by SW in Eggshell
Trim Color – Pure White by SW in Semi-gloss (in these photos it’s eggshell but need to repaint trim with semi-gloss)
Bed – Walmart
Light Fixture – Serena and Lily
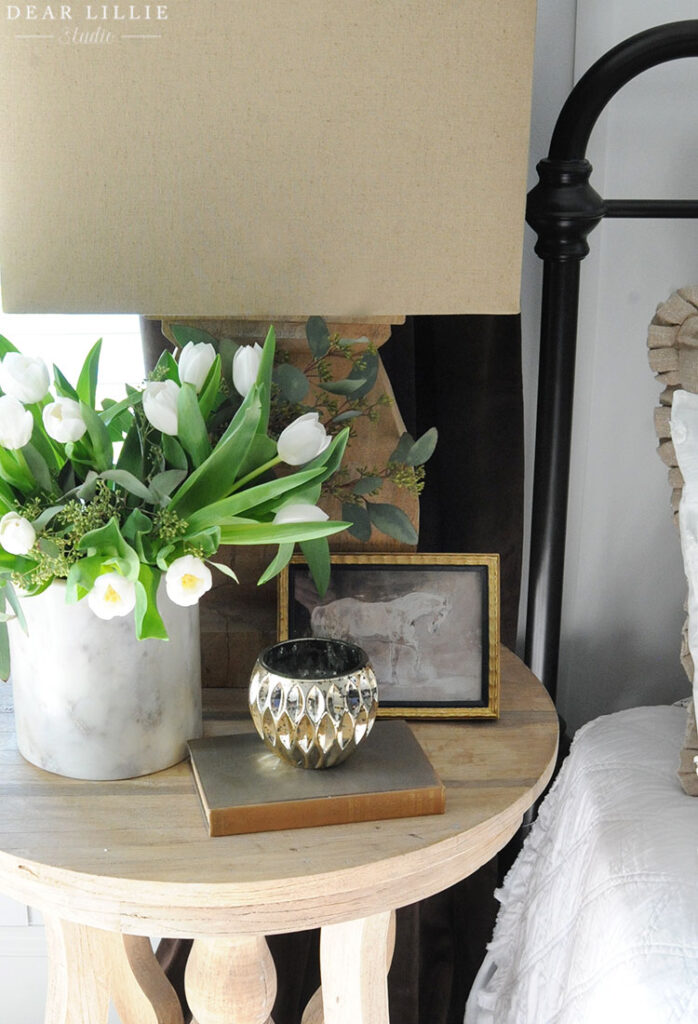
Nightstands – Birch Lane years ago similar here , here and here
Lamps – HomeGoods years ago and haven’t seen anything similar since
Quilt – Target
Sheets – Target
Gold Euro Shams – HomeGoods years ago
Plaid Pillows – Walmart
Lumbar Pillow – Walmart
Pom Pom Shams and Duvet – Walmart
Throw at End of Bed – Overstock
Chest – Soft Surroundings years ago (no longer available – painted Steelyard Common by SW in a matte finish)
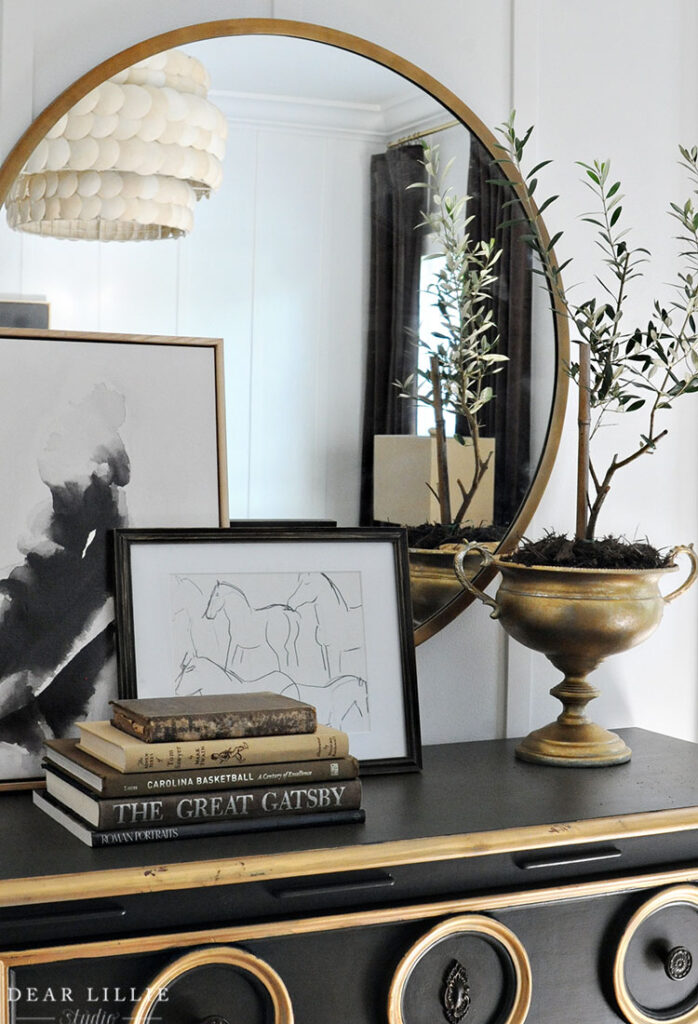
Round Mirror – World Market
Plant – Trader Joe’s
Gold Urn holding plant – have had for over 10 years
Canvas on Dresser – Minted – Premium Ash Wood Canvas Frame 16 by 20
Horse Print on Chest – Etsy (have had frame for years)
Horse Print on End Table – Etsy
Prints on back wall – can be found on Etsy
16 by 20 Black Frames – Michael’s (quality is not great – I don’t recommend them)
Curtain Rods – Target
Drapery Panels – Amazon (Chestnut Color)
Drapery Rings – Amazon
Marble Vase – have had for years, similar here
Concrete Vase – Walmart – no longer available
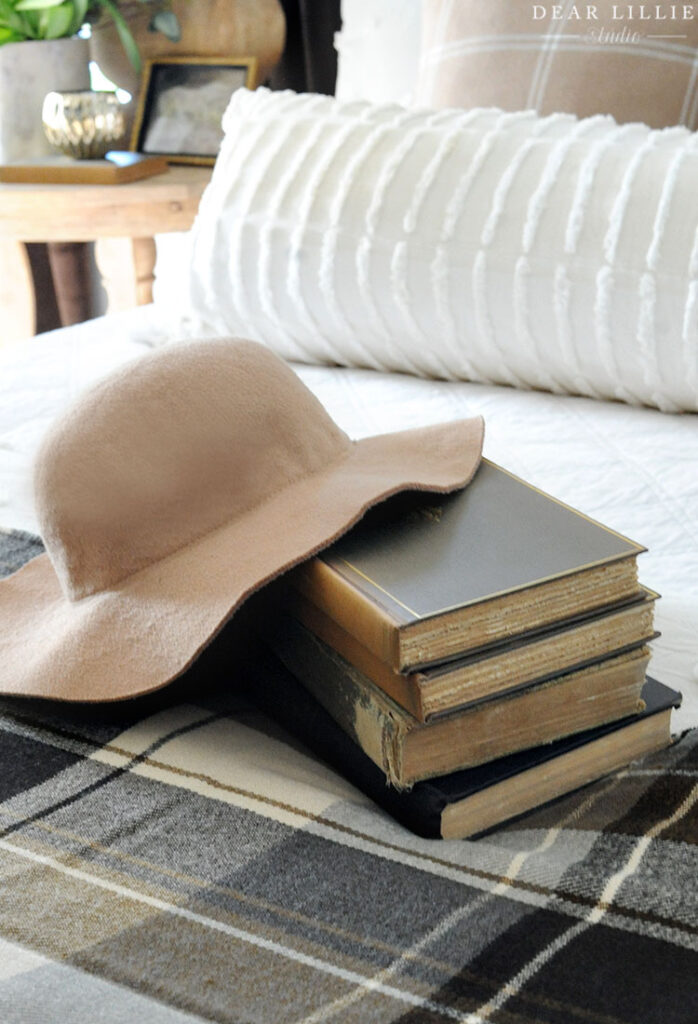
Books – Vintage
Gold Monkey – World Market
Faux Cowhide Rug – World Market
Carpet – Existing
Desk – Ikea years ago
Leather Desk Chair – World Market
Painting above desk – I painted it really quickly – plan on doing a better one soon
Lamp – have had for years
Printer – Can be found here (my favorite printer we’ve ever owned!)
Wingback Chair – Can be found here
Brown Pillow – have had for years
Striped Pillow – Dillards
Gold Orb – HomeGoods years ago
Alarm Clock – World Market
That’s it for today! I hope you all have a lovely day!
Warmly, Jenni


