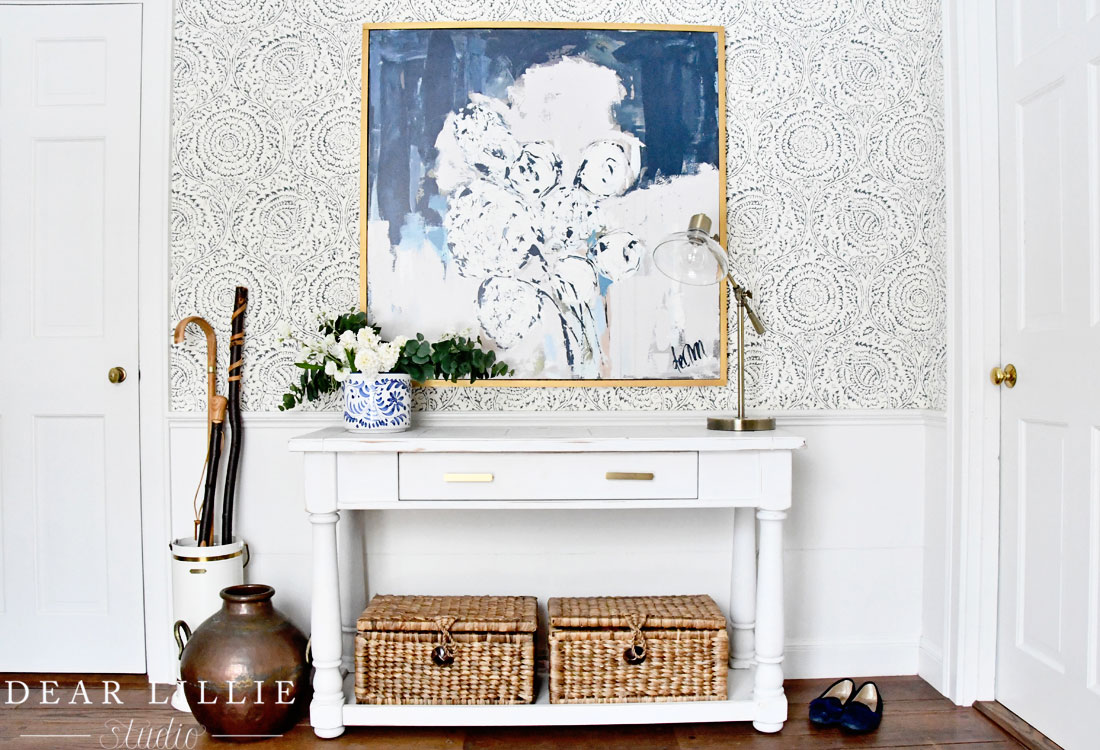
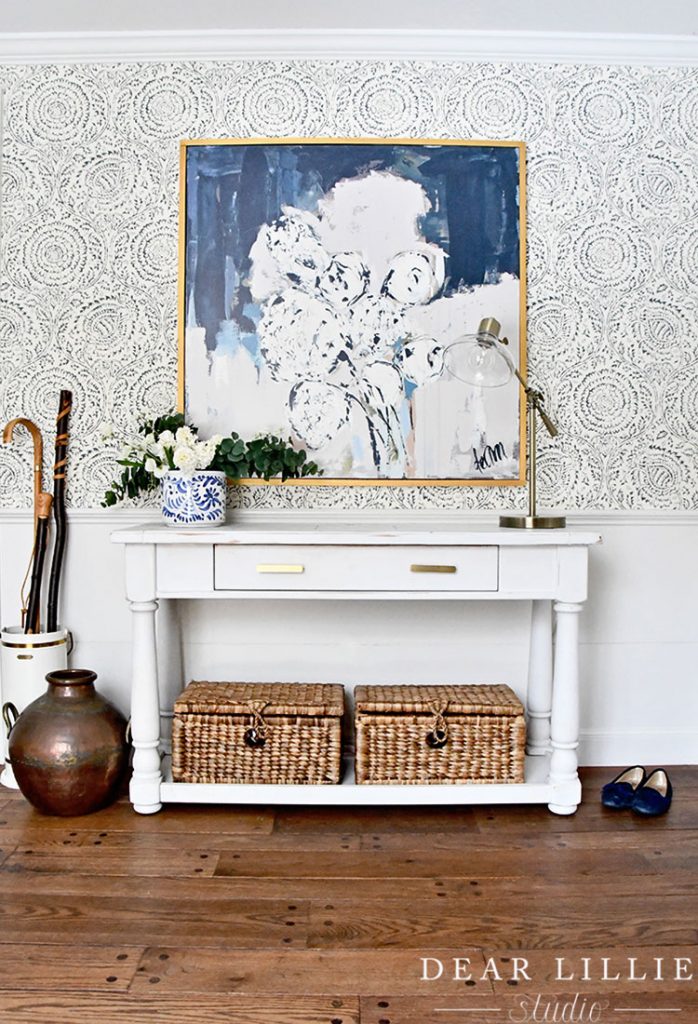
This week we decided to make a new wooden canvas frame for Jamie (of Dear Lillie and Bluestone Hill). Just a warning–this is Jason post, so aside from Jamie’s pictures of the finished frame I am issuing a POOR PHOTO QUALITY ALERT!
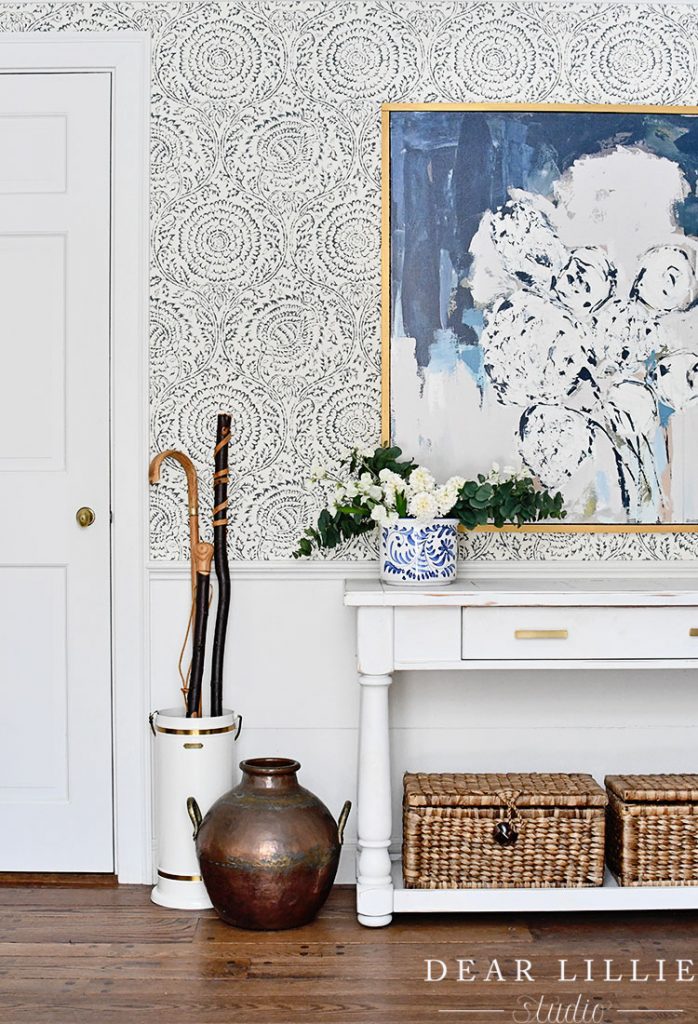
Jamie has a canvas from Fine Art by Deann that she loves and has wanted to frame for a little while now, so we thought we could make one and show you all the process! Her canvas is 40″ x 40″ so our frame is sized according to that, but you should be able to adjust your width and height needs easily to fit the size of your own canvas.
Materials
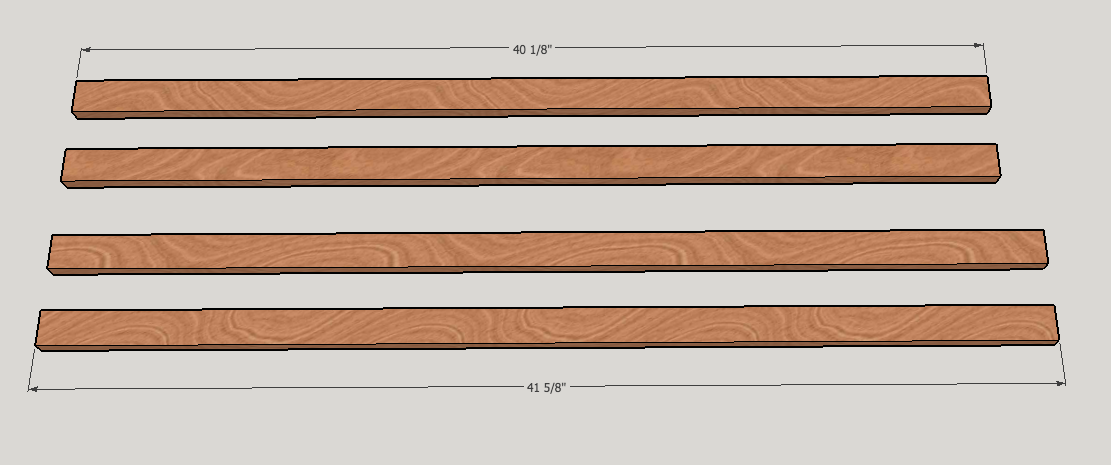
1) 2 – 8′ 1×2 Pine Boards (actual dimensions are .75″ x 1.5″)
2) 16 – Nails (preferably over 1″ long–we used 1.25″ Brad Nails)
3) 4 – Flat Corner Braces (1 packet should come with 4 braces and 16 screws)
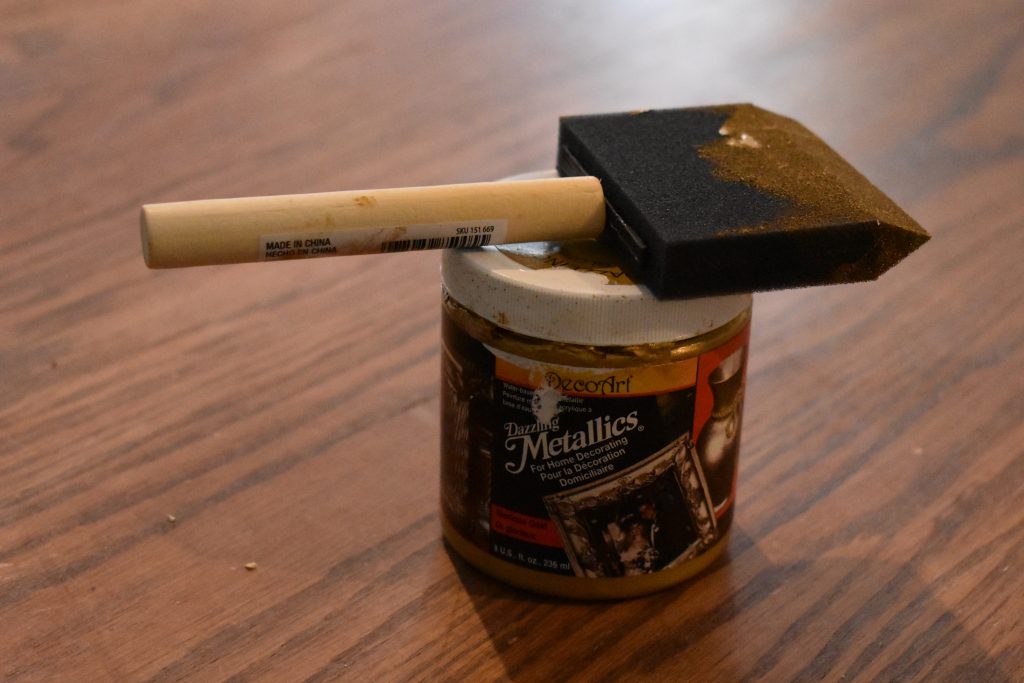
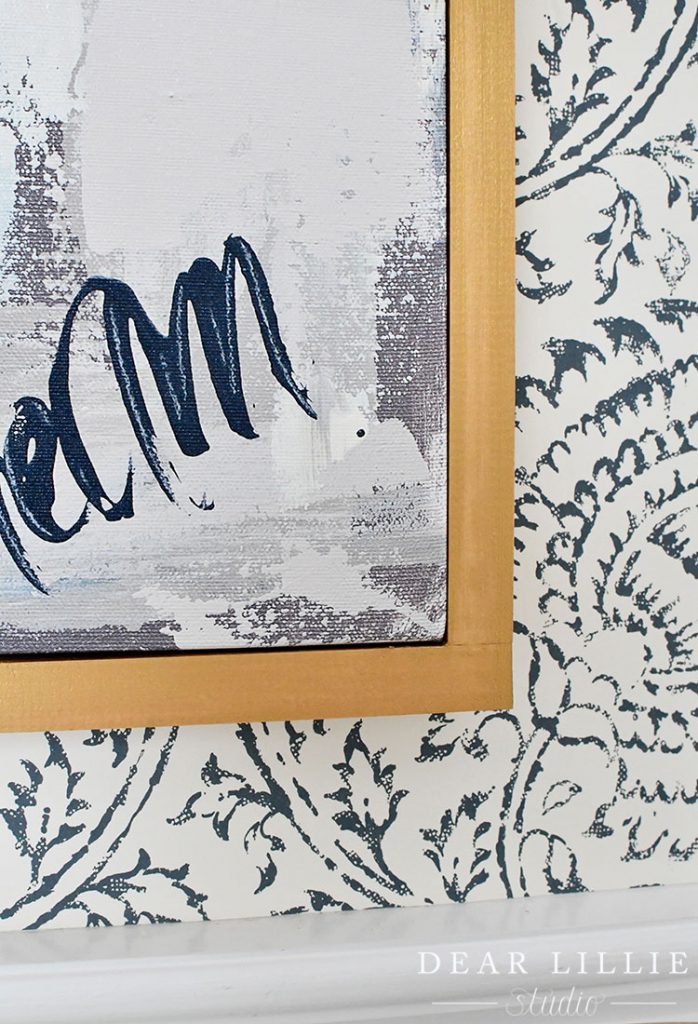
4) Paint (we used Glorious Gold by DecoArt)
5) Brush (we used a 1″ Foam Brush)
Step 1 – Cut Boards
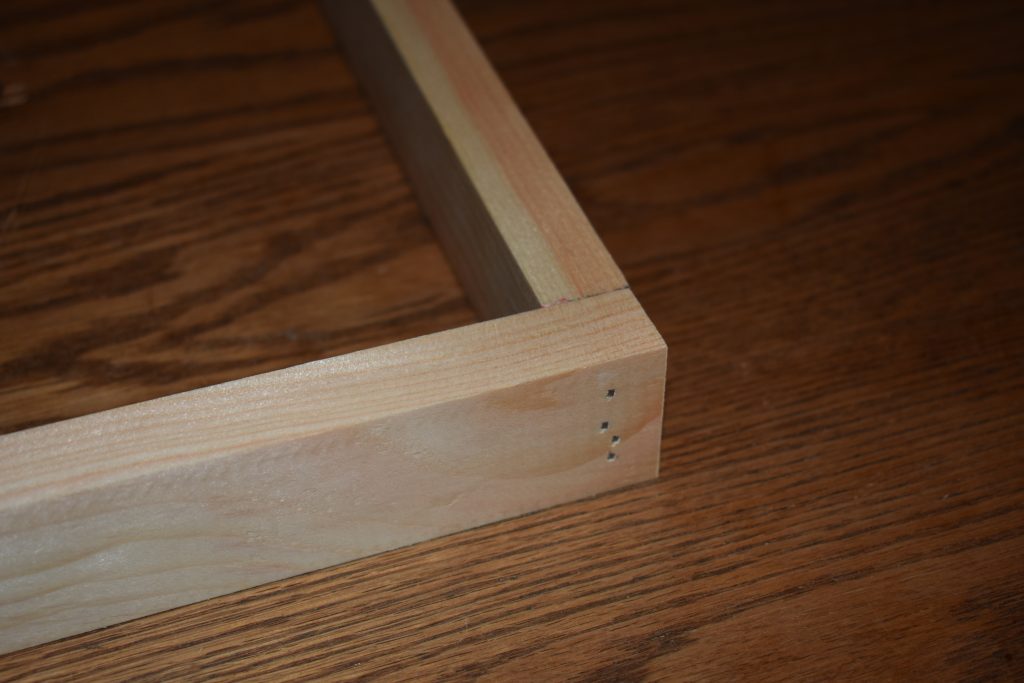
We wanted to make sure that our canvas fit inside the frame, so we gave ourselves 1/8″ of wiggle room, and cut our two vertical frame pieces at 40 1/8″ long. Given that each vertical board is .75″ thick, we added 1.5″ to each overlapping horizontal frame piece and cut the two of those at 41 5/8″ long. Here is what you should be looking at after making your cuts:
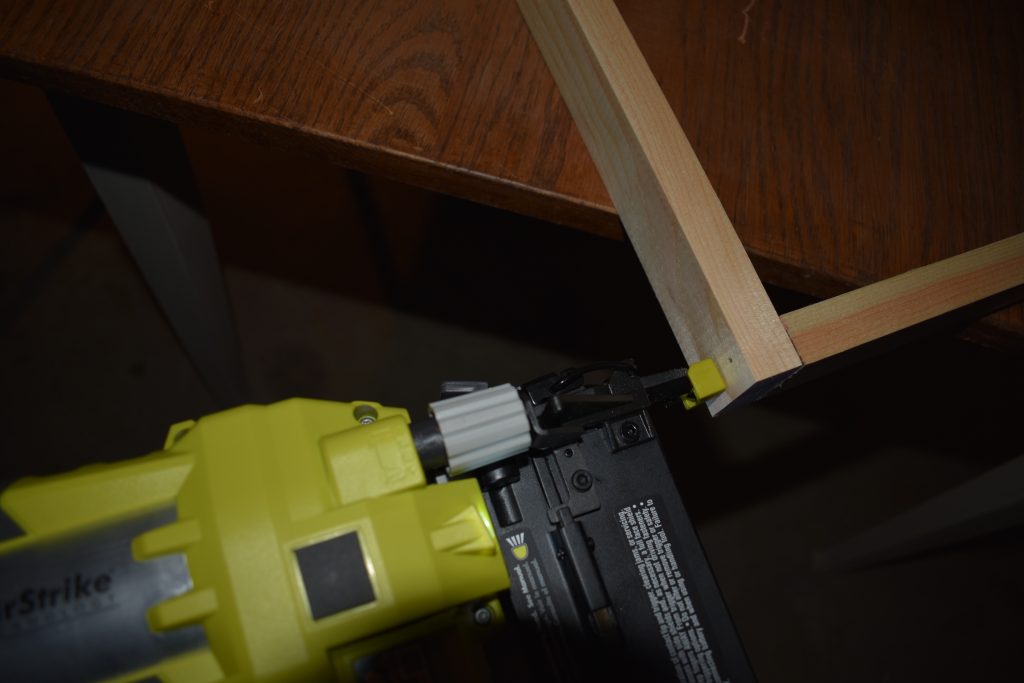
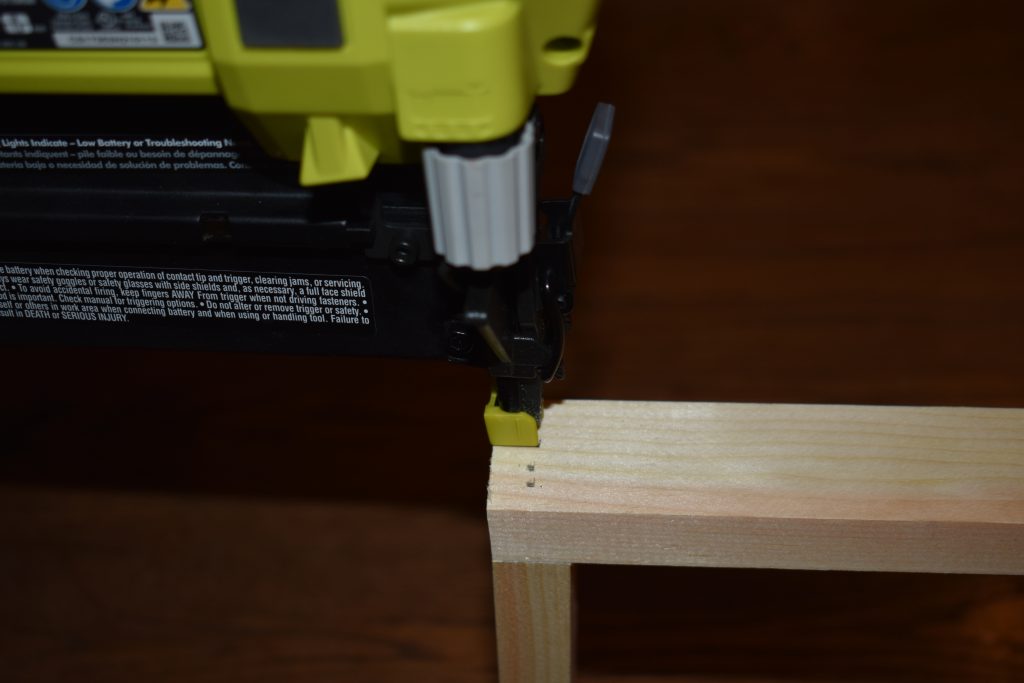
Step 2 – Nail Corners
Align one of your longer boards at a right angle with one of your shorter boards with the longer piece overlapping the shorter one. Depending on the size of your nails you’ll want to put 2-4 into each corner of the frame down through the longer frame piece and into the shorter piece. Repeat for all four corners!
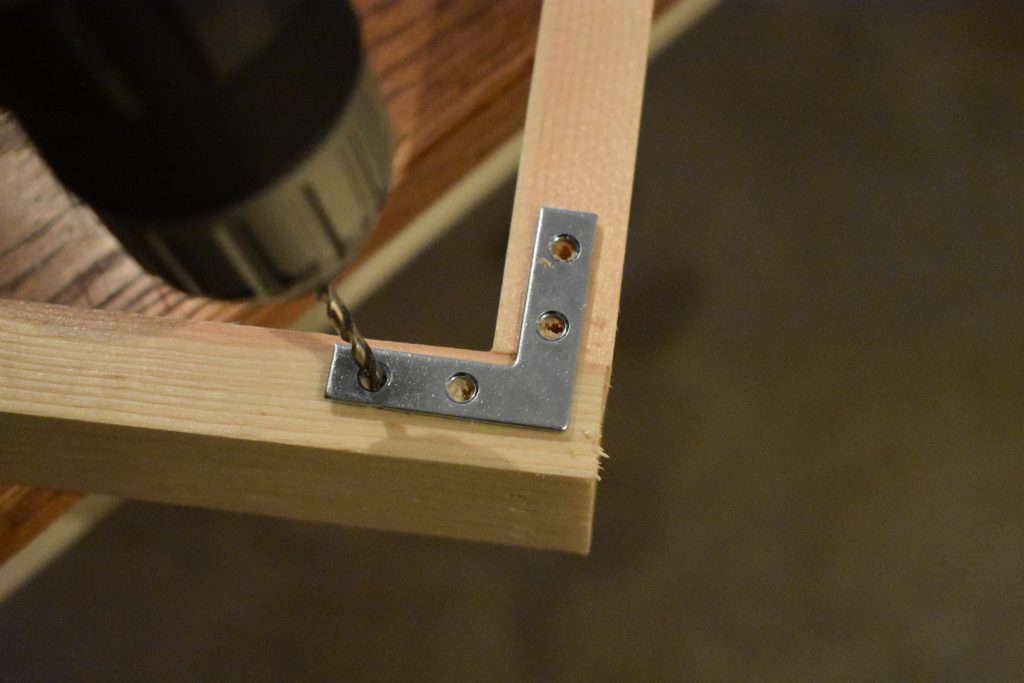
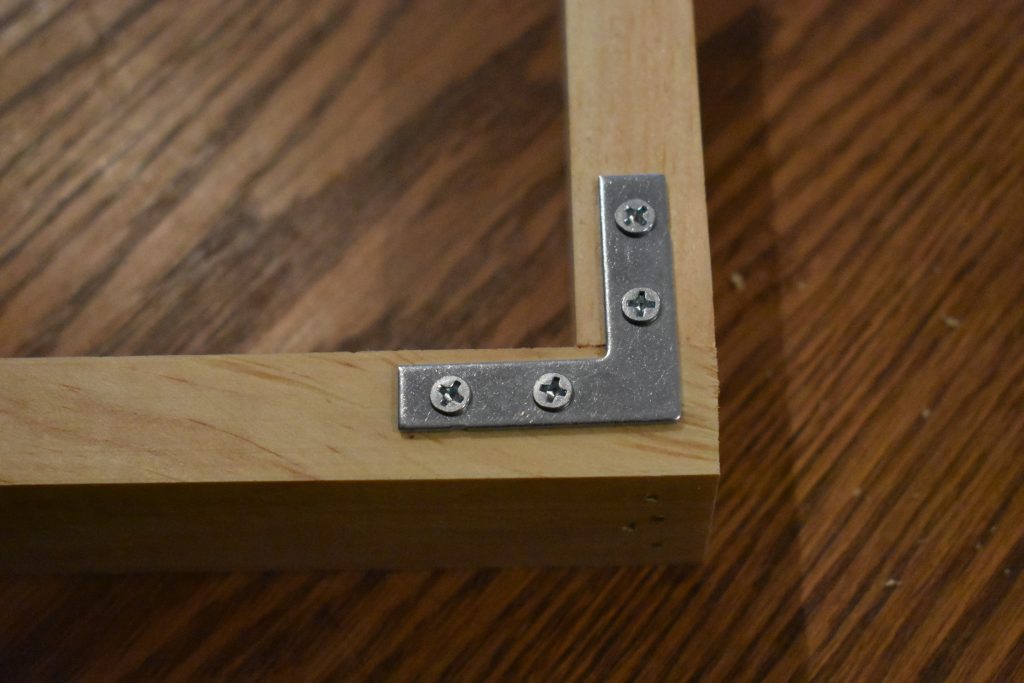
Step 4 – Secure Corners
Flip your frame over to the side you want to be the back, and align one of the flat corner braces with the corner of the frame. Pre-drilling the four holes using the brace as a guide, and then tighten the four screws.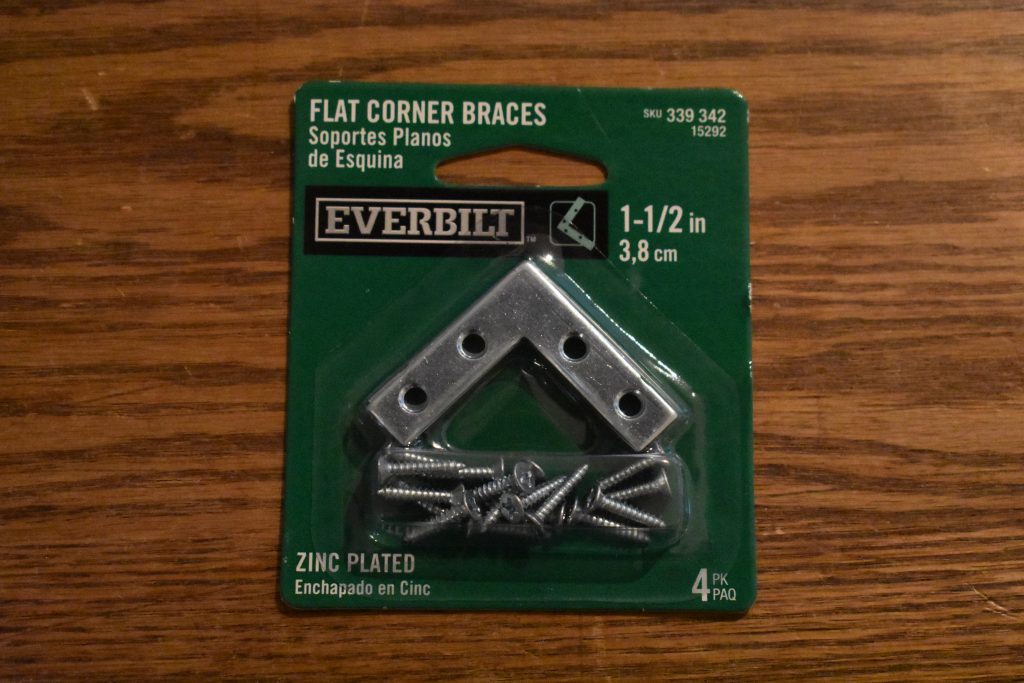
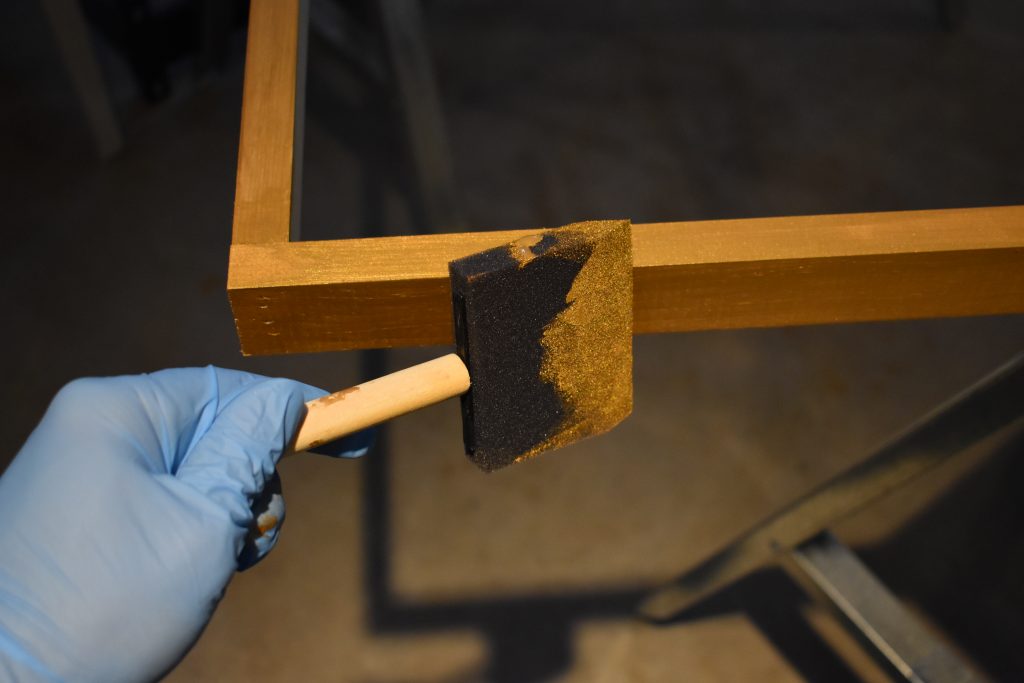
Step 5 – Paint Frame
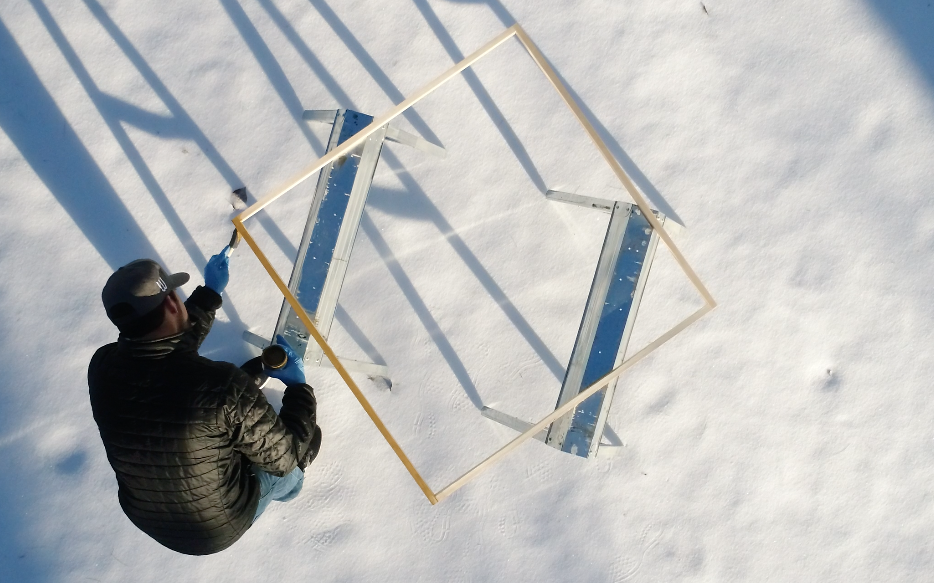
Flip your frame back over to the front and paint away! I thought it be a great idea to paint Jamie’s frame outside… and then realized it was only 4 degrees out which was causing the paint to gel up! Next time I will make sure I check the thermometer before carrying the sawhorses out into the snow haha.
Next time I will make sure I check the thermometer before carrying the sawhorses out into the snow haha!
Step 6 – Frame The Canvas
If the edges or sides of your canvas are painted, I would recommend letting your frame paint dry longer than you normally would just to play it safe. We waited about 48 hours, and then just popped the frame over the edges of the canvas! If you measured correctly it should fit snuggly over the side of your canvas!

You can check out the video version of our tutorial below, and be sure to subscribe to our new Youtube channel!


Thank you! I have so many paintings that I would like to frame and this really helps. I am just a little confused about the end – you don’t attach the frame to the painting? So the painting is hung on the wall and the frame just rests on the hanging painting? Wouldn’t that end up having your 1/8″ wiggle room be 0″ at the top and 1/4″ at the bottom?
Hi, Cheryle–glad we can help! In theory you are definitely right! However, whenever we do frames like this at what you would think would be 1/8″ too big they still end up fitting very snug. I won’t pretend to know why, but honestly my best guess is just that having that 1/8″ of wiggle room account for human error (like not cutting perfectly at your marks) and the fact that the boards themselves are not perfectly straight. Also while the corners are at 90° to the eye, they probably are not perfectly exact either. For this project even with that 1/8″ of wiggle room the frame just barely fit over the edges of the canvas and while it definitely can be removed if Jamie ever changes her mind about the look, it would take a little bit of effort.
Sorry this wasn’t the most definitive answer, but I hope it helps a little!
-Jason
Thanks, Jason.