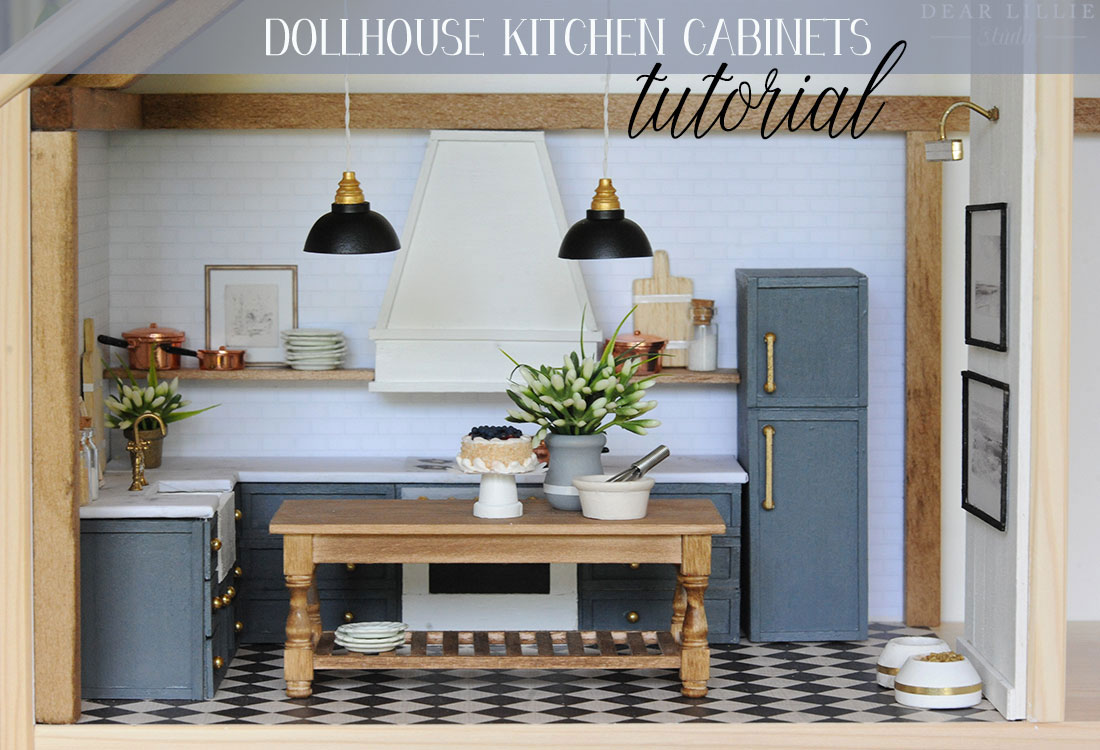
Good morning! Here is my attempt at a tutorial for how we made the cabinetry for our dollhouses. You can read more about the dollhouse kitchens here. You can also check out our highlights section on Instagram from pictures and to keep up with the room we are working on now (the study).
We bought inexpensive IKEA dollhouses and are making them over and trying to hand make as many items as possible starting with the kitchen cabinets after discovering how expensive cute dollhouse furniture was! Today is just going to be about the actual cabinets we made with photos and some measurements. I am missing a few things but have enough that it should help as far as building your own.
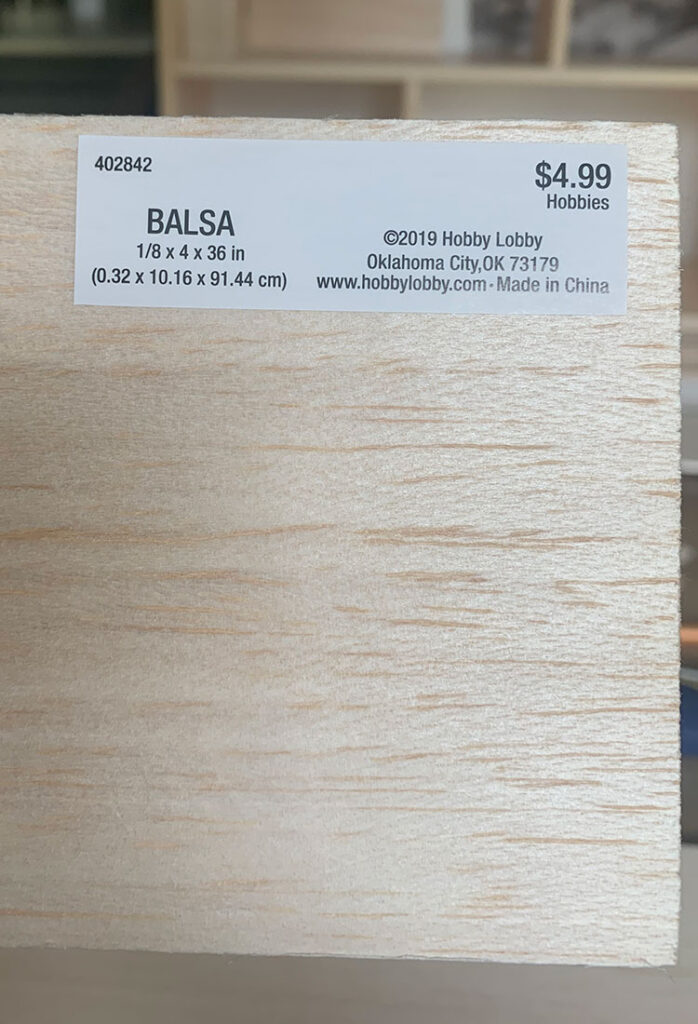
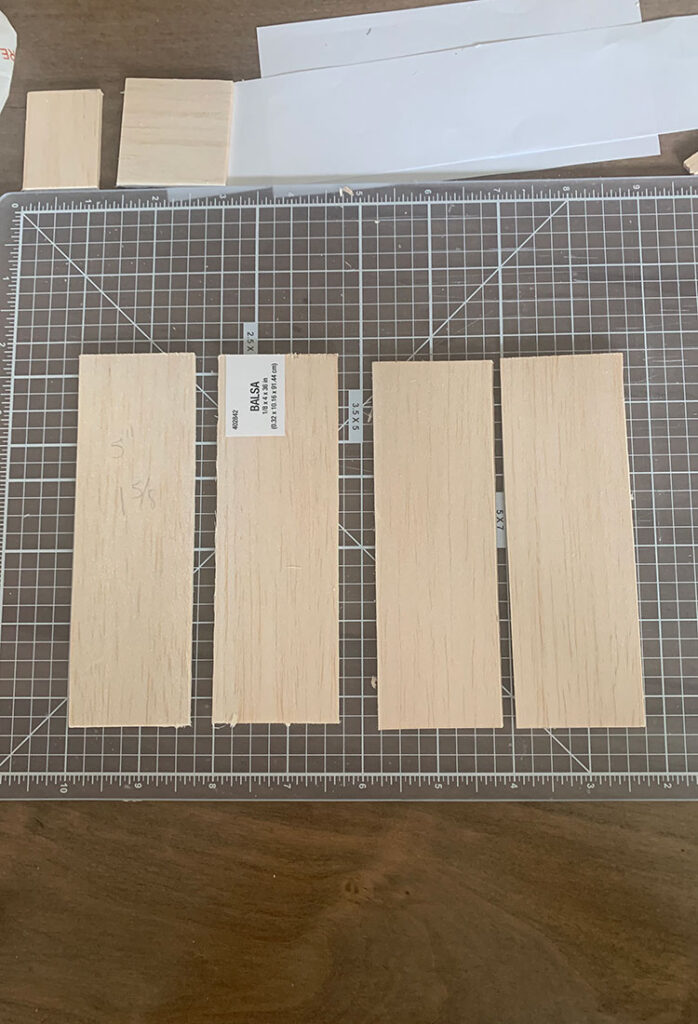
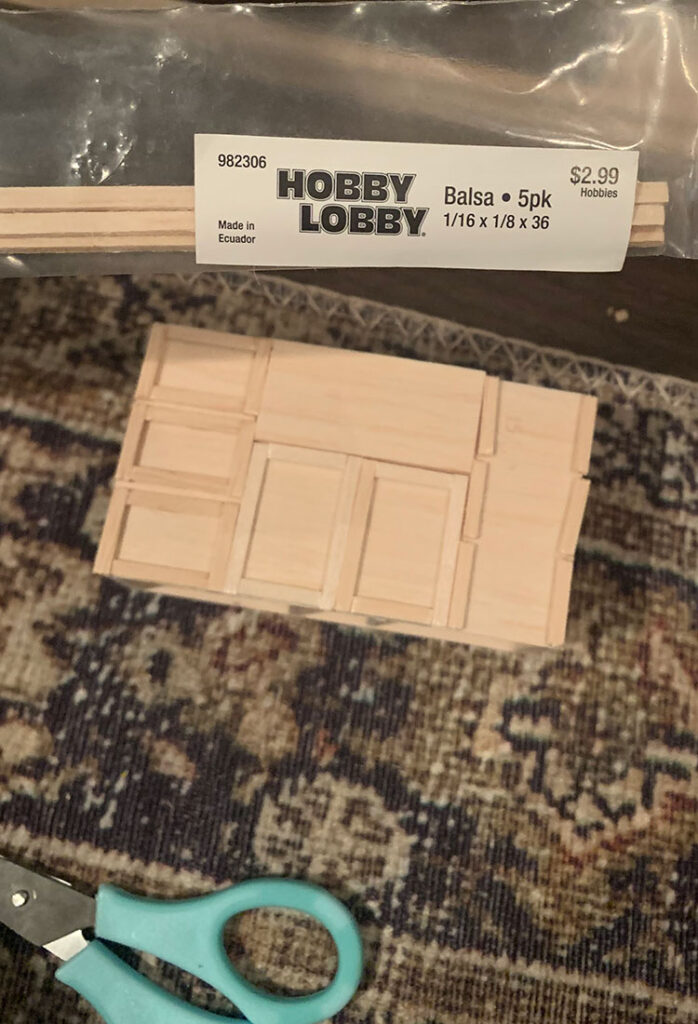
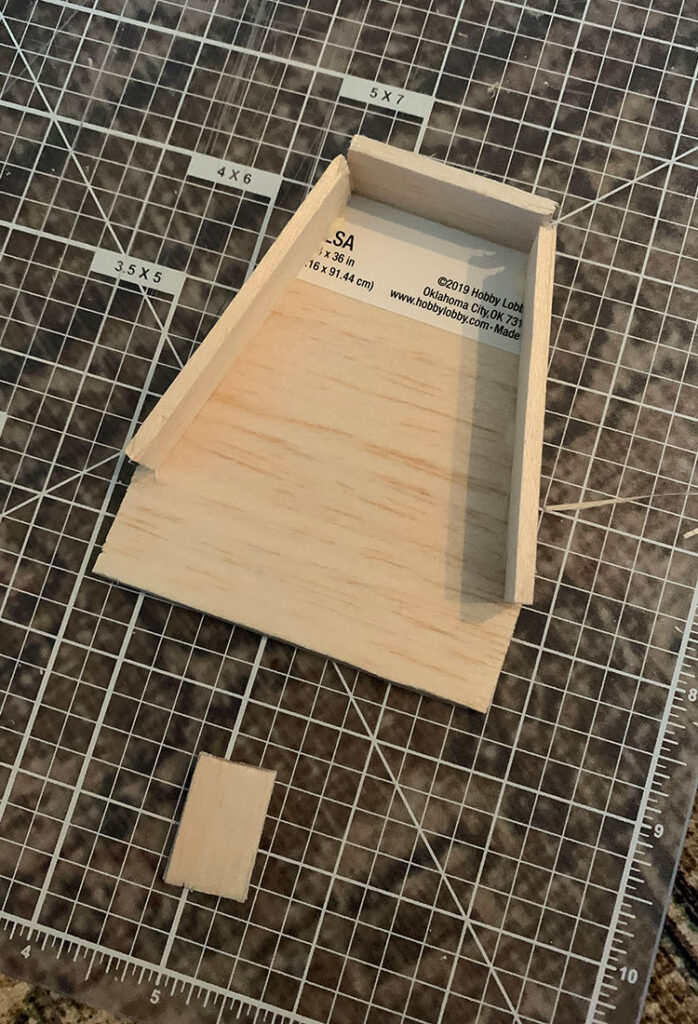
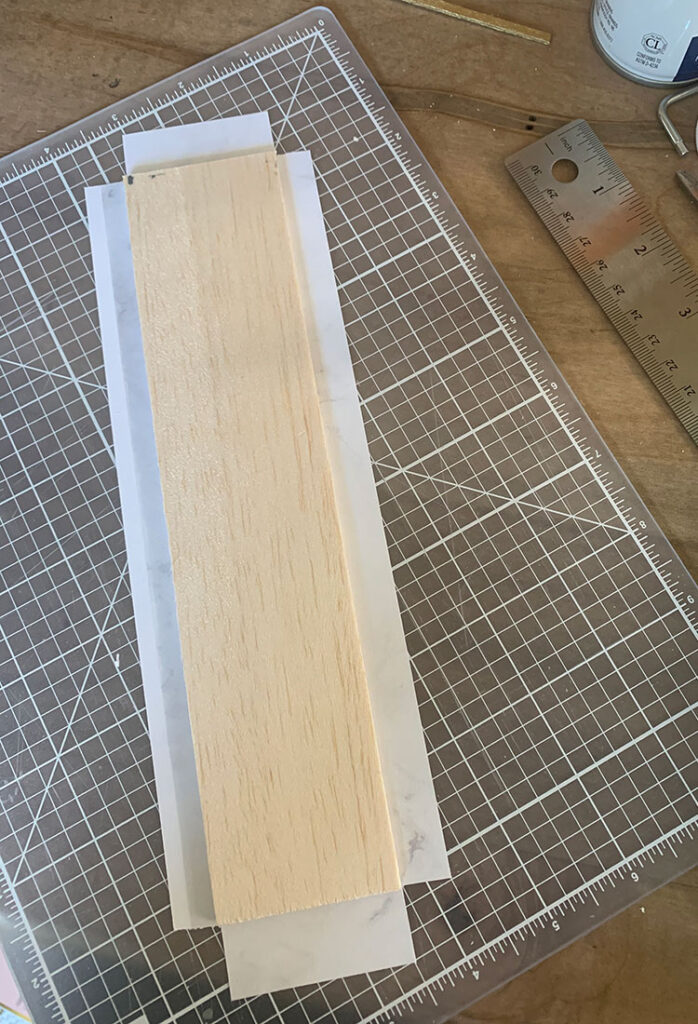
So to start with we used the Balsa wood shown in the picture below. I think we ended up using three sheets of it for our two kitchens. My 11 year old daughter, Lillie and I are working on them side by side each doing our own with the same general layout but different colors, finishes and accessories.
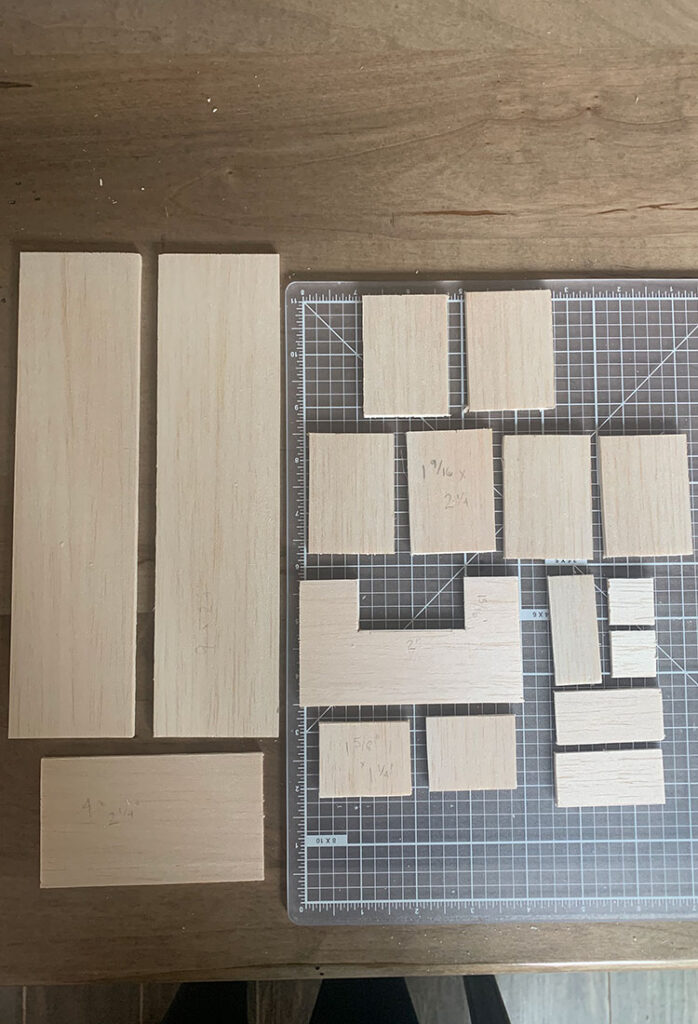
Then for the lower cabinets I cut out these pieces:
(2) 2 1/4″ by 9″
(6) 2 1/4″ by 1 9/16″
(2) 4″ by 2 1/4″ (one of these you will cut out a 2″ by 15/16″ section for the sink)
(2) 1 5/8″ by 1 1/4″
Some of the sink pieces are shown in the picture below also but I don’t have those all exactly measured. For the sink I used two pieces that were 2″ by 15/16″ (one of these was the piece cut out from the 4″ piece above) and then 2 side pieces that I don’t have measurements for – sorry! They were 15/16″ tall – just not sure how wide they were. And then once those four were glued together I measured the bottom and cut a piece to glue inside that.
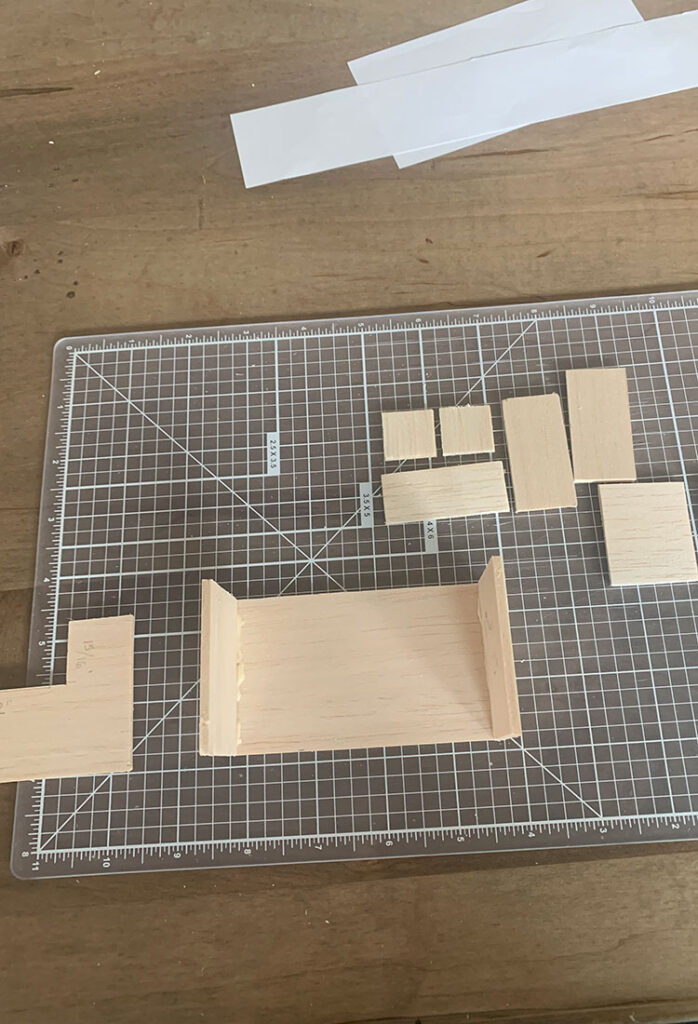
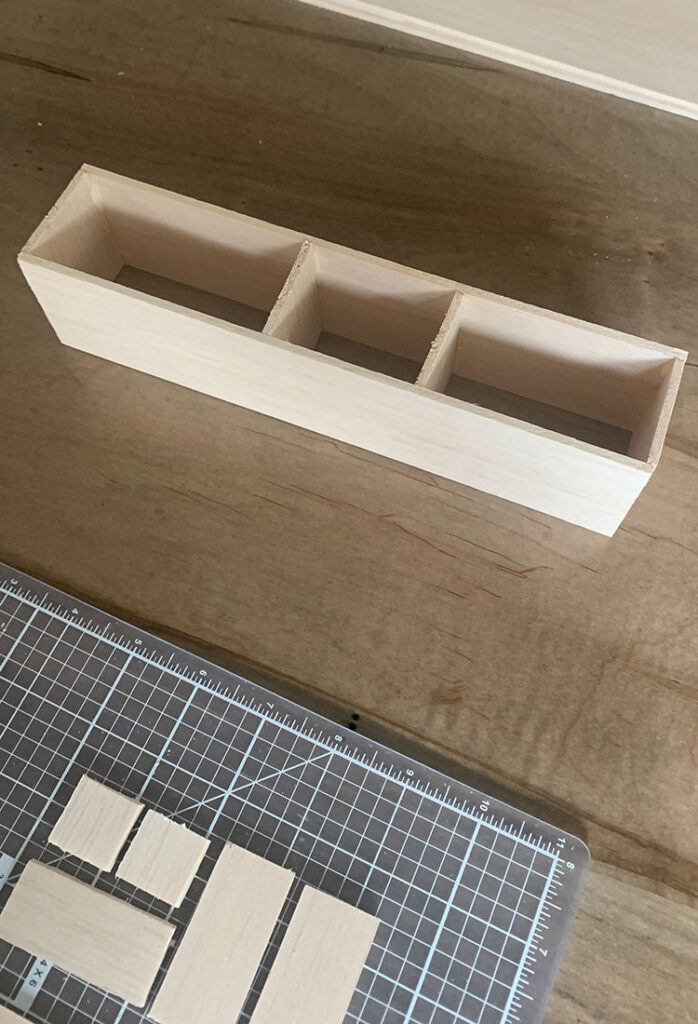
So here is what it should look like when you’ve cut your balsa wood for this part:
Here’s the start of the sink cabinet. Basically we just laid the back piece down (one of the 4″ by 2 1/4″ pieces) and then glued on two of the side pieces (which are the 2 1/4″ by 1 9/16″ pieces) and held them there until the glue dried enough that they stayed put. I used this glue for this part of the project.
Then I added the two bracing pieces (I think they were the 1 5/8″ by 1 1/4″ pieces) to make sure the sink had something to sit on.
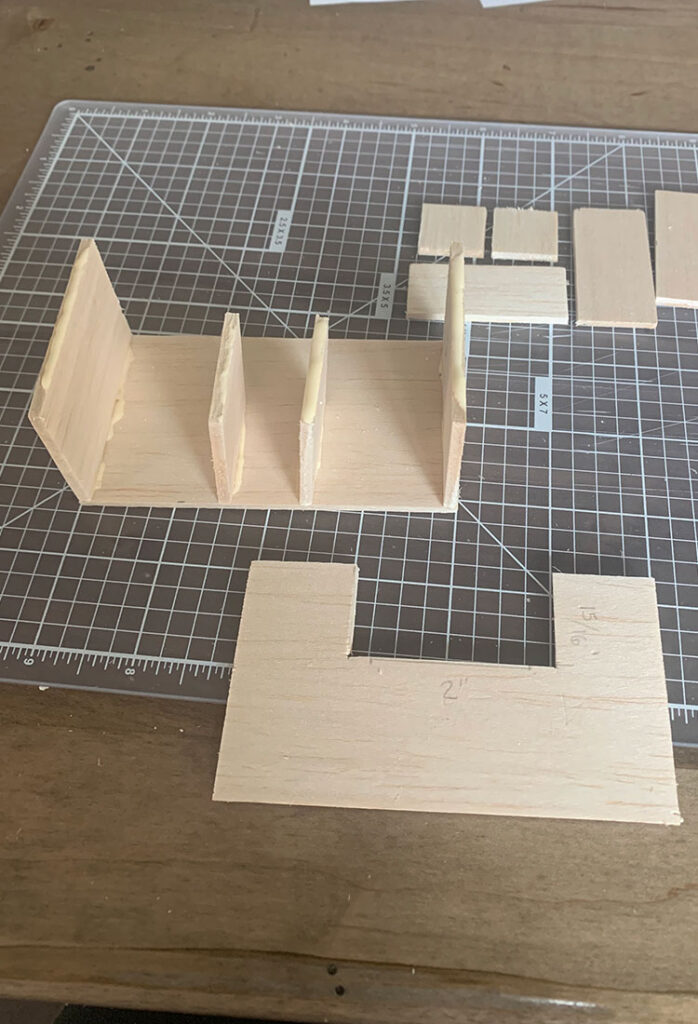
Then we glued on the piece with the front cutout for the sink area:
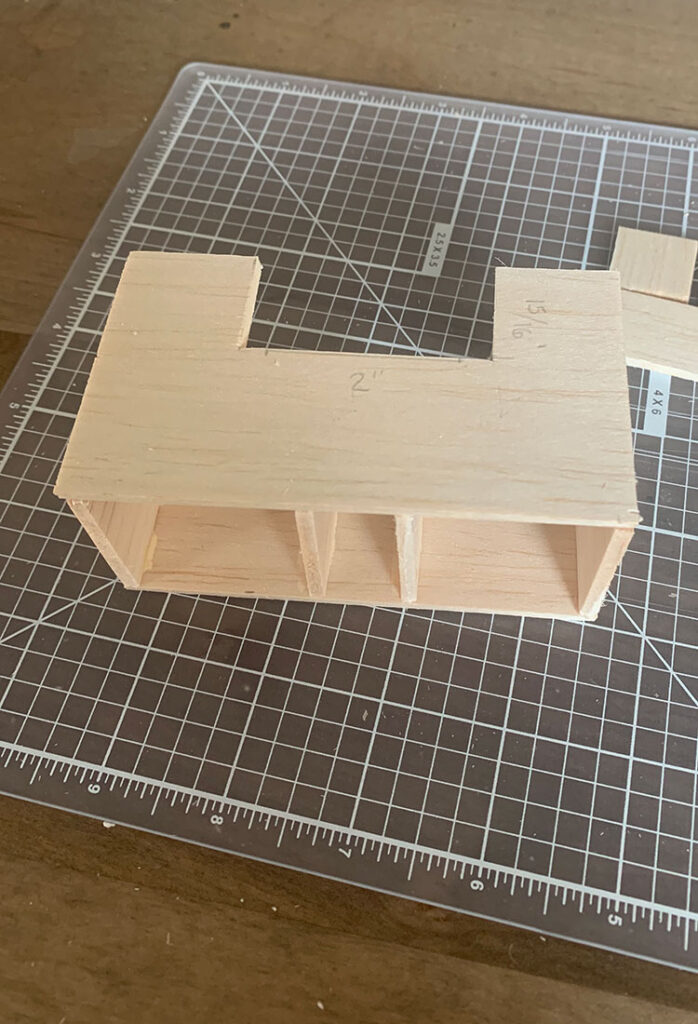
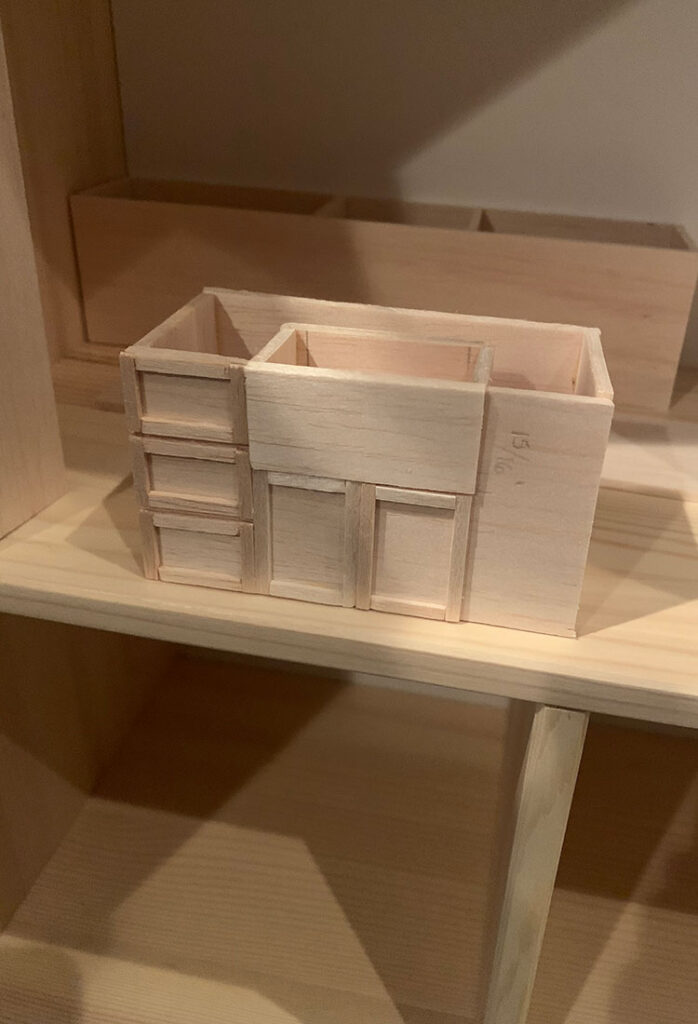
This is what it will look like standing up. You want to wipe off any glue that is visible on the outside! But it’s no big deal if it’s completely oozing or visible on the inside!
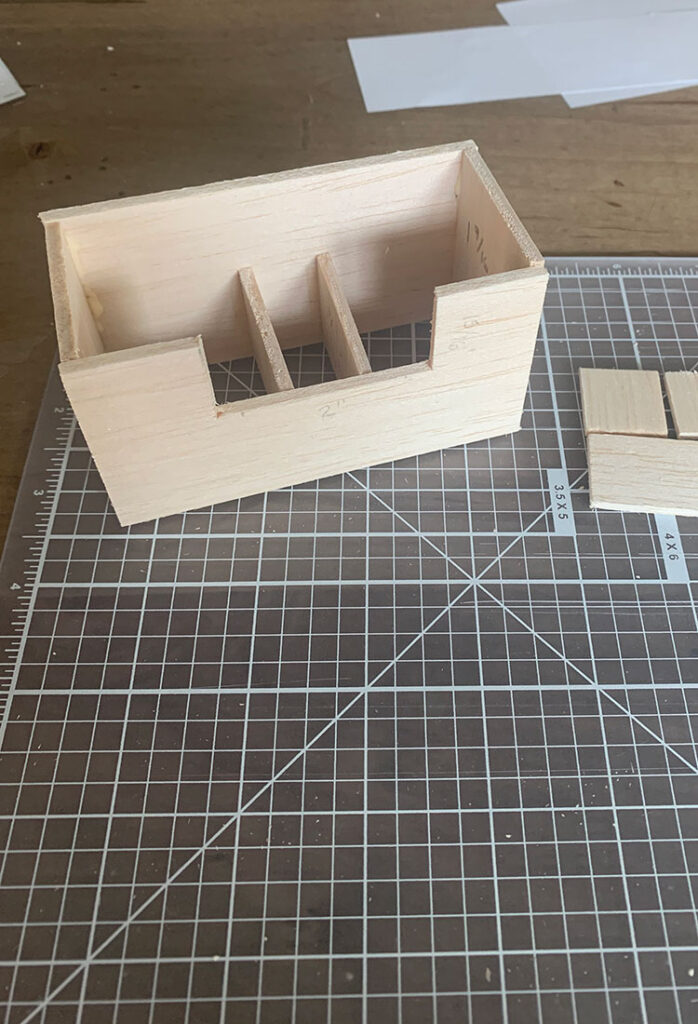
Then you basically build the longer cabinet the same way – the bracing pieces don’t need to be perfectly centered – they are just to give support for the countertops and anything you want to be able to set on them. This was built from the two 9″ long pieces and four of the 2 1/4″ by 1 9/16″ pieces.
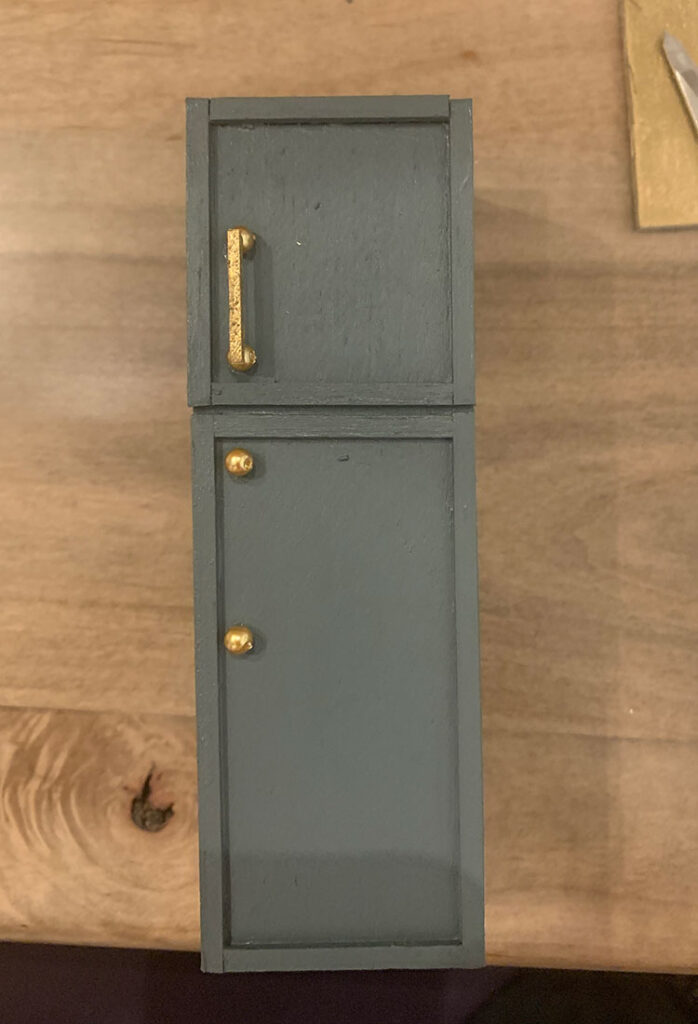
Now for the fridge! We sized ours so that it would fit on the far left side but then ended up using it on the right. If I were to do it again knowing it would be on the right I would make the fridge wider! But here are the measurements we used for ours based on the fact there was only a little bit of space where we were originally going to place them.
For this cut:
(4) 1 5/8″ by 5″
(2) 1 5/8″ by 1 7/8″
So lay out your four large pieces and then glue them together in a box (I don’t have a pic of that part):
Then glue the smaller piece on top and bottom (I used a smaller piece on the bottom that fit inside the box but if I were to do it again I would used this same size on the top and bottom so that it how I am typing it out here):
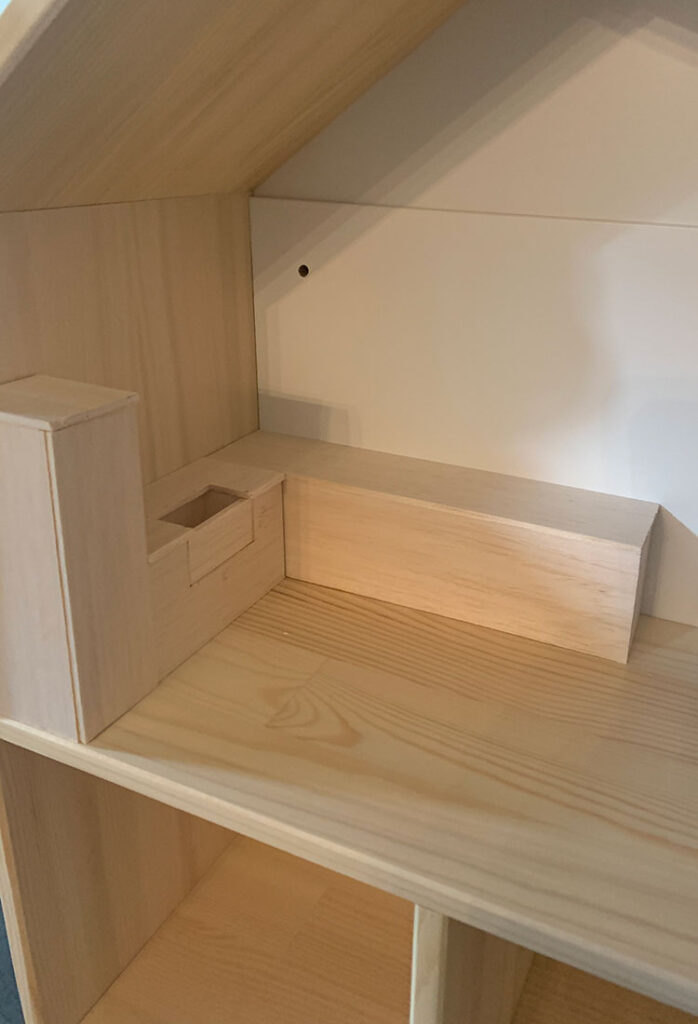
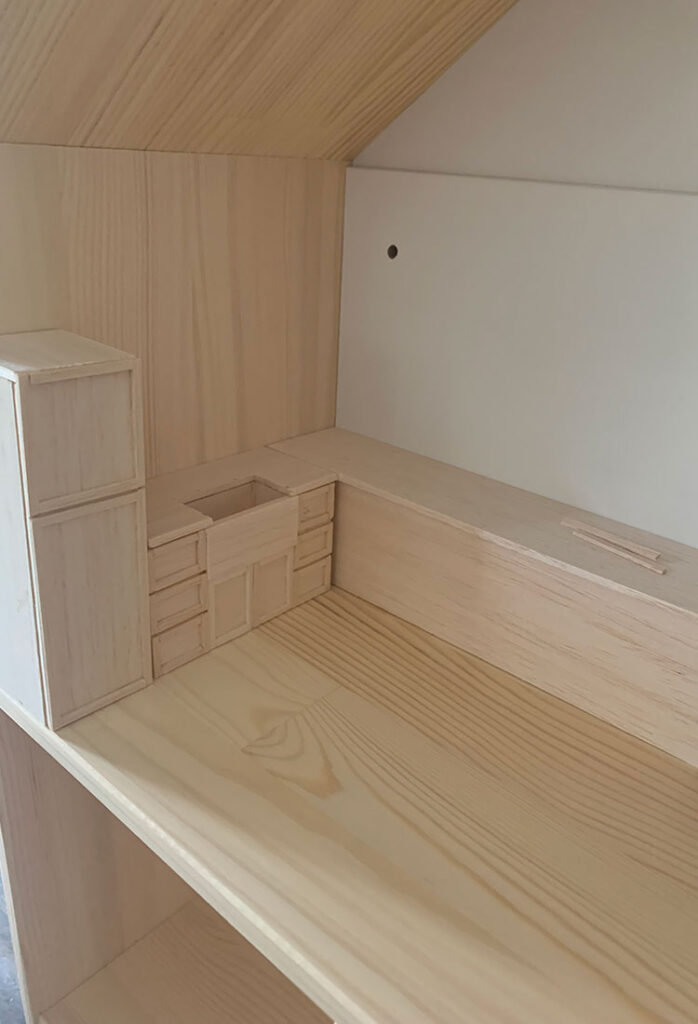
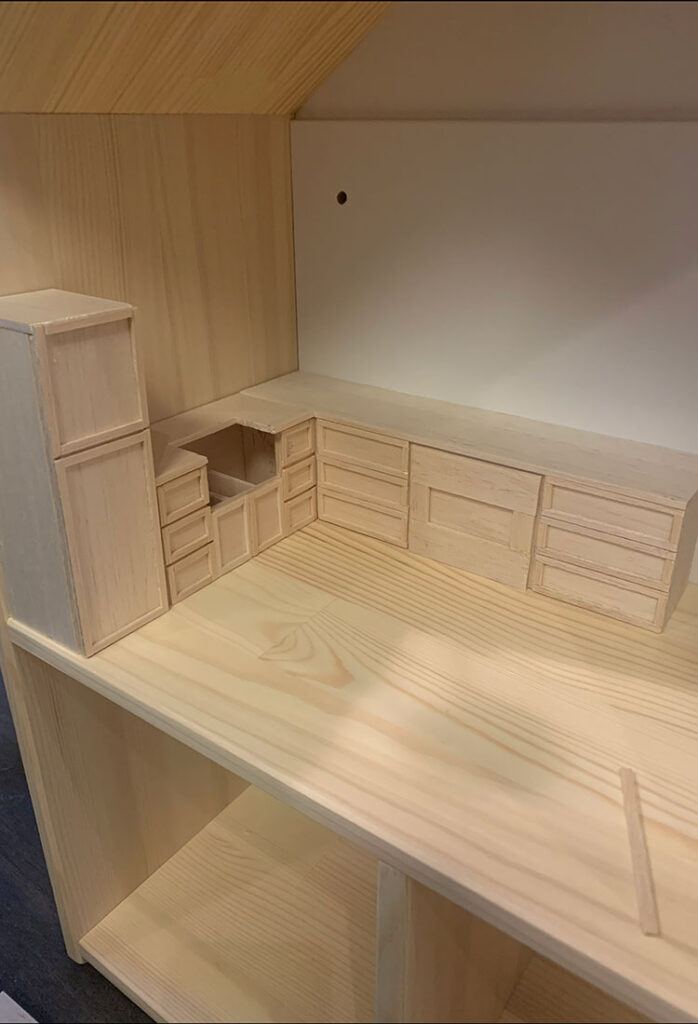
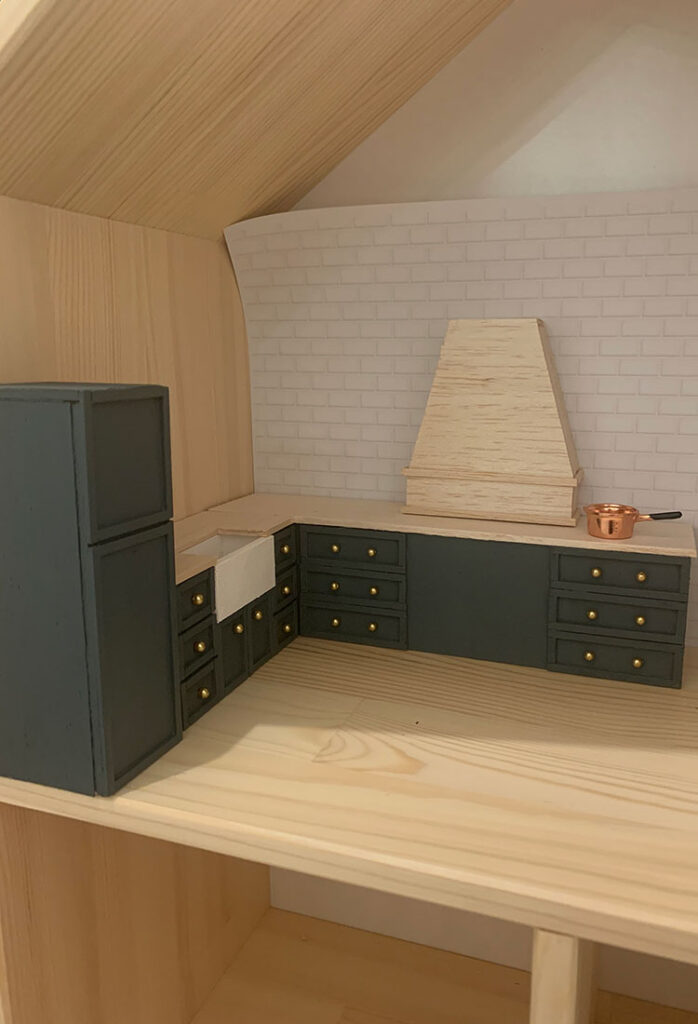
Once you have everything glued together measure the top of each cabinet and cut your counter top to fit. For the sink area cut out a spot so that it sits over the sink correctly. Do NOT ATTACH the counter tops yet! We set everything inside our dollhouse at this point to make sure it looked right:
Now it’s time to add the trim to the cabinets which really brings them to life! This is the wood we used for the trim. You should only need one pack – we had plenty left over for other things like picture frames!
For this just play around with the cuts until you like how it looks – gingerly lay it out before you start gluing to make sure you like how it looks:
We used the same glue for this as we did putting the larger pieces together. Here you can see how it’s starting to come together:
Here you can see how it looks with the sink cabinet done and the fridge done. It makes such a different just adding the trim compared to the cabinet on the other wall that we hadn’t done any trim on yet.
For this larger piece I left the far left with nothing on it because it’s tucked behind the sink cabinet and then measured the remaining 7″ and left the center of that blank so I could add a faux oven front to it and then trimmed out either side of that so it looked like this:

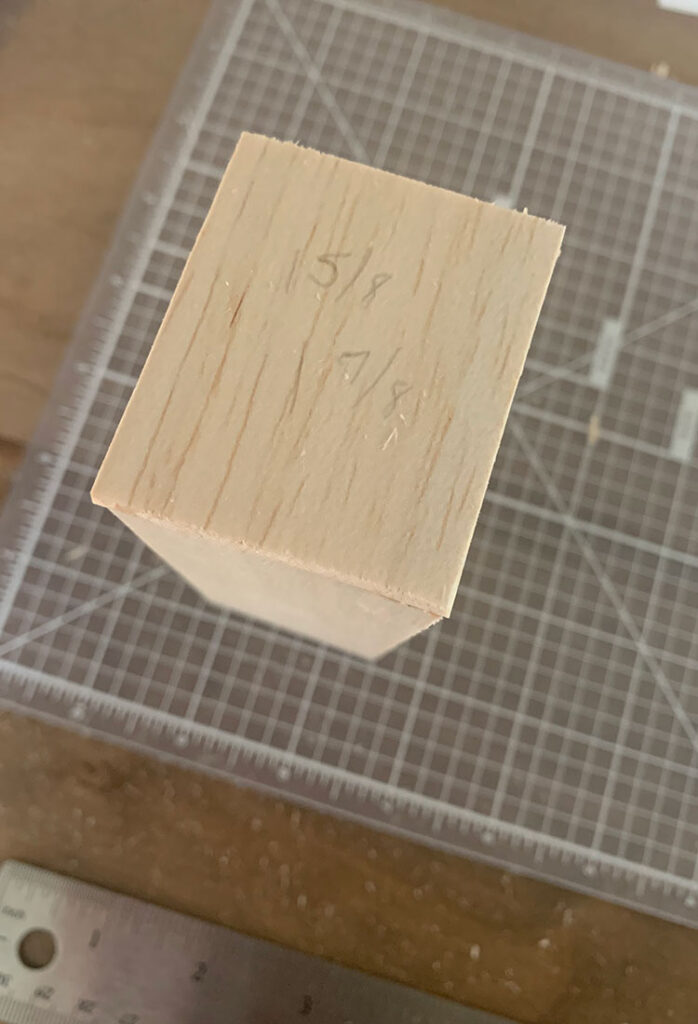
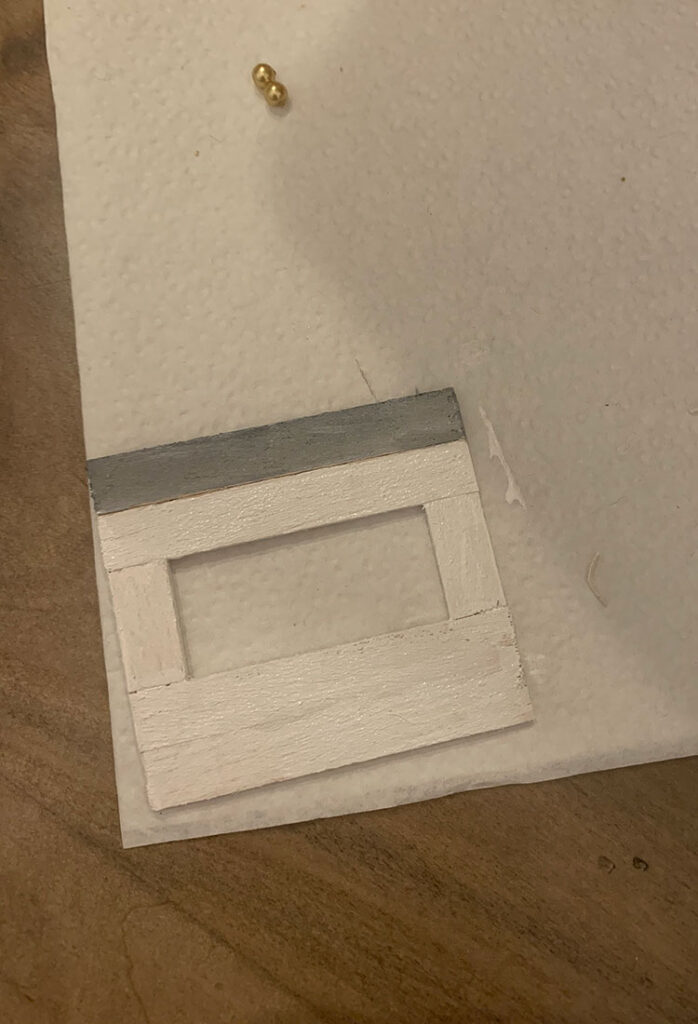
Then I built the little oven front using Balsa Wood that was this size:
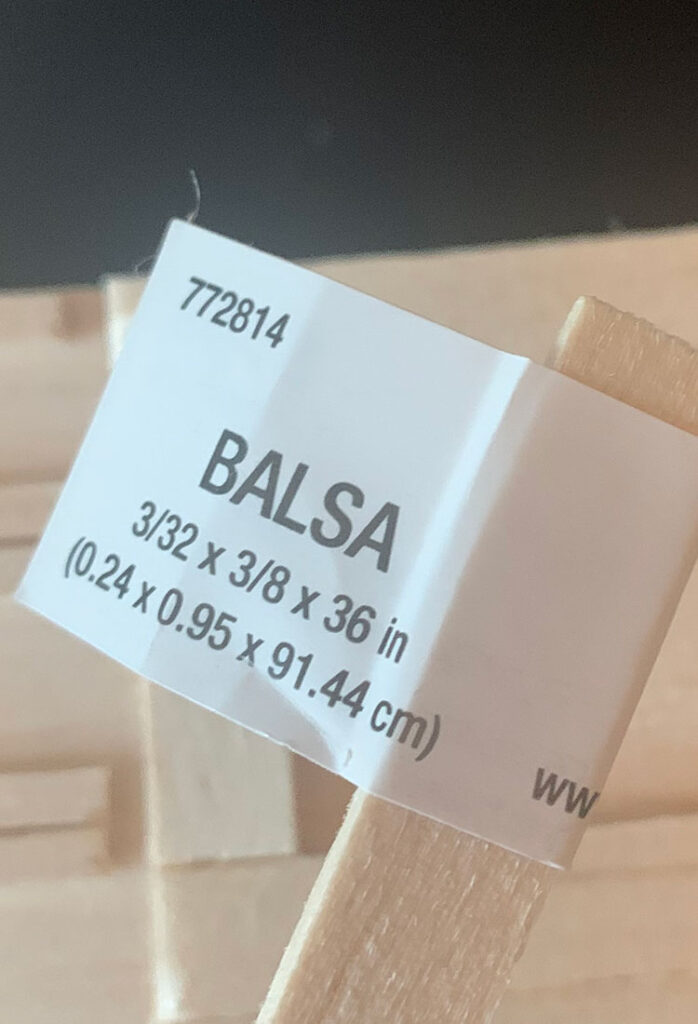
I cut four pieces the same size and then two smaller ones so it looked like there was a little oven window. Do NOT glue this to the cabinet yet. You will want to paint it and add the handles first (which we will show in a minute) and then after all of that attach it! In this picture the oven part is just leaning against the cabinet – it is not actually attached!
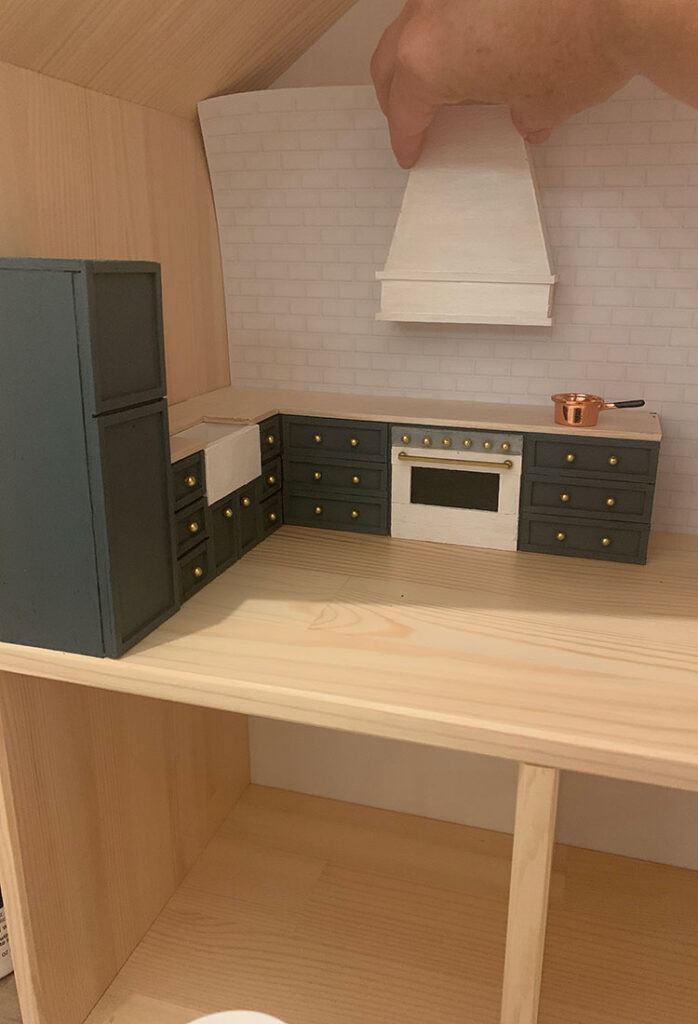
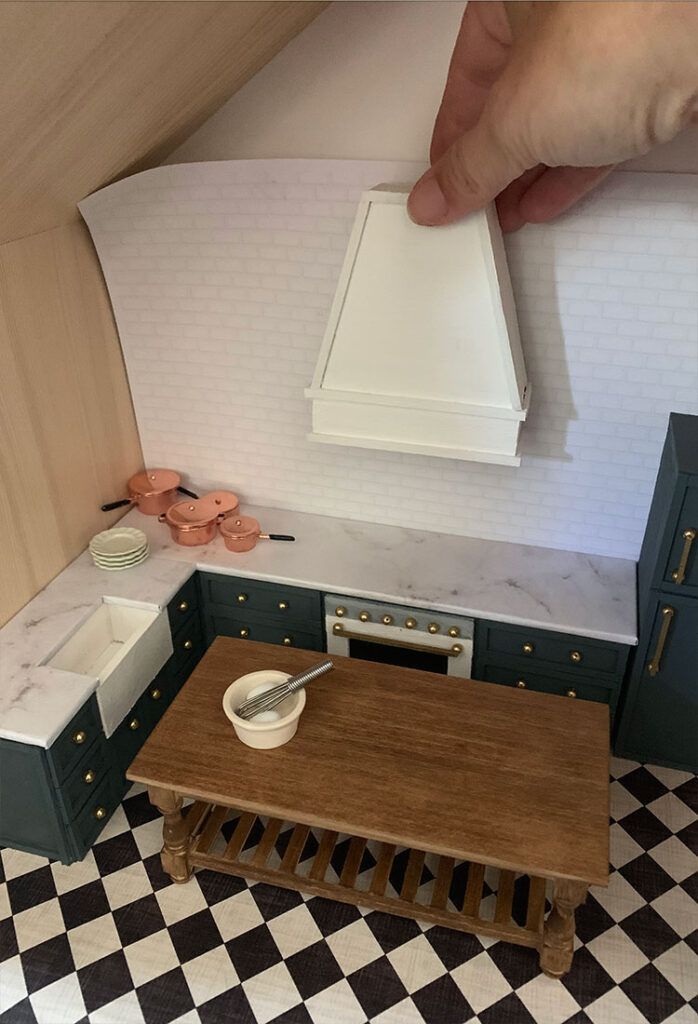
And sorry! I didn’t take any pics or measurements of the hood except this one so I will show it just so you can have somewhat of a visual. But basically first I traced out on paper different shapes for the hood and held them up and then once I got one that I liked I cut out two pieces of wood in that shape. And then using the same wood as the oven I add those and then glued the second shaped piece on top of that and then used some thin trim to trim it out! Sorry about not having proper photos and measurements for the hood!
Once that was done we painted the cabinets and fridge. For the cabinets Lillie used this spray paint and I used a left over sample can of Grays Harbor by Sherwin Williams with a little tiny brush. (And we both ended up painting our hoods white with a basic white craft paint).
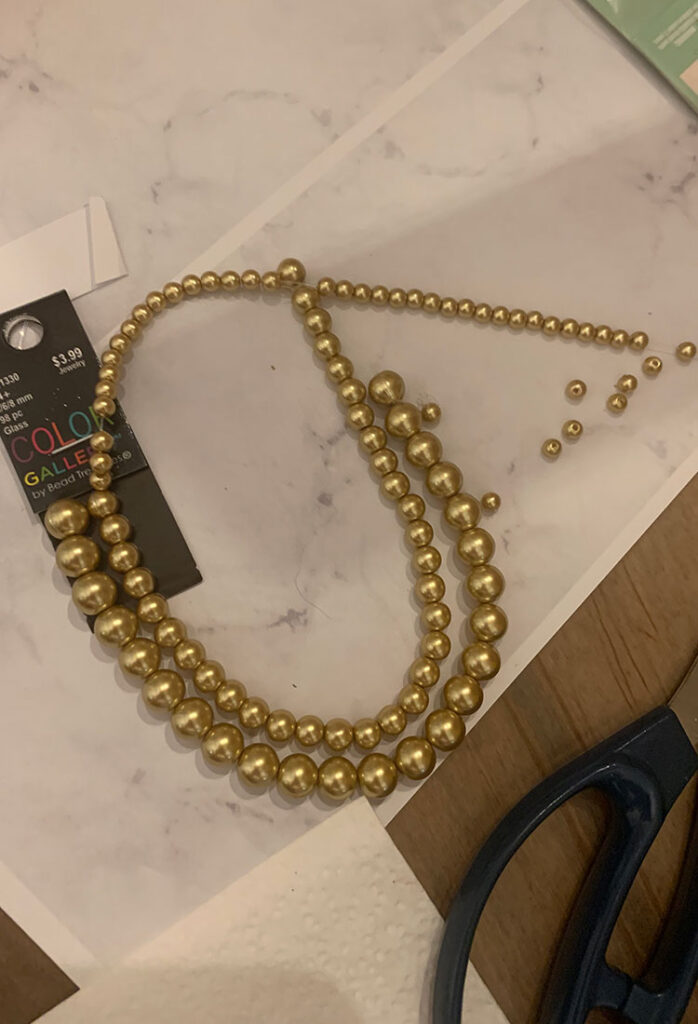
Then it was time to make little knobs and handles! For this we bought this pack of beads and used the 4mm sized ones:
We used little drops of gorilla glue and attached each bead to look like a knob on all of the cabinet drawers:
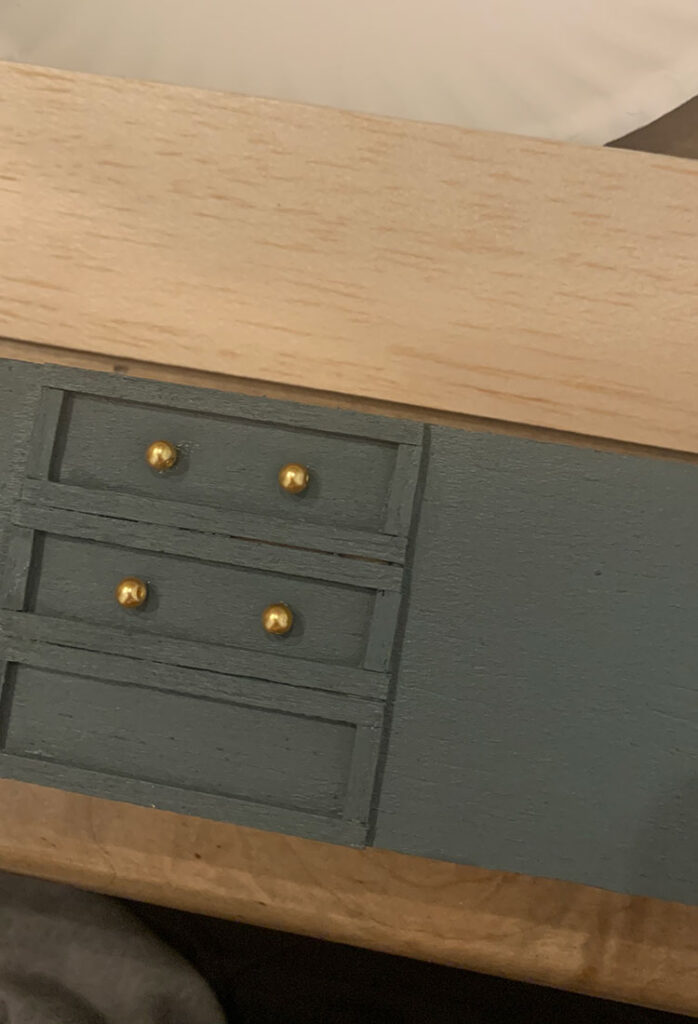
It was starting to look more pulled together which got us pretty excited!
Then for the handles on the fridge (and also on the oven) we placed two tiny beads and then glued on teeny tiny strips of balsa wood that were spray painted with this paint on top of the beads so it looked like a handle. They do sell cute little handles on Etsy but this was MUCH cheaper!
For the ovens we painted the top piece of wood a gray and the rest white. This was just after one coat so it’s still looking pretty sloppy. We added a second coat once this had dried:
Once that had dried we added the knobs and oven handle the same way as on the cabinets and fridge. Then I painted the cabinet black in the little area that sits behind the “window” of the oven and once that dried I finally glued on the oven to the cabinet with the wood glue.
Now it was time to do the counters. Basically I just found an image through a google search for marble and shrunk it to a size I liked but you can also buy a download here. Here you can see how we cut it for the larger piece (the sink one was a little bit trickier and took a bit more trial and error and I don’t have any pictures of that but this was the larger long counter. I basically covered the wood with mod podge and then set it down on the backside of the paper (the side that was just white – not the marble side) and then use more mod podge on the other side of the wood and folded the paper over and held it tightly in place for a few minutes.
Then we glued the counters to the cabinets and that was it!
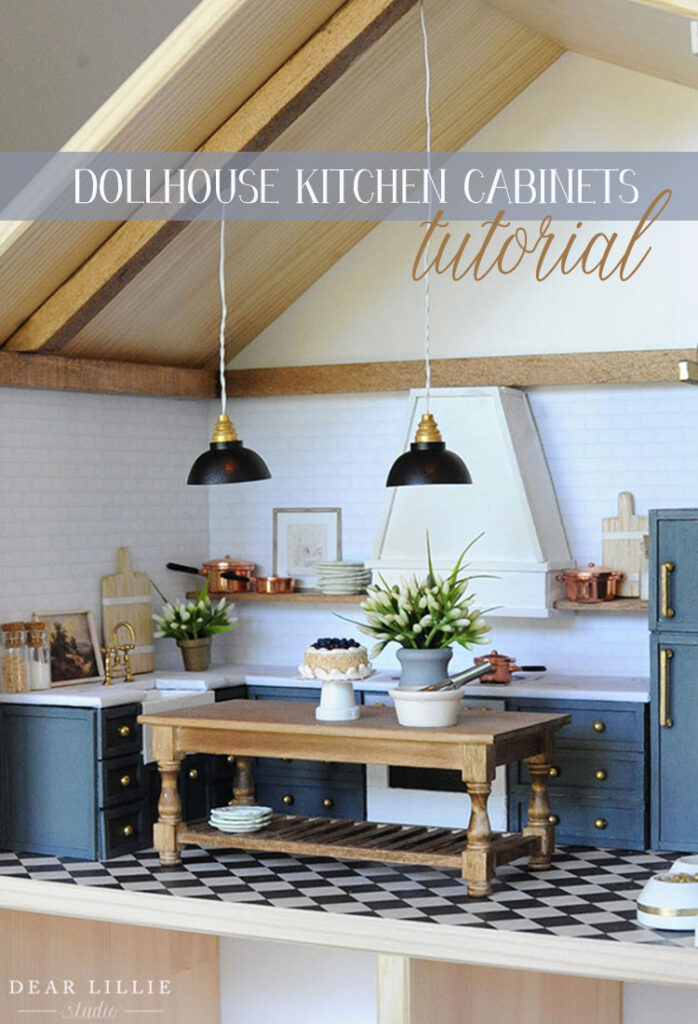
Here you can see some of the finished kitchen pictures.
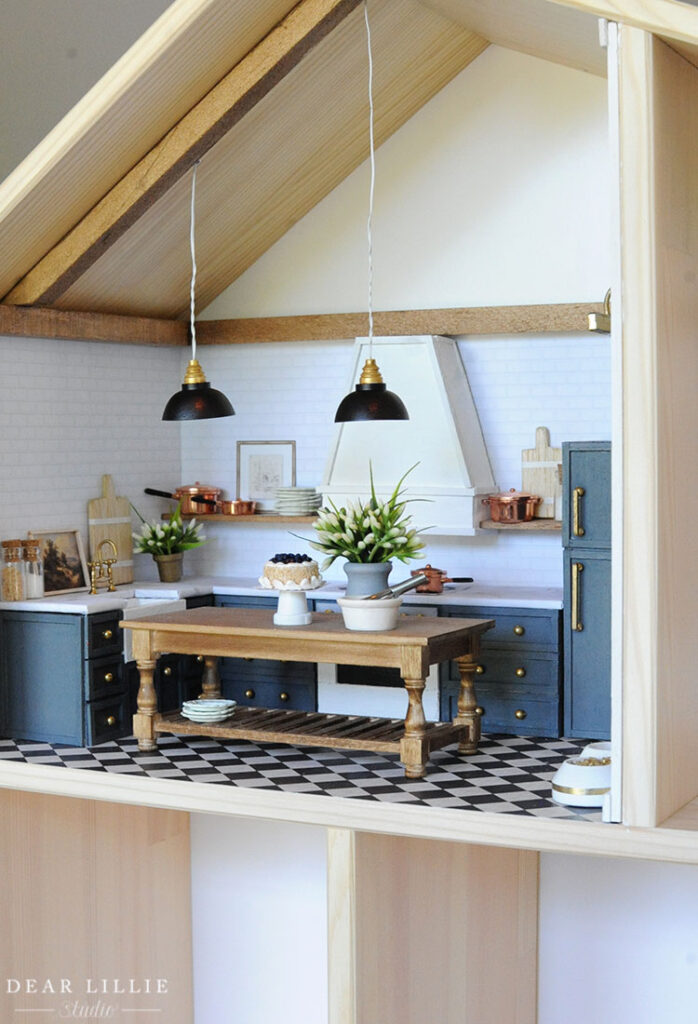
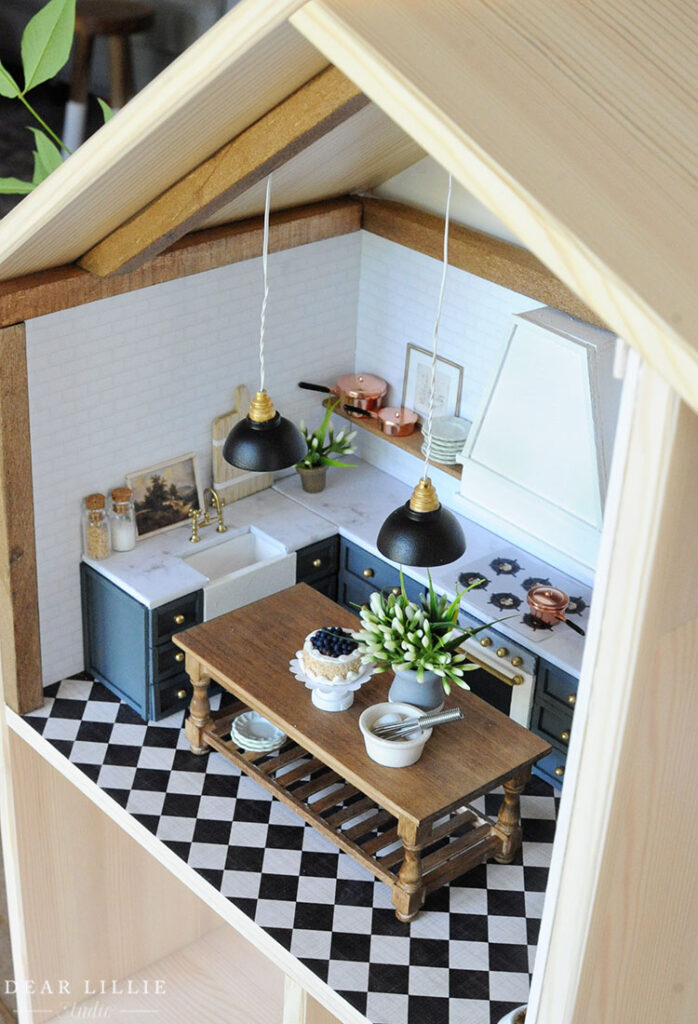
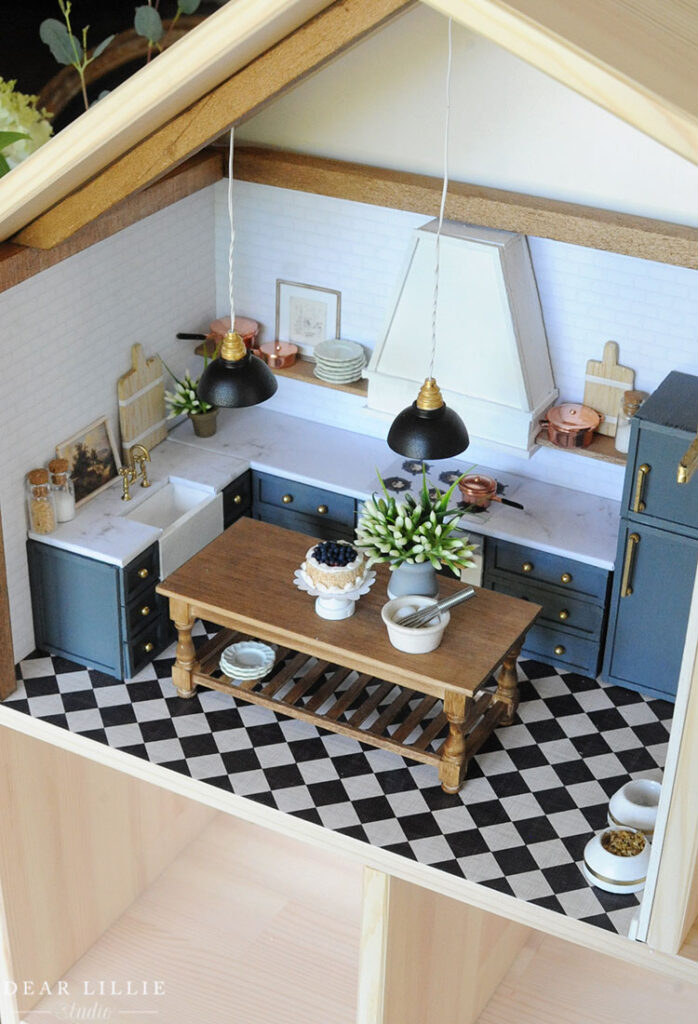
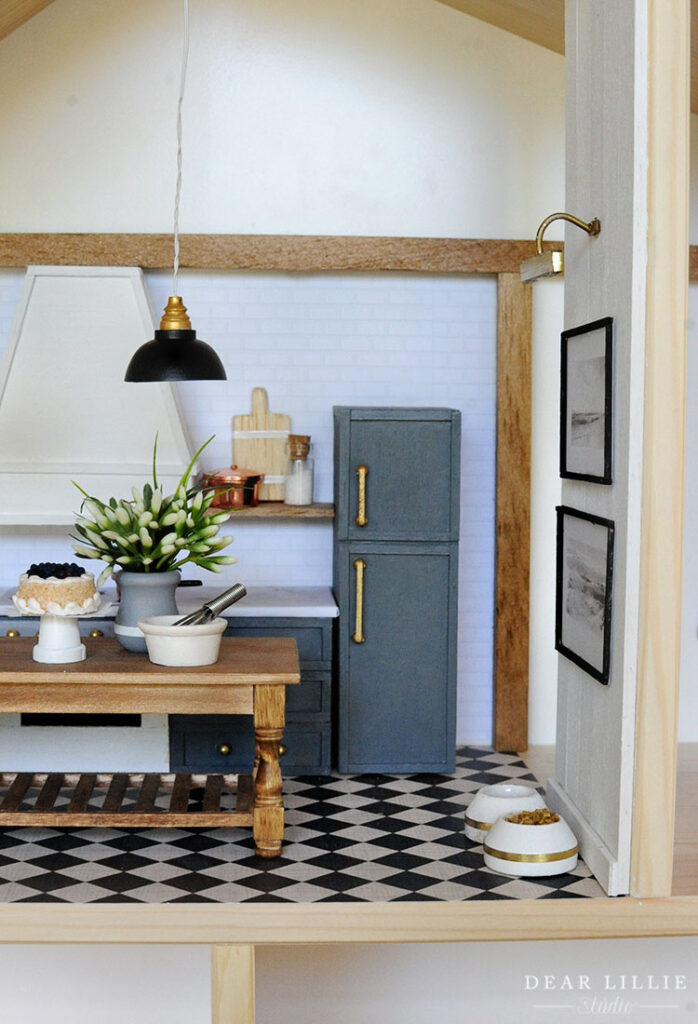
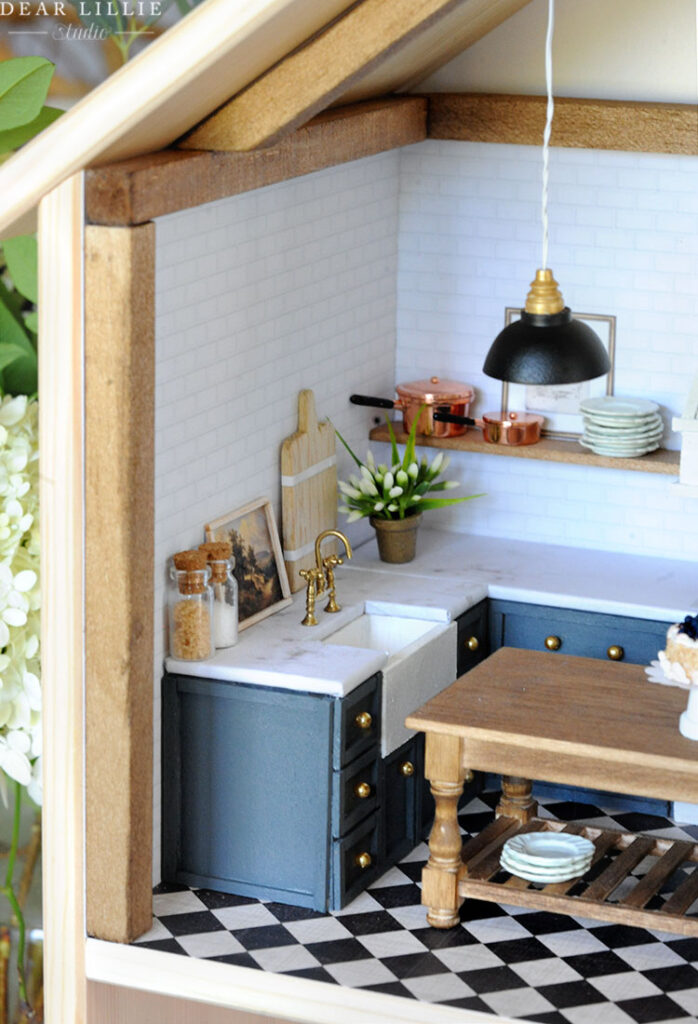
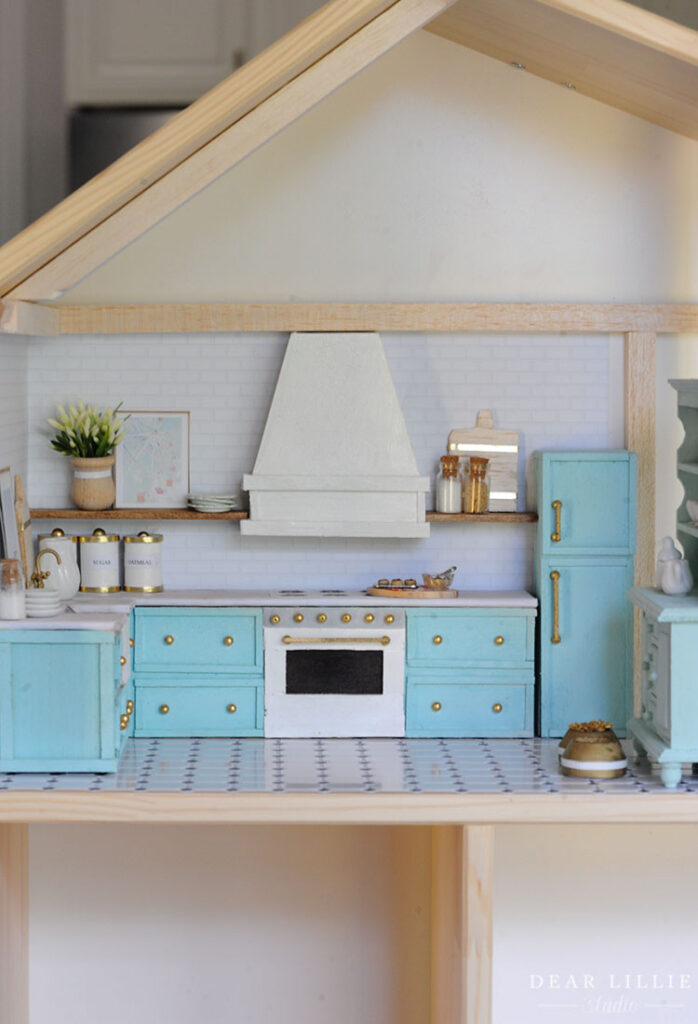
For all of the details on the rest of the kitchen you can click here. And here is Lillie’s kitchen:
Sources for My Dollhouse:
Cabinets, sink, fridge, hood and stove – We built them ourselves from scratch using Balsa Wood that was 1/8″ thick and trim pieces that were 1/16″ by 1/8″ balsa wood – will have a full tutorial up at some point in the next week or two
Cabinet Color: Grays Harbor by Sherwin Williams (just used leftovers from a $3 sample I bought last year)
Counters – Balsa Wood covered with marble we found from a google image search, resized and printed on regular computer paper and glued on (similar here)
Beads on Cabinets and Stove used as Hardware and Knobs – Hobby Lobby – Color Gallery by Bead Treasures we used the 4mm size that came in the pack
Subway Tile Backsplash – Etsy (we sized ours down a tiny bit more once we downloaded it)
Flooring – 12 by 12 Craft paper found at Hobby Lobby
Beams – 1/2″ by 1/2″ Balsa Wood Stained Early American by Minwax
Pendants – Hobby Lobby painted black and gold
Shelves – 1/8″ by 3/4″ Balsa Wood Stained Early American by Minwax
Faucet – Etsy – then we spray painted it with this gold finish
Island – Etsy then Stained Early American by Minwax
Plates – Hobby Lobby
Copper Pots and Pans – Hobby Lobby
Mini Cake – Hobby Lobby (was a cherry one and I painted the cherries blue to look like a blueberry cake)
Cake Stand – from a mini pack of flower pots from Michael’s painted and tipped upside down
Bowl with Eggs and Whisk – Hobby Lobby
Cutting Boards – just cut from extra scrap Balsa wood and then used a tiny stripe of craft tape to add the line
Dog Bowls – wood beads from Michael’s painted and then used a tiny stripe of craft tape to add the line
Vase – wood beads from Michael’s painted and then used a tiny stripe of craft tape to add the line
Flowers – cut from a 70% off bouquet from Michael’s
Artwork – Favorite images from Studio McGee
Frames – Built with super thin Balsa Wood Strips
Clear Canisters – From Jewelry Making Section and filled with real sugar and brown sugar
Lillie’s Dollhouse Kitchen Sources:
Cabinets, sink, fridge and stove – We built them ourselves from scratch using Balsa Wood – will have a full tutorial up at some point in the next week or two
Cabinet Color: Sprayed with Kyrlon ShortCuts Matte Rain Drop
Counters – Balsa Wood covered with marble we found in a google image search and printed on regular computer paper and glued on (similar here)
Beads on Cabinets and Stove used as Hardware and Knobs – Hobby Lobby
Subway Tile Backsplash – Etsy (we sized ours down a tiny bit more once we downloaded it)
Flooring – Hobby Lobby
Beams – 1/2″ by 1/2″ Balsa Wood
Shelves – Thin Balsa Wood
Faucet – Etsy – then we spray painted it with this gold finish
Hutch – Hobby Lobby – painted color we just mixed with blue green and white craft paint
White Dishware/Tea Set – Hobby Lobby
Cookie Dough and Bowl – Hobby Lobby
Cutting Boards – just cut from extra scrap Balsa wood and then used a tiny stripe of craft tape to add the line
Dog Bowls – wood beads from Michael’s painted and then used a tiny stripe of craft tape to add the line – used clear glue for water bowl and some tiny beads we had for the food bowl
Vase – wood beads from Michael’s painted and then used a tiny stripe of craft tape to add the line
Flowers – cut from a 70% off bouquet from Michael’s
Artwork – Favorite images from Pottery Barn Teen
Frames – Built with super thin Balsa Wood Strips
Clear Canisters – From Jewelry Making Section and filled with real sugar and brown sugar
White Canisters – wood beads from Michael’s painted and then used a tiny stripe of craft tape to add the gold trim and then glued on a tiny gold bead for the handle, words were just printed on regular computer paper and glued on
Warmly, Jenni


