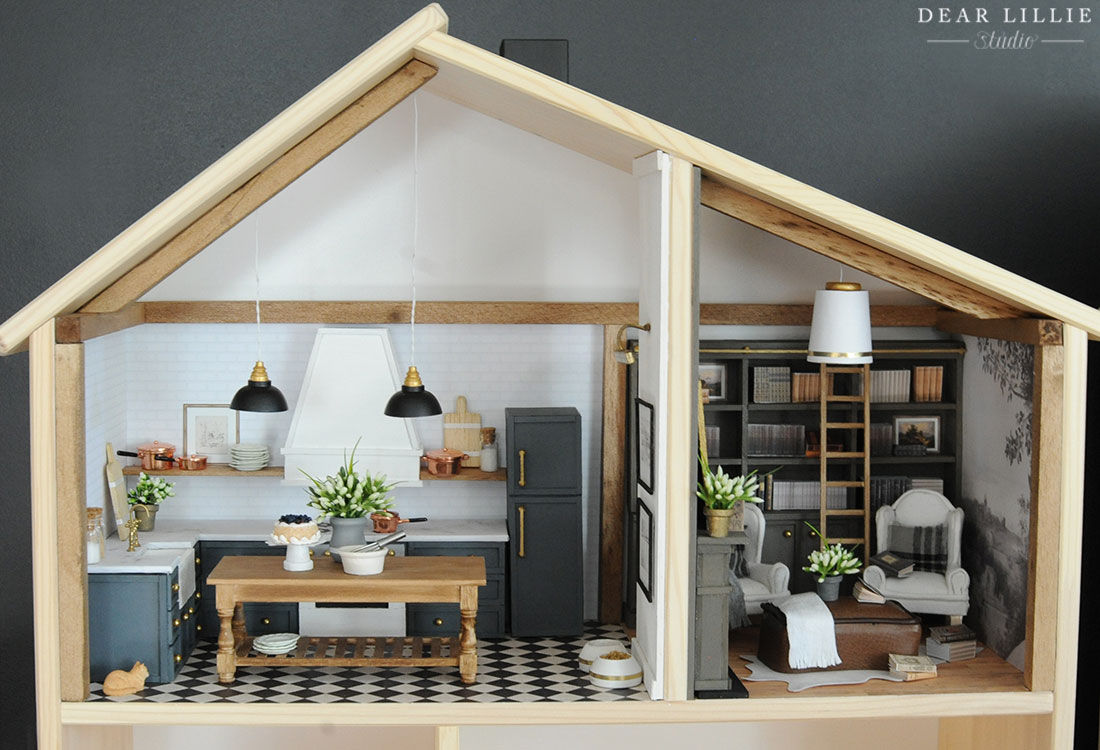
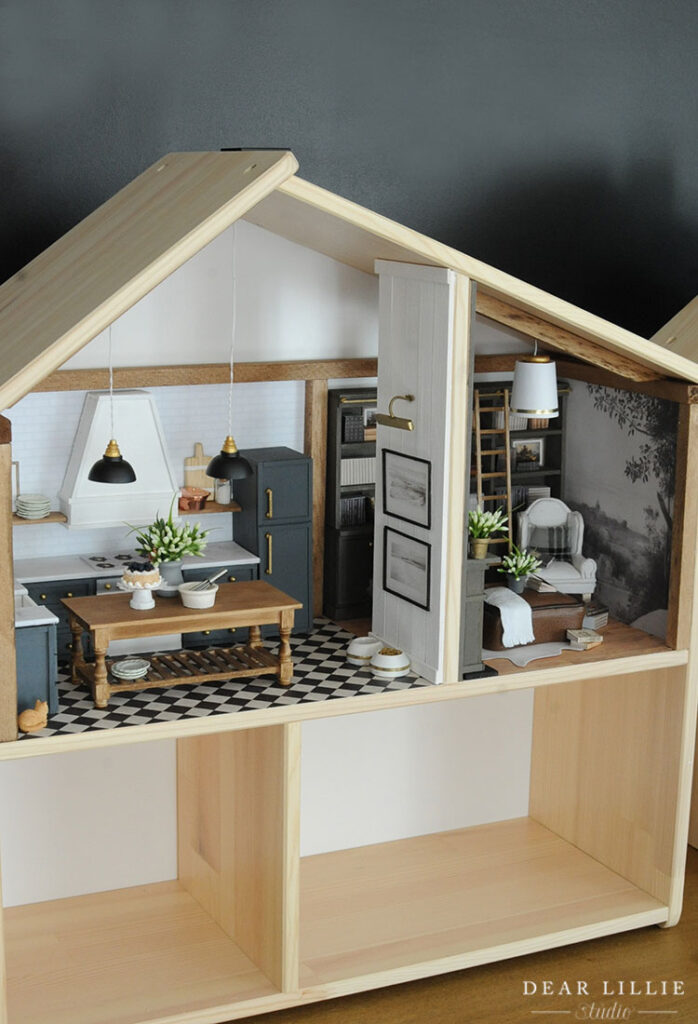
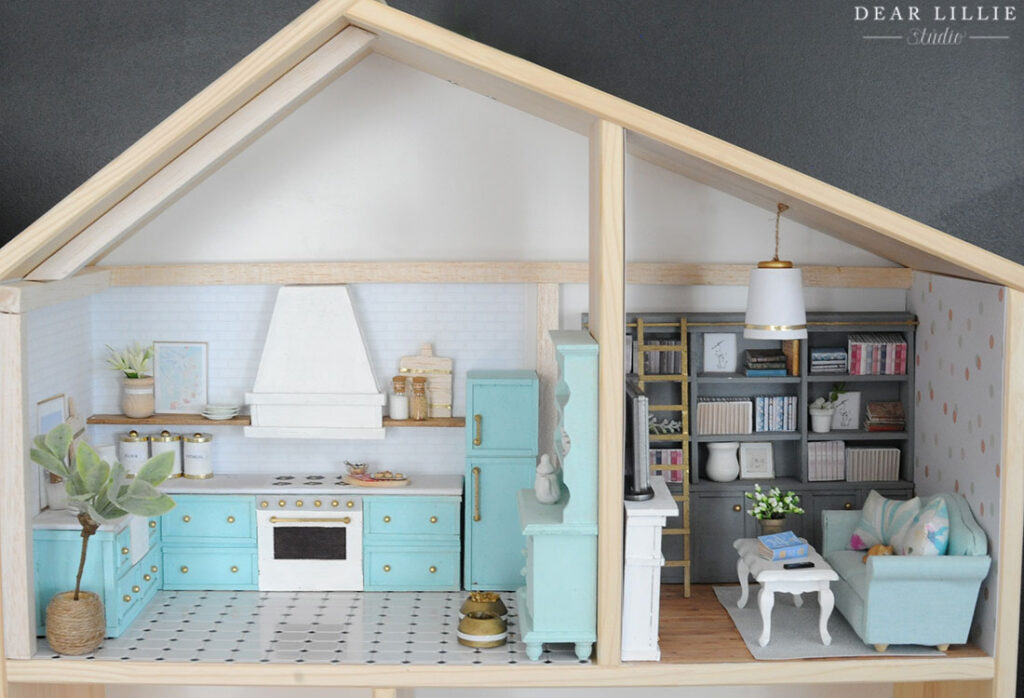
Good morning! I hope you all had a wonderful weekend! A couple of weeks ago we shared the details on the kitchens we made for our inexpensive IKEA dollhouses and today I wanted to share the photos and source info for our second room in our dollhouse – the study. When I get a chance I will write a tutorial with all the measurements for the bookshelves and fireplace and do a separate post for that like I did for our kitchen cabinets.
Here’s a little peek at Lillie’s. I love how hers turned out. She was so patient as she built her bookshelf and it came out beautifully! (I’ll have some more photos and the details for hers at the bottom of the post):
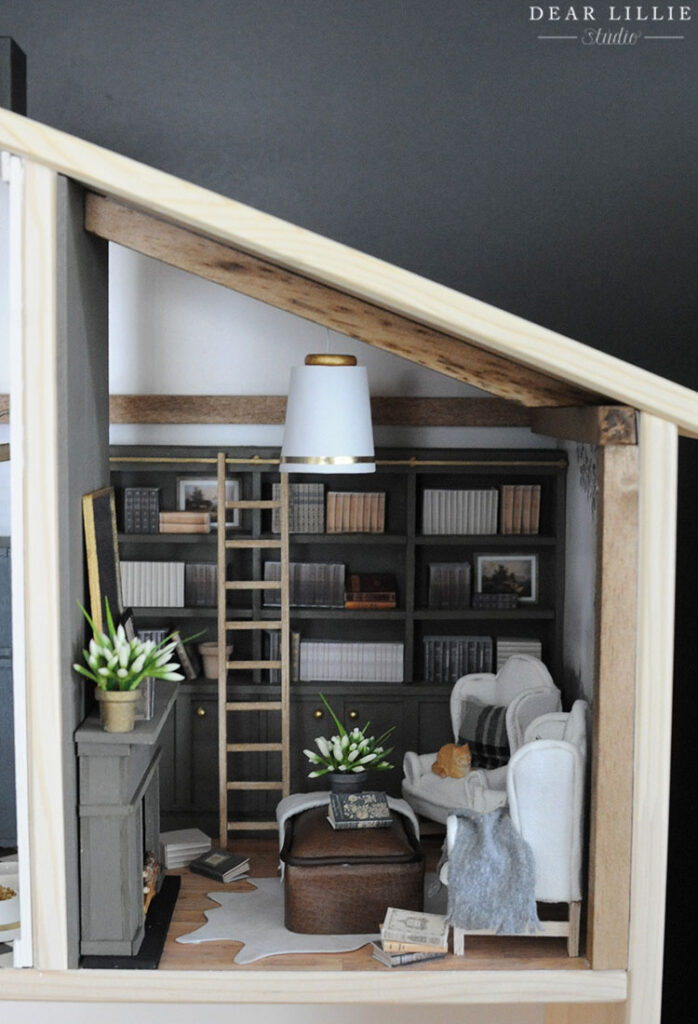
Because there are a few things I know we will have to purchase for the bathrooms I decided to try to see if I could pretty much make everything in the study/library/living room (not sure what exactly to call it – haha!) by hand with things we already owned or some basic craft supplies. We discovered very quickly when we started this project the dollhouse furniture and accessories can be really expensive! So we have been trying to make as much as we can to keep the cost down. We did end up buying a few pieces for Lillie’s room (I’ll explain the reasoning behind that a bit more when we get down to that part in the post) but I made everything in my study by hand. I enjoyed every bit of it except for one part – the wingback chairs. Those were really hard and definitely the most “homemade” looking element in the room I think once they were finished.
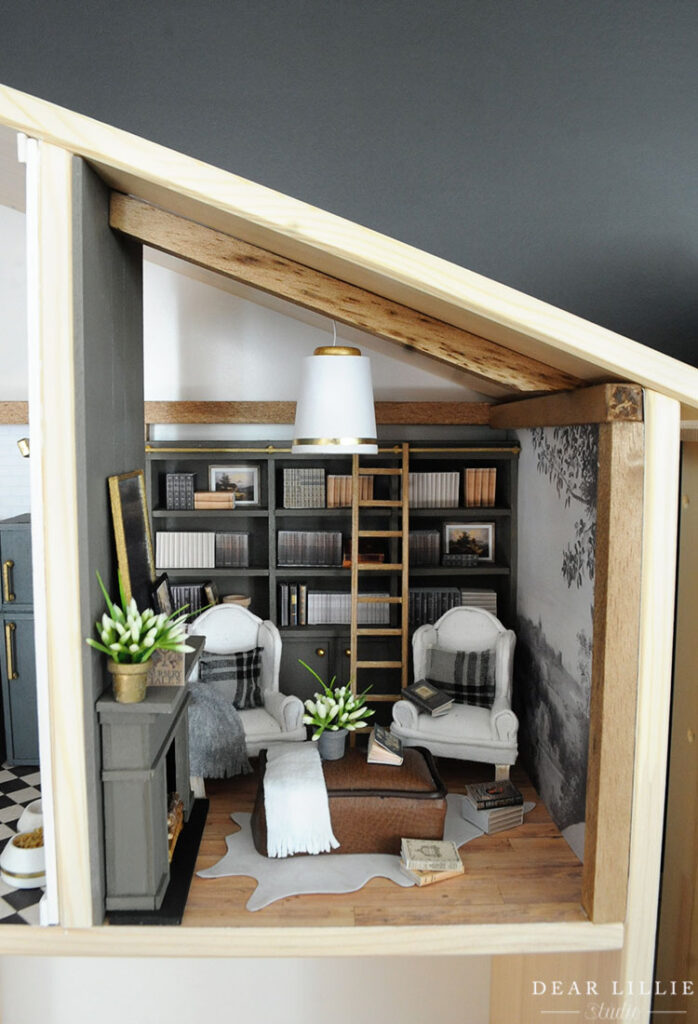
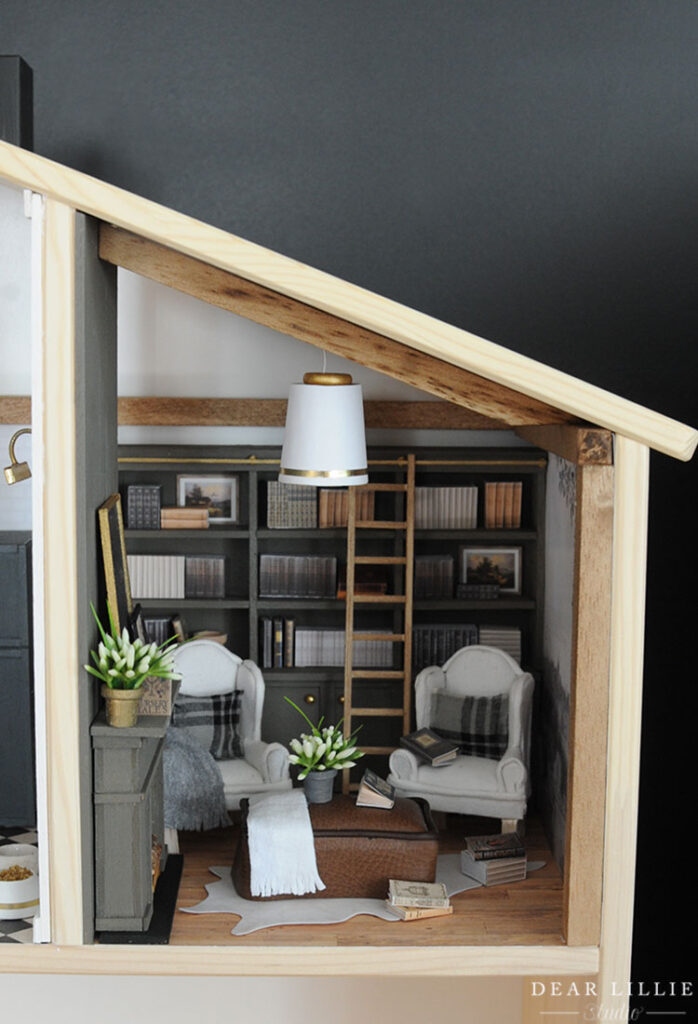
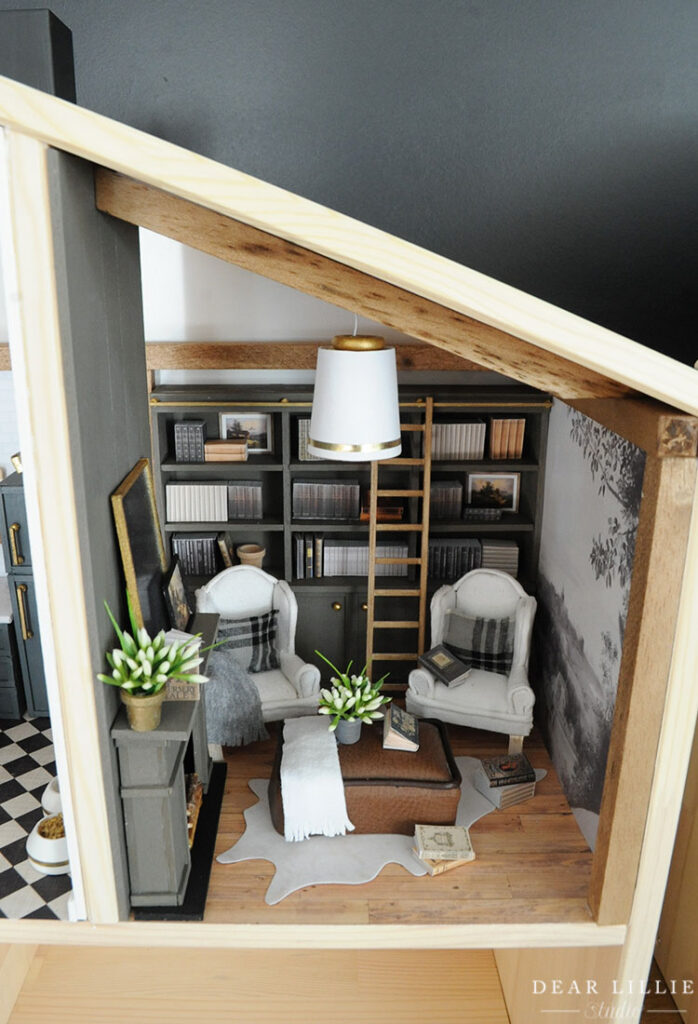
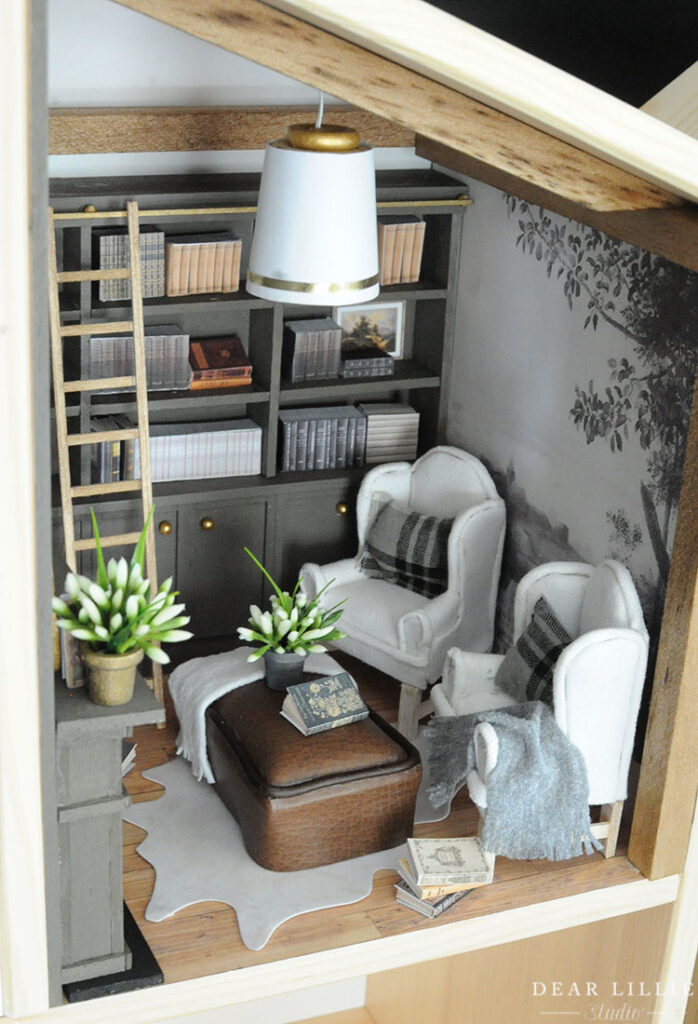
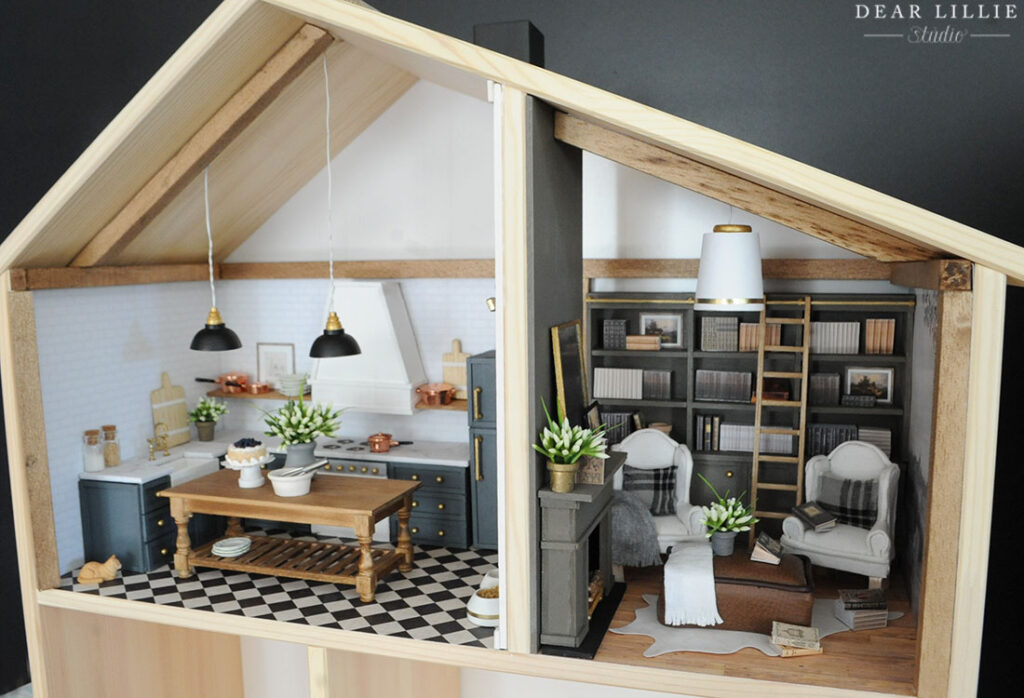
Here are a few different angles so you can get a feel for the whole room:
We started off by building the bookcases. We used the same 1/8 by 4″ balsa wood for the bookshelves that we used for our kitchen cabinets and used the same 1/16 by 1/8″ pieces of balsa for the trim. Then once the bookshelves were built and painted (I used a sample can of Porpoise by Valspar for my bookshelves) it was time to fill them. We made groupings of books by glueing printed rows of books that we found in google image searches onto foam board and then we made a bunch of individual books using covers from this Etsy shop and for the inside of the books we sized these down a bit more to fit the books we were using. There are tons of different tutorials out there but here are a few we watched before making our own books:
The Square to Spare (full bookstore)
The real miniature books that opened and closed are probably both mine and Lillie’s favorite part of the dollhouses we’ve made so far. We made over 20 mini books so far and want to make more! They are so cute and so much fun! And they are pretty easy to make. If you visit our Instagram highlights under “dollhouse” you can see some little videos of the mini books. Seriously, even if you aren’t making dollhouses, this is such a fun project to do!
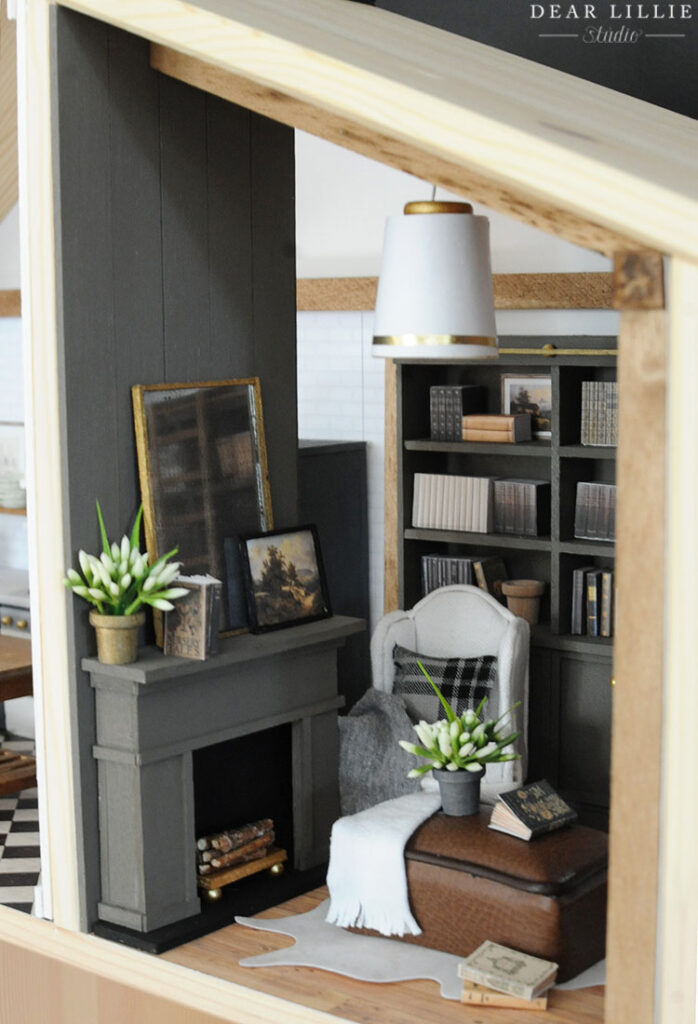
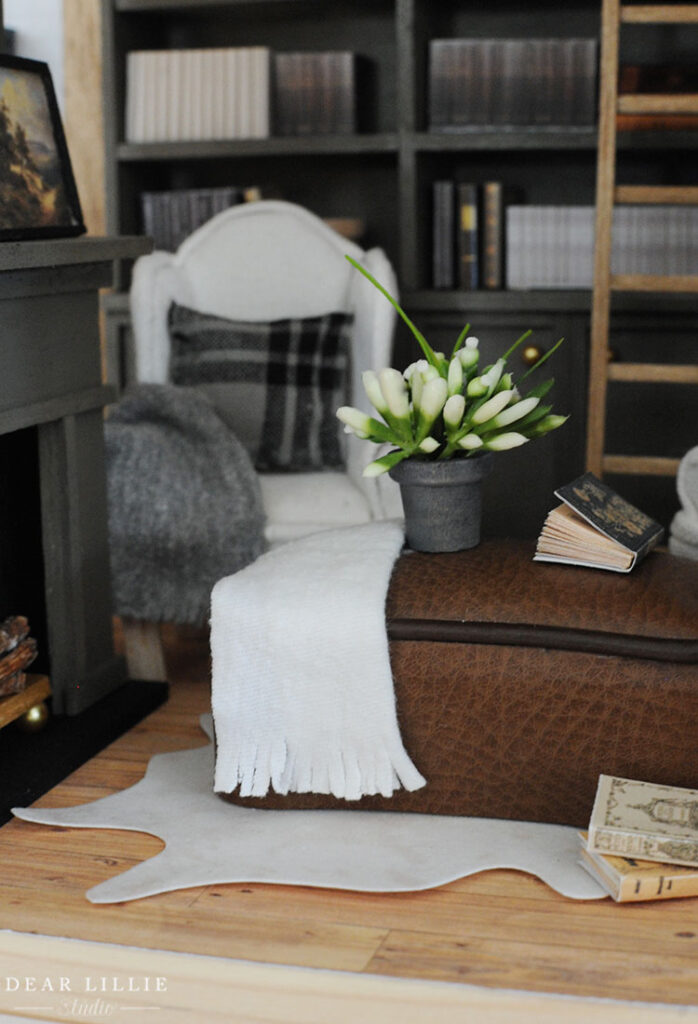
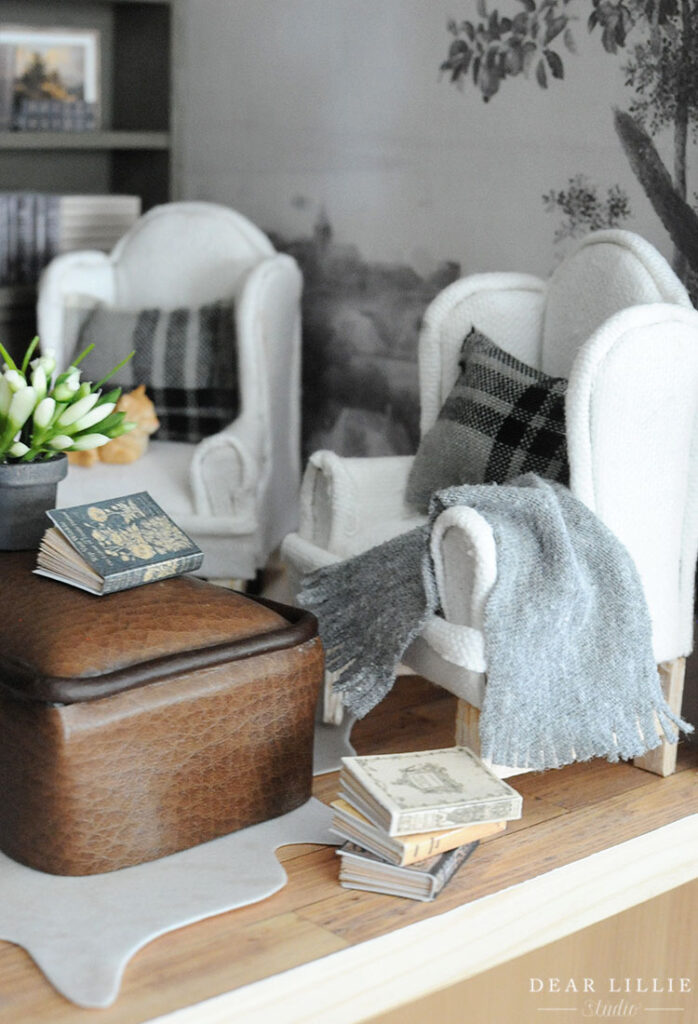
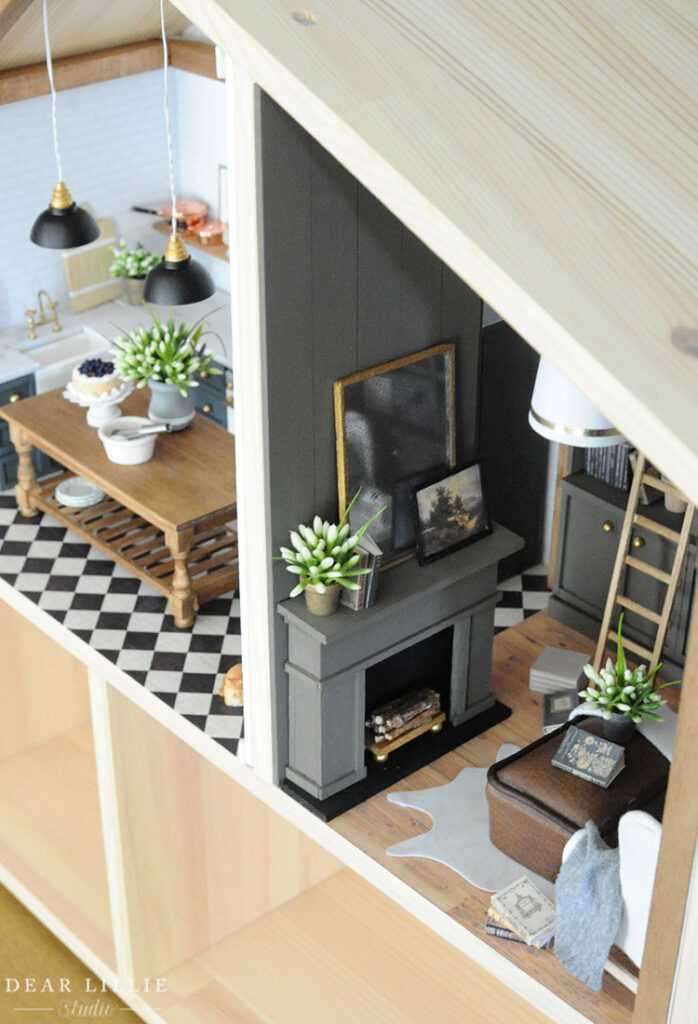
Here you can see some of the mini books on the ottoman, floor and mantle. And there are some in the bookshelf too.
Once the books were done I printed out a few image of artwork that I liked onto cardstock and then added those to a few of the shelves as well. Then I started looking into furniture. I originally was going to do a sofa in here but then I thought it would look nice to have two wingback chairs to make it feel more like a cozy study. Well, I quickly discovered that any white or neutral colored dollhouse wingback chairs were quite expensive! In fact, some of the ones I liked best were almost as much as a real chair – haha! So, I made mine using cardboard from a cereal box, some basic white fabric, batting leftover from another project and scrap balsa wood. I used this tutorial by Rina Vellichor and following it pretty closely. Hers are so perfect and beautiful! Mine are quite lumpy – whoops! I should have stopped when I realized my fabric was too heavy and instead used a lighter weight fabric but of course I just kept going because I was impatient and didn’t want to start over.
This was by far my least favorite part of the dollhouse so far and honestly the only part of it I haven’t loved doing. In fact when I finished them I claimed I would never make another upholstered piece for the dollhouses again! But of course, now that it’s been a few days I actually am looking forward to attempting to try to make another upholstered piece because I know that the only reason the chairs were such a pain was because the fabric wasn’t ideal for working in such a tiny scale and that with a lighter weight option it would have been so much easier (or at least that’s what I have convinced myself – haha!)
The ottoman is made from more batting, some scrap wood and faux leather. Then I just used some leather cording from the jewelry section at the craft store to cover the part where I had glue the “skirt” to the top part of the ottoman. The pillows are also just scraps of fabric cut down tiny and filled with some extra batting.

We also discovered that cute light fixtures were quite expensive too so we decided to make our own for this room. I used a screwdriver to make a hole through a large cork and then wired it with these bulbs. After that I used a little wooden bead painted gold to put in top of it and folded some basic white printer paper around the cork and added a bit of skinny gold tape to the bottom of the paper to give it a more “finished” look so each light ended up costing us less than $4!
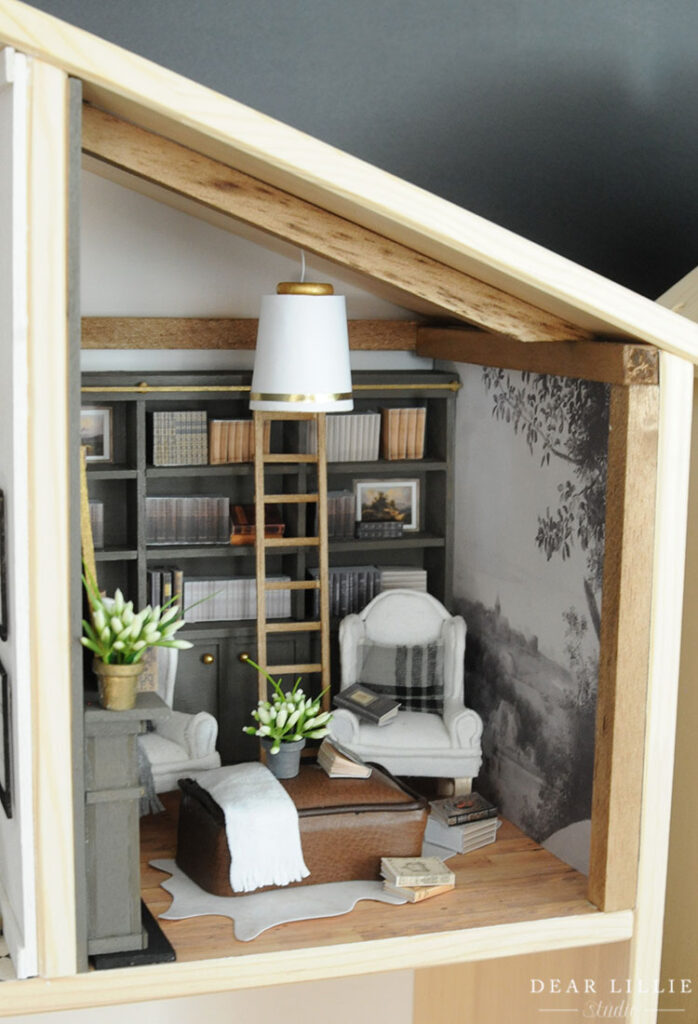
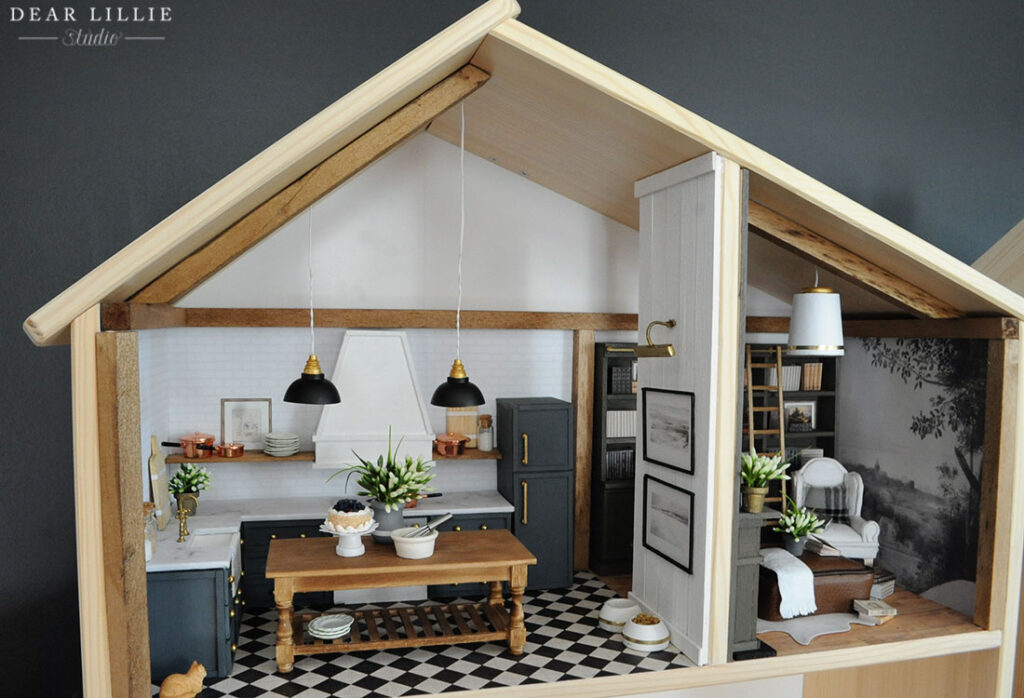
The mural over on the right wall is a sample I ordered from Anewall Decor last summer. I had wanted to use it in our real house but unfortunately didn’t end up having an ideal spot for it so I was thrilled that I could use it in my dollhouse. And maybe someday I will get to use it for real!
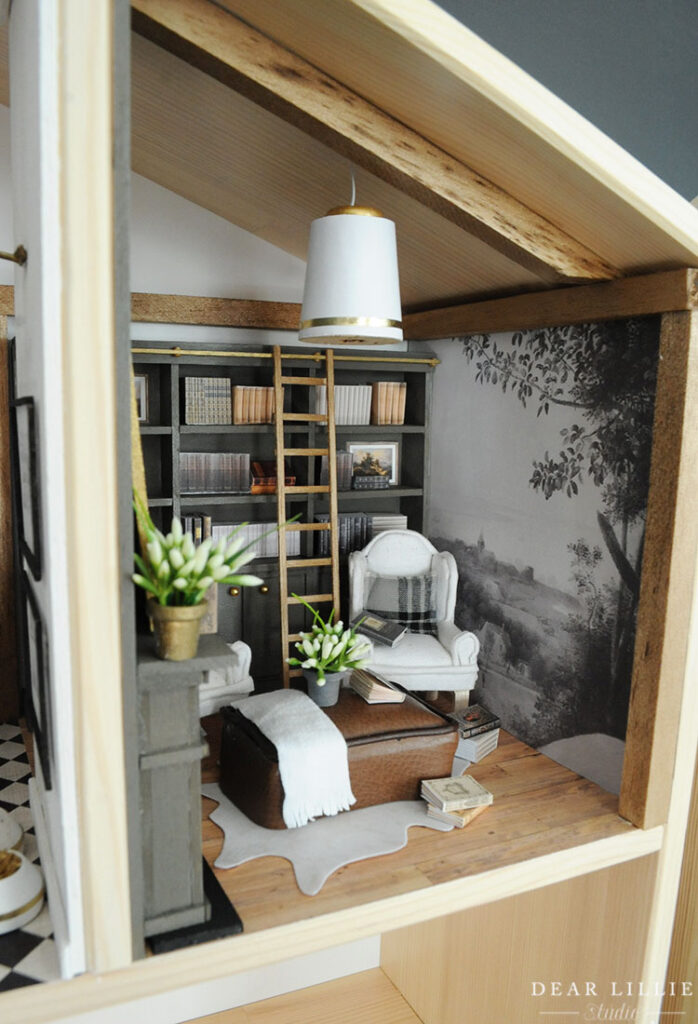
The rug is an image from online of the same rug we have in our real house and printed on this paper and then I cut it out. This paper works great for making dollhouse rugs. We’ve printed off a few already this way and love how they have turned out. We don’t have a special printer – it’s just a basic printer and the paper worked perfectly in it!
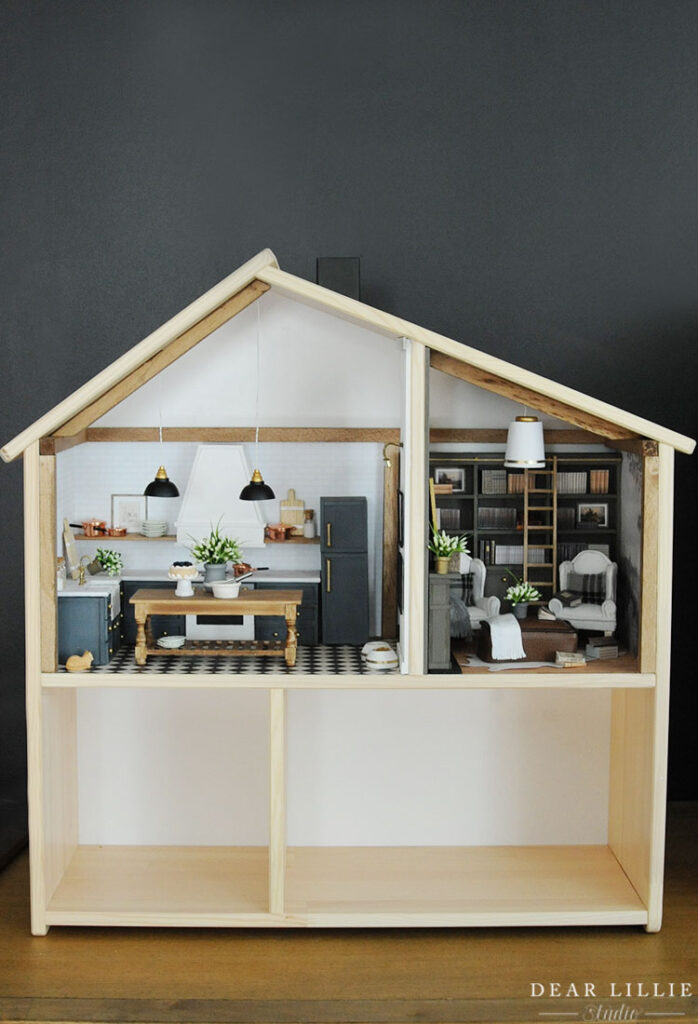
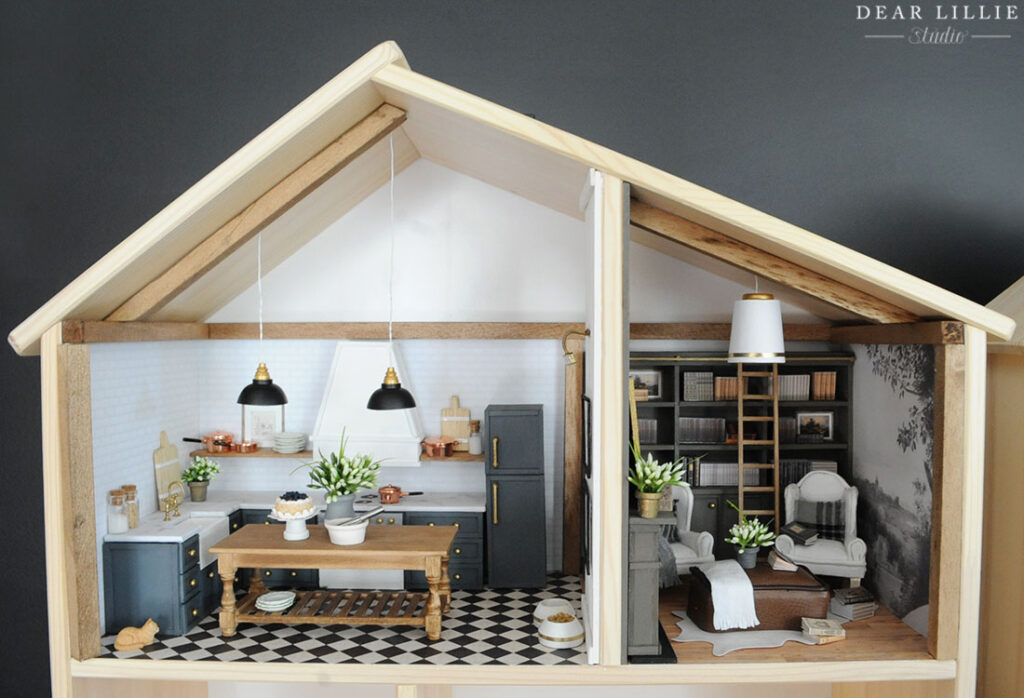
Here are two rooms we have finished so far:
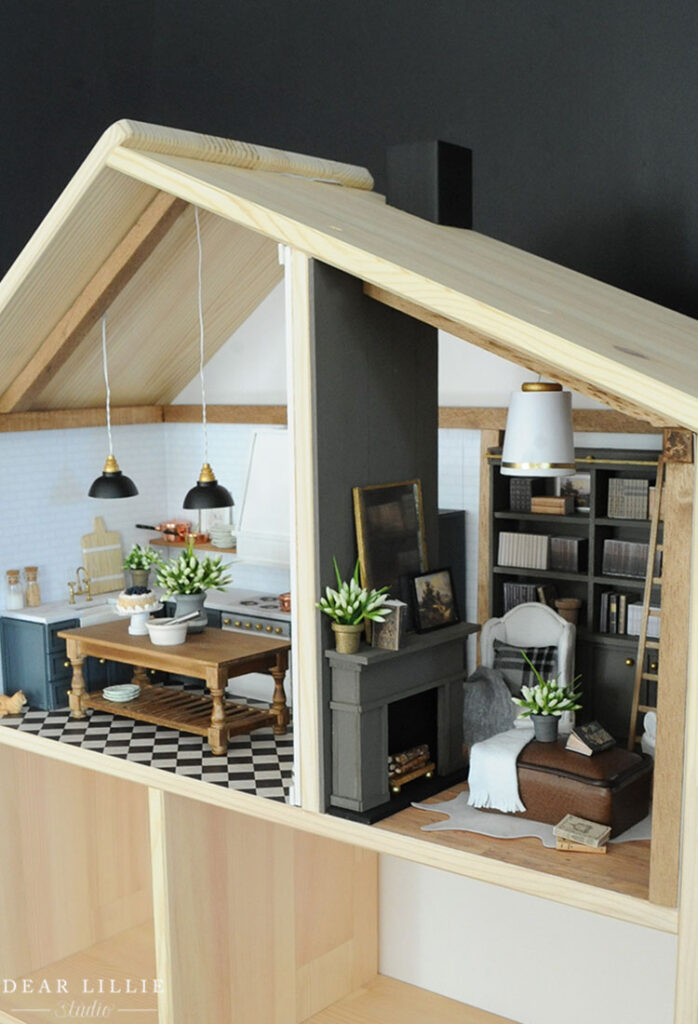
Okay, back to the study. Next up was the fireplace and the wall behind it. For the wall I just glued on strips of balsa wood to give it the feeling of paneling and add some depth and texture. Then for the fireplace we used the same balsa wood we used for our kitchen cabinets and the bookshelves. We cut tiny little branches from outside to put inside the fireplace. I used a little scrap piece of balsa wood and glued 4 little extra beads on the bottom of it to make a little stand for the wood to sit on inside the fireplace. For the mirror I found a little pack of 5 mirrors in the craft section for $2.99 and lightly sprayed it with spray paint to give it an antique look and then trimmed it out with extra balsa wood and painted that gold to give it a more finished look. The artwork is a vintage painting printed on cardstock from an online search and then “framed” with more super skinny scraps of balsa wood that were then painted black.
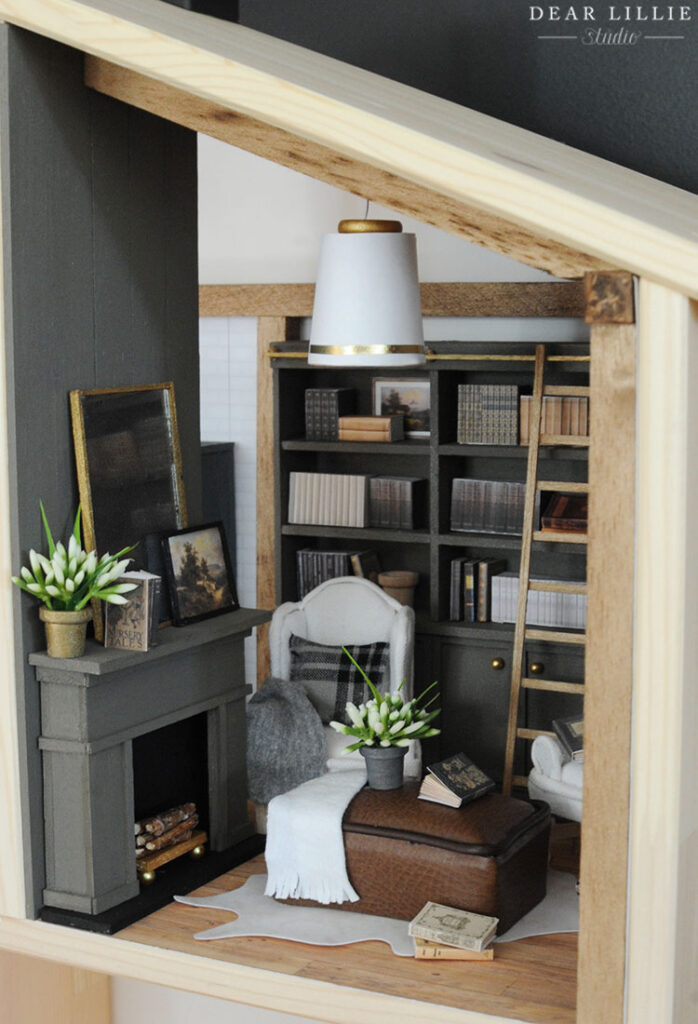
The “throw” on the ottoman and the chair are old t-shirts of Lola’s that had rips in them so couldn’t be given away or donated when we cleaned she cleaned out her drawers last week so Lillie and I saved those ones to make things for our dollhouses. We had read that really worn fabric drapes better and therefore looks more realistic in dollhouses so these shirts came in handy – haha! I just cut some “fringe” at the end of them to make them look a tiny bit more “finished” and not quite so obviously like ripped up old t-shirts. We bought one pack of miniature flower pots at the craft store at the beginning of this project when we were doing our kitchens, and one bouquet of flowers that was marked down to around $2 and I think we will be able to make all of our flower arrangements for our dollhouses from it.
I played around with two different layouts with the furniture. Because it is a dollhouse and you look at the room straight-on, I think the orientation in the photos above probably looks a little better. If it were a real house, though, I would like it this way better:
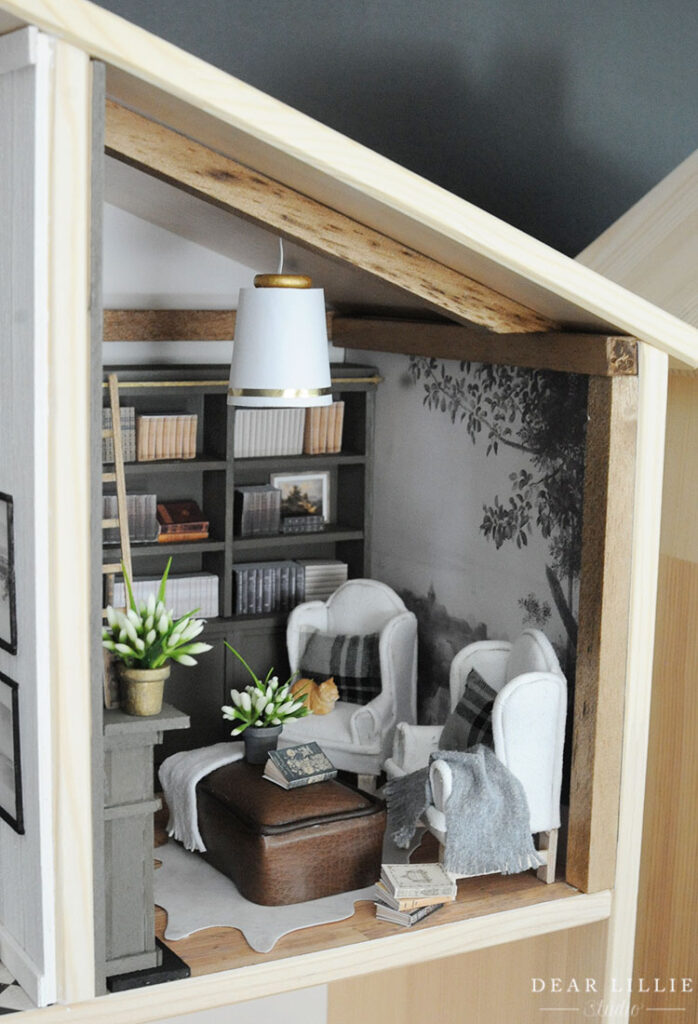
The beams are 1/2 by 1/2″ balsa wood. The one on top, at the angle, helps hide the wiring from the light fixture!
Here’s a little closeup of the throw:
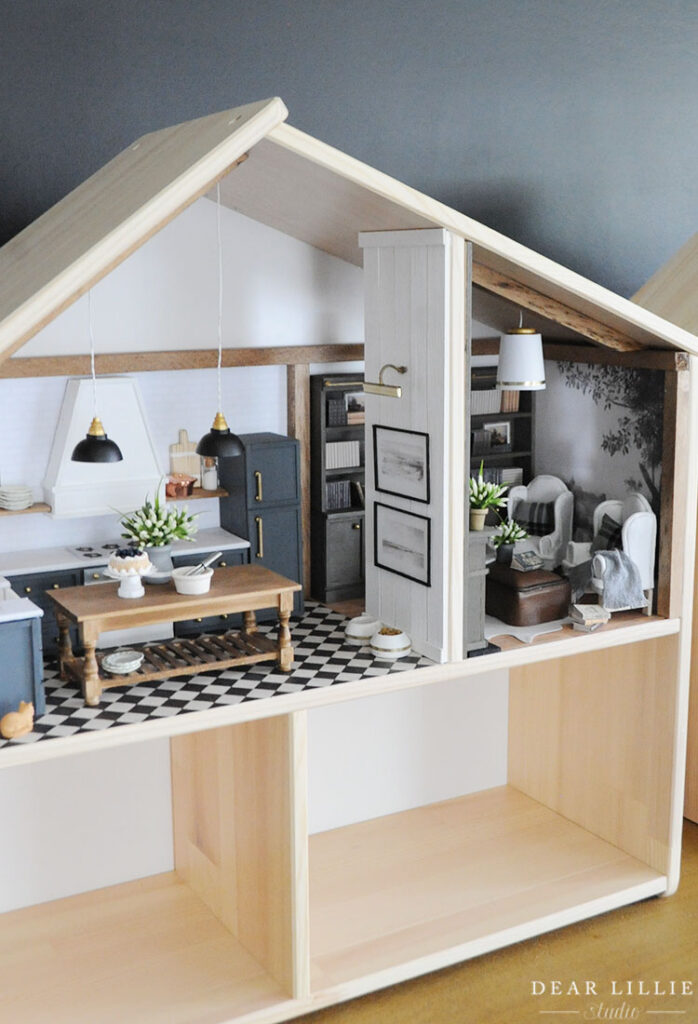
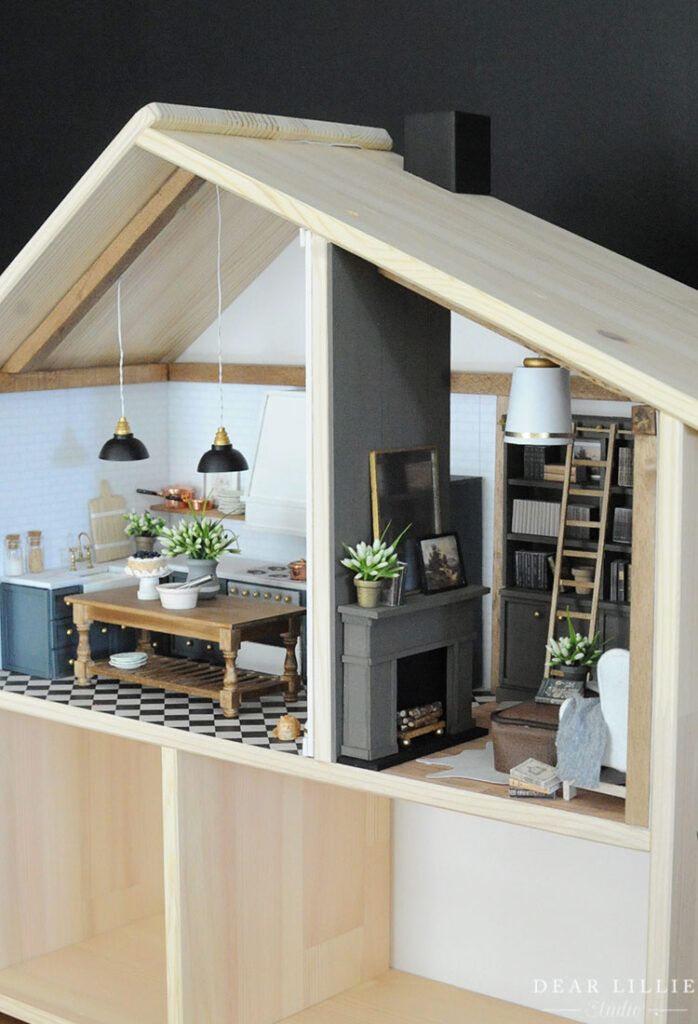
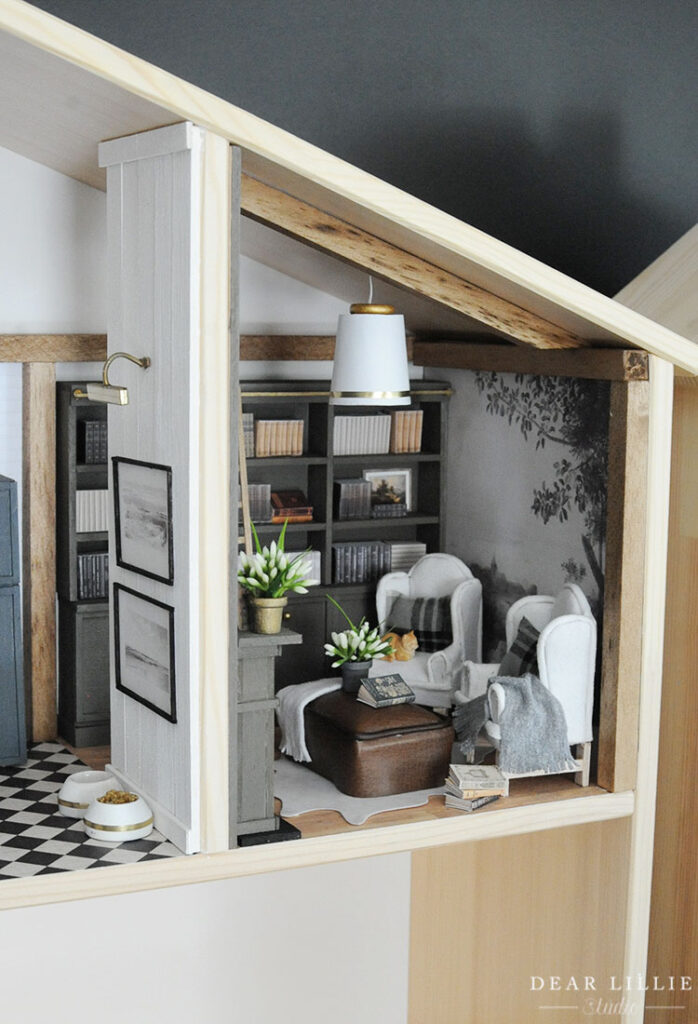
And here are a few wide angled shots of the top floor of the dollhouse! I can’t wait to start on the bottom floor. The bottom right will be a bedroom and the bottom left a bathroom.
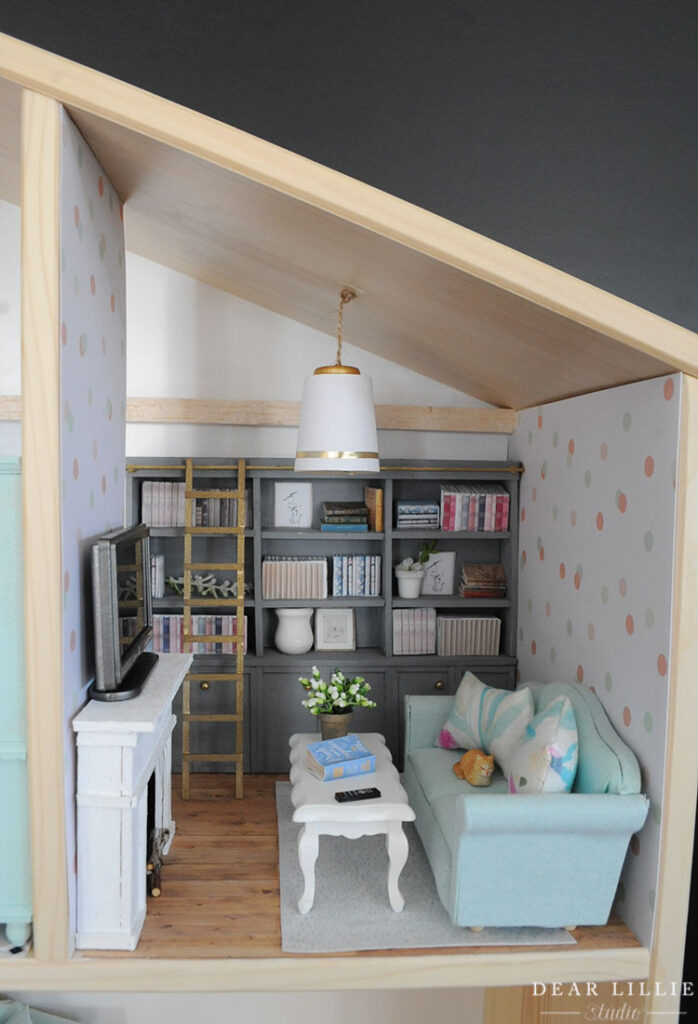
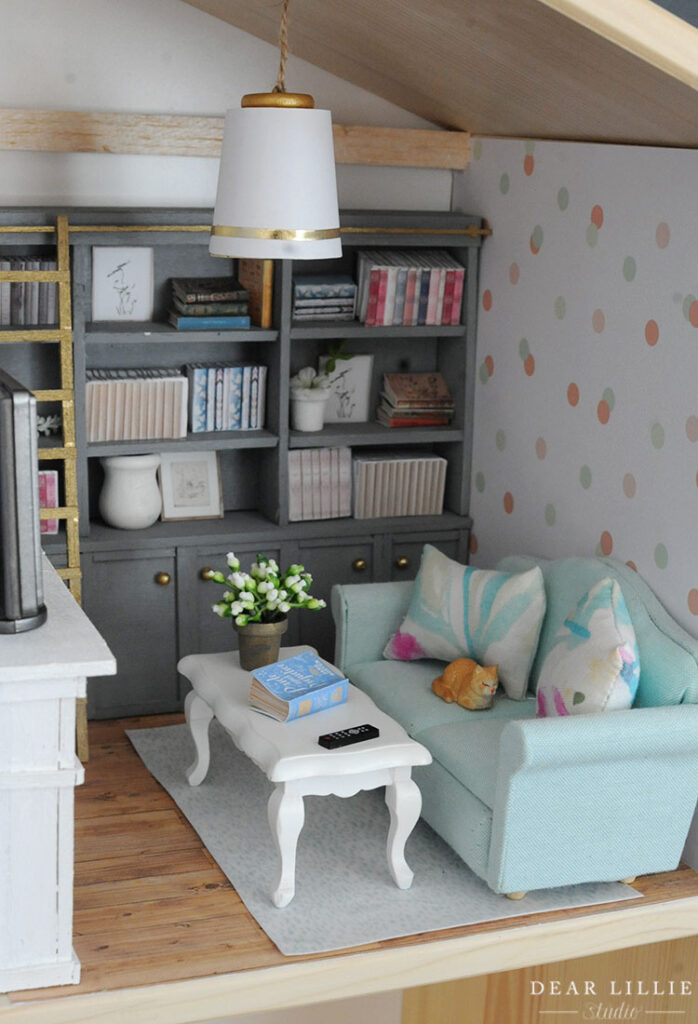
And here is Lillie’s:
Because we are still waiting on her kitchen pendant to come back in stock we haven’t wired her other light in this room yet either. I figure it will be easier to do all the wiring at once for hers once the kitchen pendant in available again. If it isn’t back in stock soon though we may just go ahead and make her kitchen on like we did our study ones now that we know how easy it is!
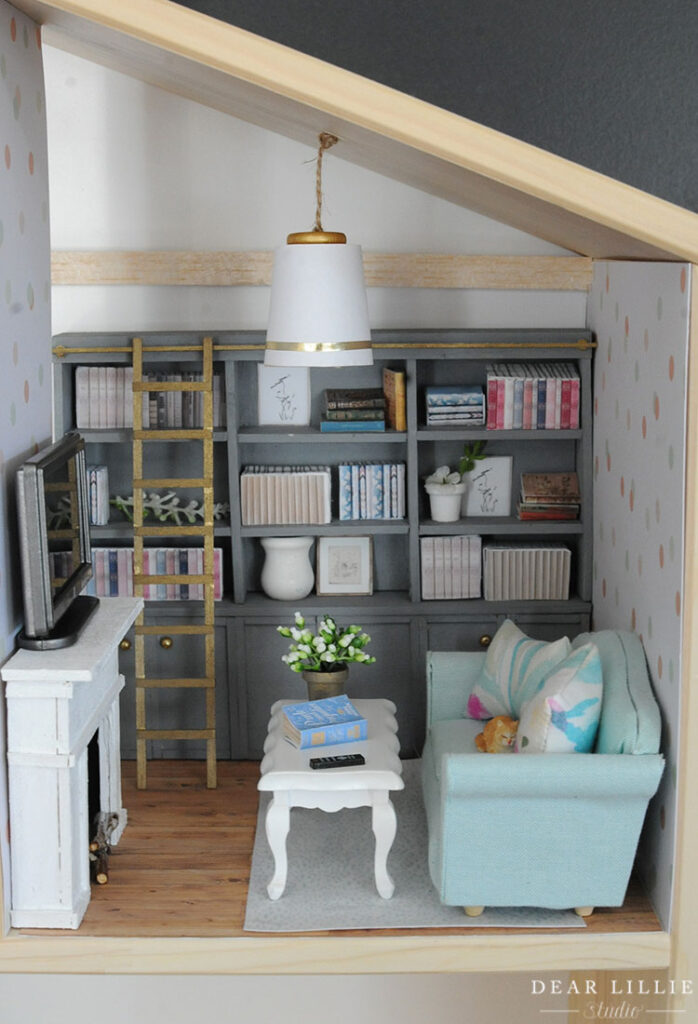
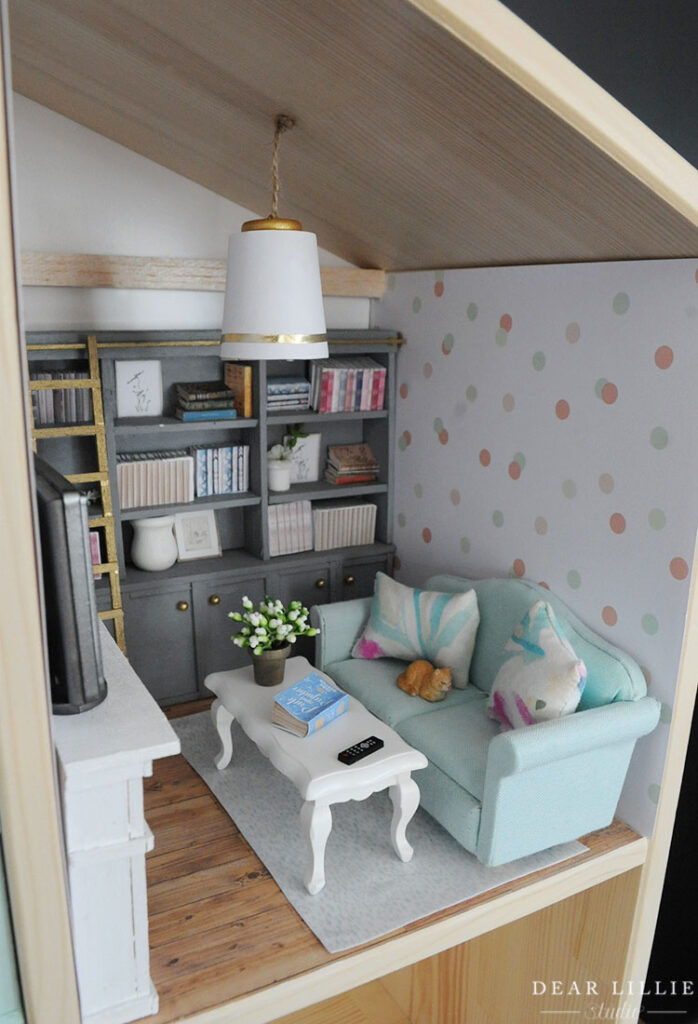
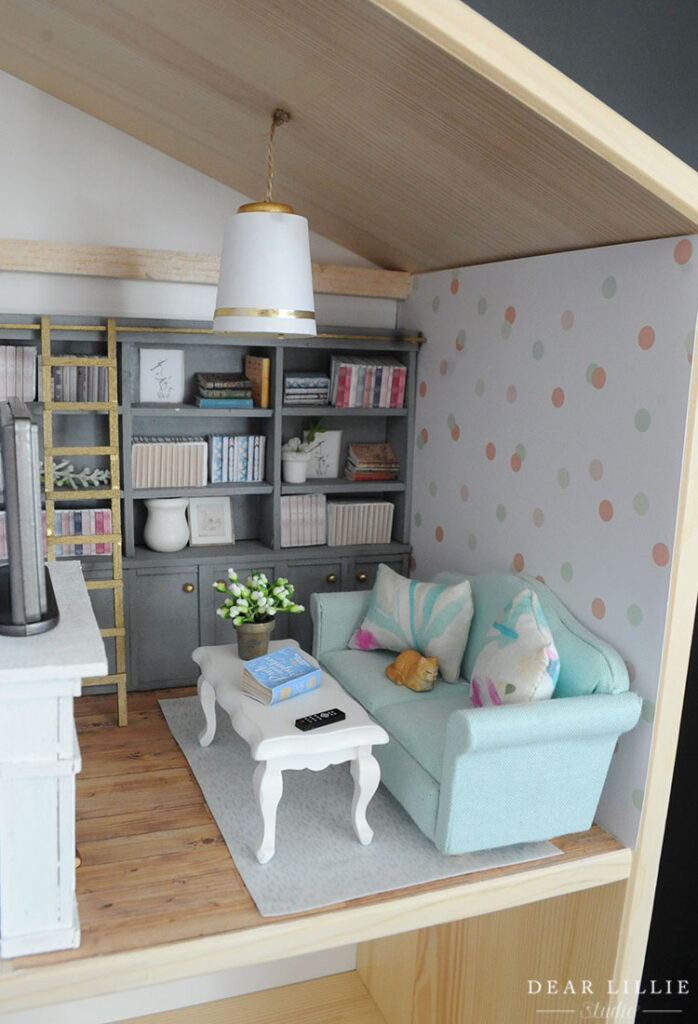
She used a fun piece of craft paper for her wallpaper and we loved how cute it looks! We had originally planned on her making her sofa herself but when I had finished my wingback chairs we both looked at each other and thought it would be so much smarter to just buy the aqua colored living room set we had seen at the craft store. It came with a sofa, two chairs, a coffee table and side table all for a great price so instead of her dealing with the headache of trying to make it herself and then being discouraged and it not being a “fun” project anymore it was a great choice. For anyone out there with kids I would say that overall this has been a GREAT project to do with her at her age (she’s 11) and she’s been able to not only do most of it herself but has really really loved doing it. That being said, I do not think the wingback chairs are something most kids could easily tackle and would not recommend it at least to start off with. After that though we did search for some more tutorials and have since seen several other much more basic style sofas and chairs that I think she easily could have done and enjoyed doing so I do think you could definitely have your child make their own sofa and chairs, I just wouldn’t recommend starting with the wingback style.
She sewed the little pillows herself with some extra little scraps of fabric and we found the little cat at the craft store. We are on the hunt for little dogs for each of our houses but so far all of the realistic looking ones are really pricey!
The very first day we went to the craft store to start getting the wood and other supplies for our dollhouses she fell in love with this little this TV and tiny remote. We didn’t get it that day but I went back and got it when I was grabbing more glue the other day and surprised her with it and she was thrilled! She was so much more excited about putting this above her fireplace than a mirror – haha! The complete opposite of my thought process.
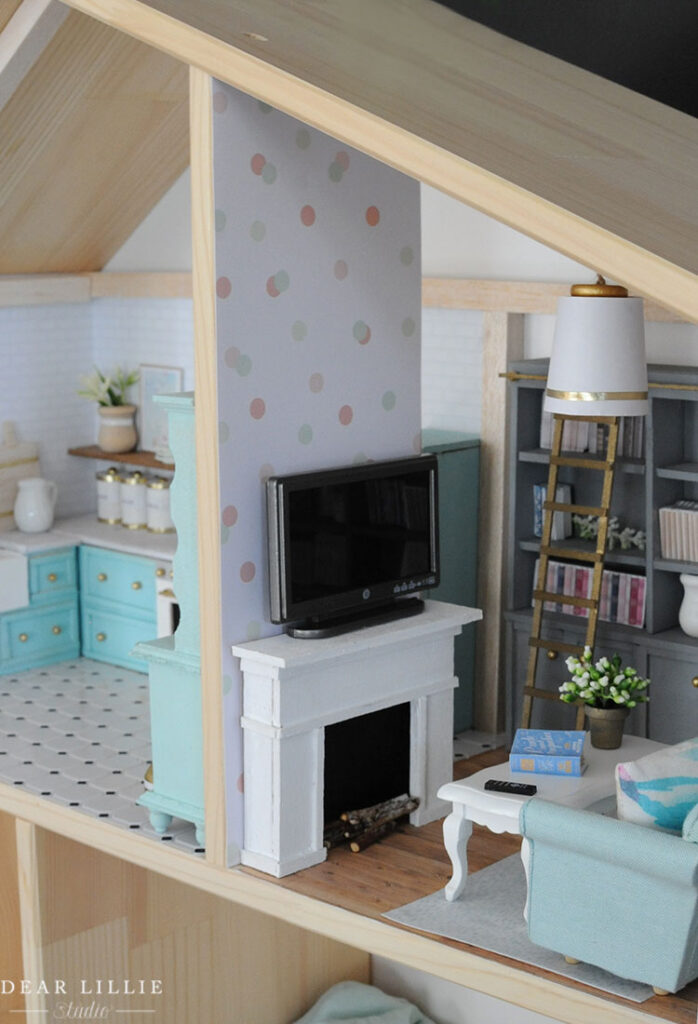
The flooring is a download from Jessica Cloe and it’s so pretty! We will probably use it in our dollhouse bedrooms as well.
This project really has been so much fun to far. We can’t wait to get started on the next room. It probably won’t be for a few more days though but once we get to work on it we will share the process in our stories on Instagram like we have for these first two rooms. If you want more details on our kitchens you can click here. And for the kitchen cabinet tutorial you can click here.
Source for My Study:
Bookshelves and Fireplace – We build them from Balsa Wood. Will have a tutorial for them up in the next week or two. Mine is painted Porpoise from Valspar
Ladder – built from Balsa Wood – mine is stained Early American by Minwax
Rows of Books – Made with foam board and printed out pictures of books glued to them
Books that open – Covers were downloaded from this Etsy shop, book pages were from here (and sized down quite a bit more to fit inside book covers we were using)
Wingback Chairs – made from cereal box, fabric, batting and balsa wood using this tutorial from Rina Vellichor
Light Fixture – Made from a cork with white printer paper wrapped around it, skinny gold tape and this bulb inserted into the middle of the cork once I had cut a hole through the center of the cork.
Ottoman – made from balsa wood, batting, faux leather fabric and leather cording from jewelry section of craft store
Mural – Anewall Decor
Rug – image found online and printed on this velvety paper (just using a regular home printer!)
Wood floors – Jessica Cloe
Mirror – 2 by 3″ mirrors from Hobby Lobby – lightly dusted with spray paint to look antique and trimmed in balsa wood
Flowers – tiny flower pots and discounted floral arrangement which I have been clipping off of were both from Michael’s
Throws – old t-shirts cut to add “fringe”
Pillows – made from scrap fabric and batting
Cat – Hobby Lobby
Logs – cut from outside
Log stand – scrap of balsa wood with beads glued to the bottom
Sources for Lillie’s Study:
Bookshelves and Fireplace – We build them from Balsa Wood. Will have a tutorial for them up in the next week or two. Lillie’s is painted Dolphin – was just one of those tiny craft paints, not sure of brand
Ladder – built from Balsa Wood – Lillie’s is spray painted gold
Wallpaper – Craft Paper from Hobby Lobby
Rows of Books – Made with foam board and printed out pictures of books glued to them
Books that open – Covers were downloaded from this Etsy shop, book pages were from here (and sized down quite a bit more to fit inside book covers we were using)
Light Fixture – Made from a cork with white printer paper wrapped around it, skinny gold tape and will have this bulb inserted into the middle of the cork once I had cut a hole through the center of the cork.
Rug – image found online and printed on this velvety paper (just using a regular home printer!)
Wood floors – Jessica Cloe
Flowers – tiny flower pots and discounted floral arrangement which I have been clipping off of were both from Michael’s
Throws – old t-shirts cut to add “fringe”
Pillows – made from scrap fabric
Cat – Hobby Lobby
Logs – cut from outside
TV and Remote – Hobby Lobby
Sofa and Coffee Table – Hobby Lobby
Well, that is it for today! I hope you all have a wonderful day!
Warmly, Jenni


