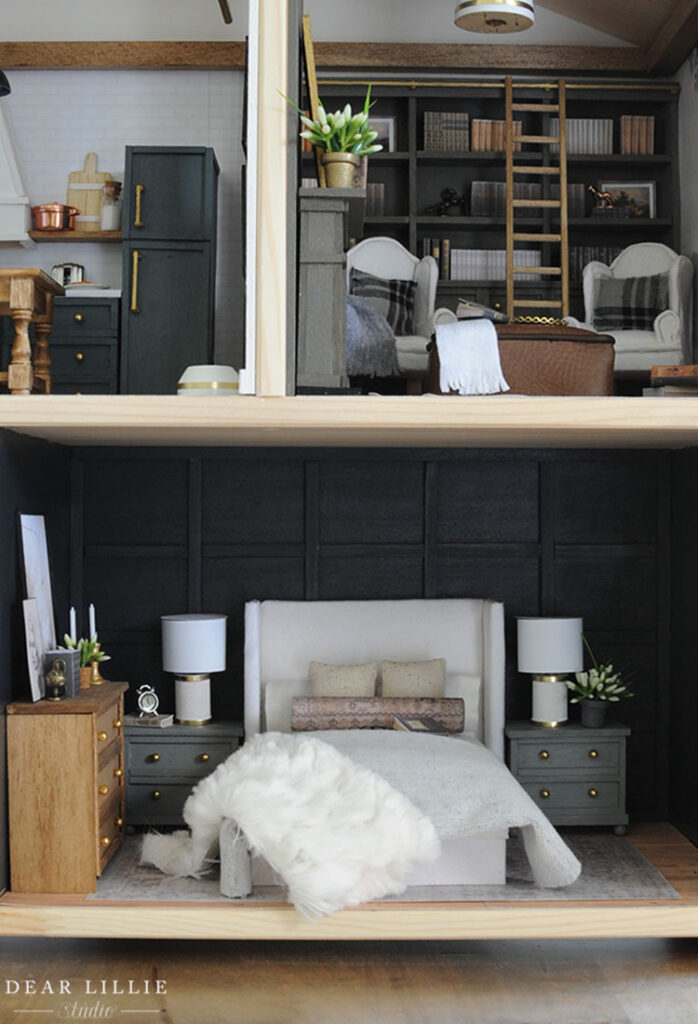
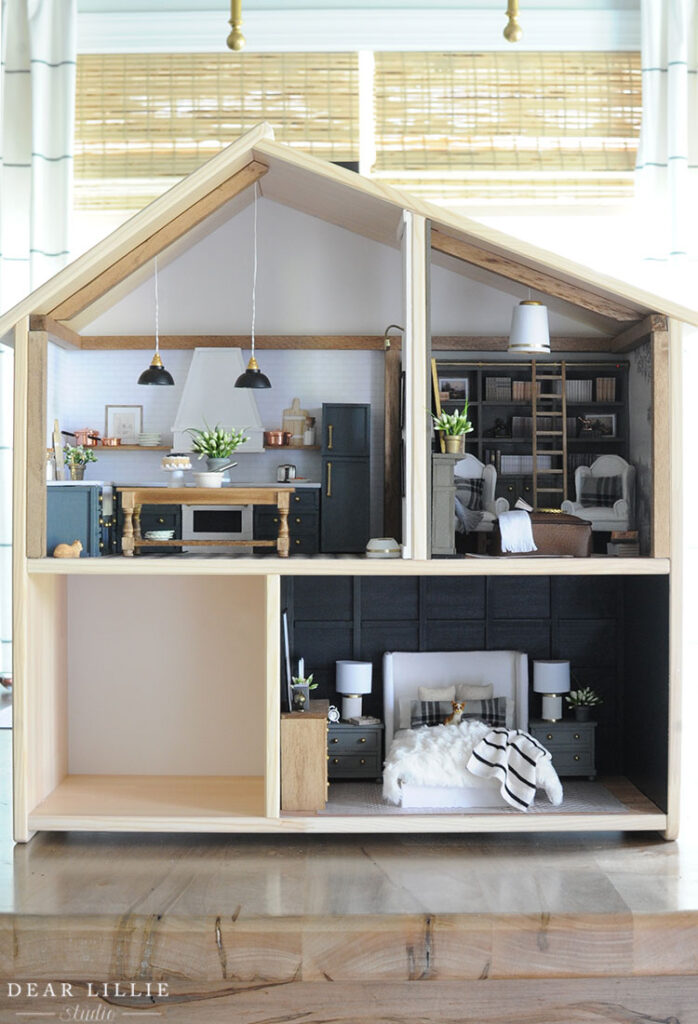
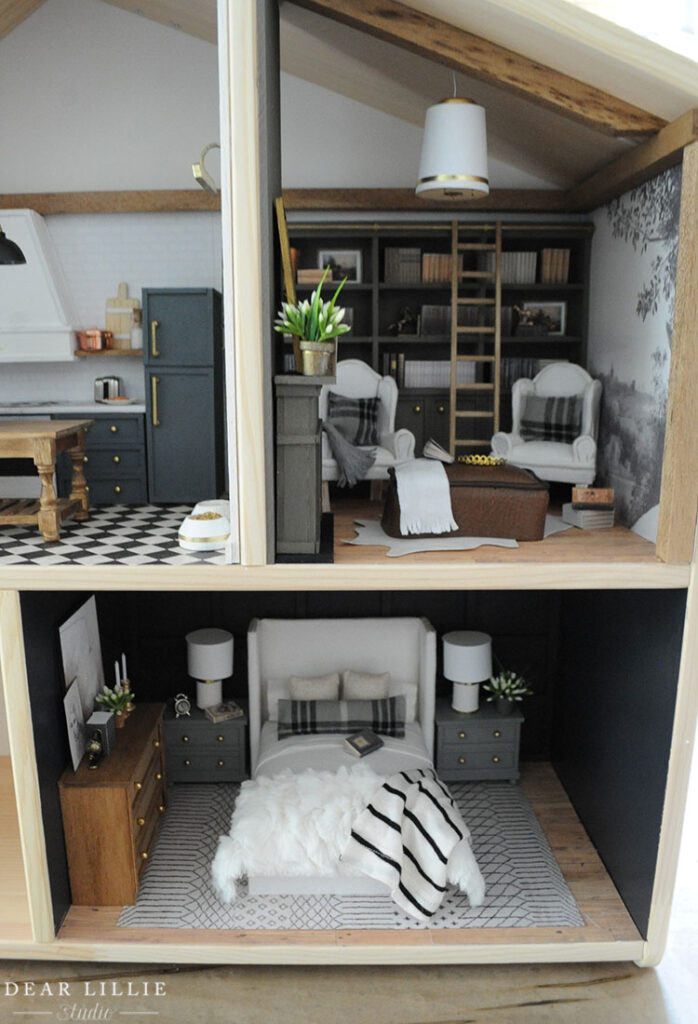
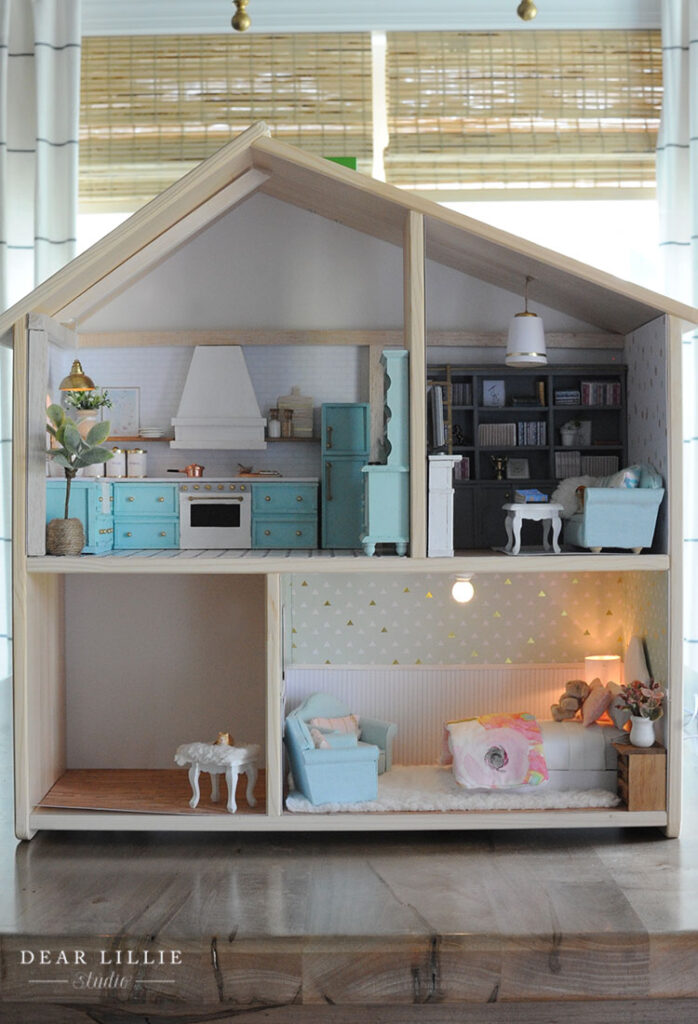
Good morning! Well, I am getting ready to start on some real house projects this week but wanted to share our third finished room in our dollhouses this morning. And then it might be a few weeks before we get around to the final room in our dollhouses but once we do we will share the fully finished photos.
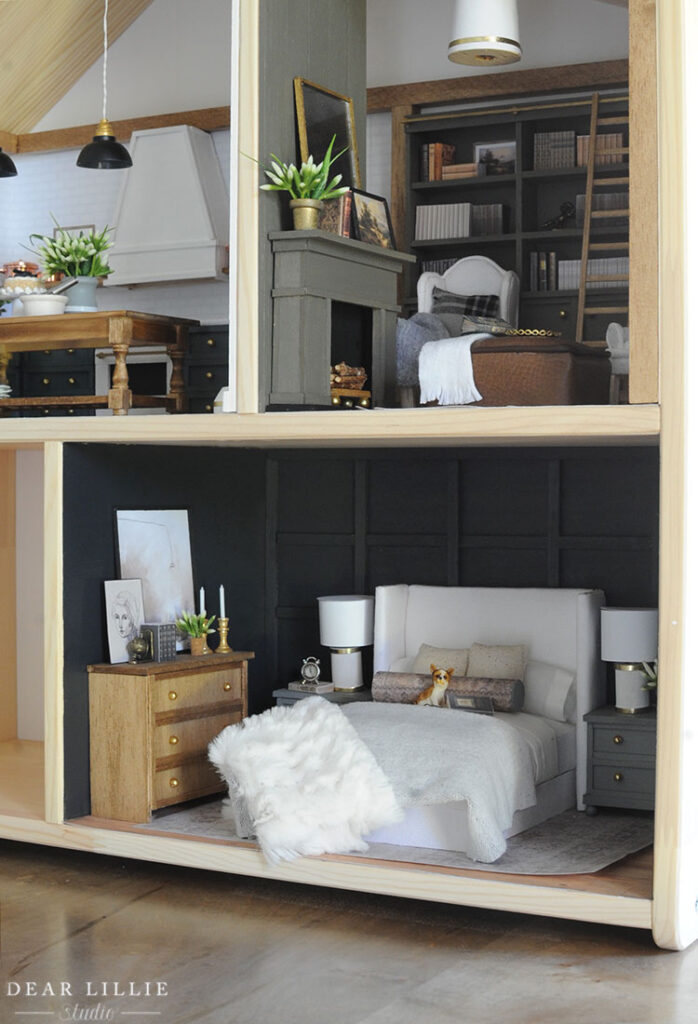
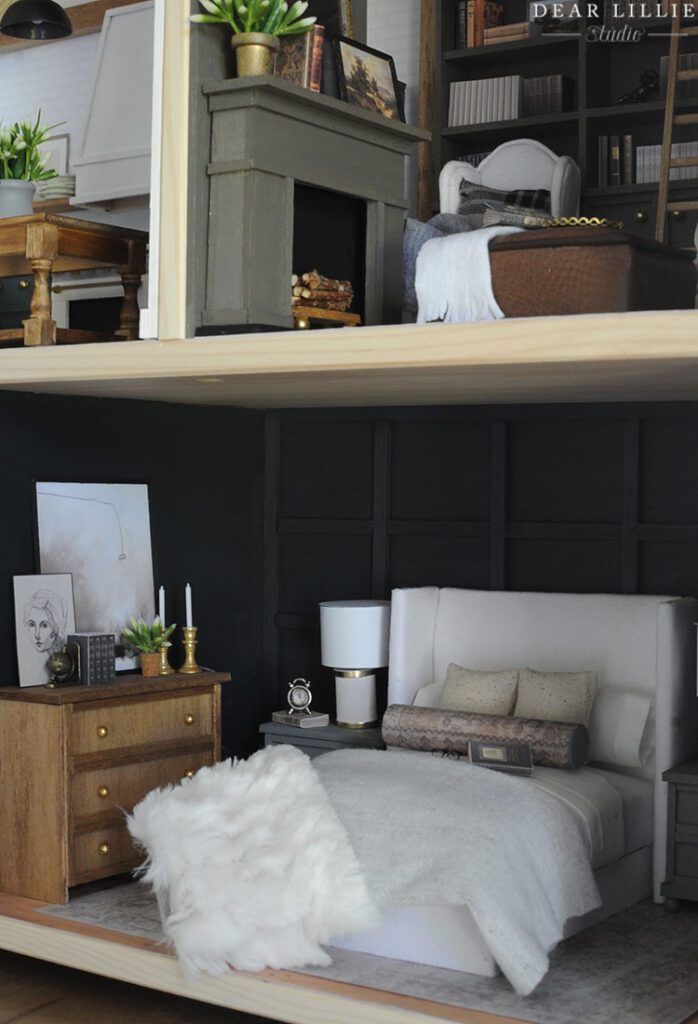
Once Lillie and I had finished our kitchens and studies it was time to move onto our bedrooms. I styled mine two different ways with the bedding/rug. I thought I would like one decidedly better than the other but then I couldn’t decide so I ended up photographing it both ways.
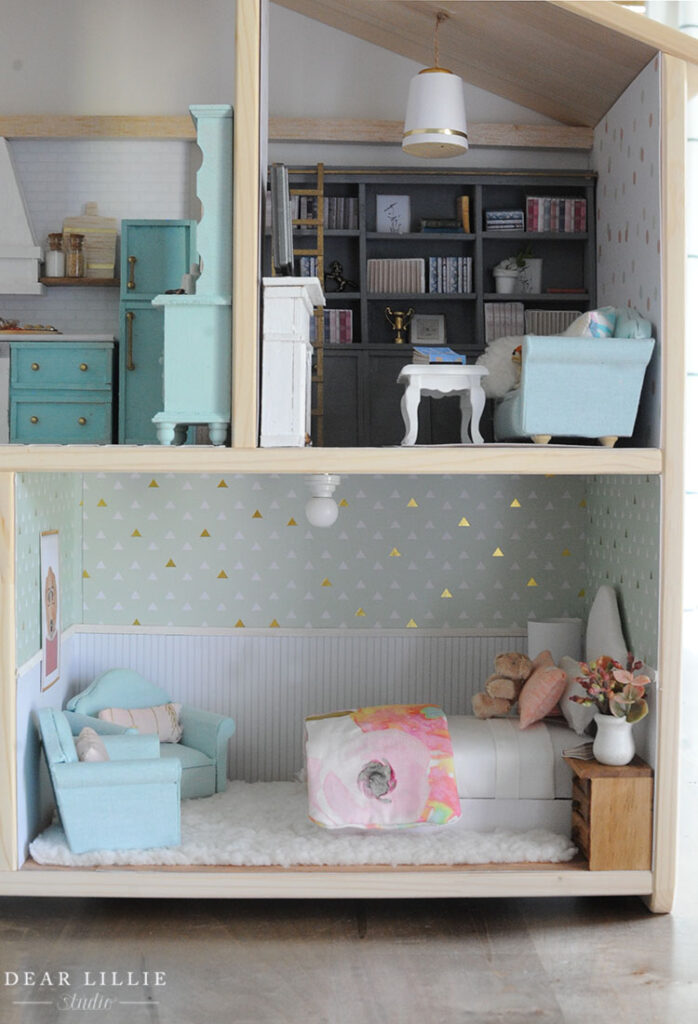
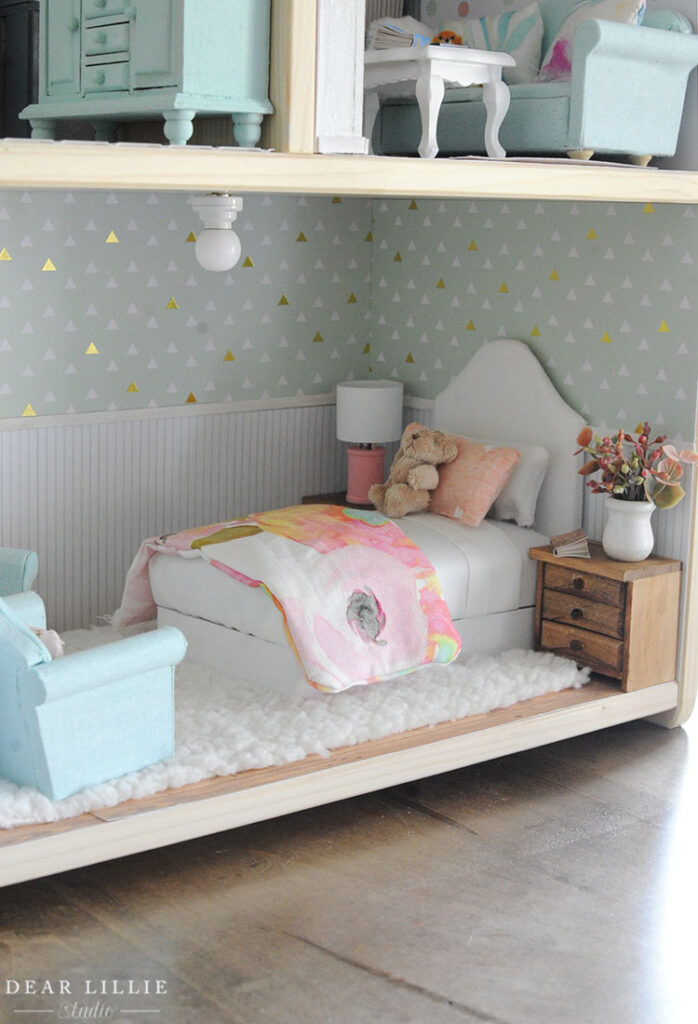
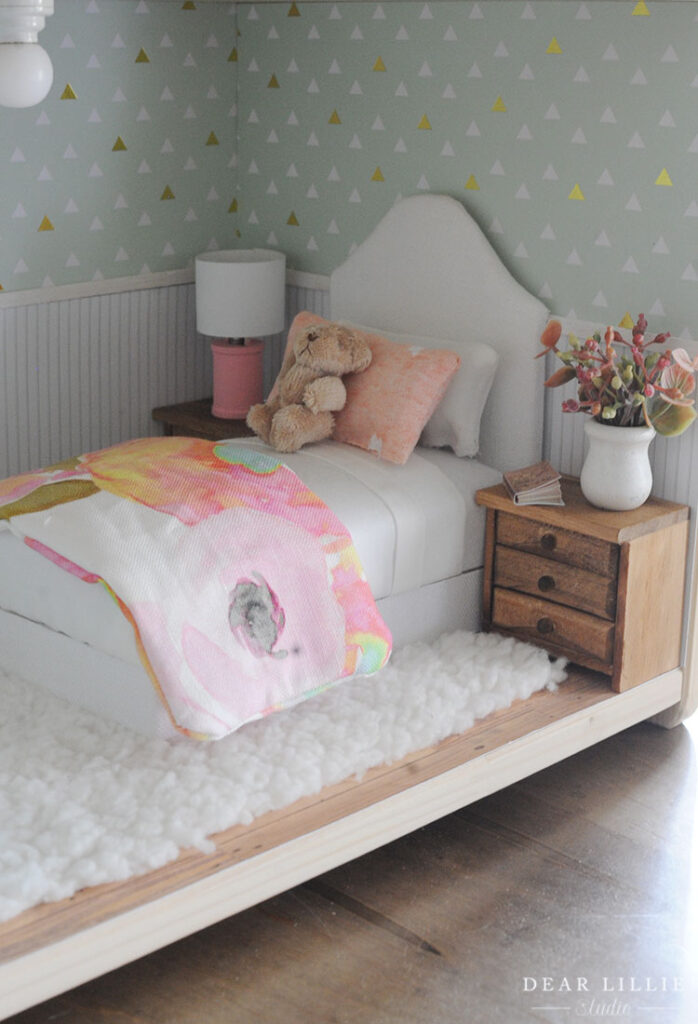
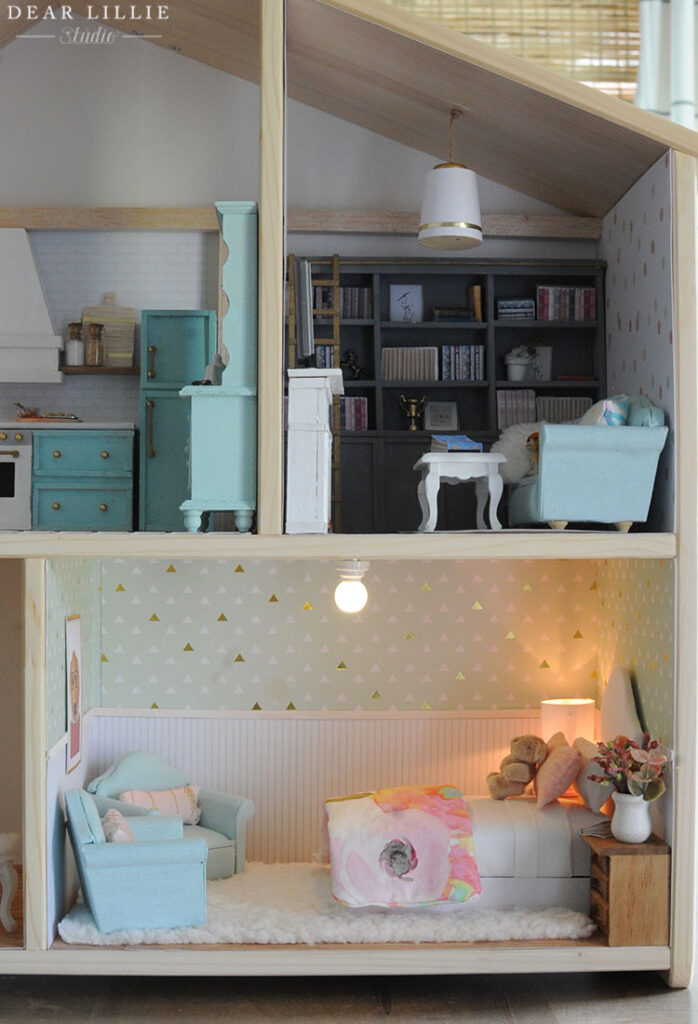
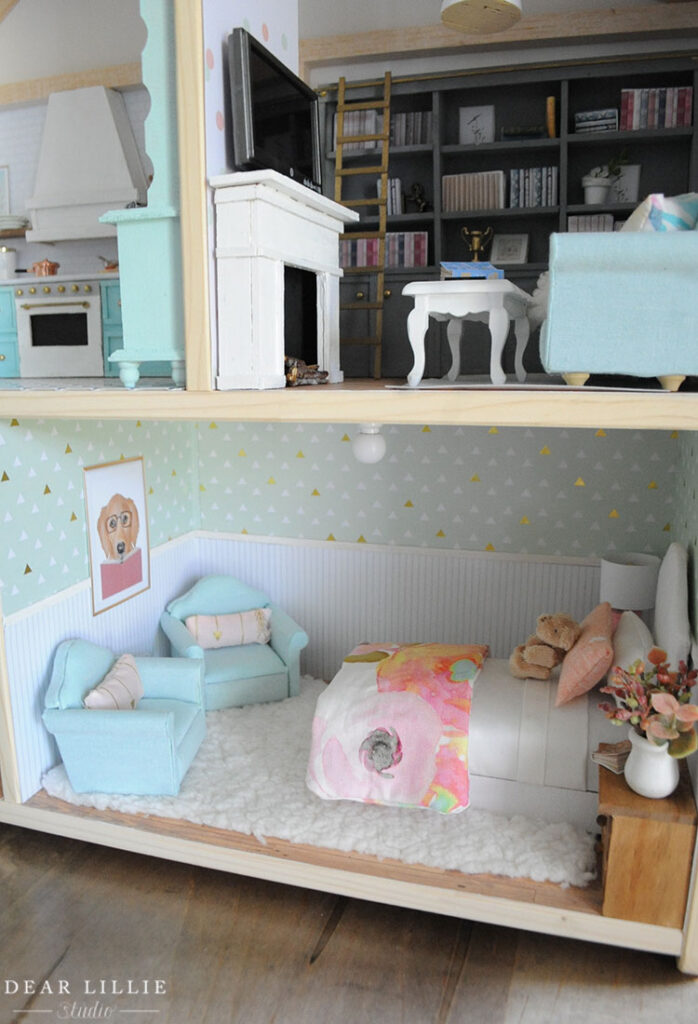
And here is Lillie’s. It’s my favorite room of hers so far! It’s her favorite too. She loves to sew and getting to make the little pillows and quilt and pillowcase was so much fun for her! I’ll have more details on hers at the end of the post.
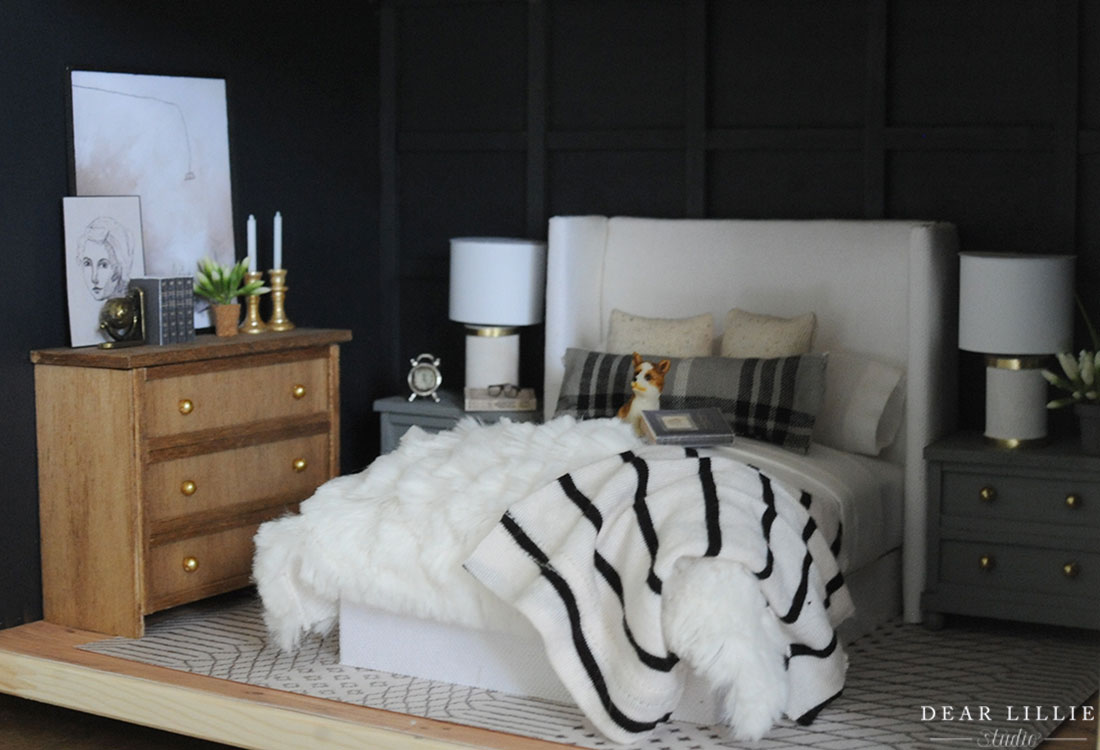
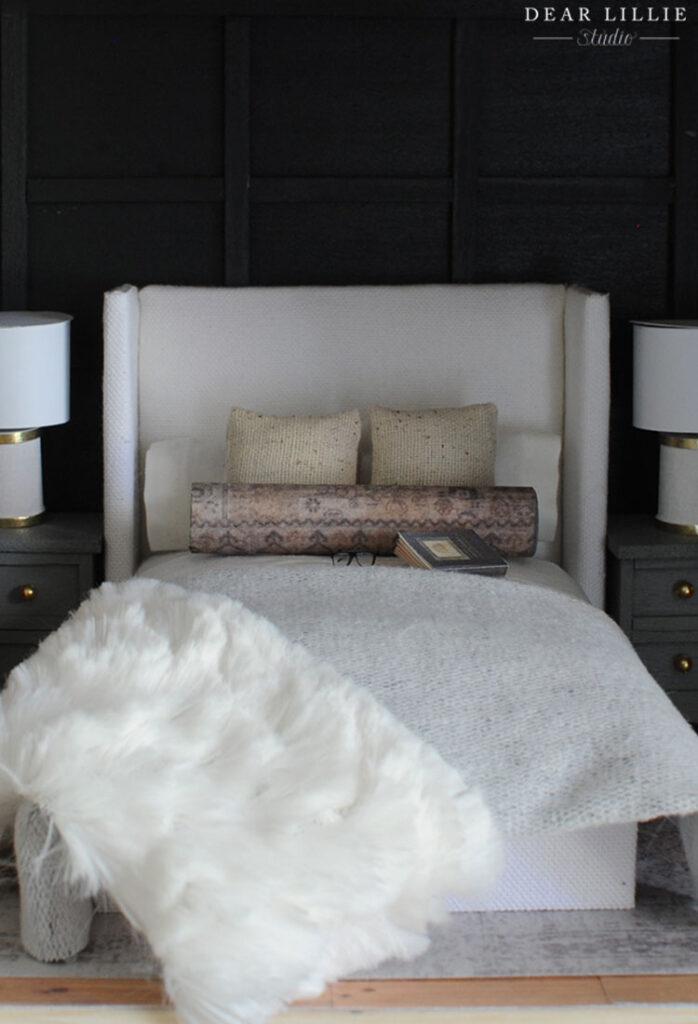
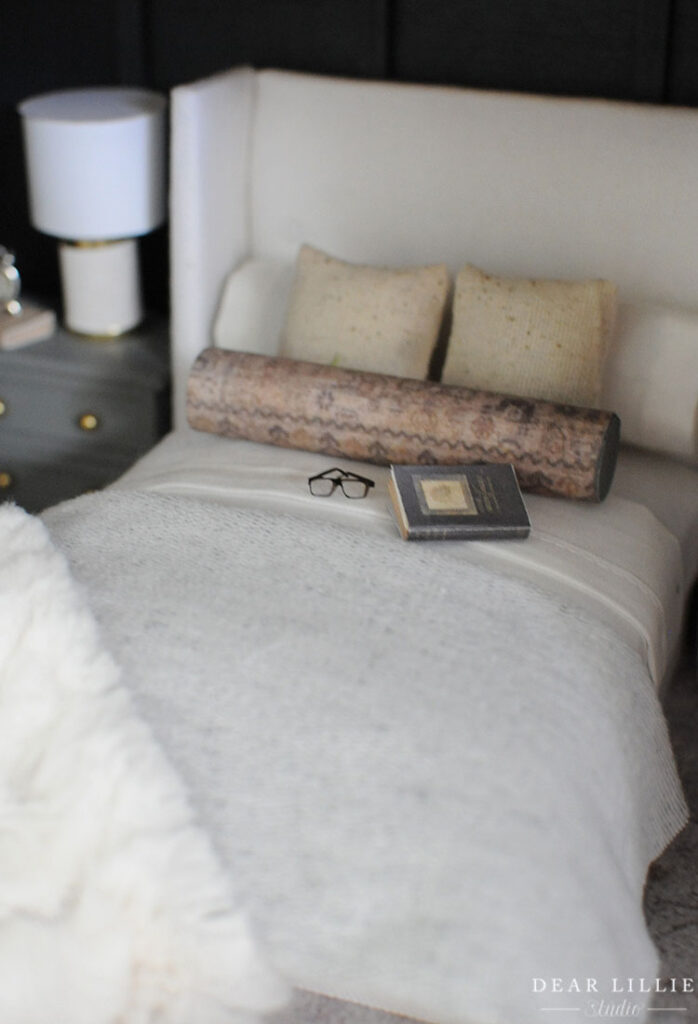
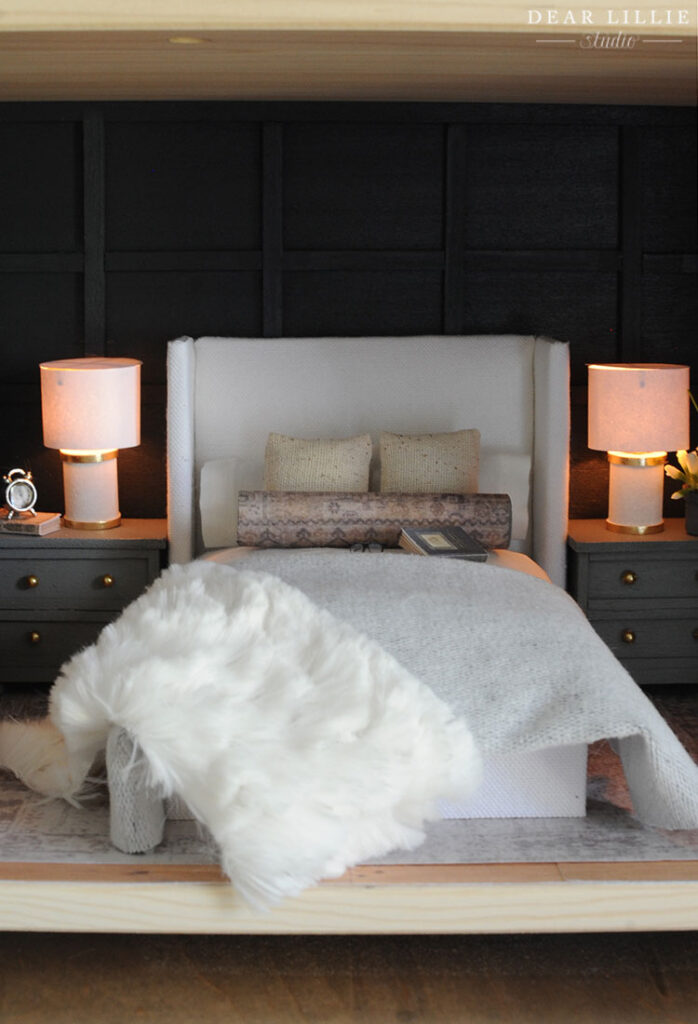
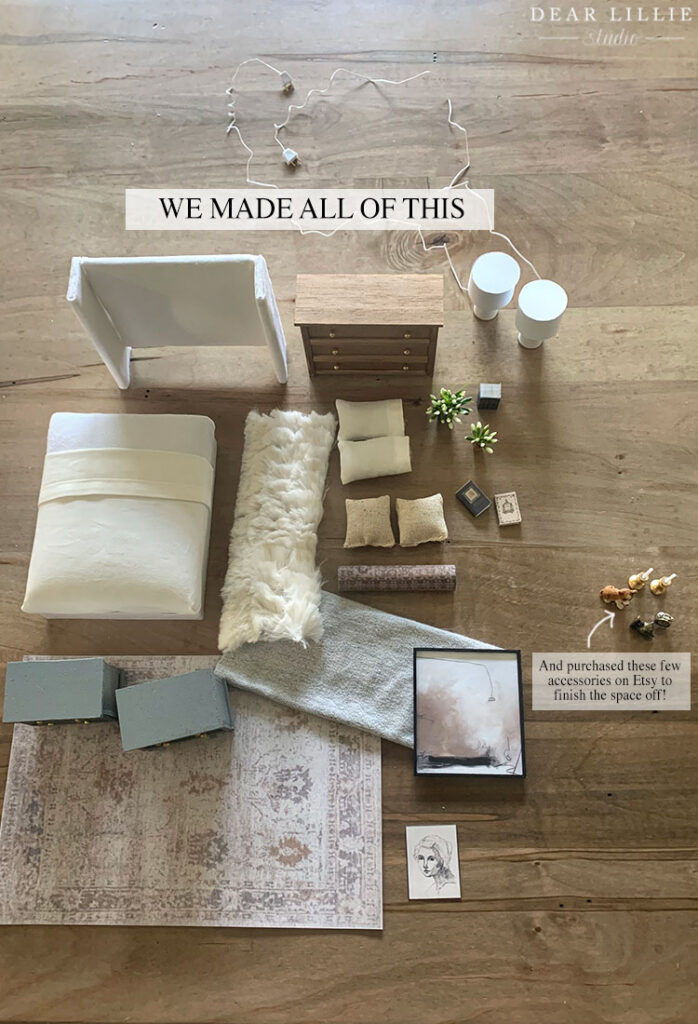
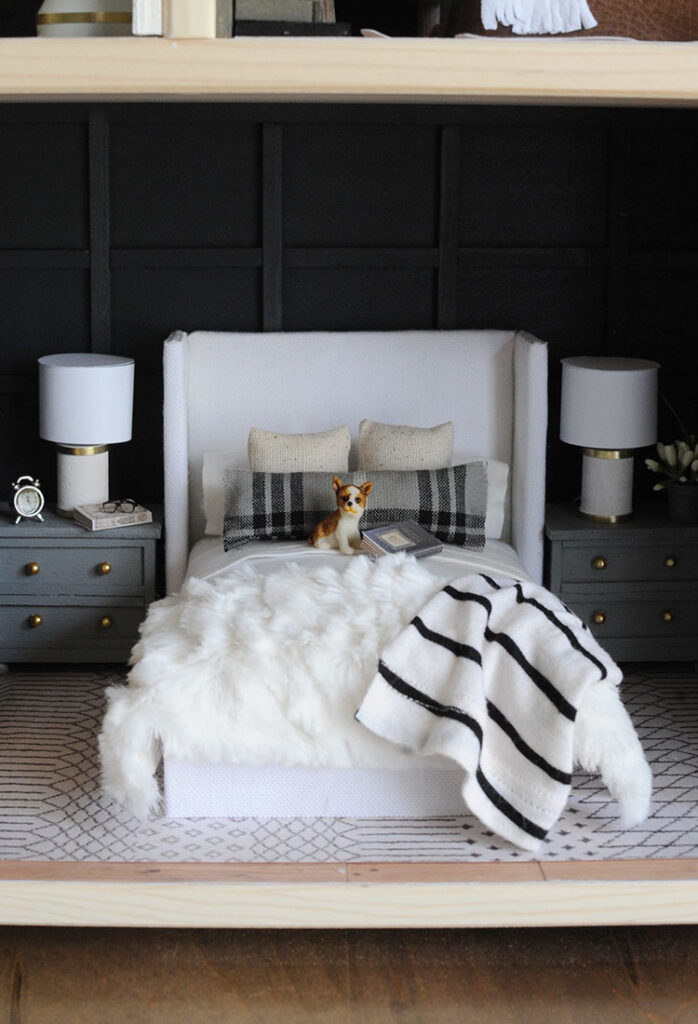
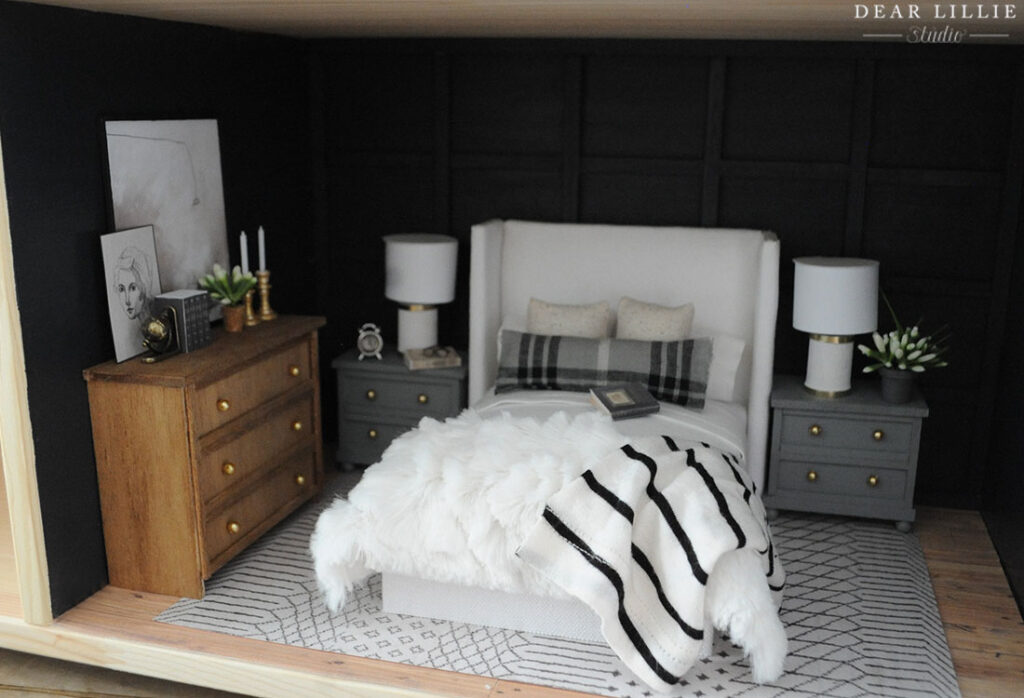
For my bedroom I decided to closely model it after our current master bedroom. I tried to copy our headboard pretty much exactly as it is. I was a little nervous about it because the upholstered chairs were so hard but this turned out to be super easy. I just used foam board, batting, fabric and some glue. I won’t be doing a tutorial for it but I did include photos of the process in our instagram stories and they are saved in our highlights labeled “Dollhouse Part 2” if you are looking for tips. I also made the mattress the same way and then covered it with a top sheet that we made from an old pillowcase. That was Lillie’s idea. I had originally been using an old t-shirt we had cut up but her idea looked so much more realistic! We made the pillowcases that way too. Then the little square pillows we just sewed from scrap fabric we had and the bolster pillow is actually a rug I printed out onto paper and rolled around a wooden dowel I had. The quilt at the end of the bed was cut from an old pair of sweatpants and then the fuzzy throw was just cut from some fuzzy fabric.

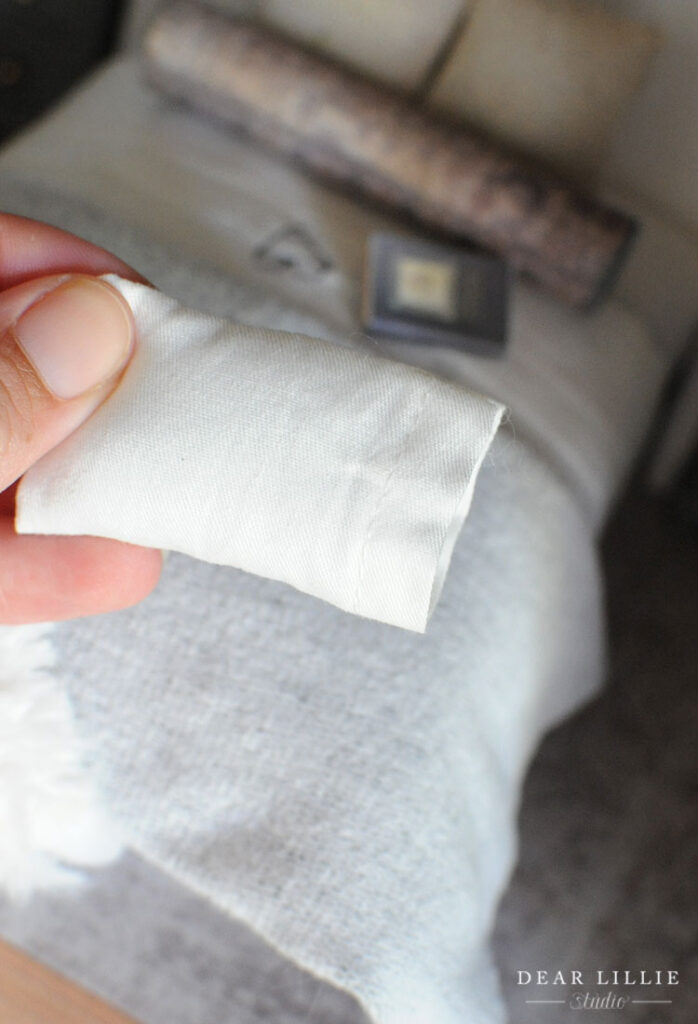
Here’s a closeup of the little pillowcase:
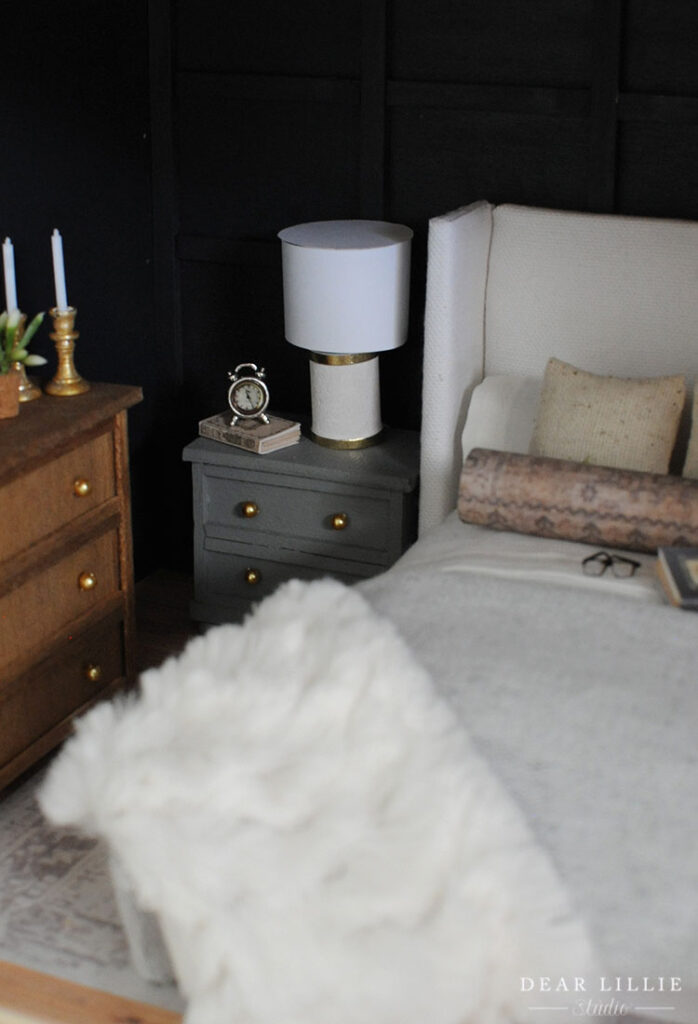
How cute is the little tiny alarm clock? I tried to make pretty much everything I possibly could by hand including all of the furniture, bedding, artwork, rug, etc., but did splurge on a few tiny little accessories to finish the room off – the candlesticks, bookend, alarm clock and teeny tiny glasses.
I love this sketch of the girl so much! I want to order it for real now! We made more books than we needed when we made our libraries so we used some of the extra ones in our bedrooms.
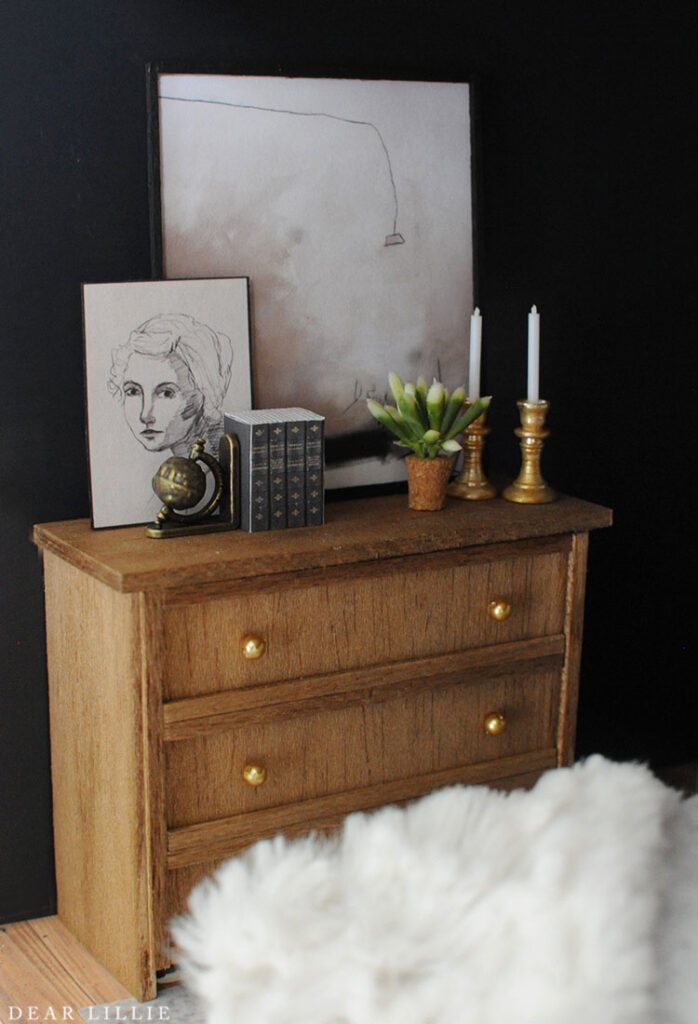
The quality of the candlesticks is so impressive! They are surprisingly heavy and the candles are so realistic! They only came in silver so I just added a light coat of gold paint to them to go with the room.
We still get really excited when we turn the lights on and off! Haha! We shared more details on how we made these lamps in our instagram stories as well and they are also all saved in our highlights section labeled “Dollhouse Part 2”.
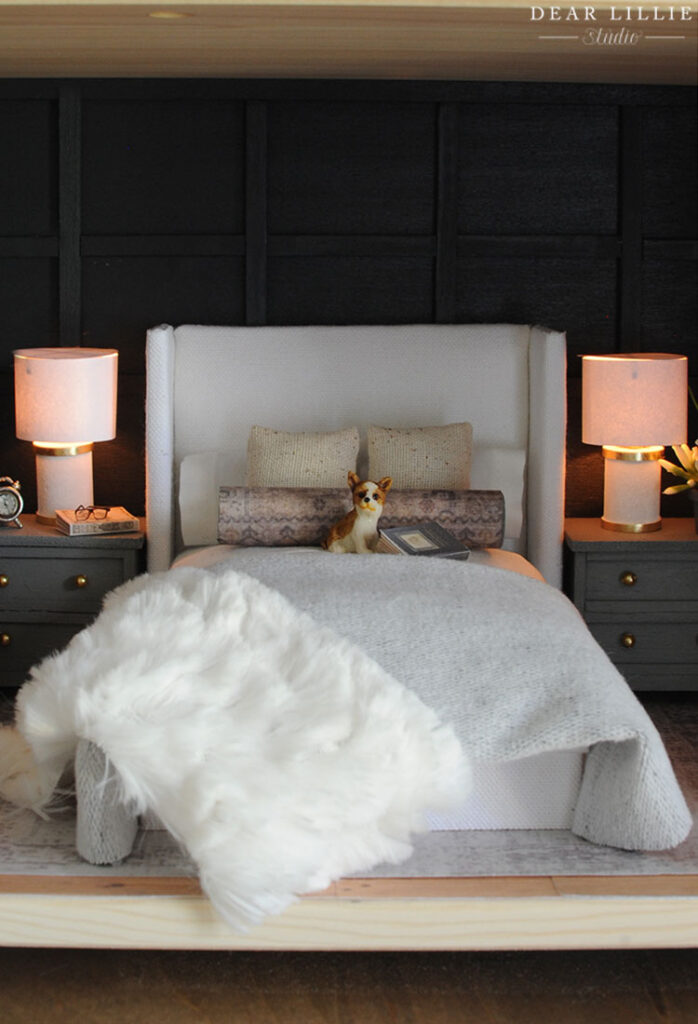
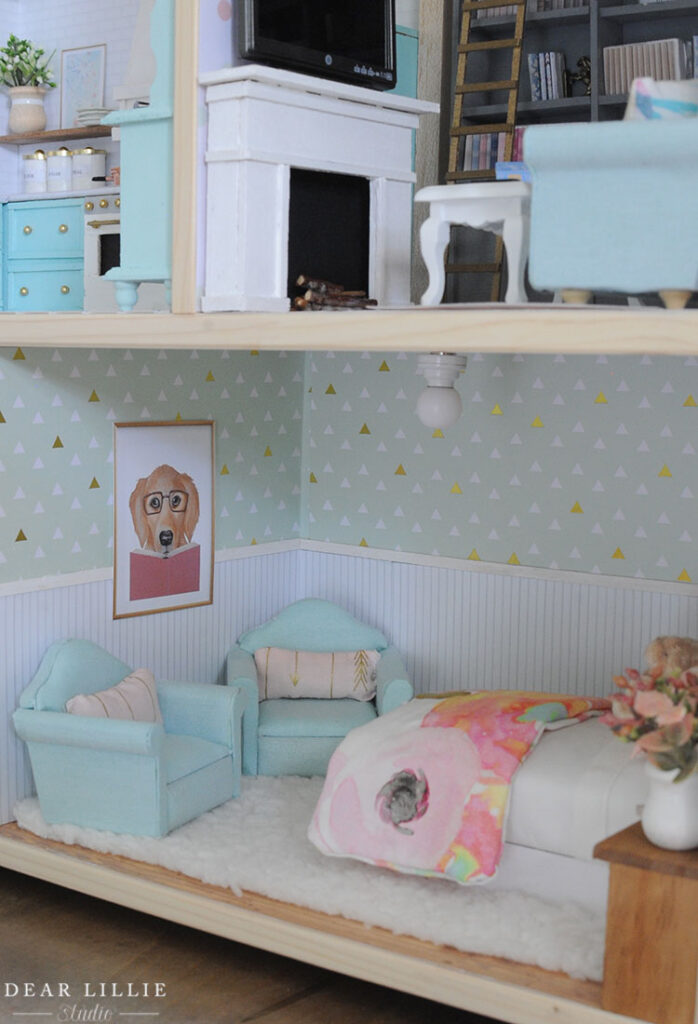
And just for fun we added a puppy too – seeing how that’s pretty much Teddy’s favorite spot in our real house – haha!
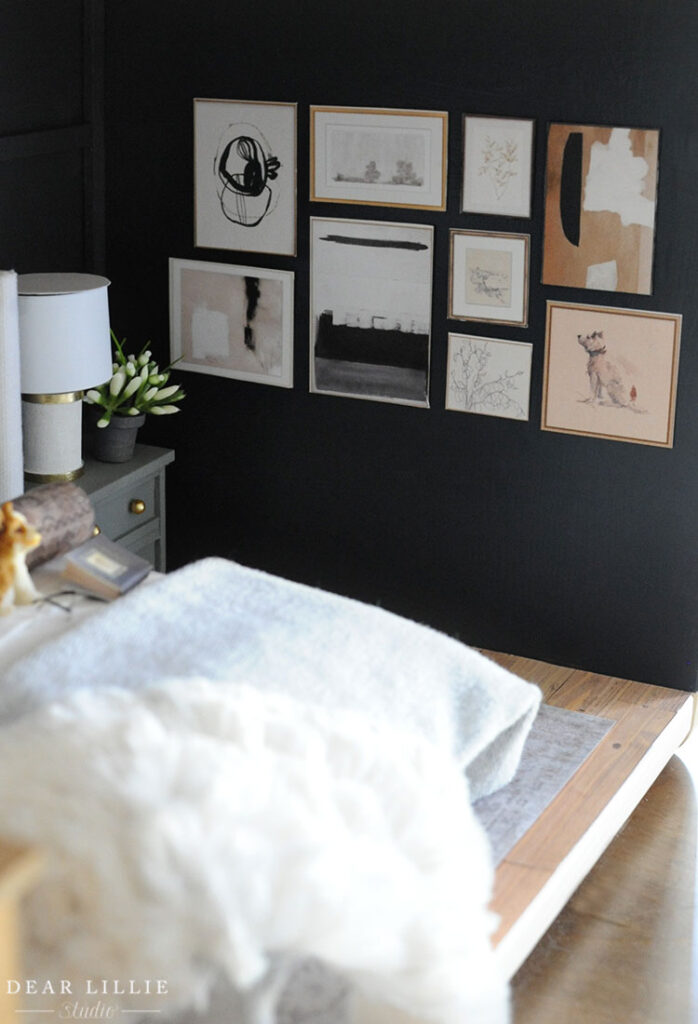
I also tried playing around with a gallery wall on the bare wall but Lola informed me it was way too busy and she was right! So I took it back down about five minutes later. The artwork on the top left is from Minted (and what we currently have in our real bedroom) and all the rest are from McGee and Co. I really love the dog on the bottom right! I left this wall bare for now but may at some point add a tall leaning mirror here or something simple like that.
As you can see – it really saves a ton of money if you make as much as possible yourself. And it’s really easy to do!
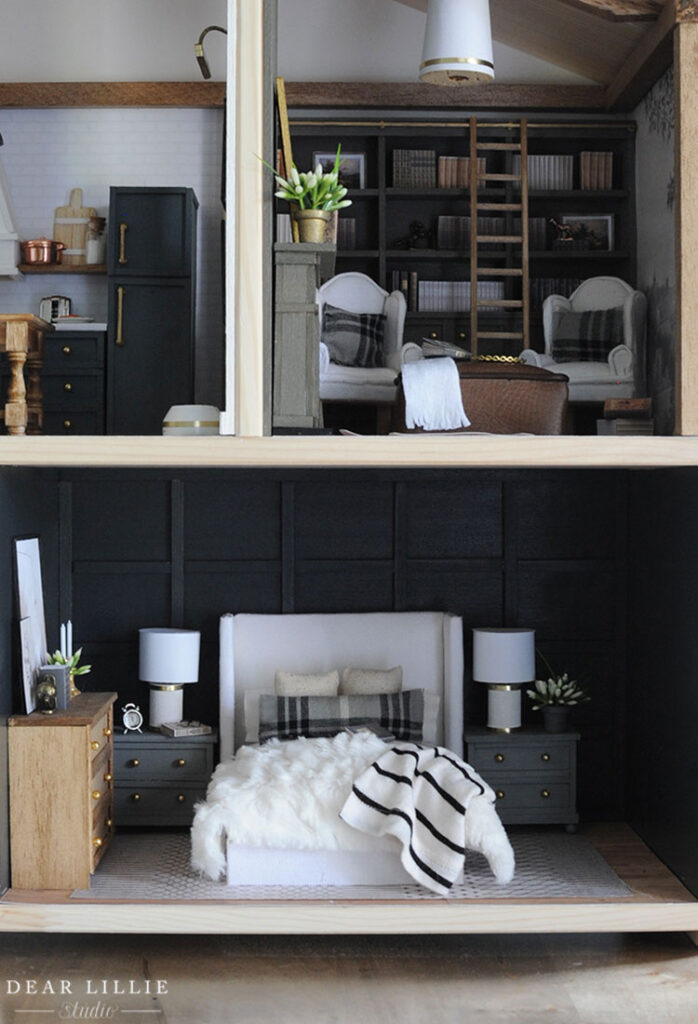
And here is a different rug, bolster and throw for a slightly different feel for the room:

I really really love how Lillie’s room turned out. She really wanted to do the same look as her real room where there was only wallpaper on the upper part of the walls and I am so glad she did because it turned out so good! I had initially encouraged her to just do the wallpaper from the floor to the ceiling because I thought that would be easier for her but she didn’t have any trouble at all pulling off this look! I helped her make the headboard but then she made all her bedding and pillows completely herself. I built the lamp for her because that ended up being a little tricky but then she painted it the perfect shade of peachy pink to go with the quilt she made for the end of the bed! She really loves the decorating, sewing and painting parts of the dollhouse but doesn’t enjoy the building furniture part as much as I do. She doesn’t mind it – that’s just not her favorite part so when we can find her inexpensive pre-made pieces that she just has to paint we snatch them up like these nightstands that were $2.99! And the little bear was a fun little Etsy find.
The chairs came as a set with the sofa and coffee table that we got for her study and worked really well as a seating area in her bedroom. And then the artwork is one of our Ruby Downloads that we just shrunk down tiny and printed out.
Here you can see it with the lights turned on!
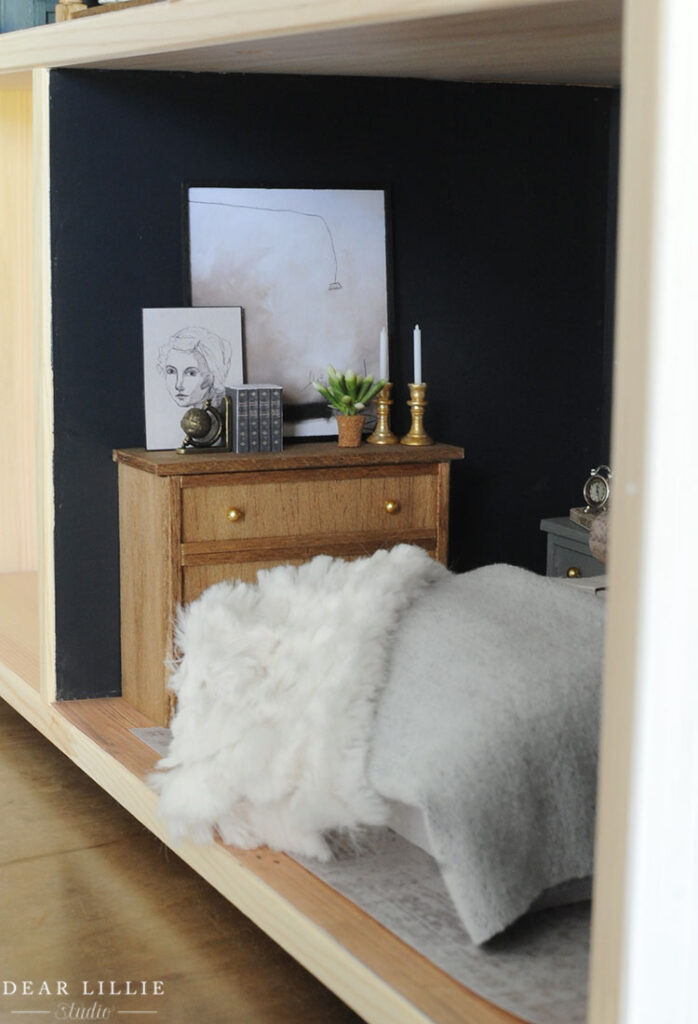
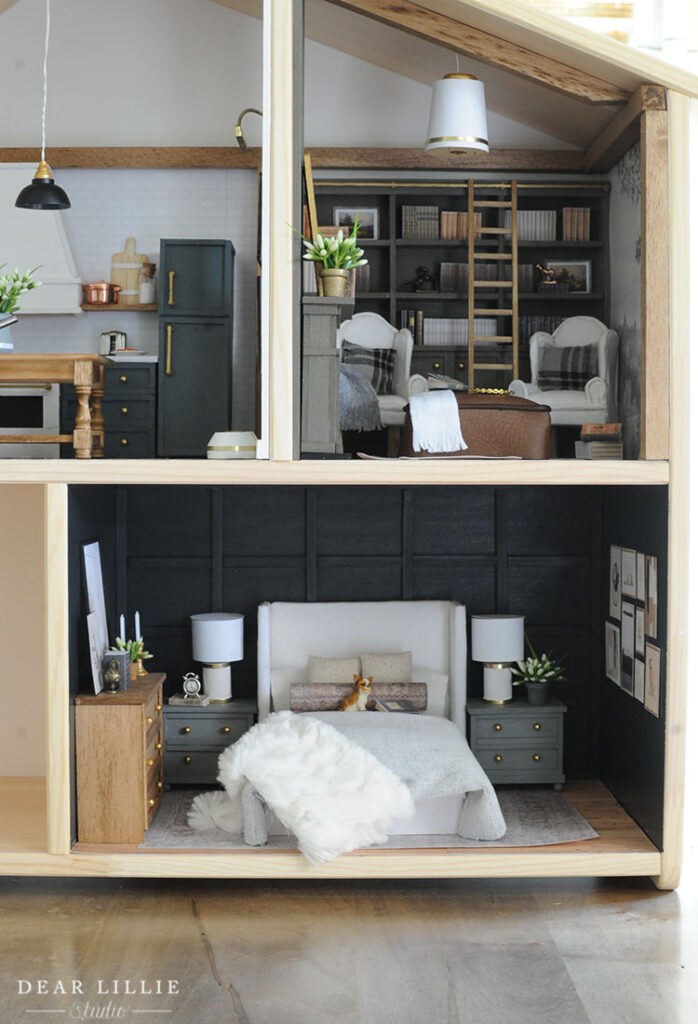
And here you can see we are 3/4 of the way done with the inside!
Well, that’s it for today. Here is all of the source information:
My Dollhouse Bedroom Sources:
Wall Color – Soot by Benjamin Moore (leftover from real house projects)
Feature Wall – Made from thin strips of Balsa Wood
Floor – Download from This Etsy Shop
Headboard – Made using foam board, batting, white fabric and gorilla glue
Bed Frame – Made using balsa wood and fabric
Mattress – Made using foam board, batting and an old T-shirt
Bed Sheet and Pillow Cases – Made using an old pillow case
Square Pillows – Made using scrap fabric and batting
Round Lumbar Pillow – paper glued over a wood dowel and then just painted the ends of the dowel a coordinating color
Plaid Lumbar Pillow – just sewed using scrap fabric and batting
Gray Quilt – cut from an old pair of sweatpants
Fuzzy Quilt – cut from a fuzzy scrap of fabric
Black and White Striped throw – cut from an old shirt of Lola’s
Dog – Etsy
Glasses – Etsy
Nightstands – Made using Balsa Wood, Wood Glue and Beads
Lamps – Made using spools from Michaels, this wiring, basic paper, tiny strips of balsa wood and thin gold tape
Books – we made them ourselves – you can read more about them in this blog post
Alarm Clock – Etsy
Flowers on Nightstand – made from tiny flower pot found in a pack at Michael’s and glued tiny flowers into it
Dresser – Made from Balsa Wood, Wood glue and beads and then stained Early American by Minwax
Large Artwork on Dresser – Made from a printout of this artwork from Studio Mcgee and framed with tiny strips of Balsa Wood
Smaller Artwork on Dresser – Made from a printout of this artwork from Studio Mcgee
Books – We made (you can read more about them here)
Globe Bookend – Etsy
Candlesticks – Etsy
Flowers on Dresser – Tiny flower scraps glued into a tiny cork
Neutral Rug – Printed out copy of this rug
Black and White Rug – printed out a copy of this rug
Lillie’s Dollhouse Bedroom Sources:
Wallpaper – craft paper from Hobby Lobby
Beadboard – we created on our own in photoshop but I recommend this Etsy shop’s download as well then she painted a thin white piece of balsa wood to act as a chair rail and glued it where the two papers met
Floor – Download from this Etsy Shop
Headboard – Made using foam board, batting, white fabric and gorilla glue
Bed Frame – Made using balsa wood and fabric
Mattress – Made using foam board, batting and an old T-shirt
Bed Sheet and Pillow Cases – Made using an old pillow case
Other Pillows – Made using scrap fabric and batting
Teddy Bear – Etsy
Quilt at End of Bed – just sewed using scrap fabric and batting
Nightstands – Hobby Lobby (we didn’t use the backsplash piece)
Rug – Fuzzy fabric from Hobby Lobby cut down to size
Chairs – Hobby Lobby
Artwork – Printout of our Ruby Download
Overhead Light – Hobby Lobby (not sure I would recommend it personally)
Lamps – Made using spools from Michaels, this wiring, basic paper, tiny strips of balsa wood and thin gold tape
For Dollhouse Kitchen Sources you can click here
For Dollhouse Study Sources you can click here
For Dollhouse Kitchen Cabinets tutorial you can click here
I hope you all have an amazing week!
Warmly, Jenni


