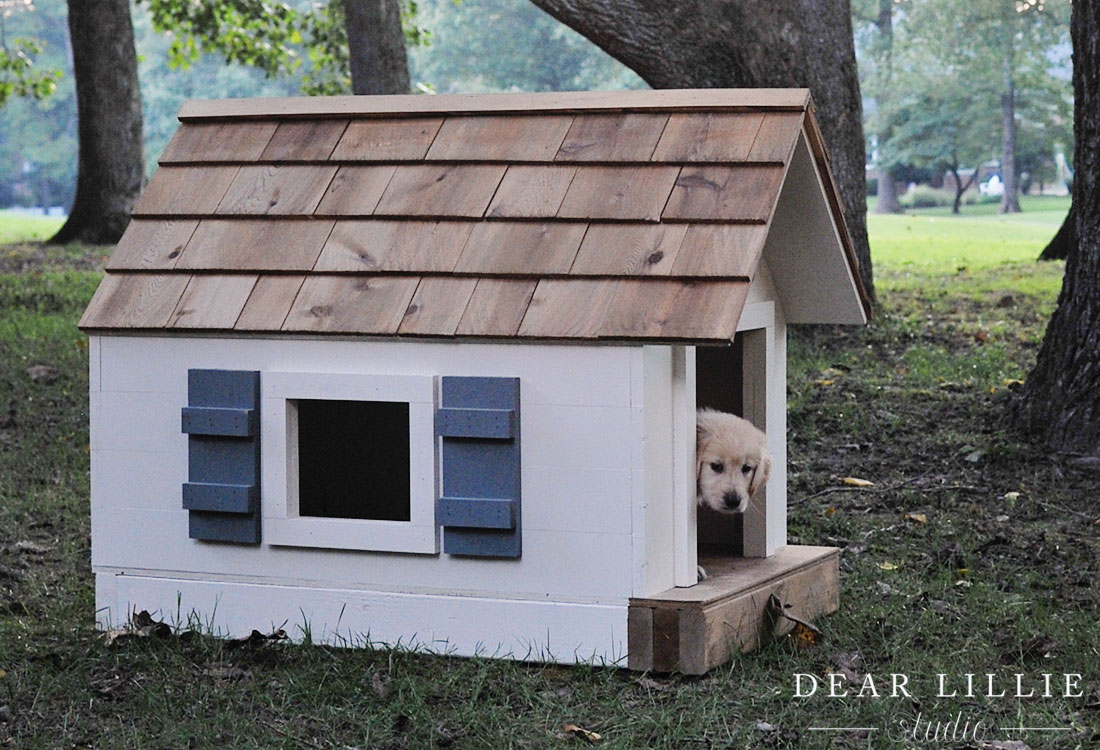
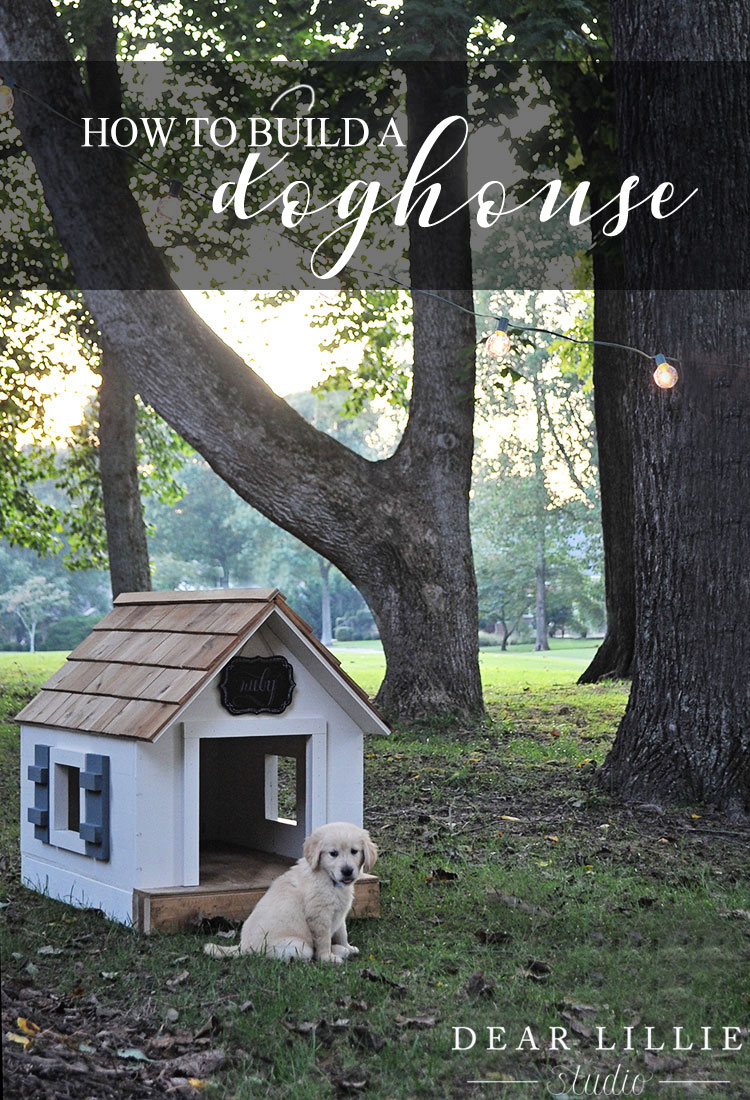
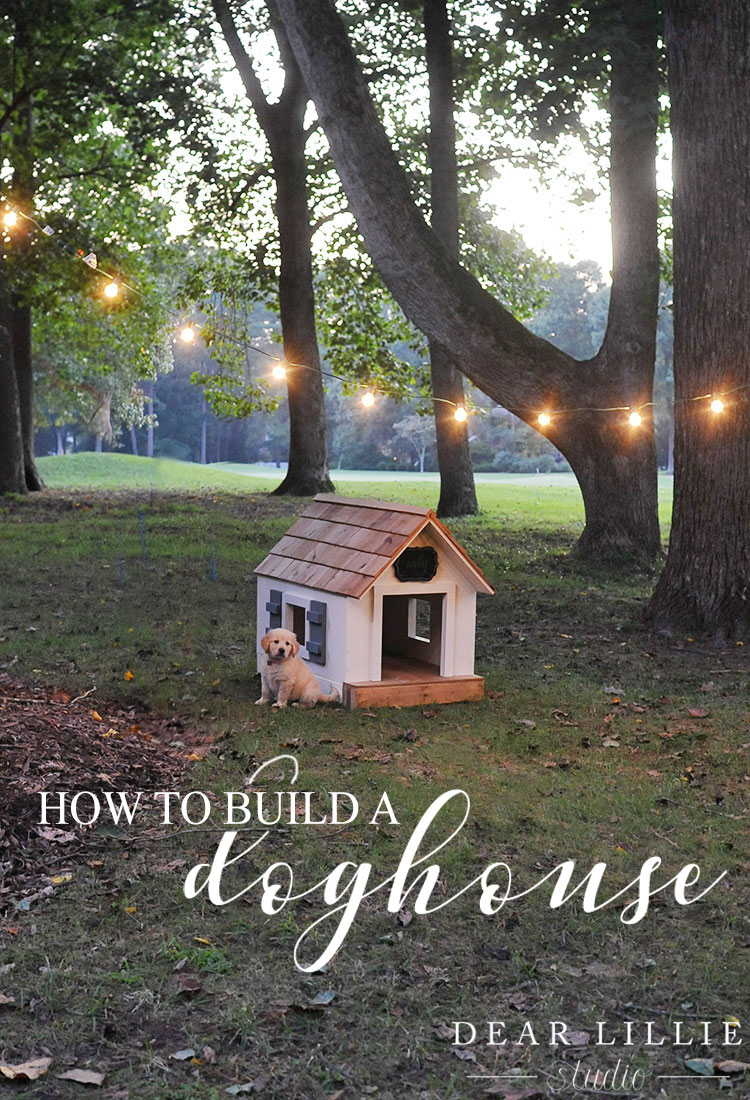
Although I can’t say anyone would describe our family as “animal people,” we were all so excited when we heard that Jenni, Jon, and the girls would be bringing home a brand new golden retriever puppy! Naturally (being the kind of uncle that I am) I immediately decided to surprise the girls with a handmade doghouse for little Ruby. Below you will find my much-lower-quality-than-you-are-used-to photographs, step-by-step instructions, the required tools, and the list of materials you will need to purchase to complete the project!
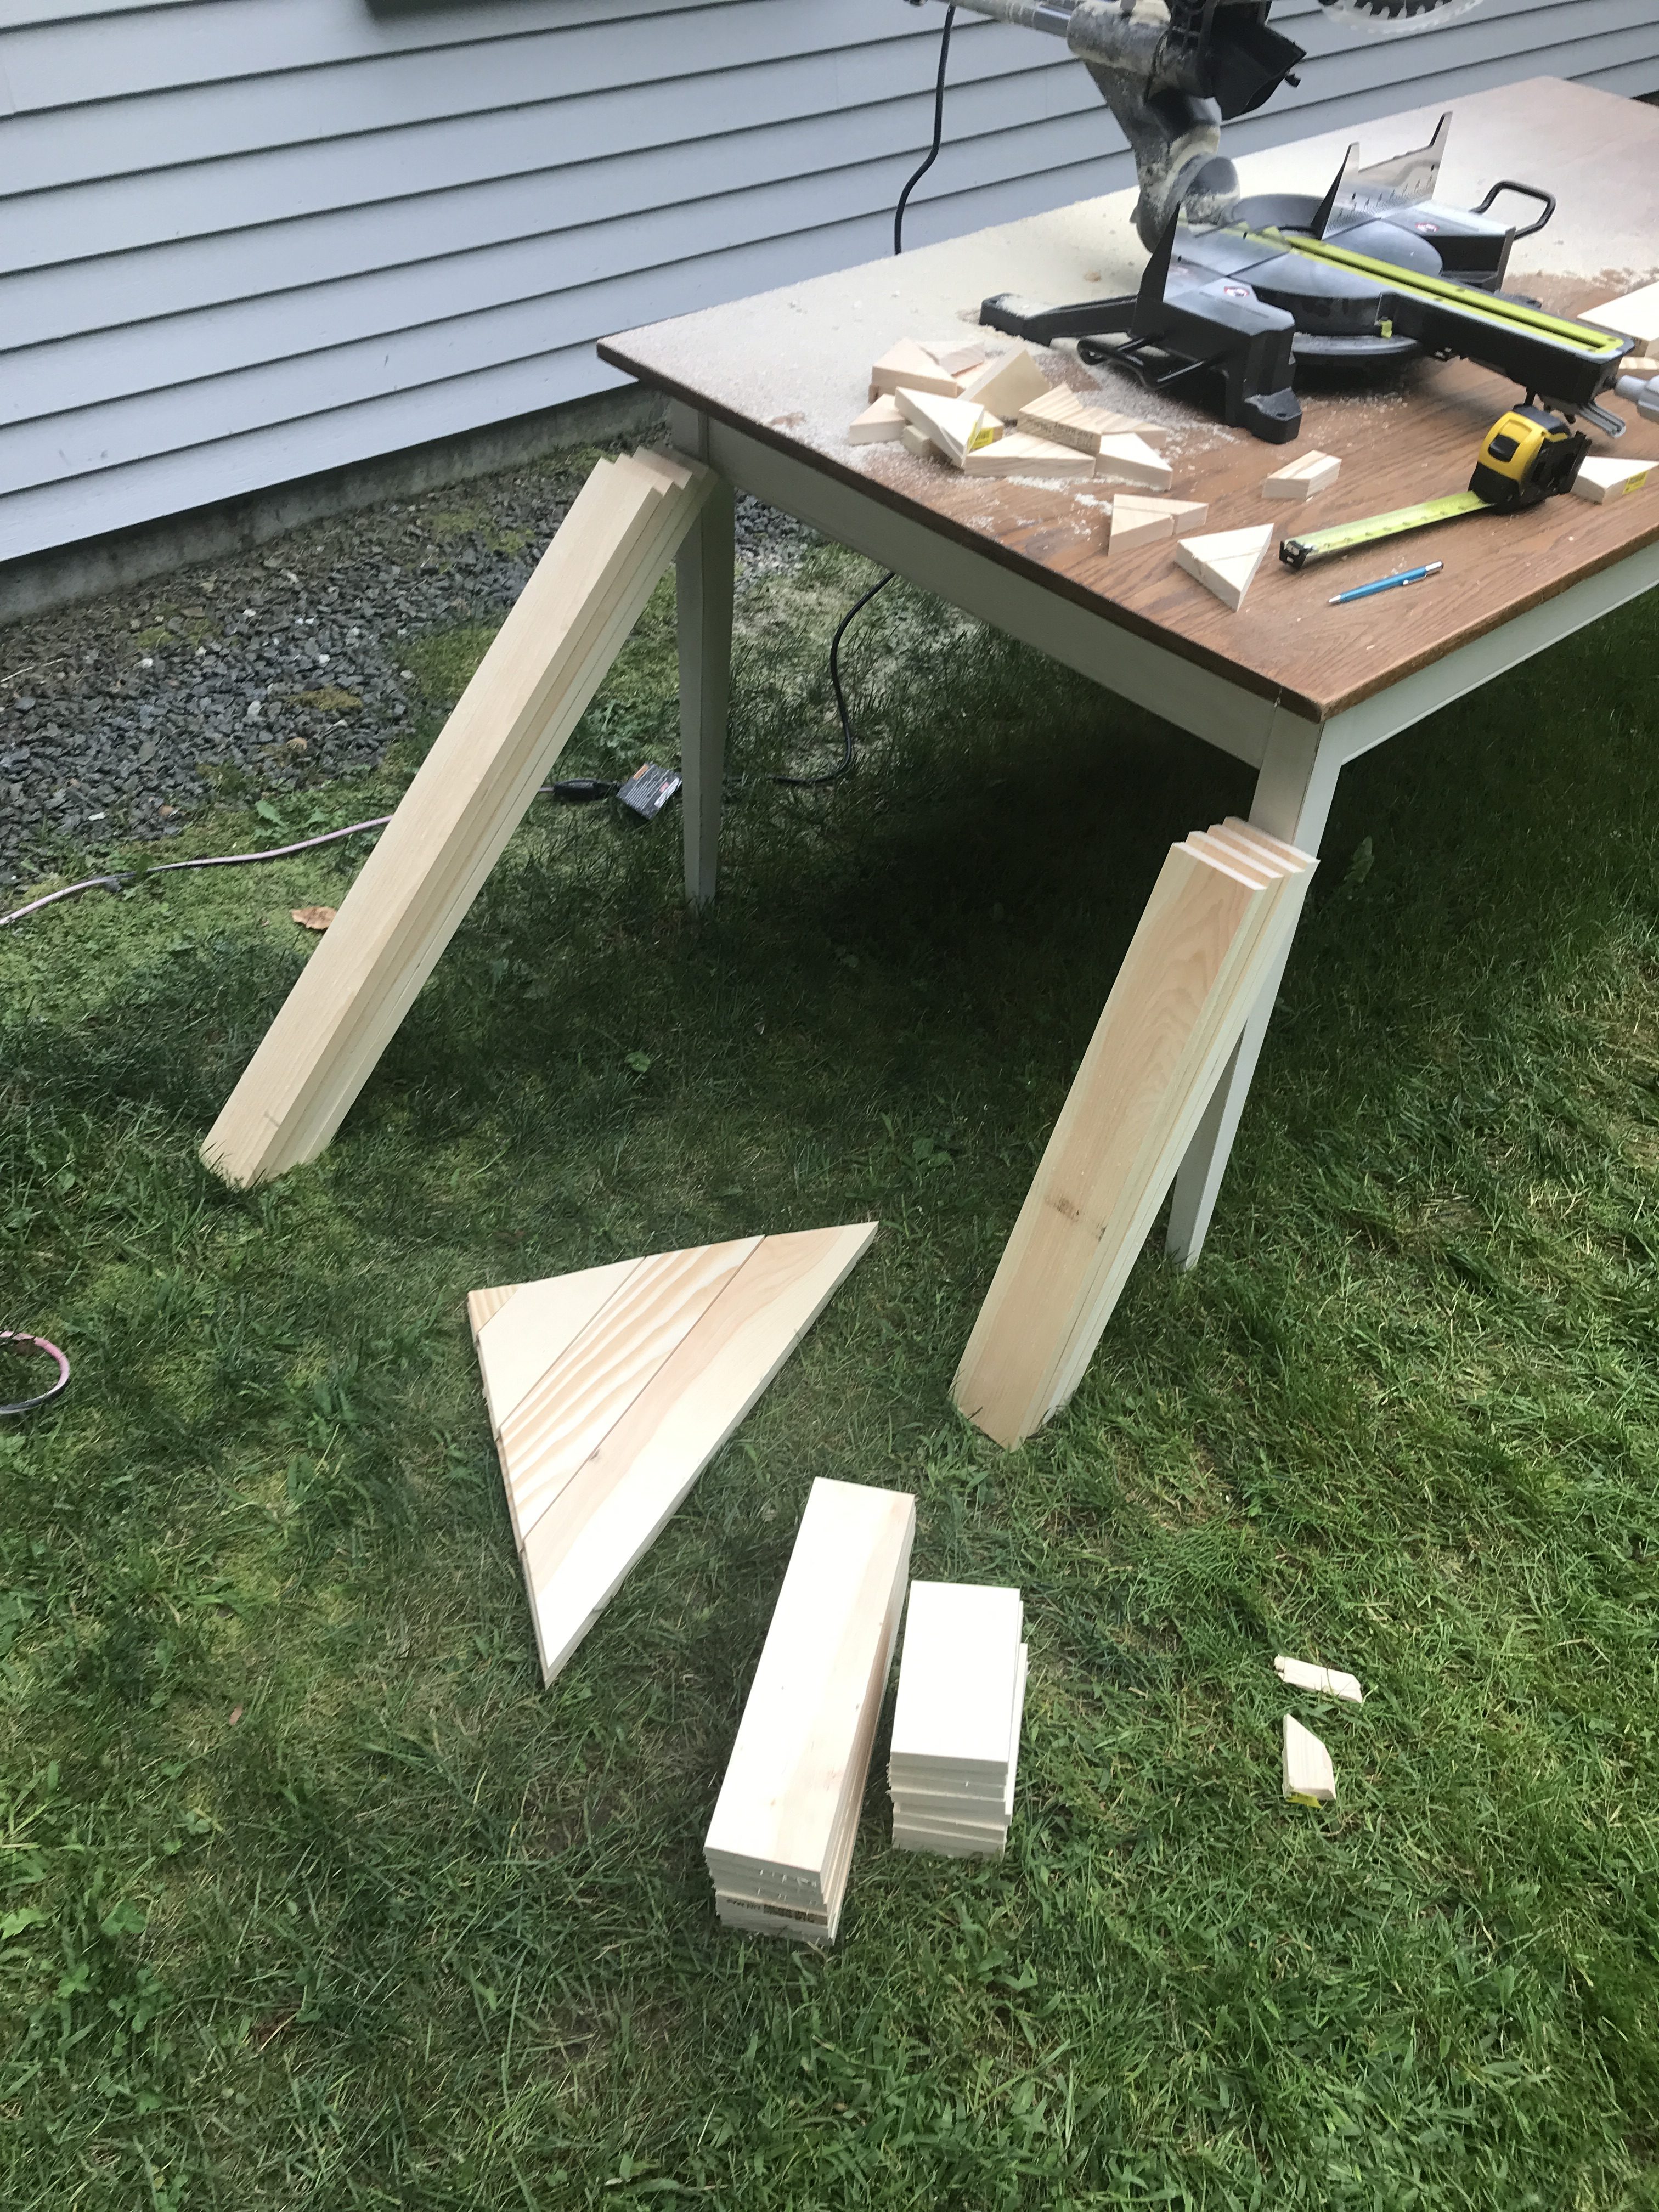
Step 1: Make Your Cuts
Using my Miter Saw, I generally like to make my longest cuts of each size board first and work my way down to the smallest, that way you can sometimes luck out and end up turning the scraps from your initial cuts into your smaller length cuts.
1/2″ Plywood
1 @ 24×39.5″
1 @ 17.5×41.25″
1 @ 17×41.25″
1 @ 1.5×41.25″
1 @ 2×41.25″
*I had my local lumbar store make these cuts for me.*
2×4 Pine (Straight Cuts)
2 @ 33.5″
4 @ 24″
1 @ 21″
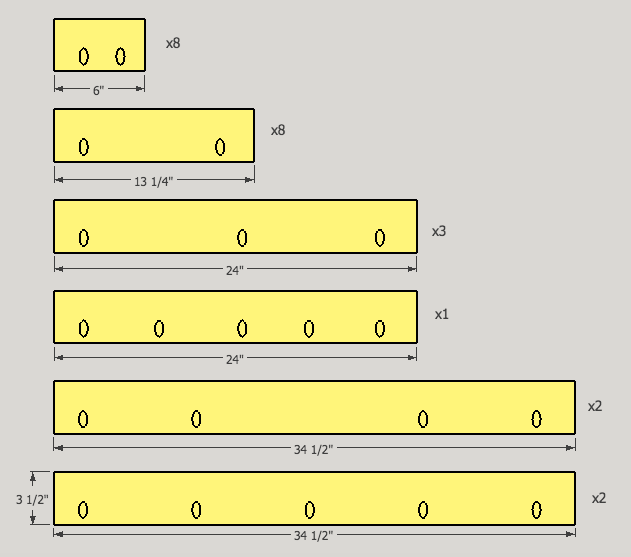
1×4 Pine (Straight Cuts)
4 @ 34.5″
4 @ 24″
8 @ 13.25″
8 @ 6″
1×4 (45 Degree Cuts)
2 @ 24″
2 @ 17″
2 @ 10″
2 @ 3″
*Length for these is measured from the bottom/longer side of the board. Cut each side at 45 degrees and angled in, so that the top of your board ends up 7″ shorter than the bottom side. Be EXTREMELY careful cutting the 3″ boards, as your result will be a tiny triangle. Cutting these from a much longer board that you secure far away from the blade (as opposed to a 3″ board) will result in a much safer cutting process.*
1×2 Pine (Straight Cuts)
1 @ 15″
2 @ 14″
4 @ 11″
12 @ 10″
4 @ 7″
8 @ 4.5″
Step 2: Build Foundation
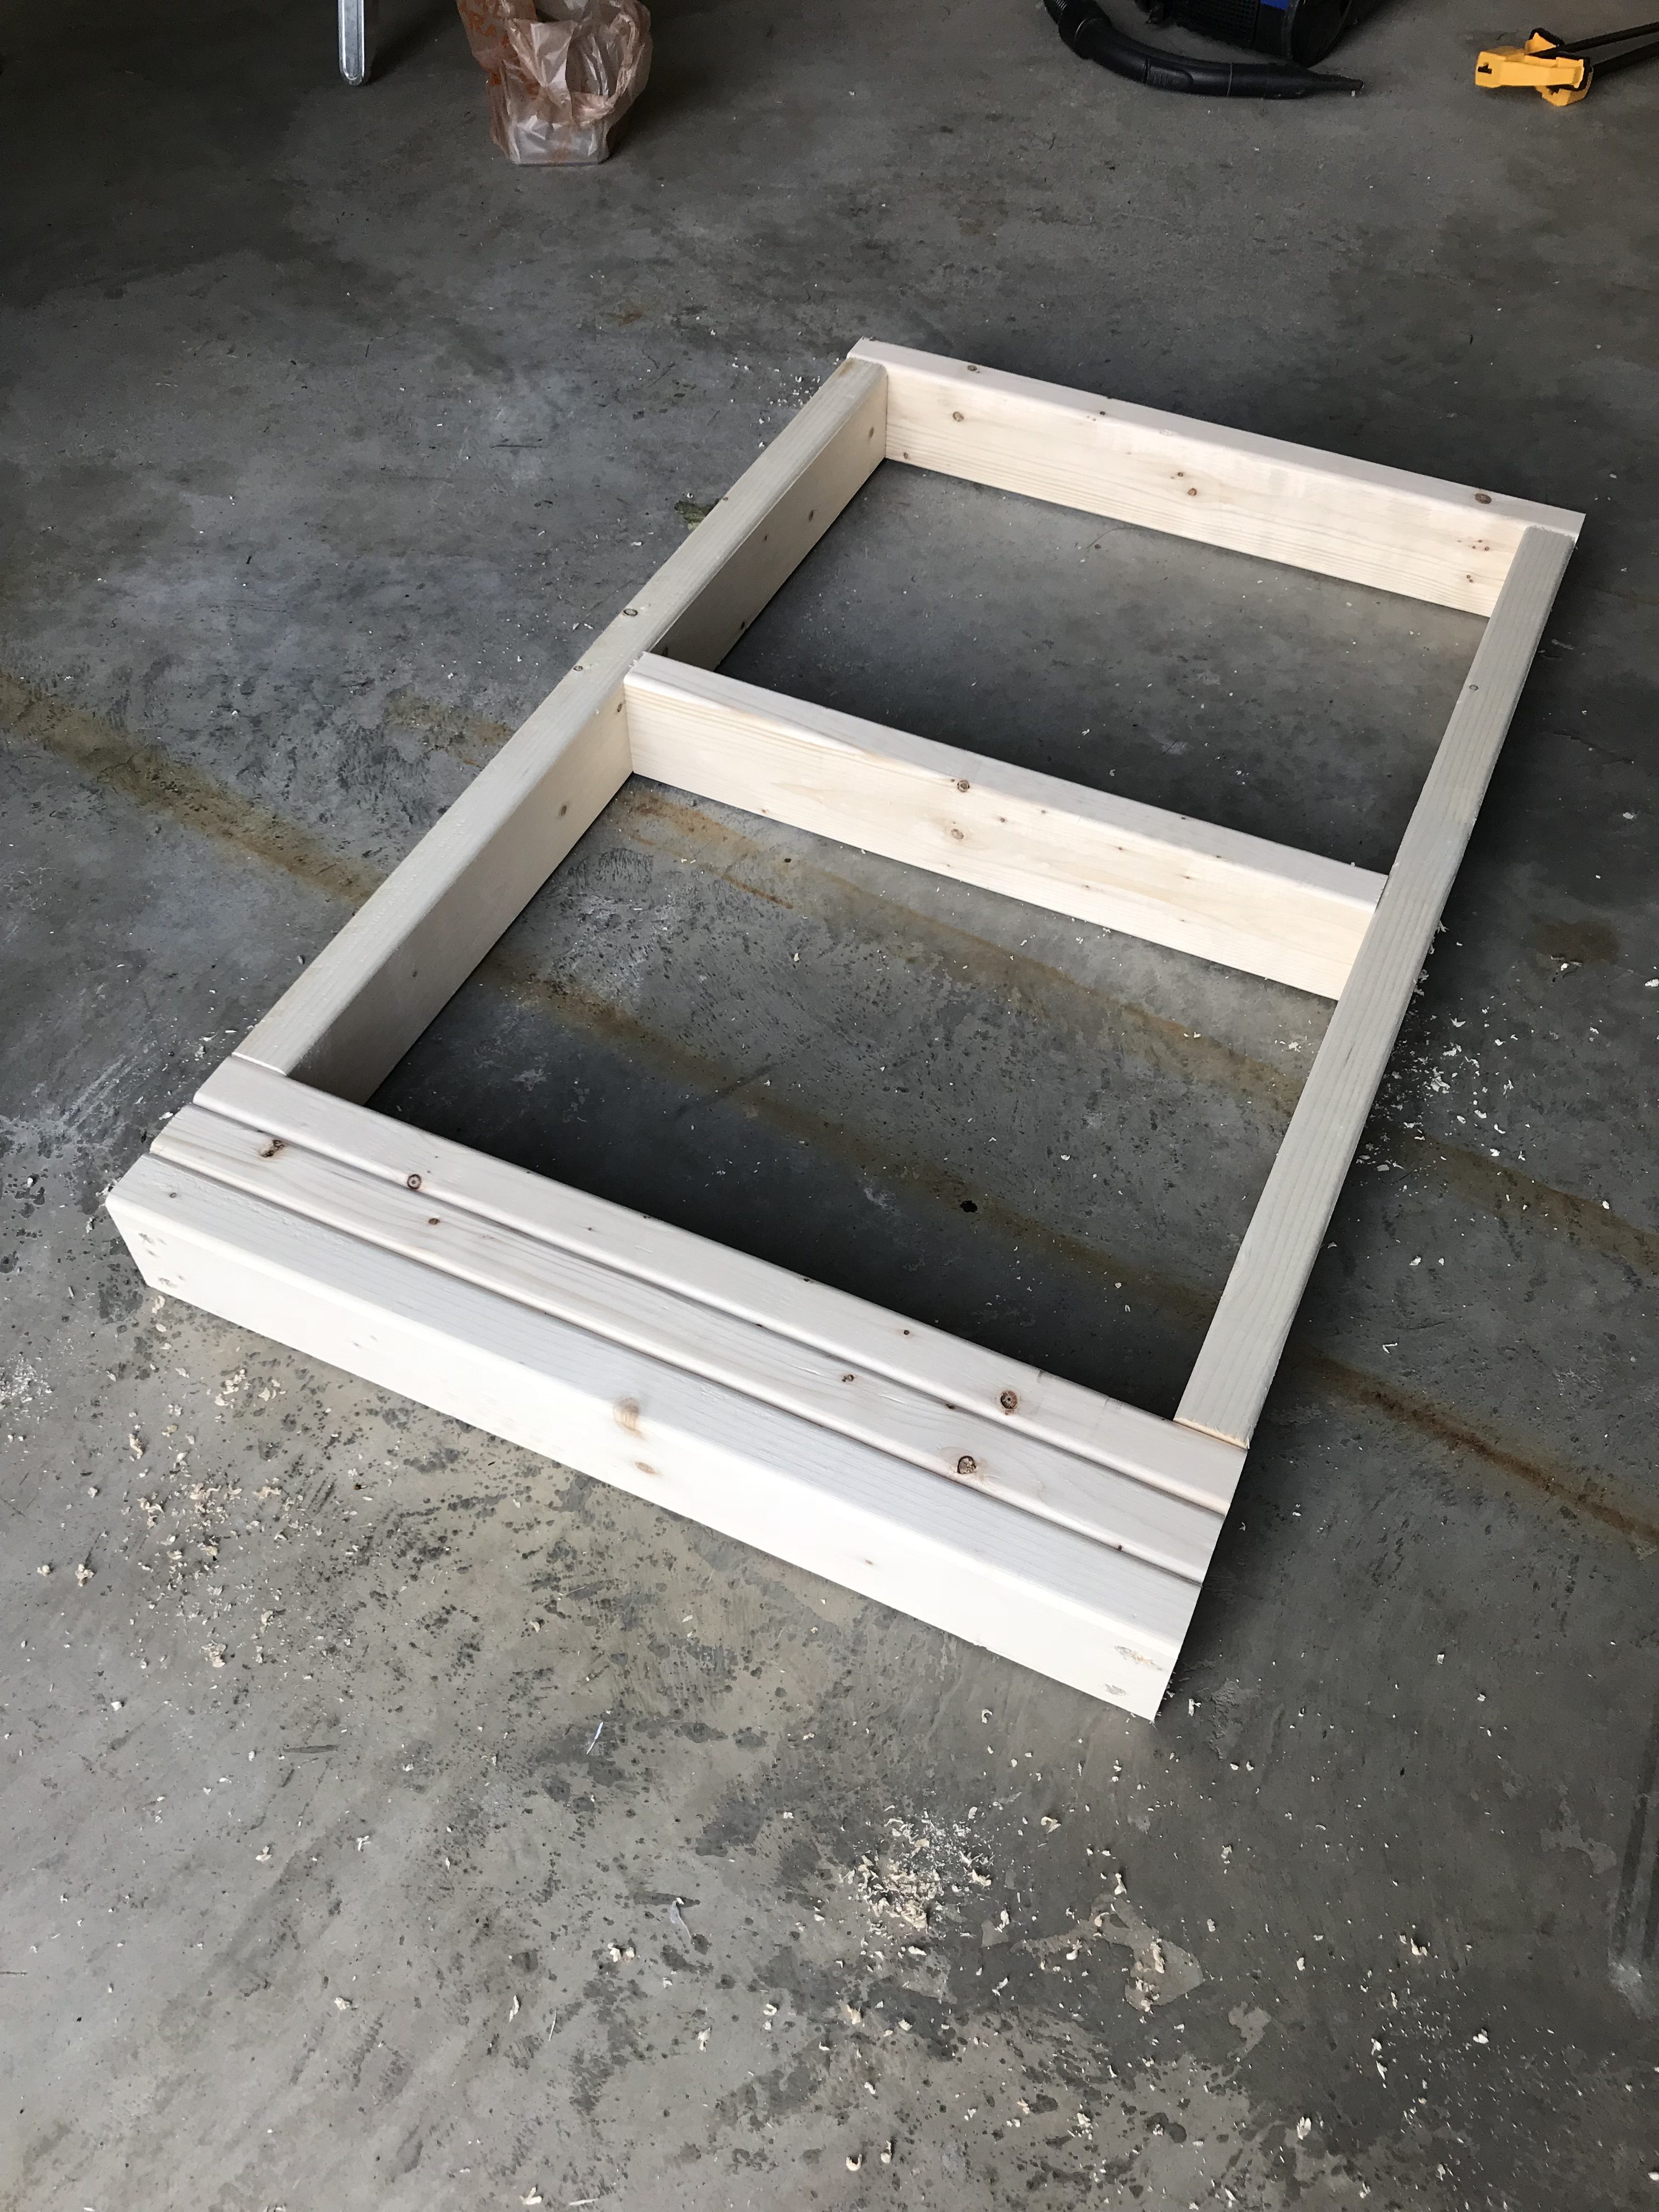
Using a flat, level area lay out your four 24″ 2×4’s, your two 33.5″ 2×4’s, and your one 21″ 2×4 as shown above. Drill two vertically aligned pilot holes at each joint (I like to use the bit that comes with your Kreg Jig Kit, as it will allow your screws to sit below the surface of the wood), and then secure using 1.25″ pocket screws. For the three 24″ boards that will make your “porch” just secure the inside board first and work your way out to the second and third boards. Once your foundation is secure, sand down any rough edges from your pocket holes, putty any visible holes with wood filler, and sand that down smooth once it dries.
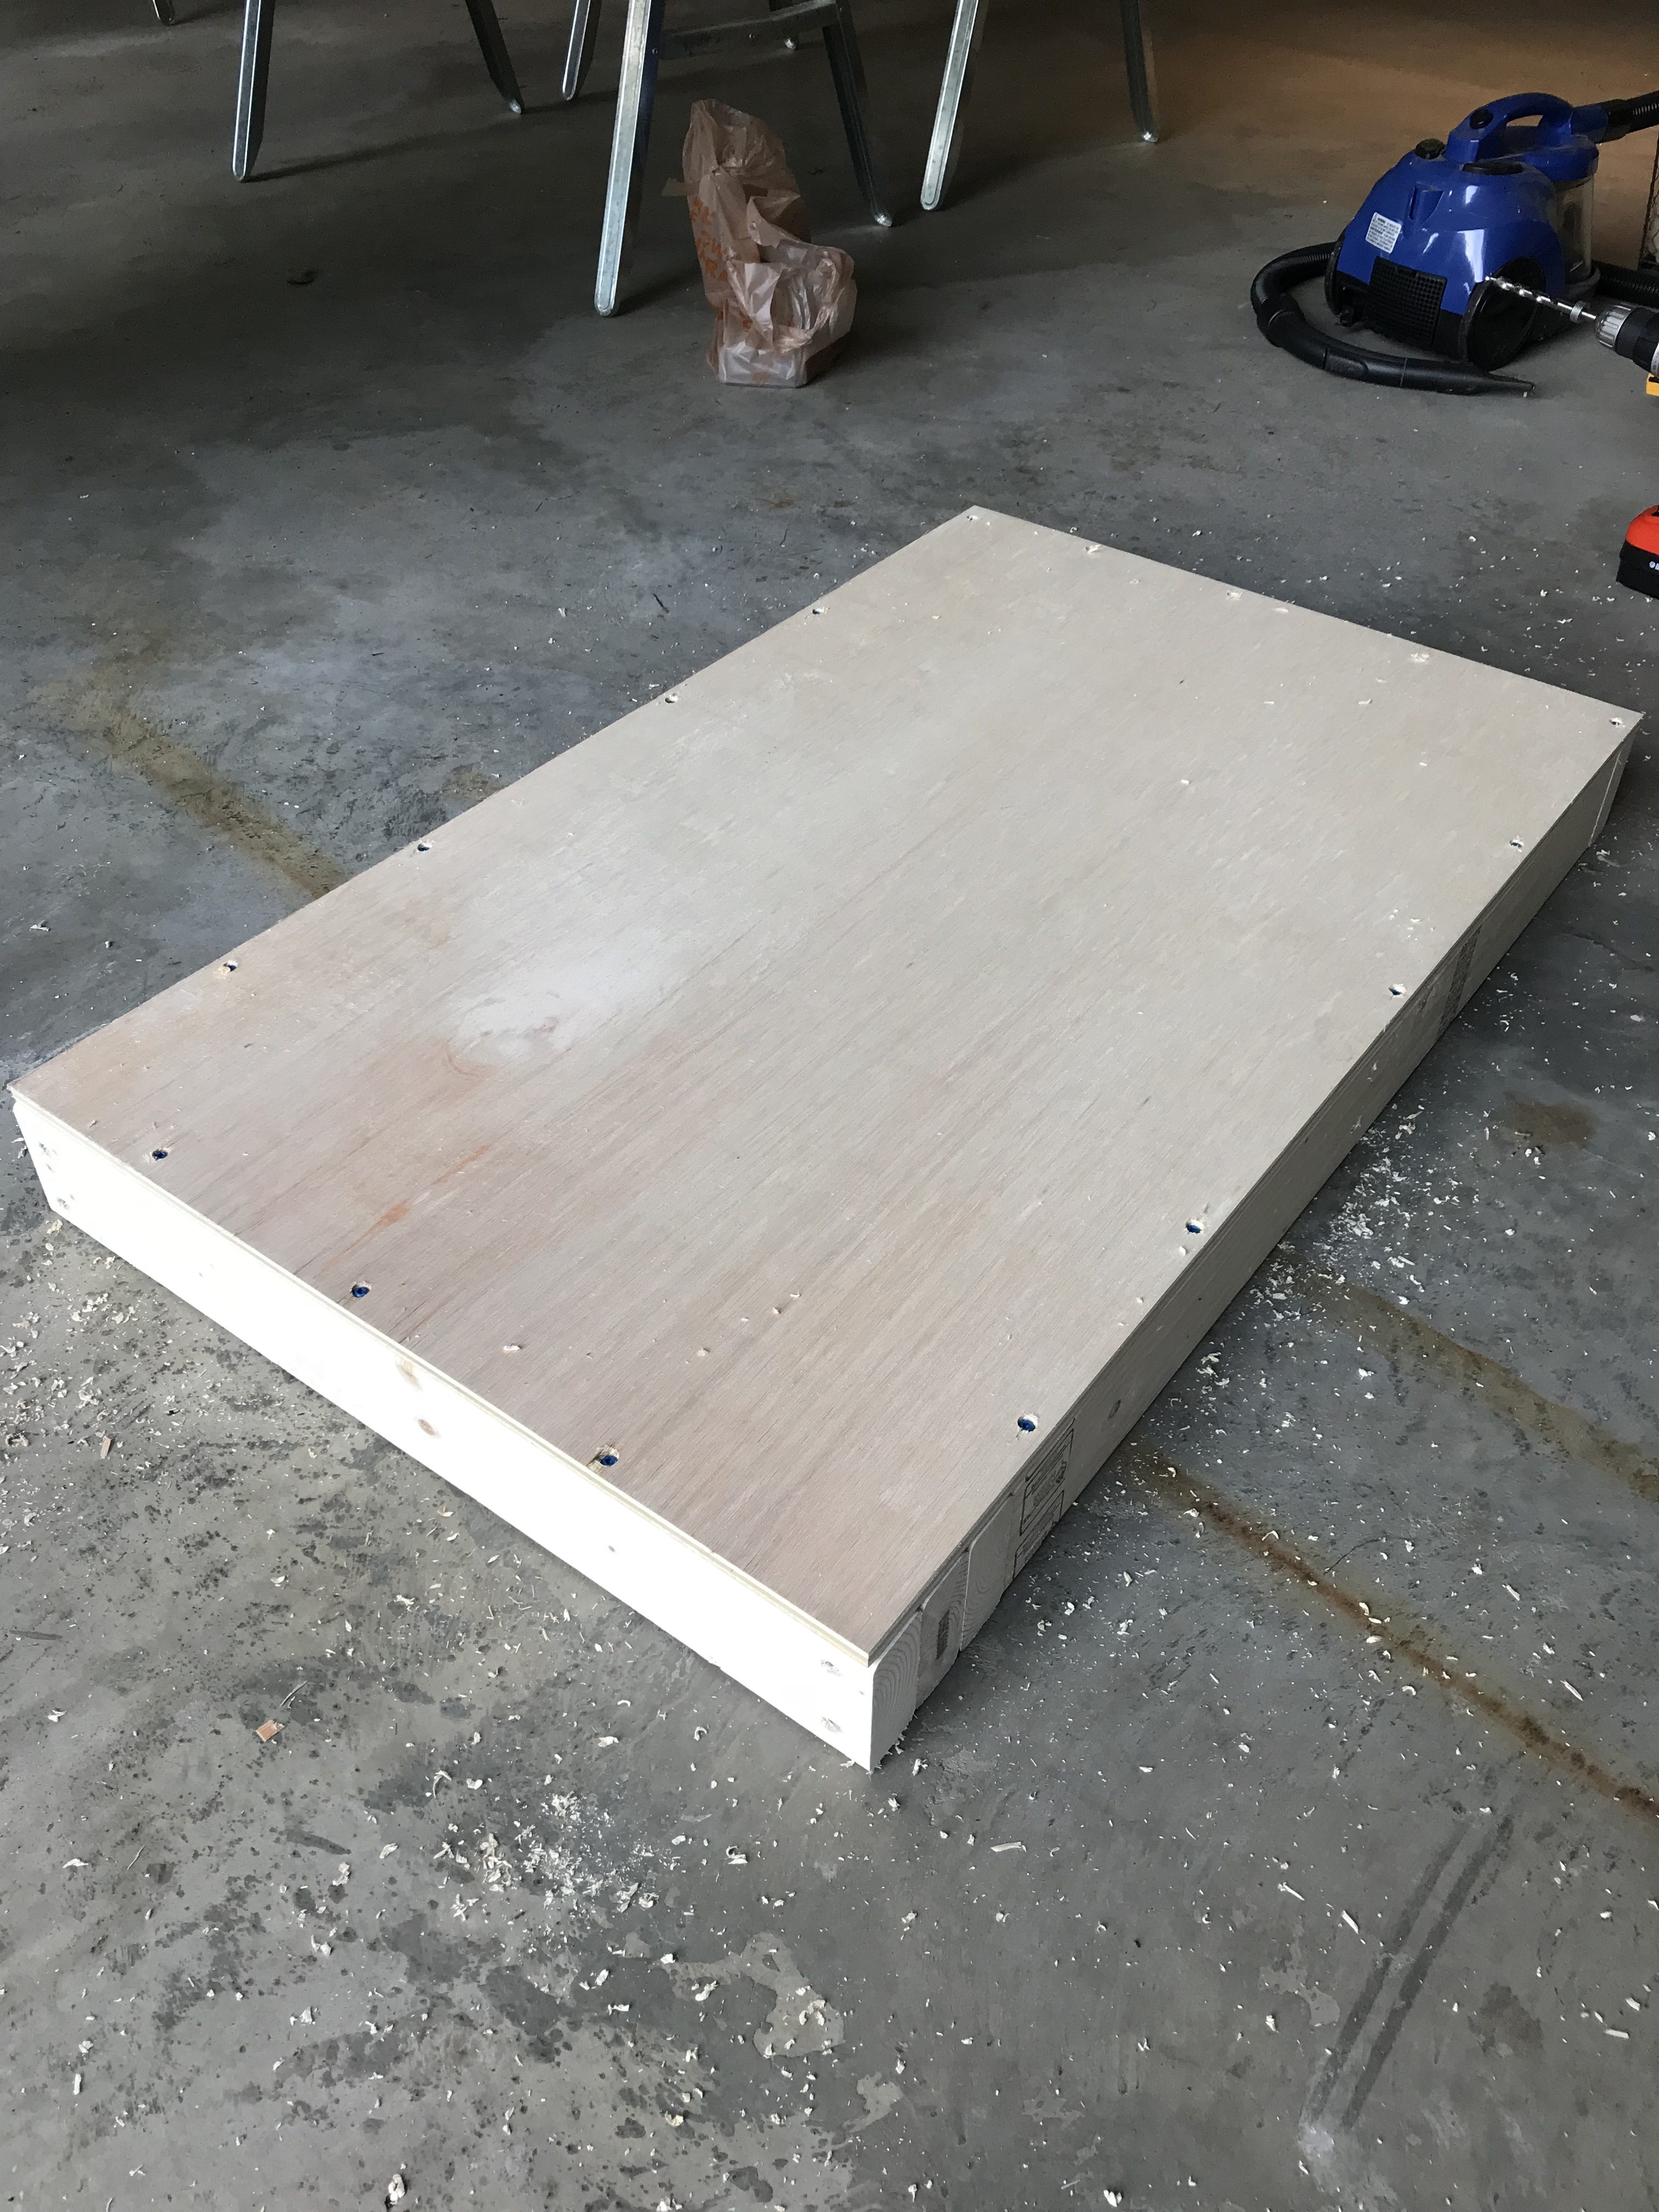
Next secure your 24×39.5″ piece of plywood to your foundation. You don’t need to worry too much about perfectly spacing out the screws symmetrically, as your walls will end up sitting on top of all of these screws except the couple on the very front of the porch area. Once the floor is fully secured, fill in the holes on the end of the porch with wood filler, wait for it to dry, and then sand smooth.
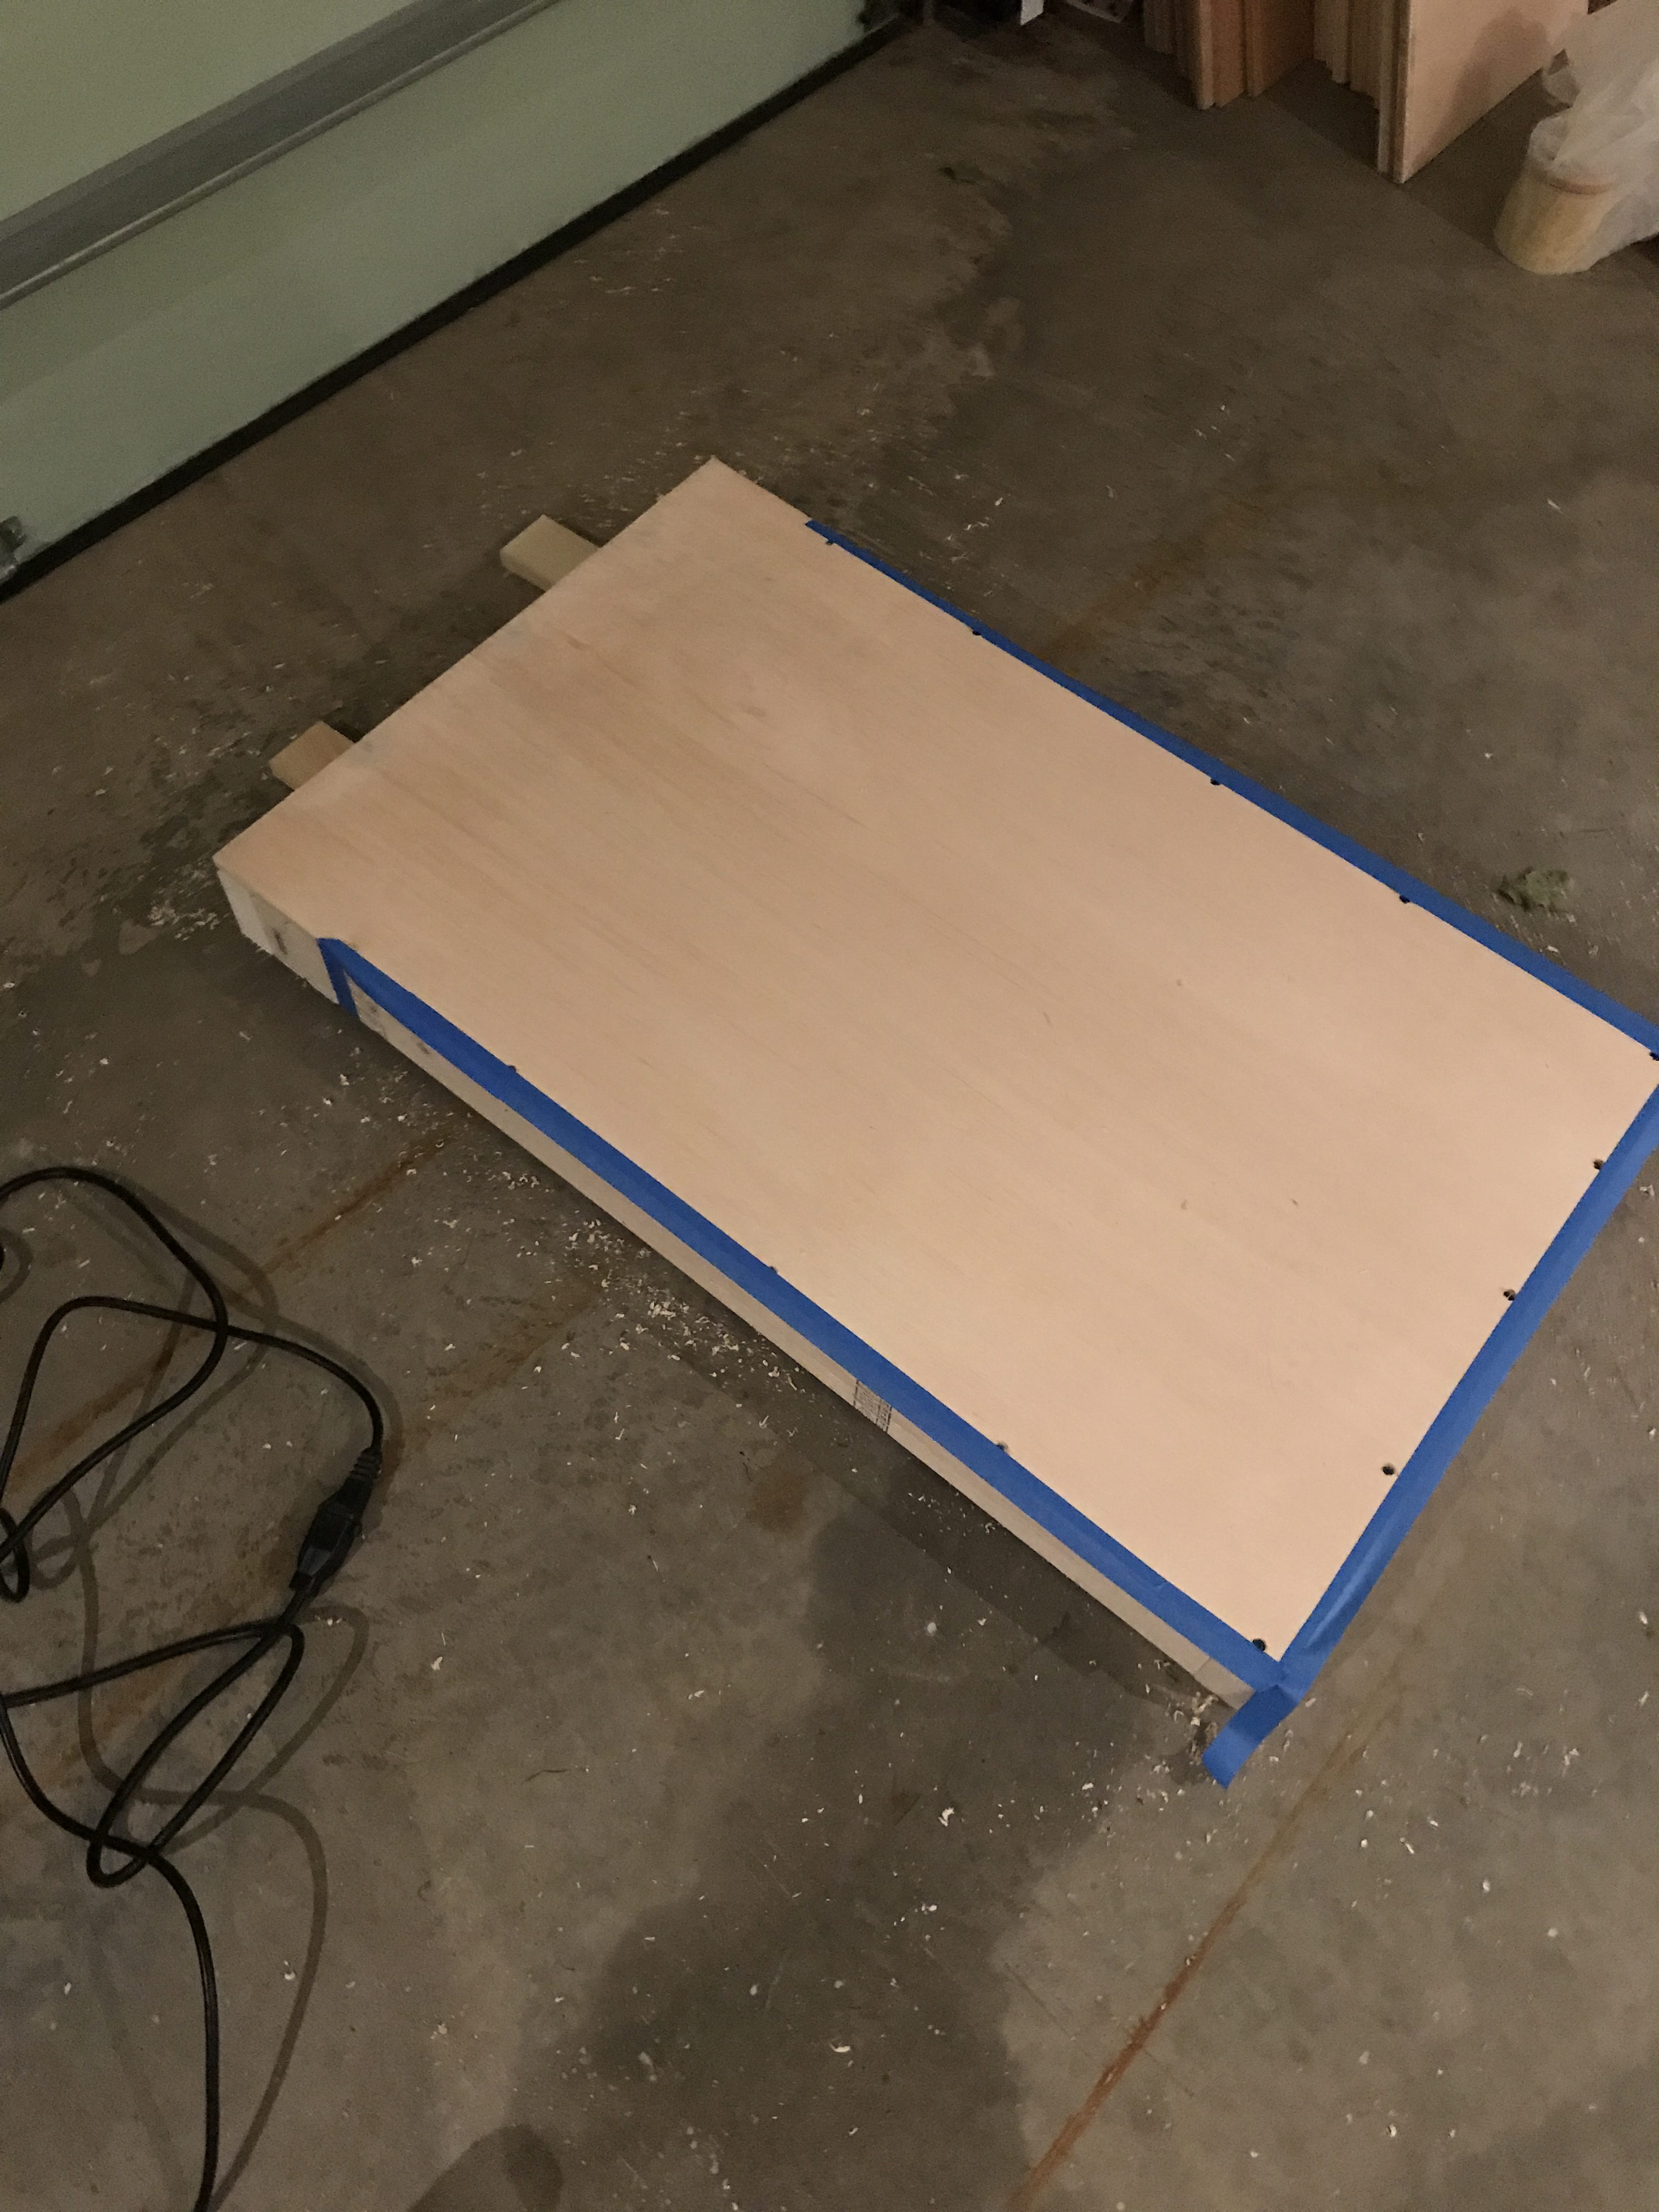
Knowing that I wanted to paint the entire outside of the house white (including the foundation), I didn’t want to take any chances of the floor stain seeping down the side of the plywood. To prevent that from happening, I taped off about 1/4″ of the back and side edges. Your walls will be 3/4″ thick, so they completely cover the 1/4″ edge of unstained plywood.
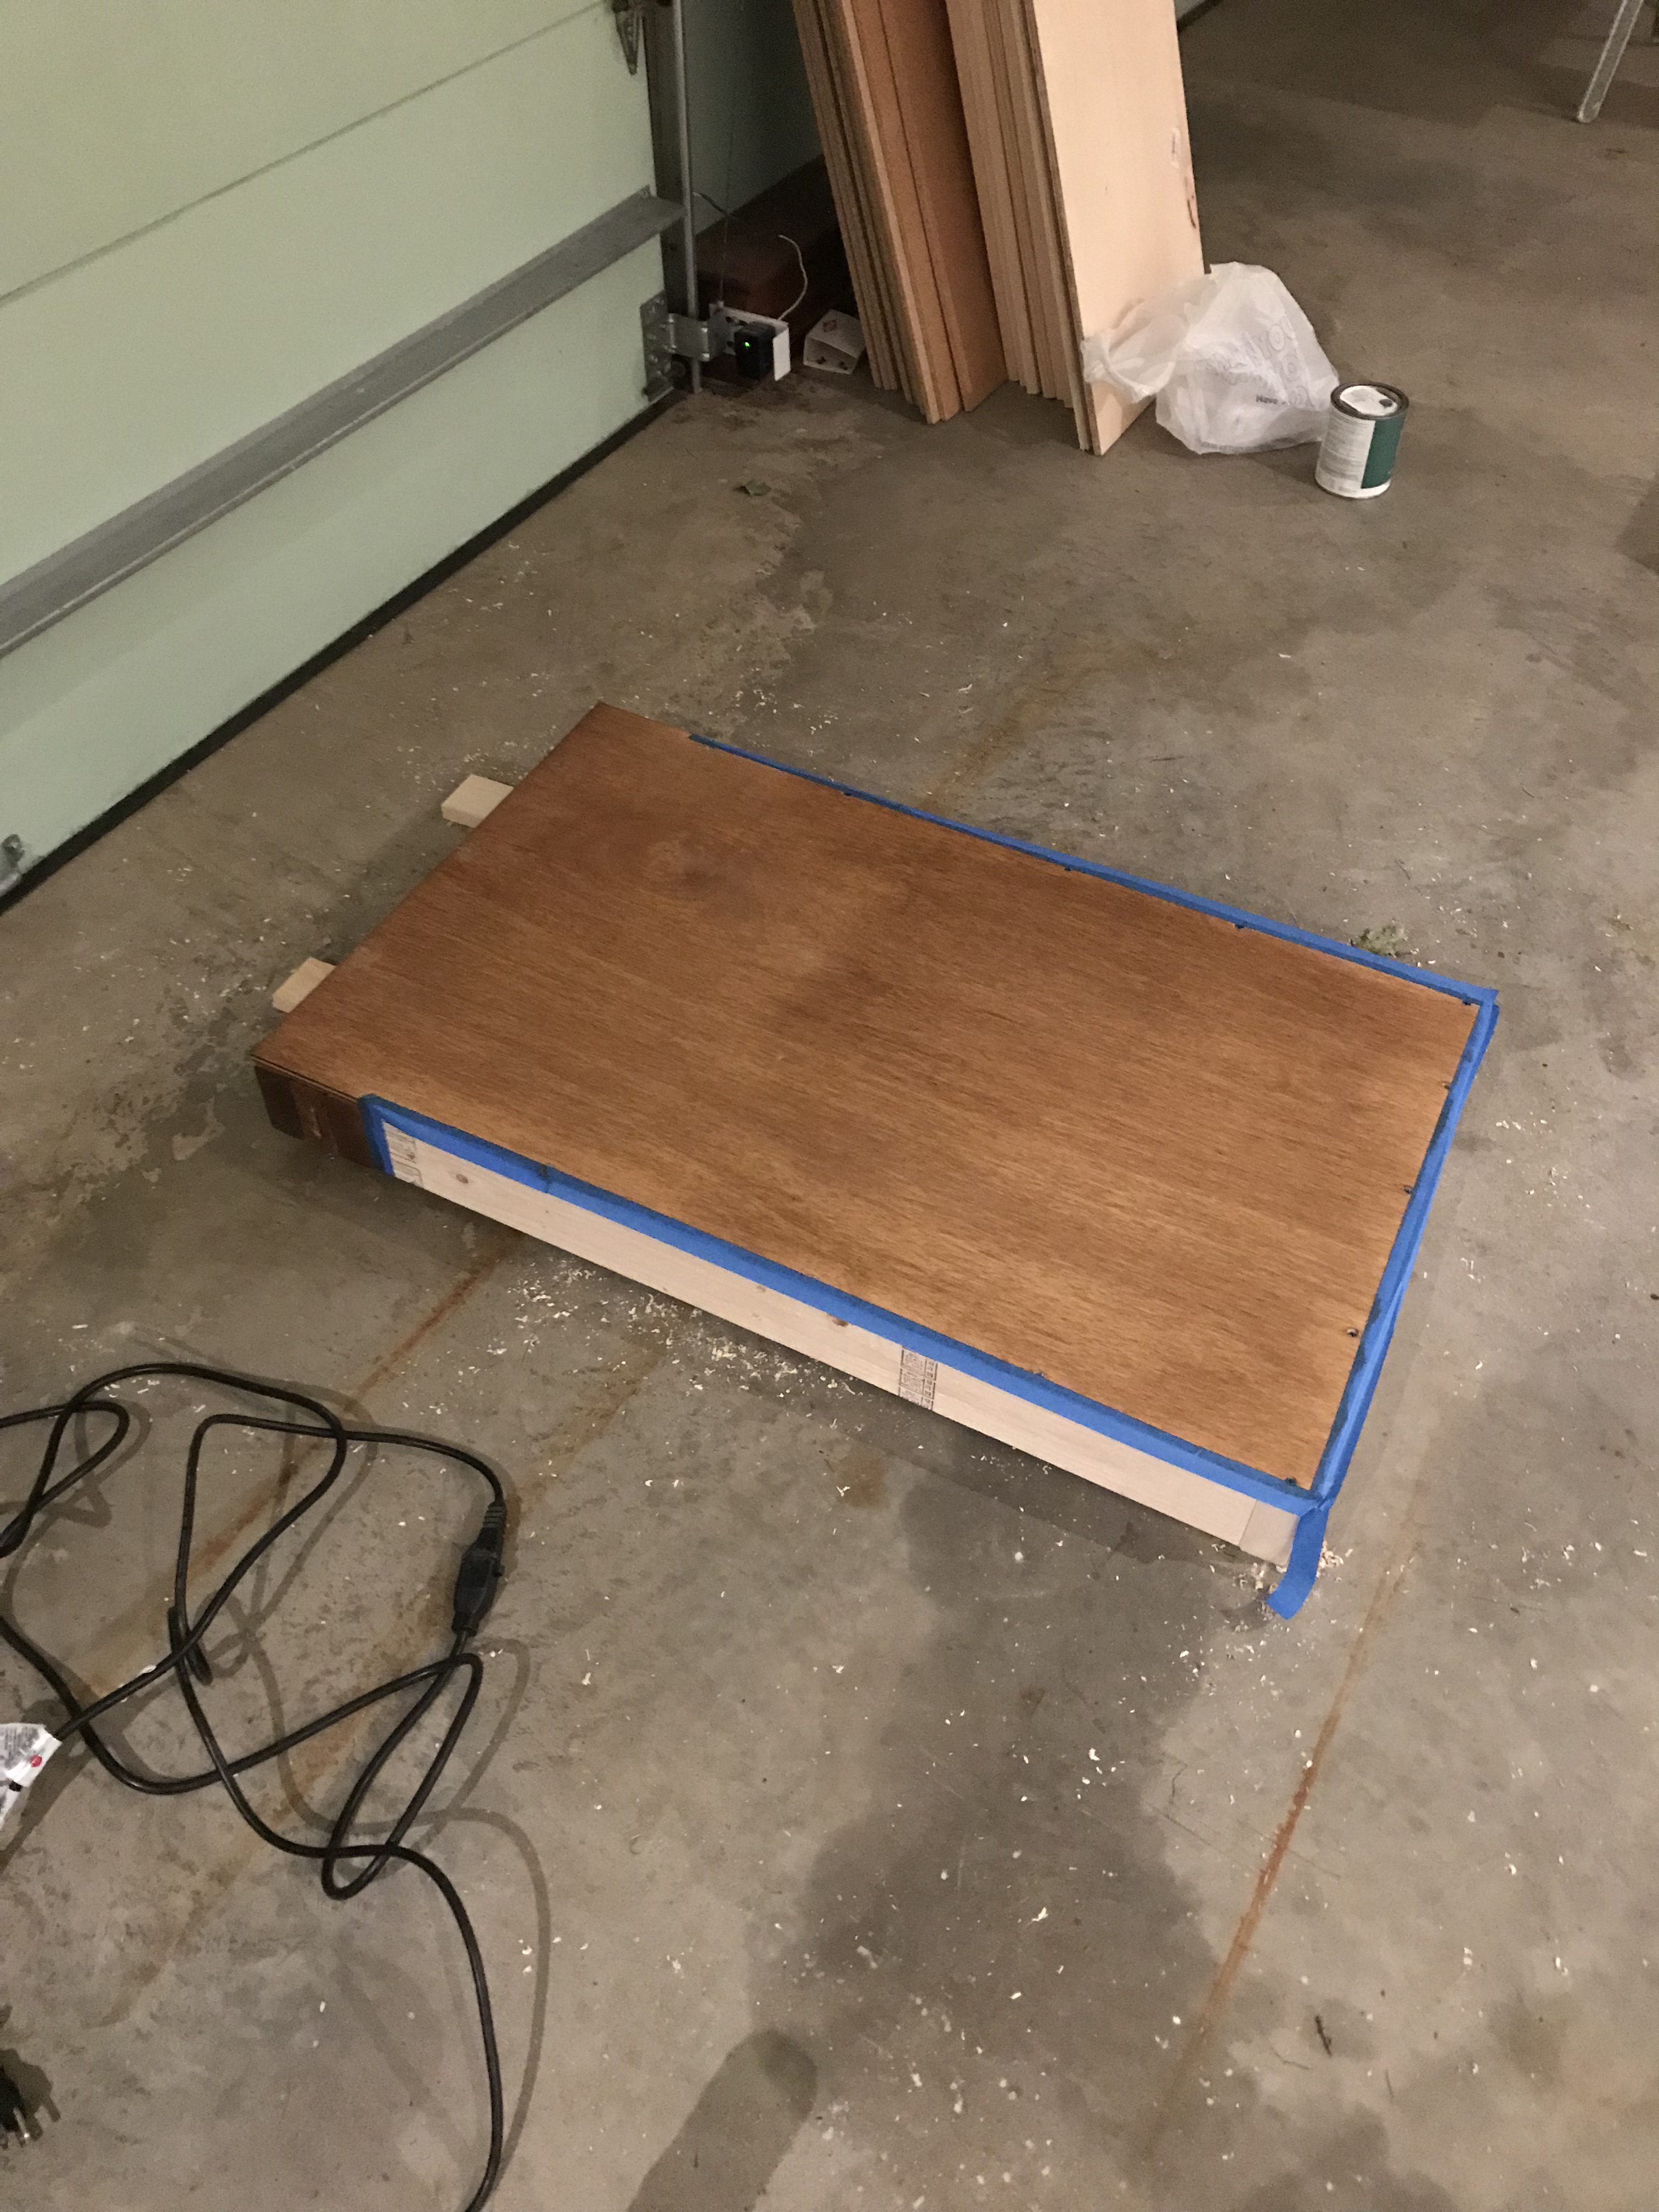
The next step is to stain the floor and porch area (including the front and side of the porch. For a stain color, we picked Golden Oak by Minwax. I didn’t do any prep-work to wood, and just applied it directly with a sponge brush, then wiped away the excess with rag. Once dry, just pull up your painter’s tape, and your foundation and floor is complete!
Step 3: Drill Pocket Holes Using Kreg Jig Kit
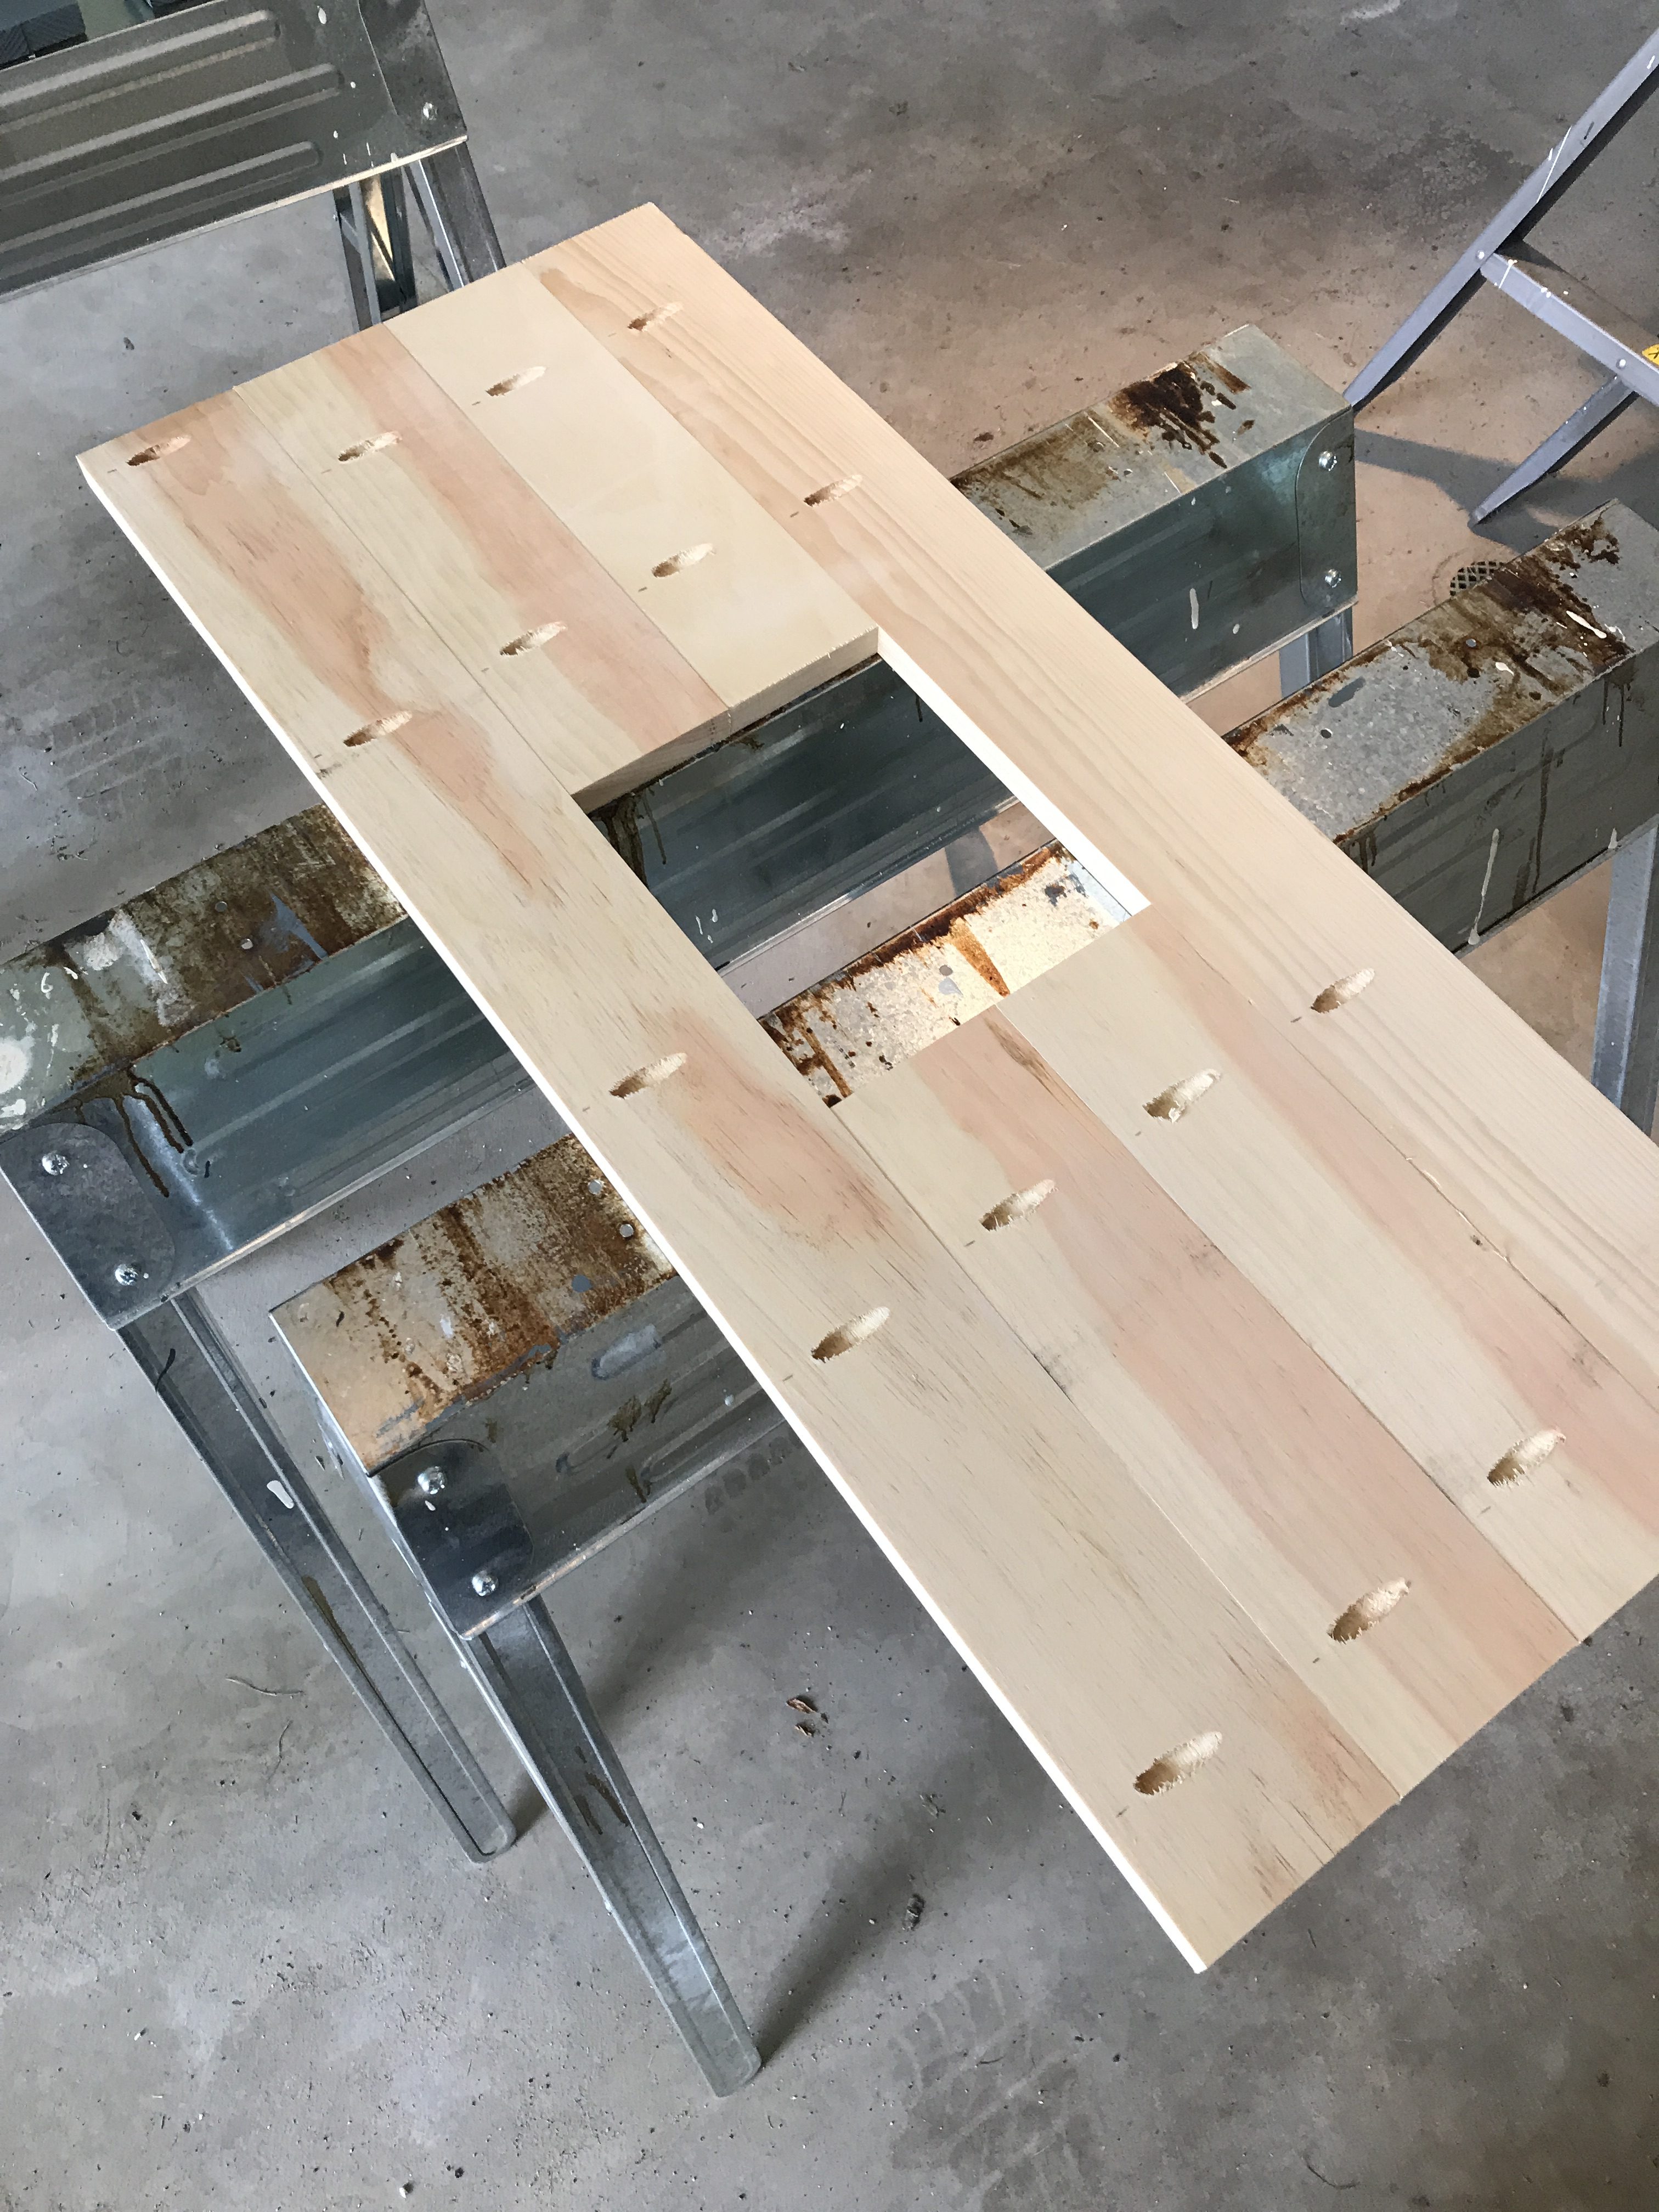
I always find it best to drill all of your pocket holes at once, then quickly run your sander over the rough edges. If you need any help getting started with your Kreg Jig, there are many tutorials available that can be found with a quick Google search.
Here are the pocket holes you will want to drill for your straight cut 1×4’s (I didn’t measure out their placement, as you only really need to eyeball them).
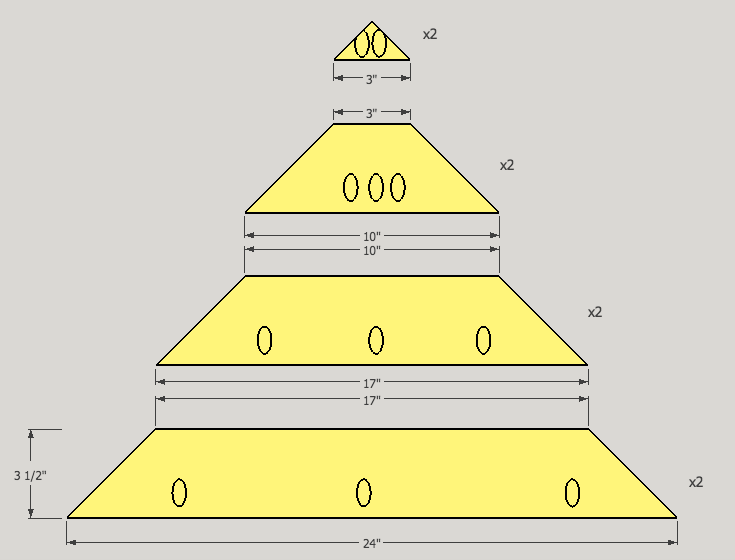
Here are the pocket holes to drill for your angled boards. Again, I kind of just eyeballed how to space them out.
Step 4: Build Walls
For the walls, you will have two identical side walls with one window in the middle of each, a solid back wall, and a front wall with a open doorway.

Starting with the back wall, align four of your 24″ boards and four of the angled-edged boards that will make the top half of your back wall. Insert your 1.25″ screws into all of the pocket holes, and then fill the holes with wood filler. Once it dries, sand the wood-filled spots down smooth. Repeat all steps for your front wall, using the 6″ long boards to create on opening for your doorway (see below for a visual reference).
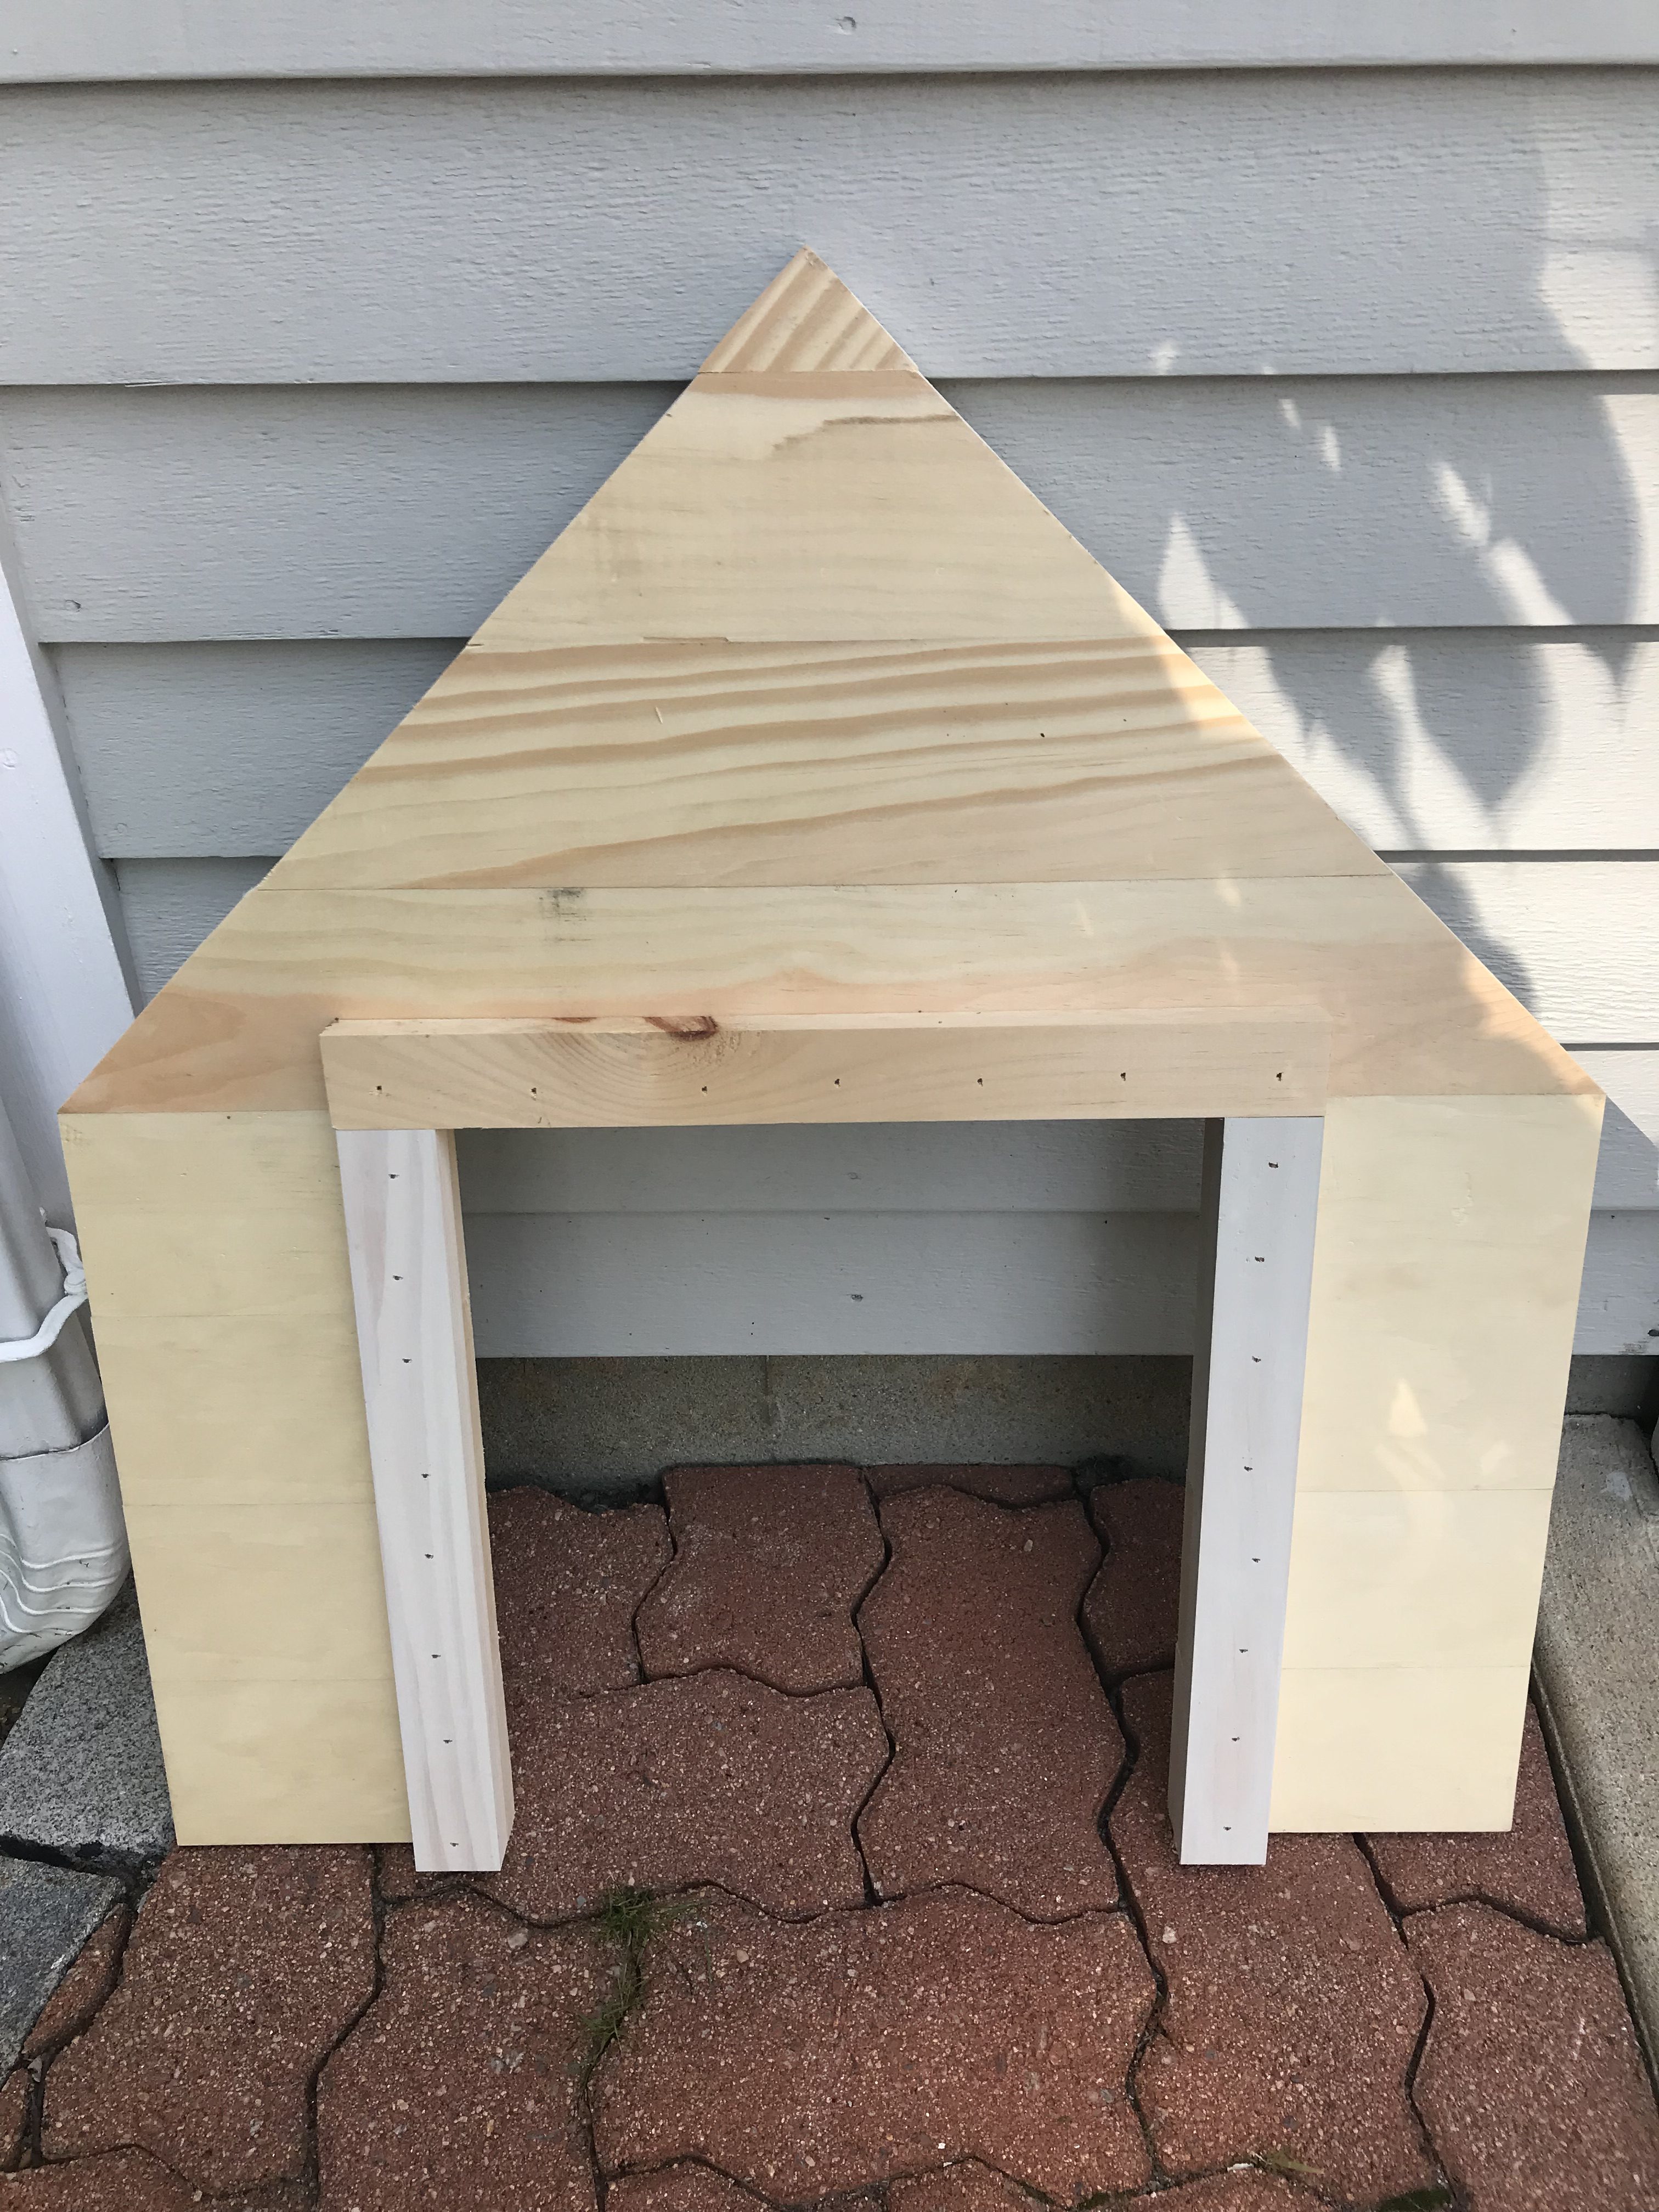
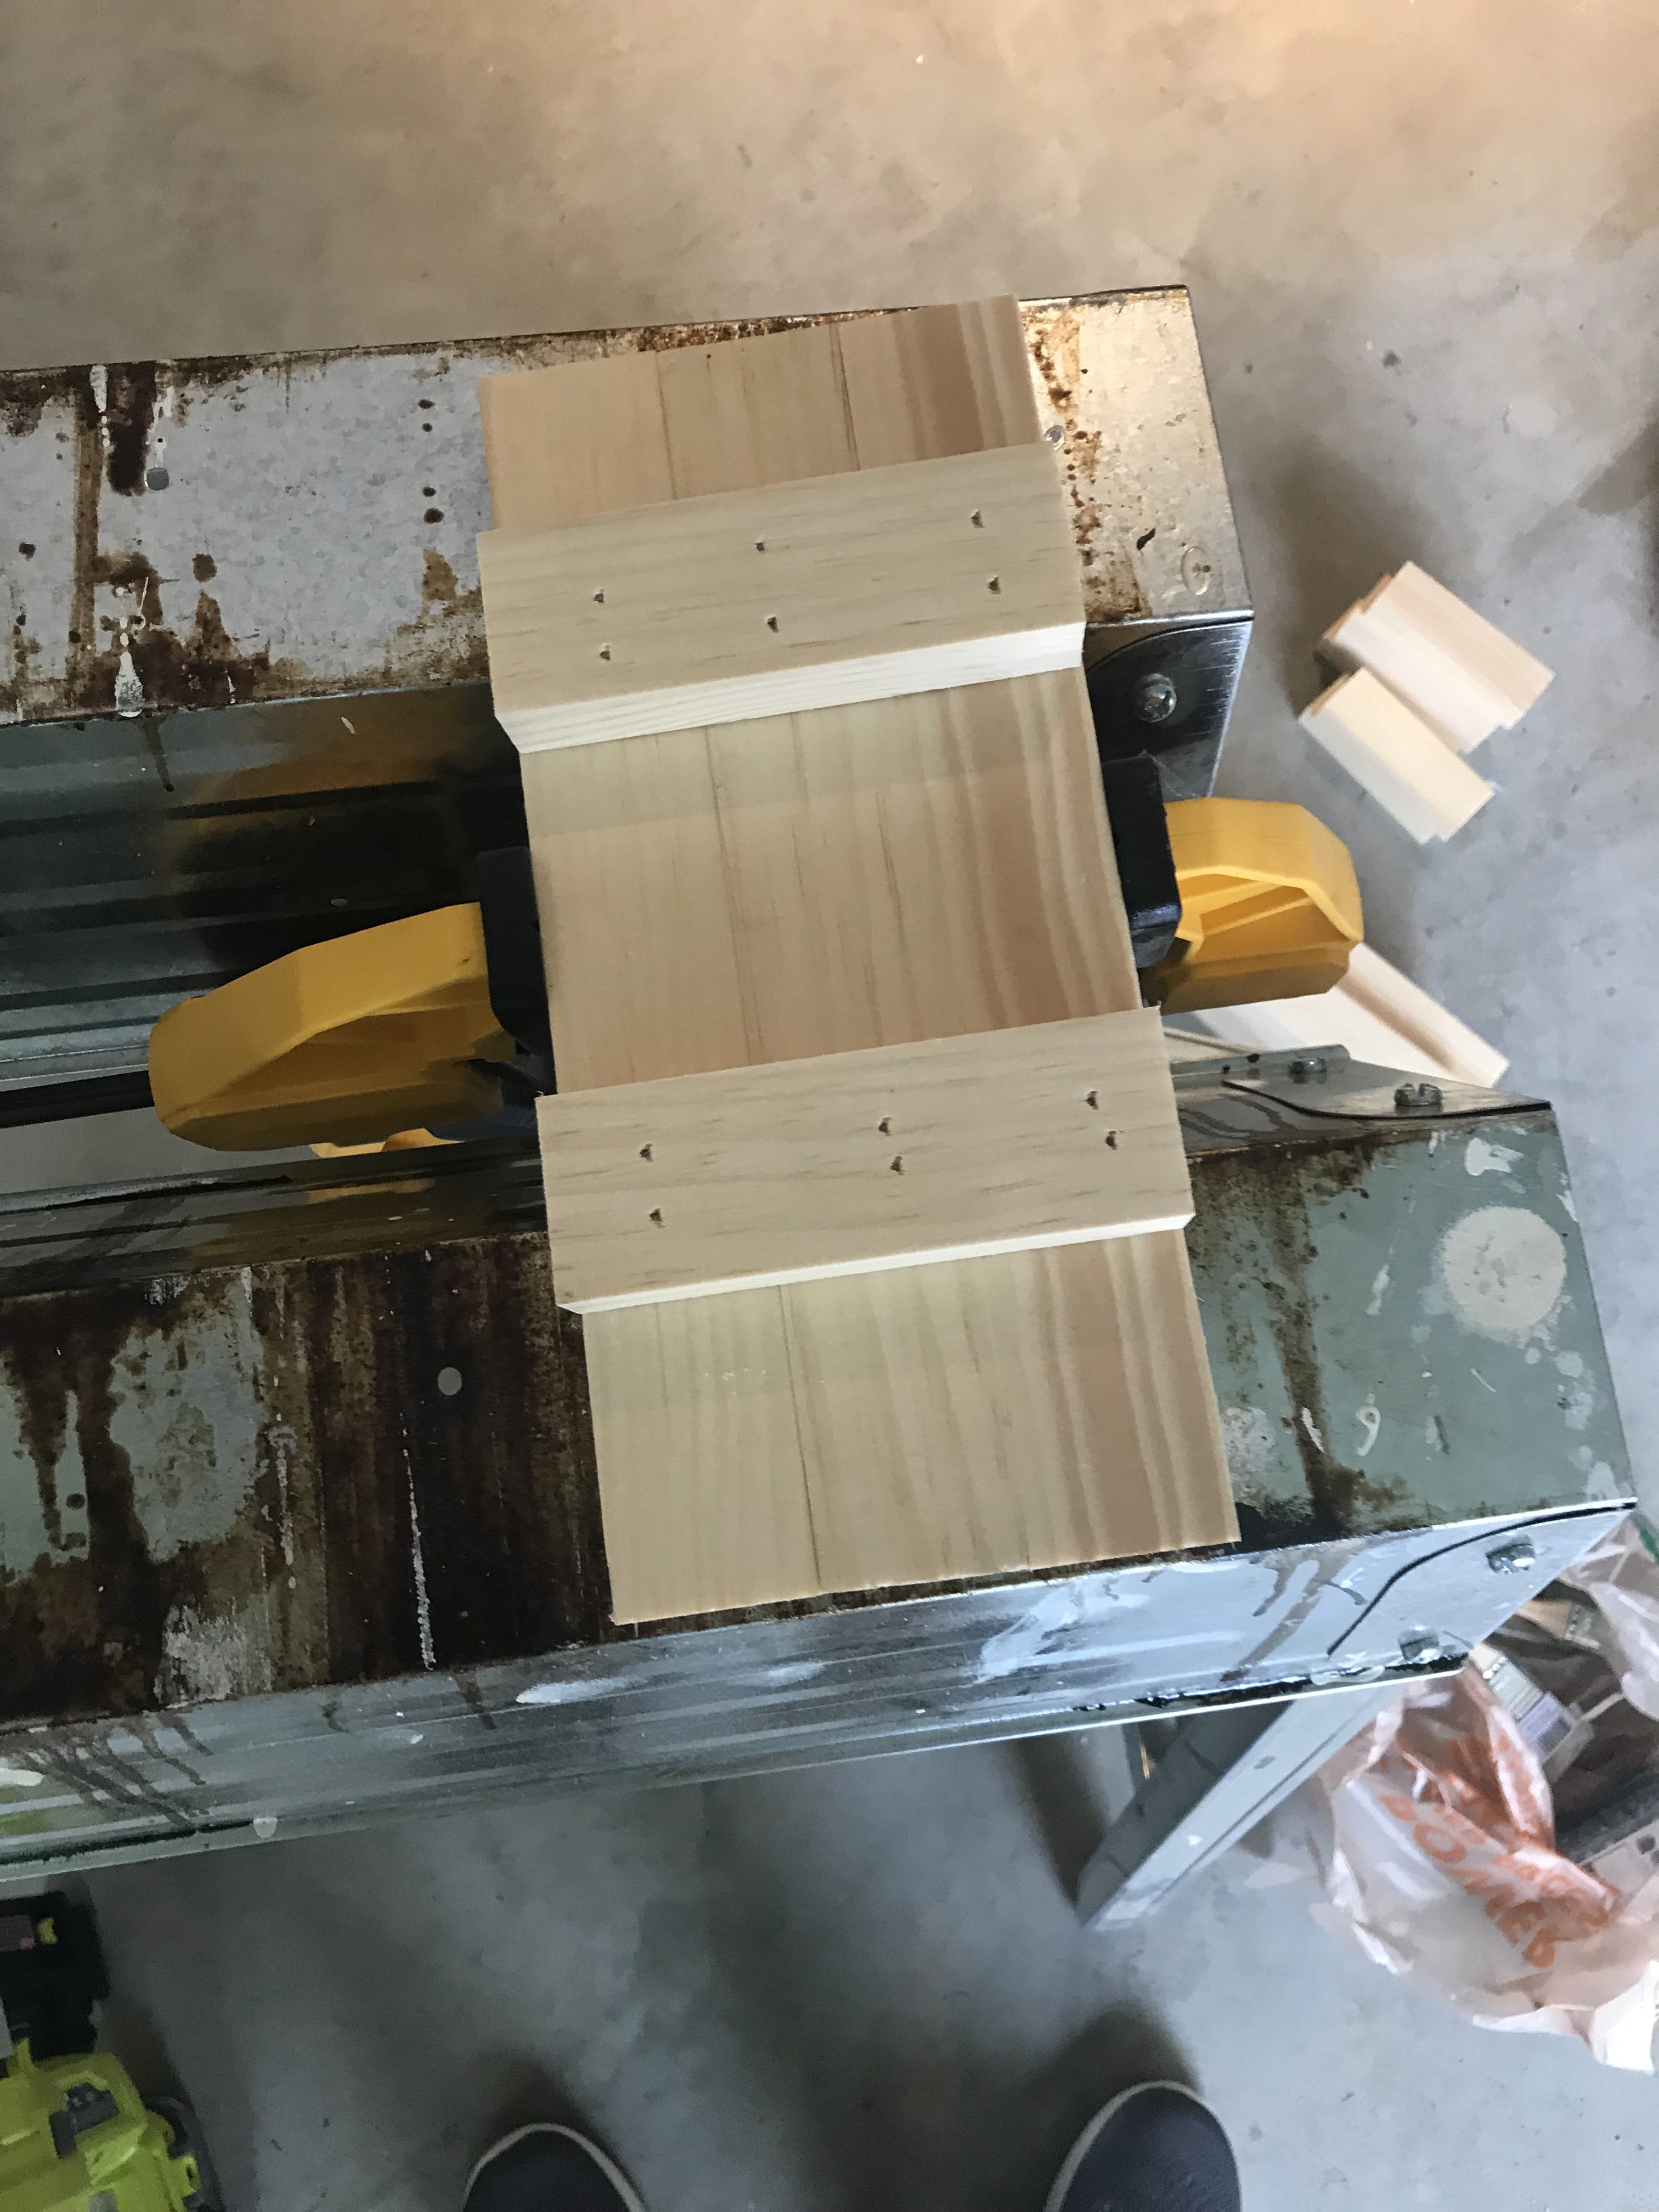
Flip your front wall over and using your Brad Nailer and 1.25″ nails, nail your two 14″ 1×2’s around the doorway edges. Then nail your 15″ 1×2 across the top.
Align your two 34.5″ and your four 13.25″ boards, insert your screws, and putty the holes. Once the wood filler dries, sand it down. Then repeat all steps for the other side wall.
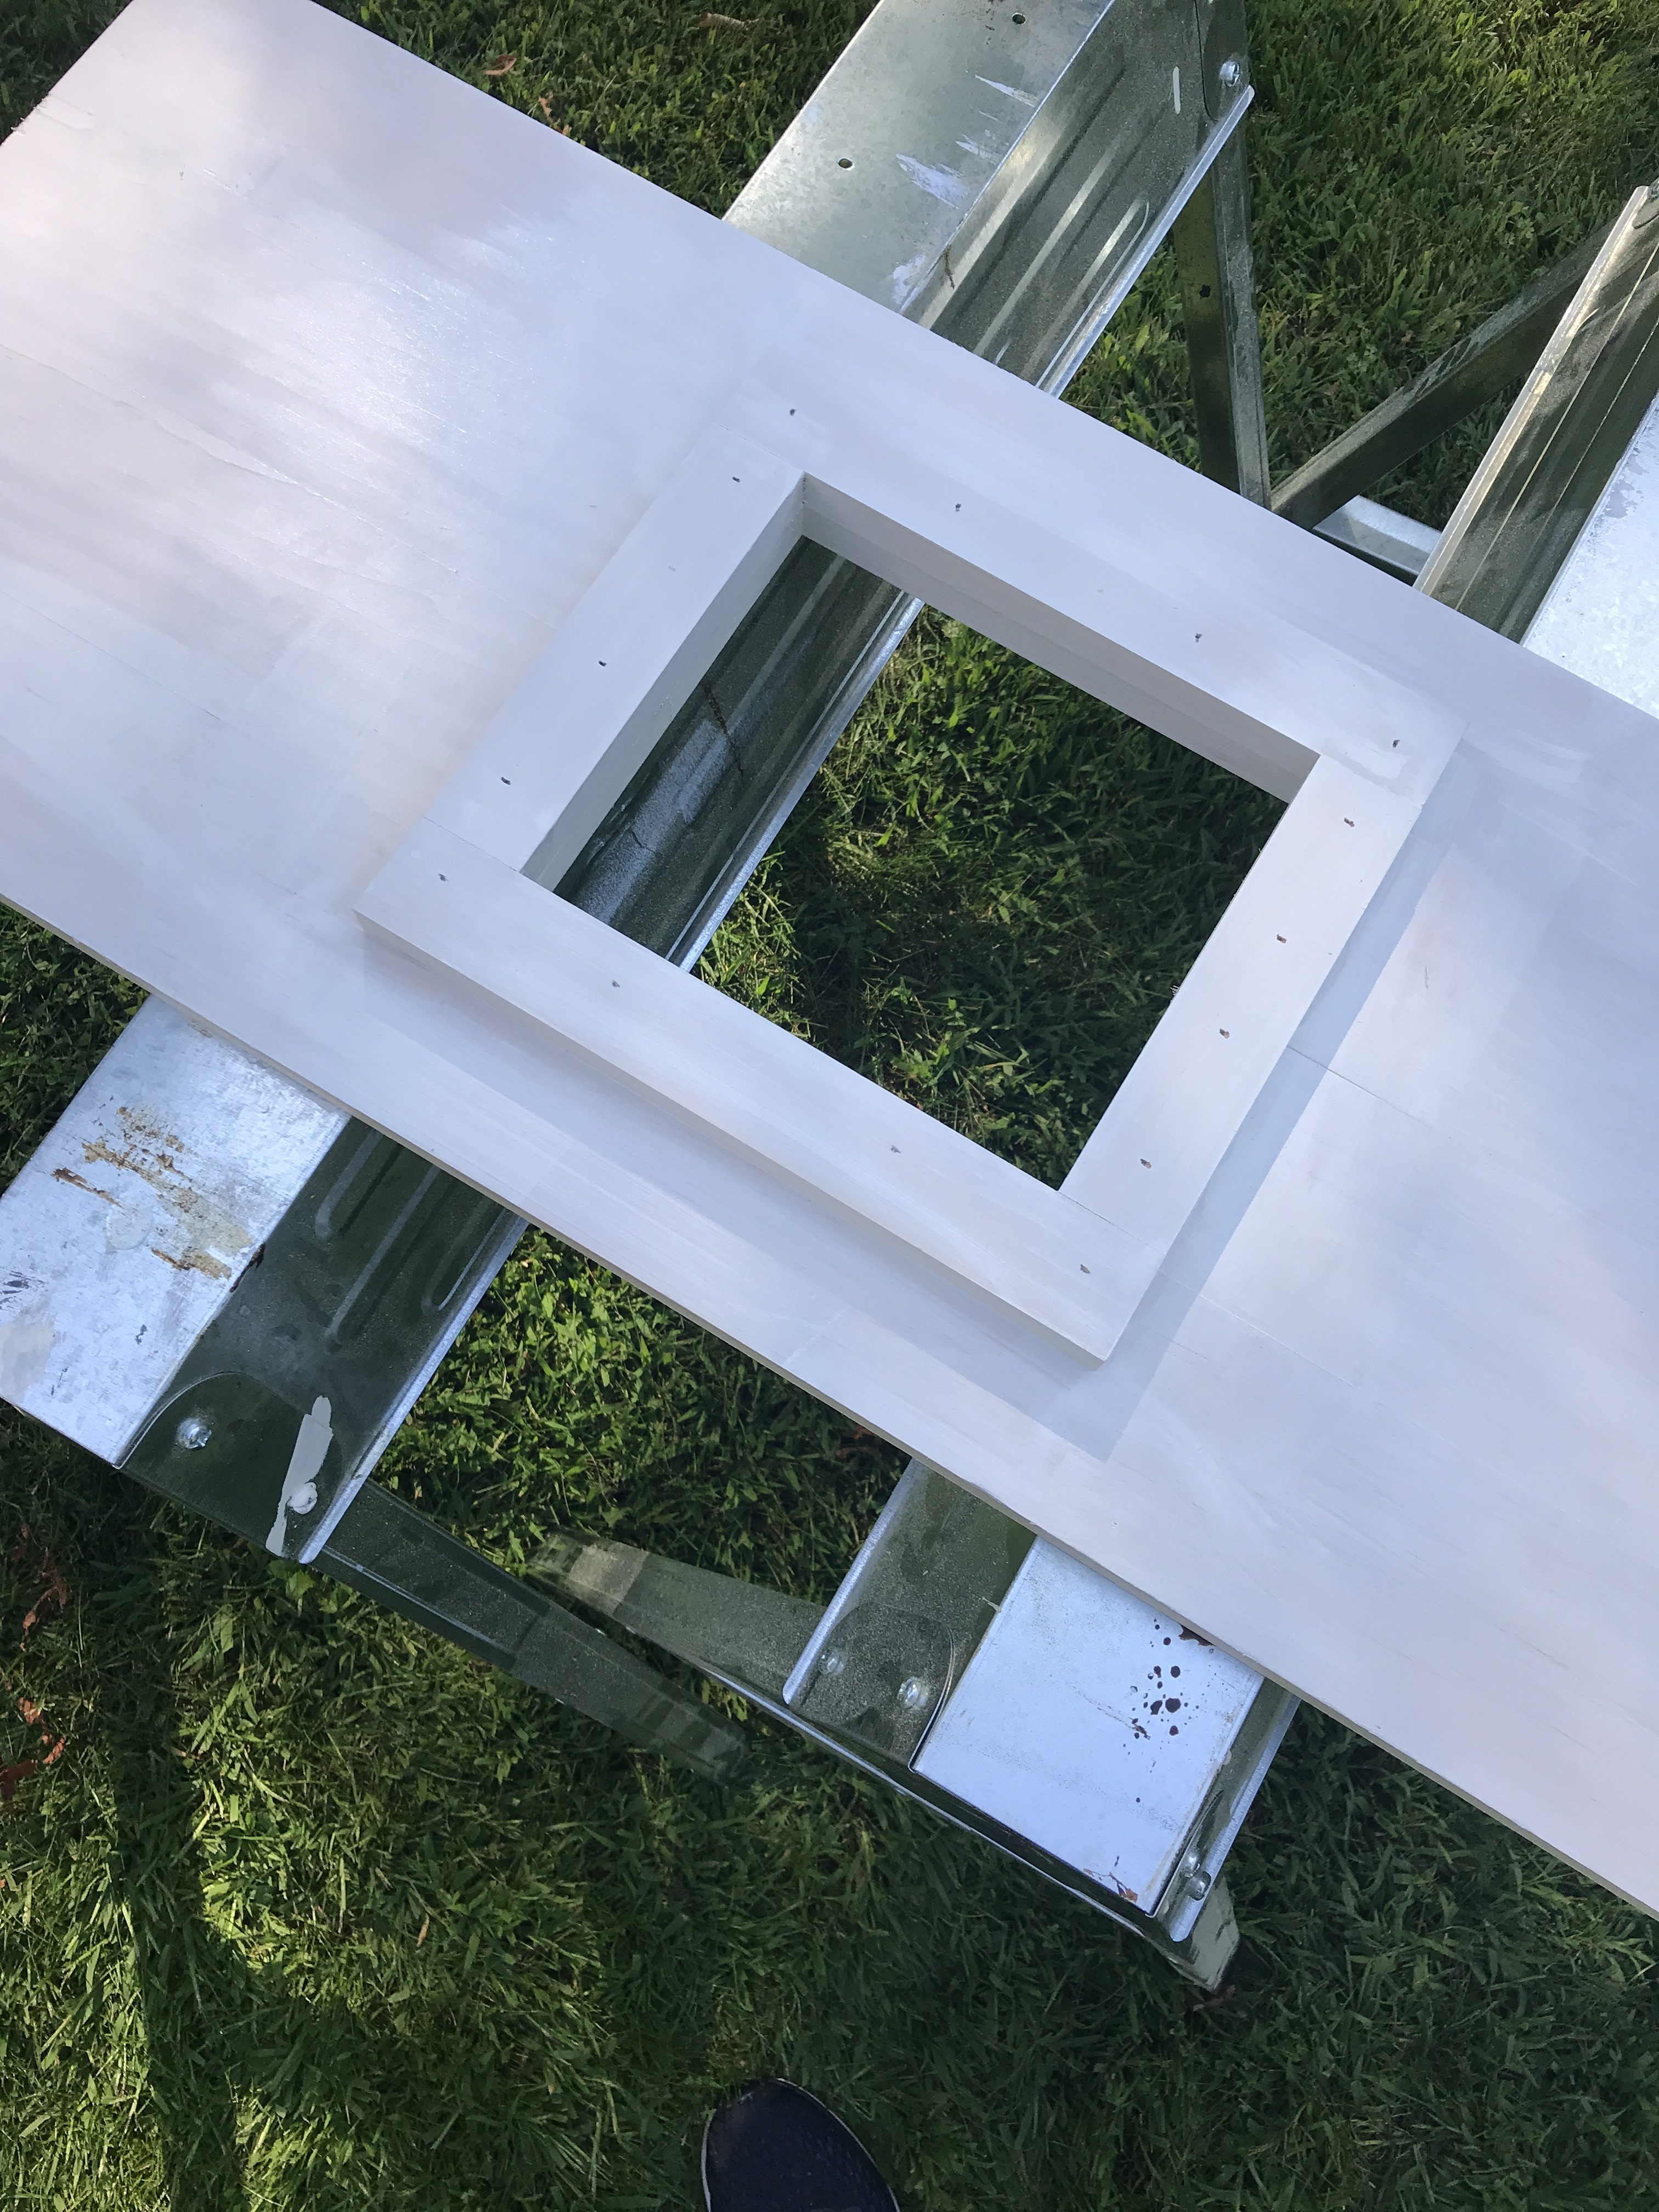
Flip your side wall over. Then, again using your Brand Nailer and 1.25″ nails, nail in two 7″ 1×2’s at the edge of the vertical opening, and two 11″ horizontally across the top and bottom of the opening.
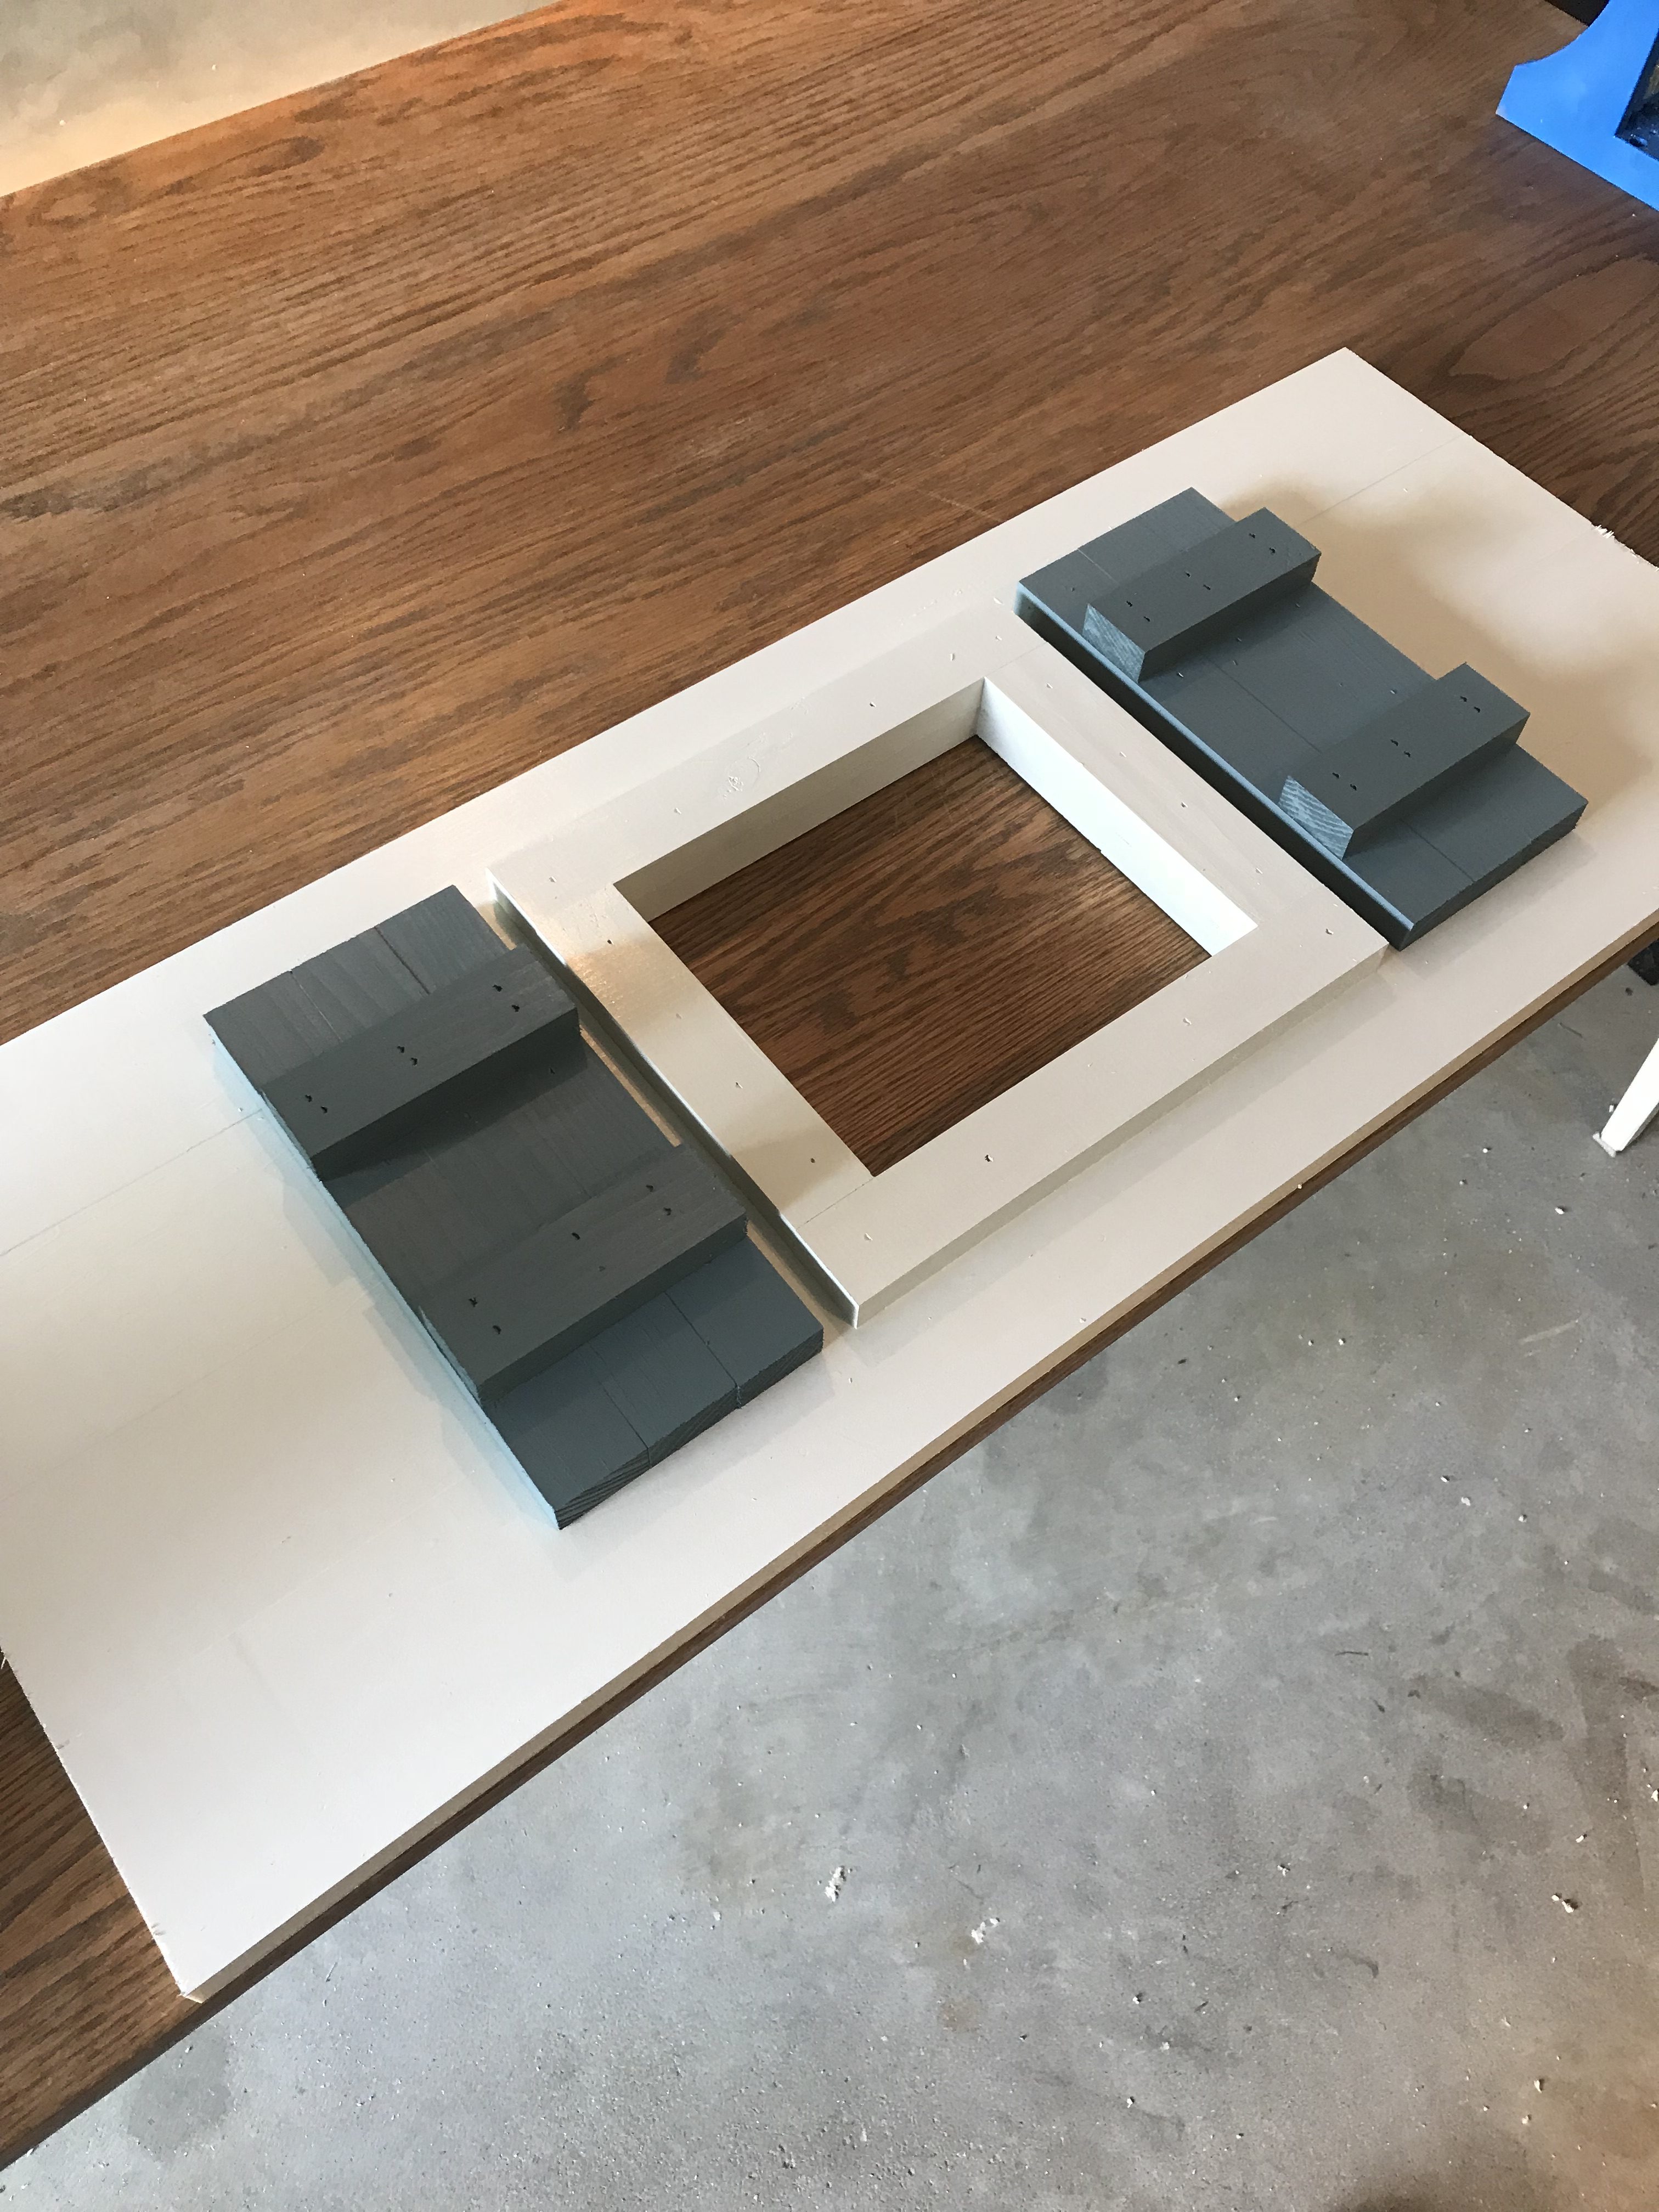
For your shutters place three 10″ 1×2’s vertically, and then Brad Nail two 4.5″ horizontally to keep them together (still using your 1.25″ nails). Repeat process three more times. I chose to paint my shutters Steep Cliff Gray by Benjamin Moore at this point, so that I wouldn’t have to worry about getting any shutter paint on the walls.
Nail your shutters around both windows, and then paint the inside and outside of all four walls. I went with Benjamin Moore’s Ballet White for the wall color.
Step 5: Attach Walls
Starting with the back wall, tighten your screws through the pocket holes of your bottom board into your plywood floor. Next, do the same for both your right and left side wall. Then screw a couple pocket hole screws through the exterior of your back wall straight into the perpendicular boards of side wall to keep the corners tight and flush.
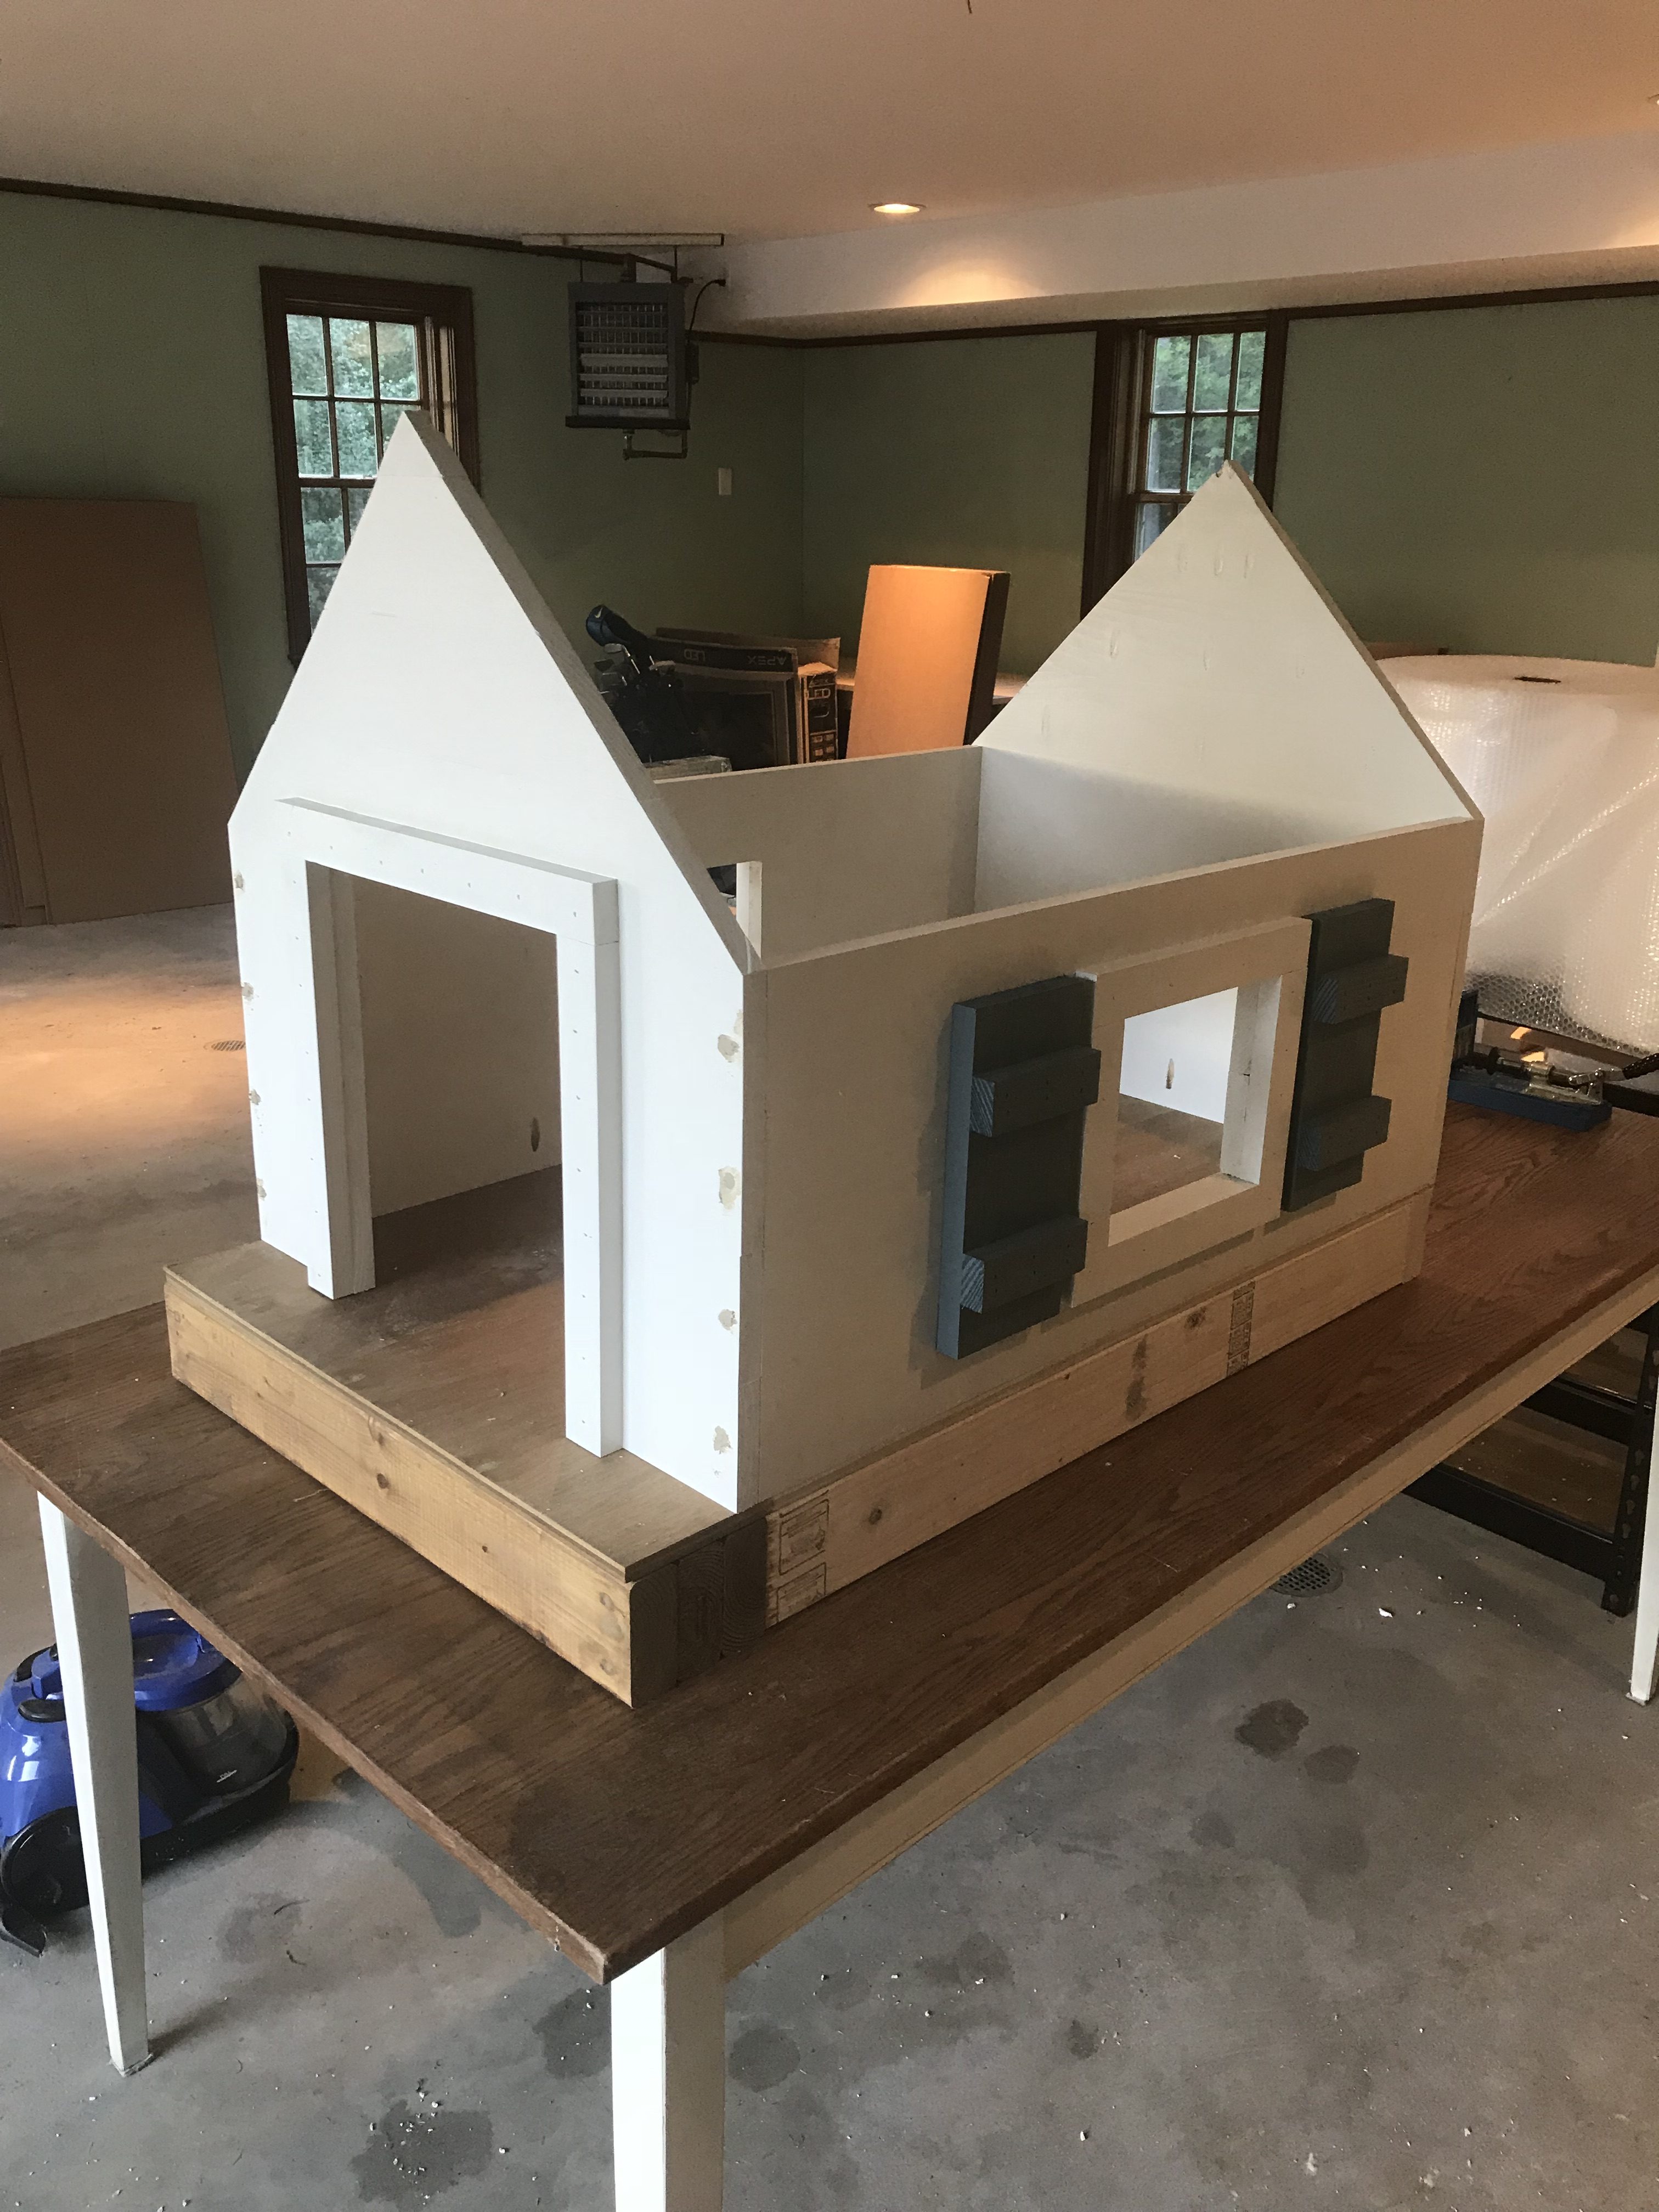
Next attach the front wall to the floor, and then insert screws straight through the exterior of the front wall directly into the perpendicular side walls. Putty over the screws, sand down, and the paint the wood filler.
Step 6: Attach Roof
Lay the 17×41.25″ sheet of plywood flush with the back wall, which should give you a little over a 5″ overhanging on the front side (covering your porch area). Insert three screws through the plywood and into top of the back wall. Then screw three more through the plywood and into the top of the front wall.
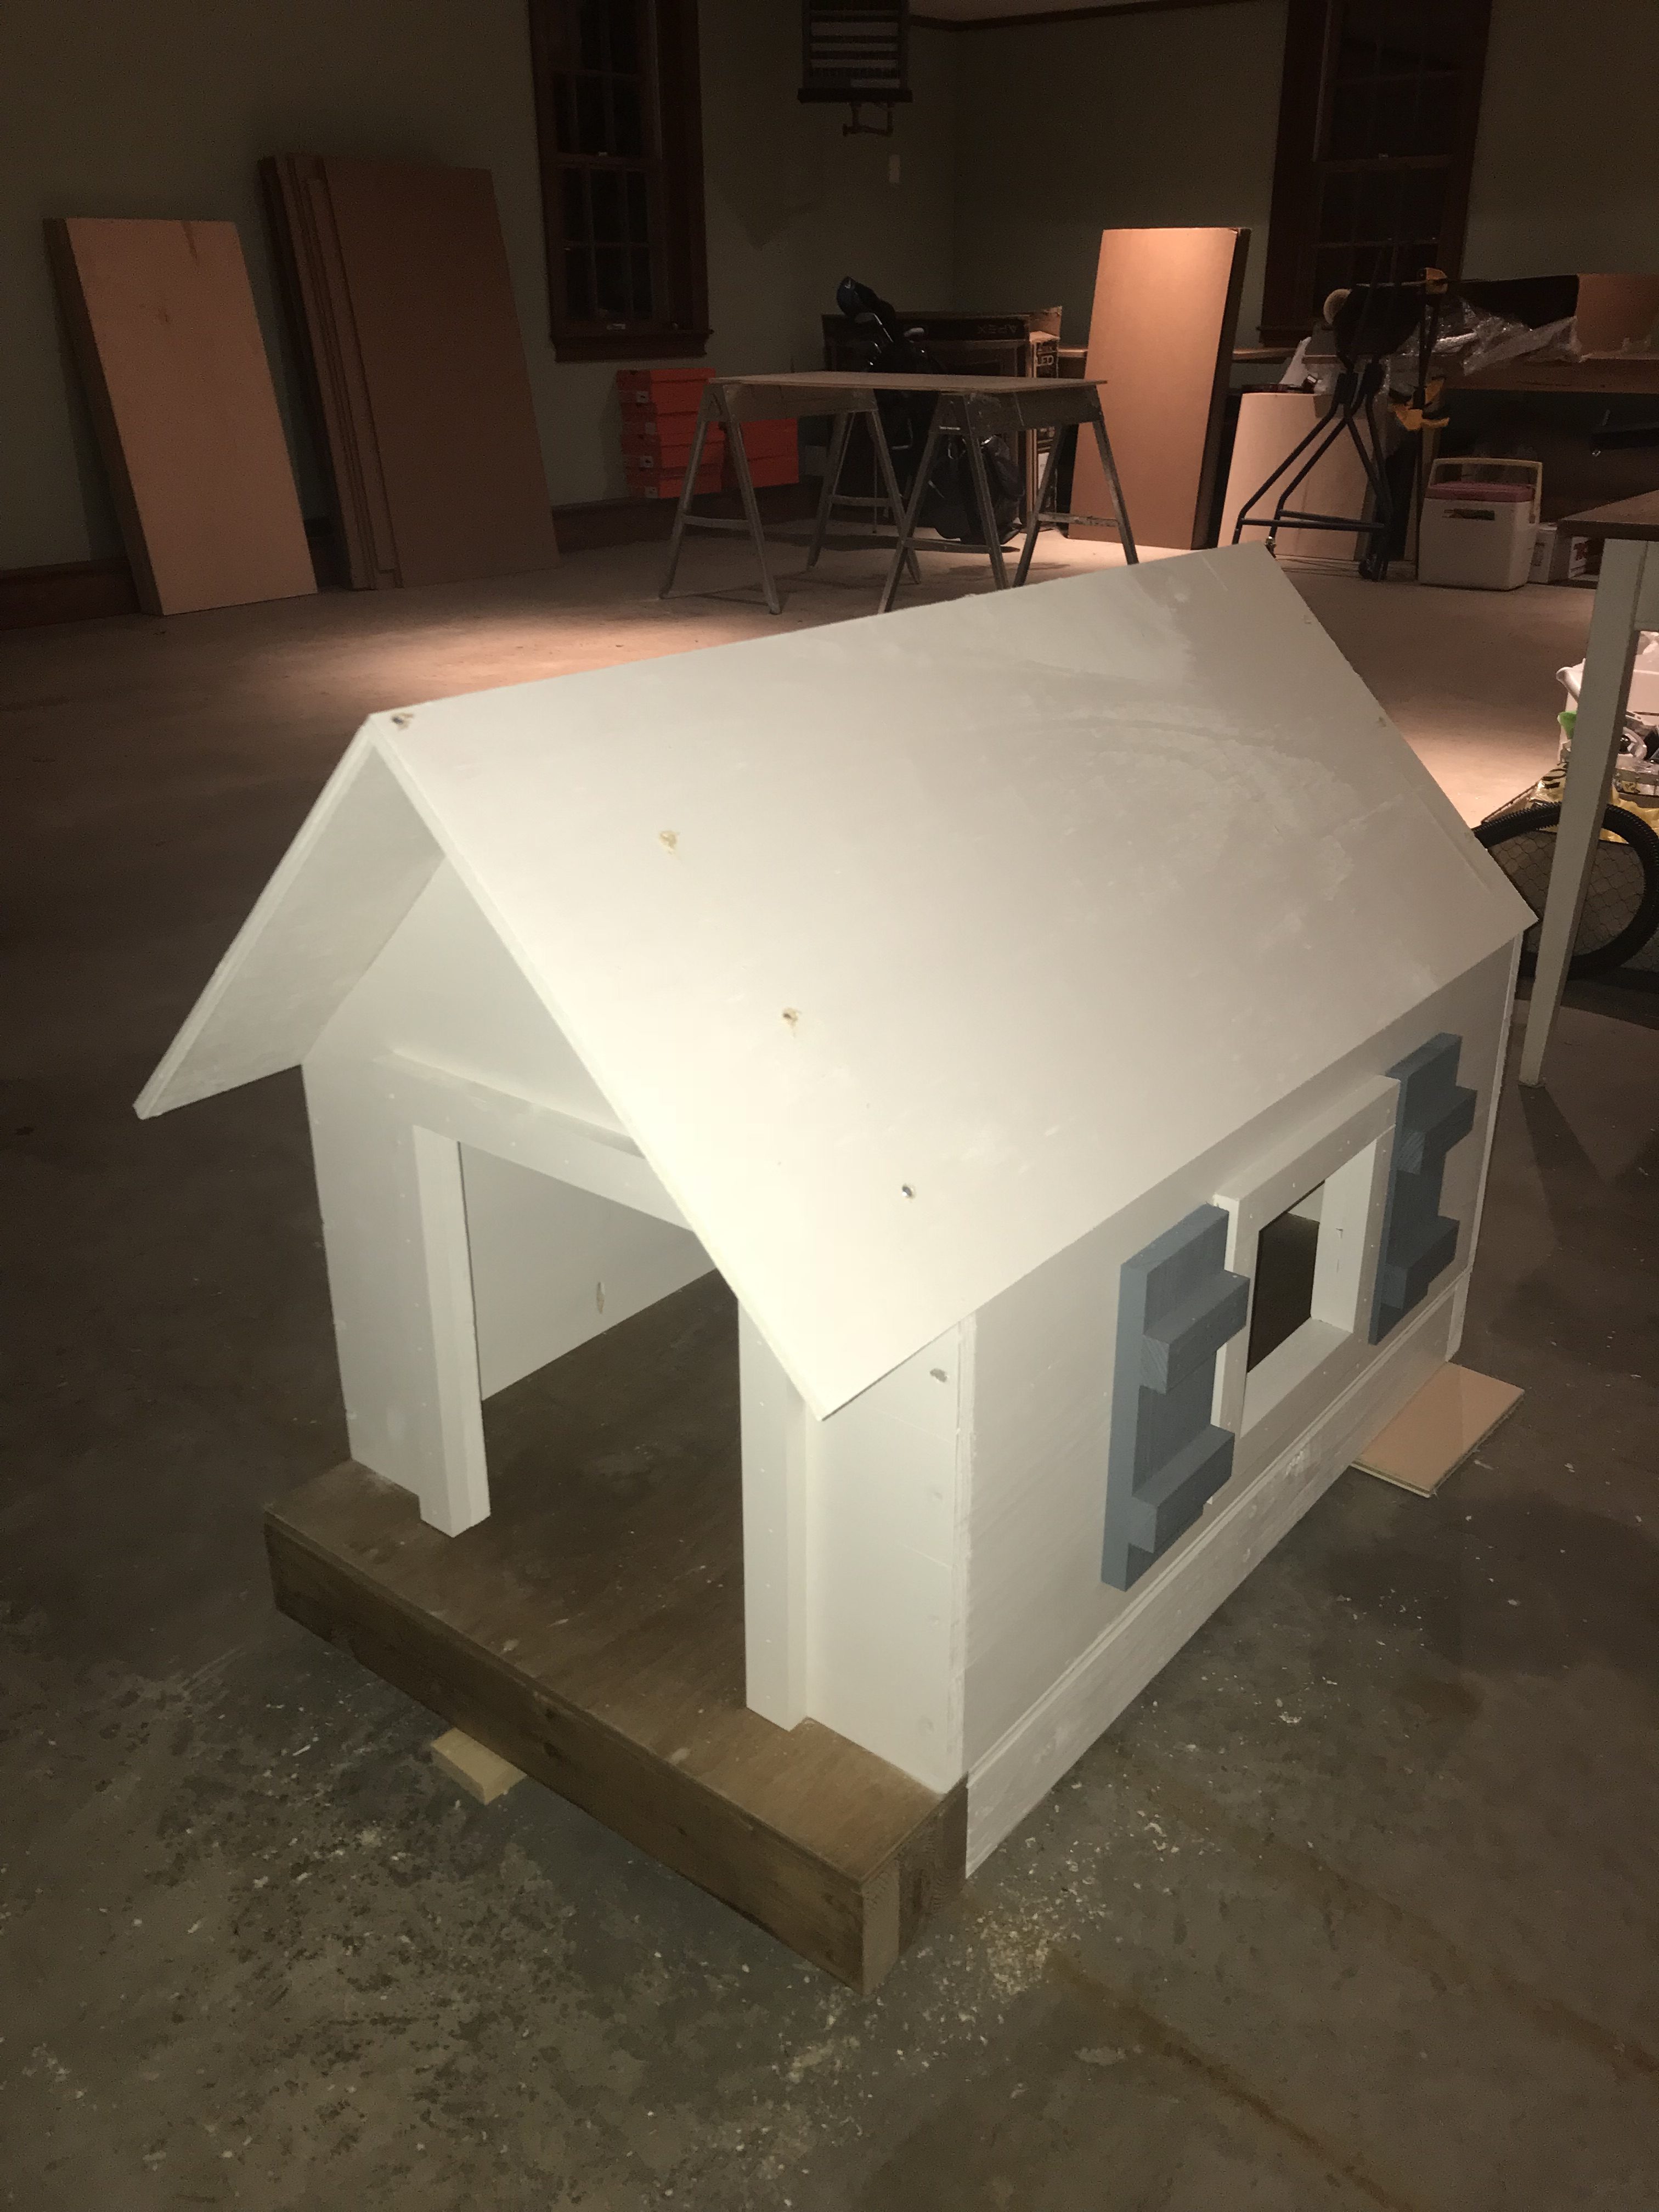
Now lay your 17.5×41.25″ plywood sheet flush with the back wall. It should also lay flush with the top edge of the first side of the roof. Then insert six screws through the plywood and into the top of the front and back walls. I also chose to insert one screw in the very top of the front of the roof, keeping the second plywood sheet tight and secure to the first.
Step 7: Shingle Roof
The final step is to shingle your roof! I had some help from Jamie’s husband Josh for this part, which definitely helped speed up the process.
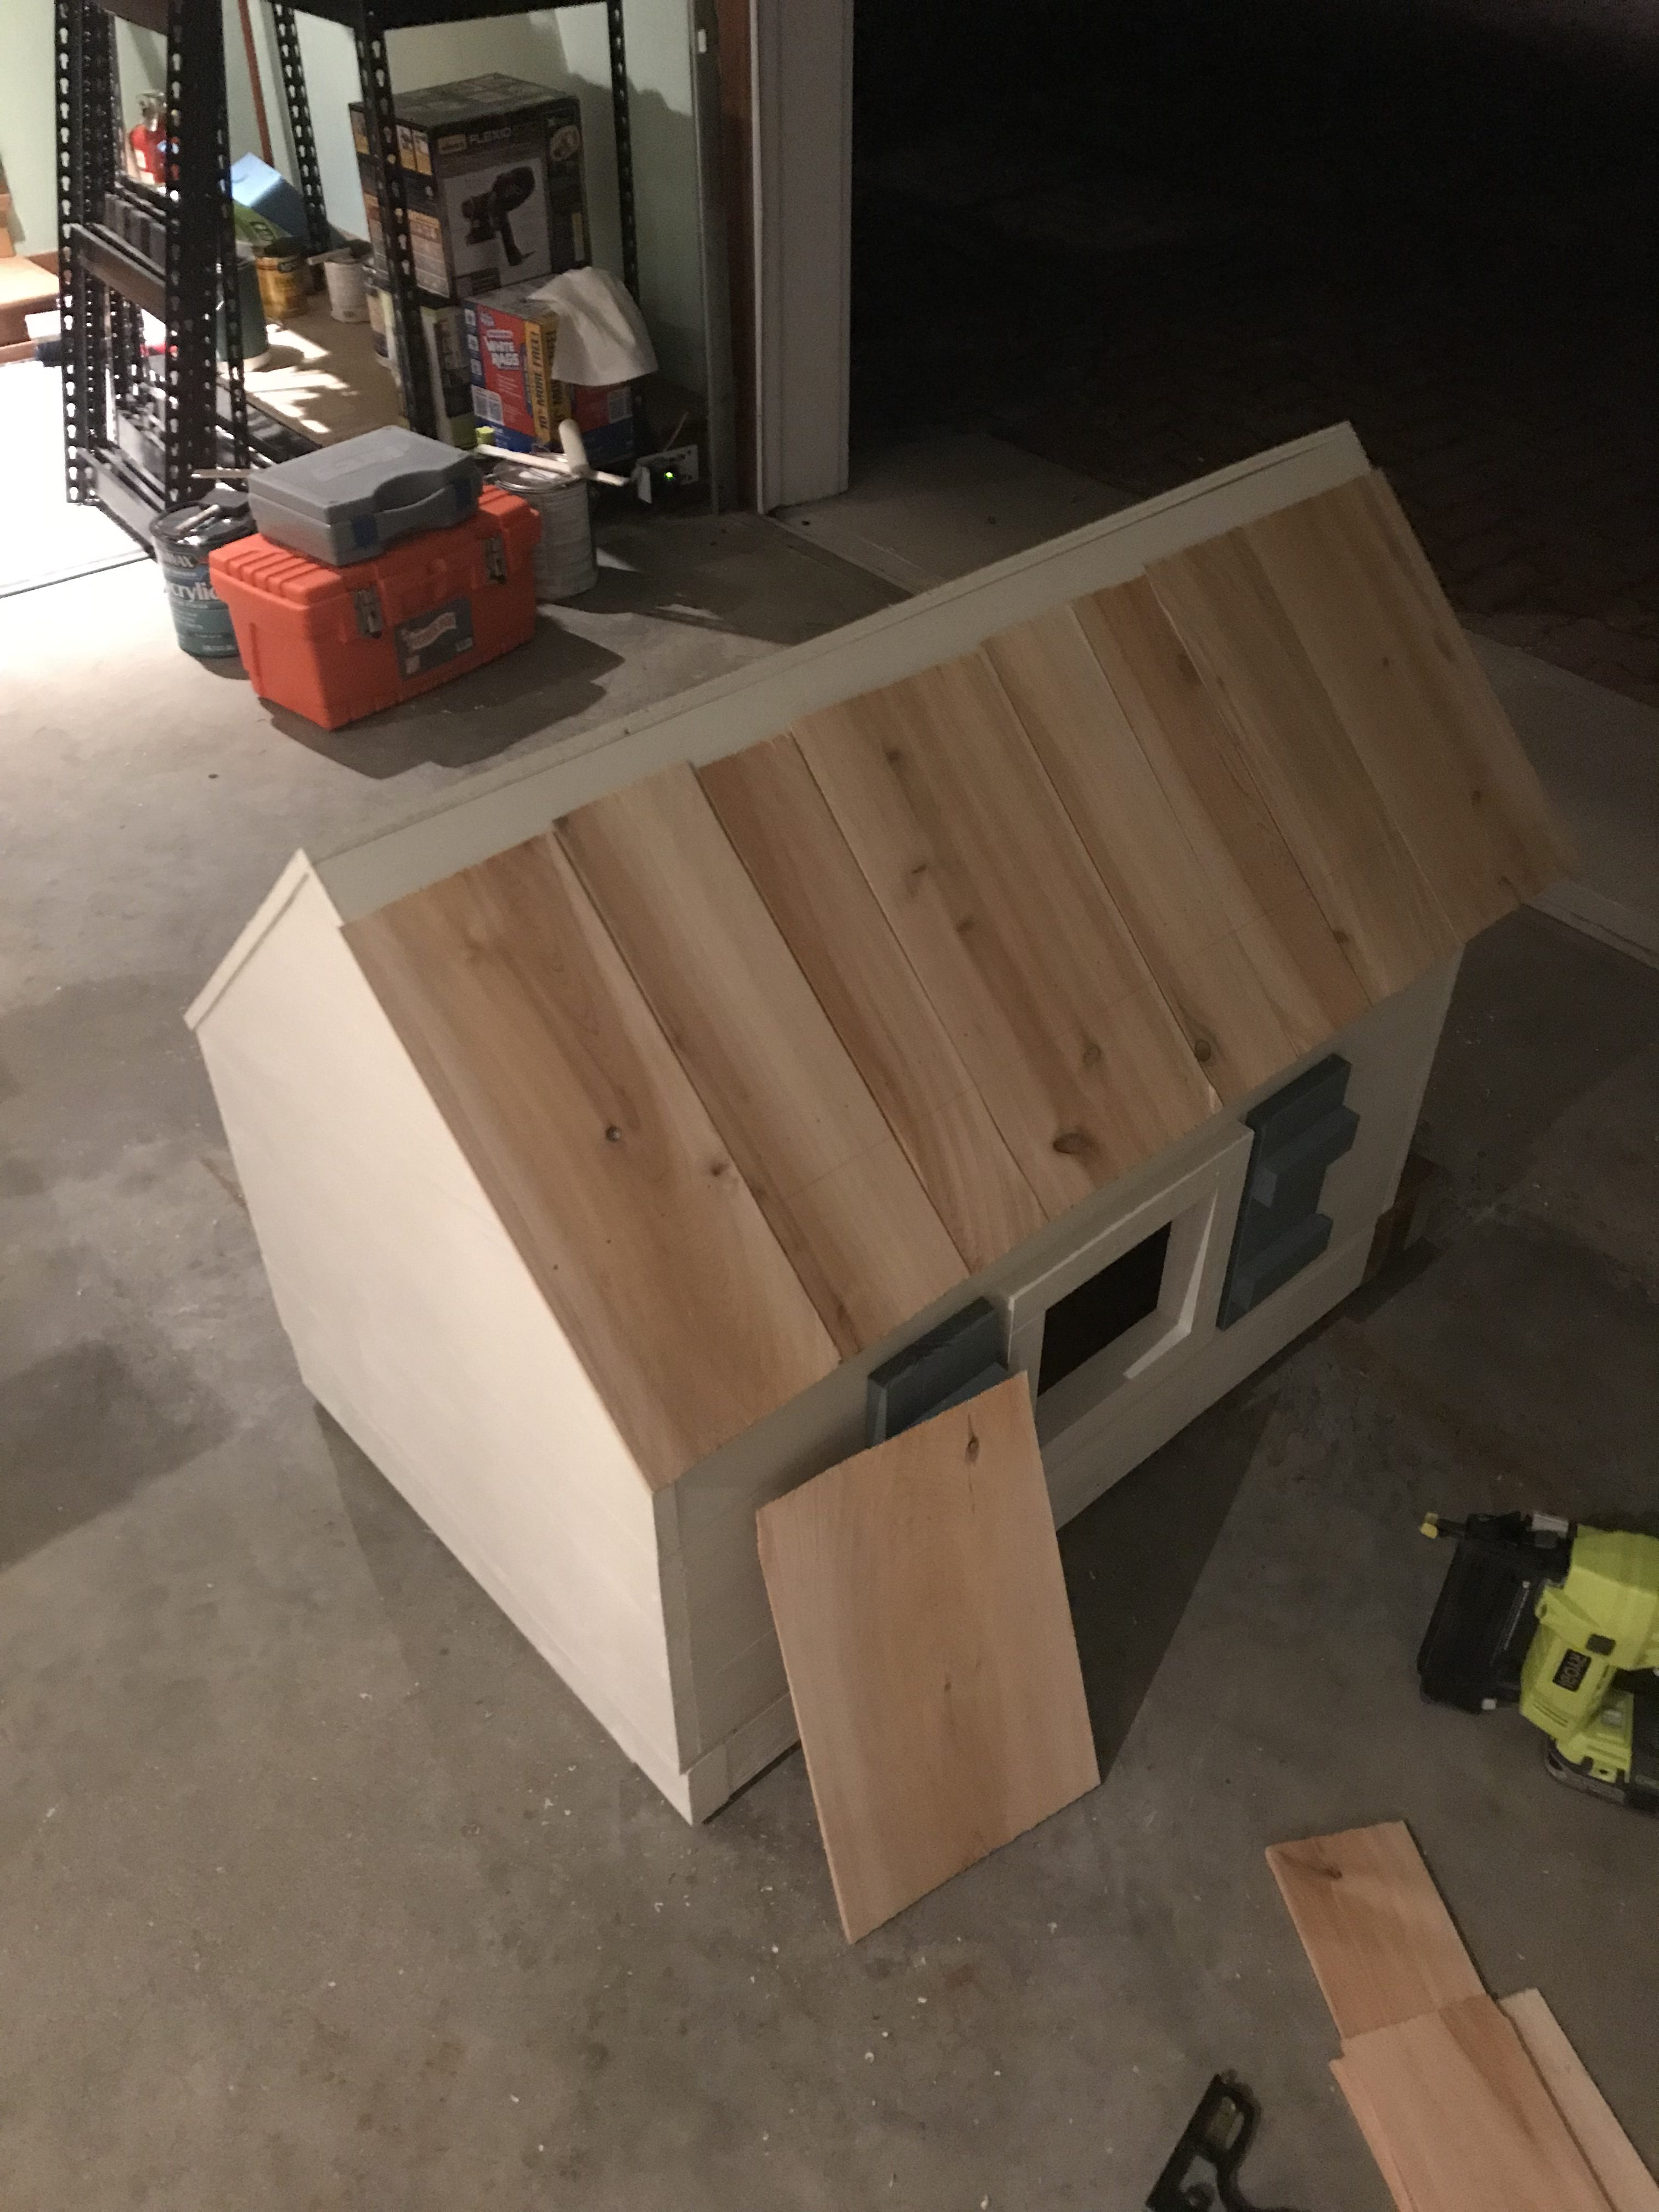
For the shingles we switched to our 5/8″ nails (so that they wouldn’t poke the whole way through the ceiling), and Brad Nailed them directly into the plywood. Our 2nd, 3rd, and 4th rows of shingles extended past the roofline, so we simply scored them with a boxcutter and broke off the excess.
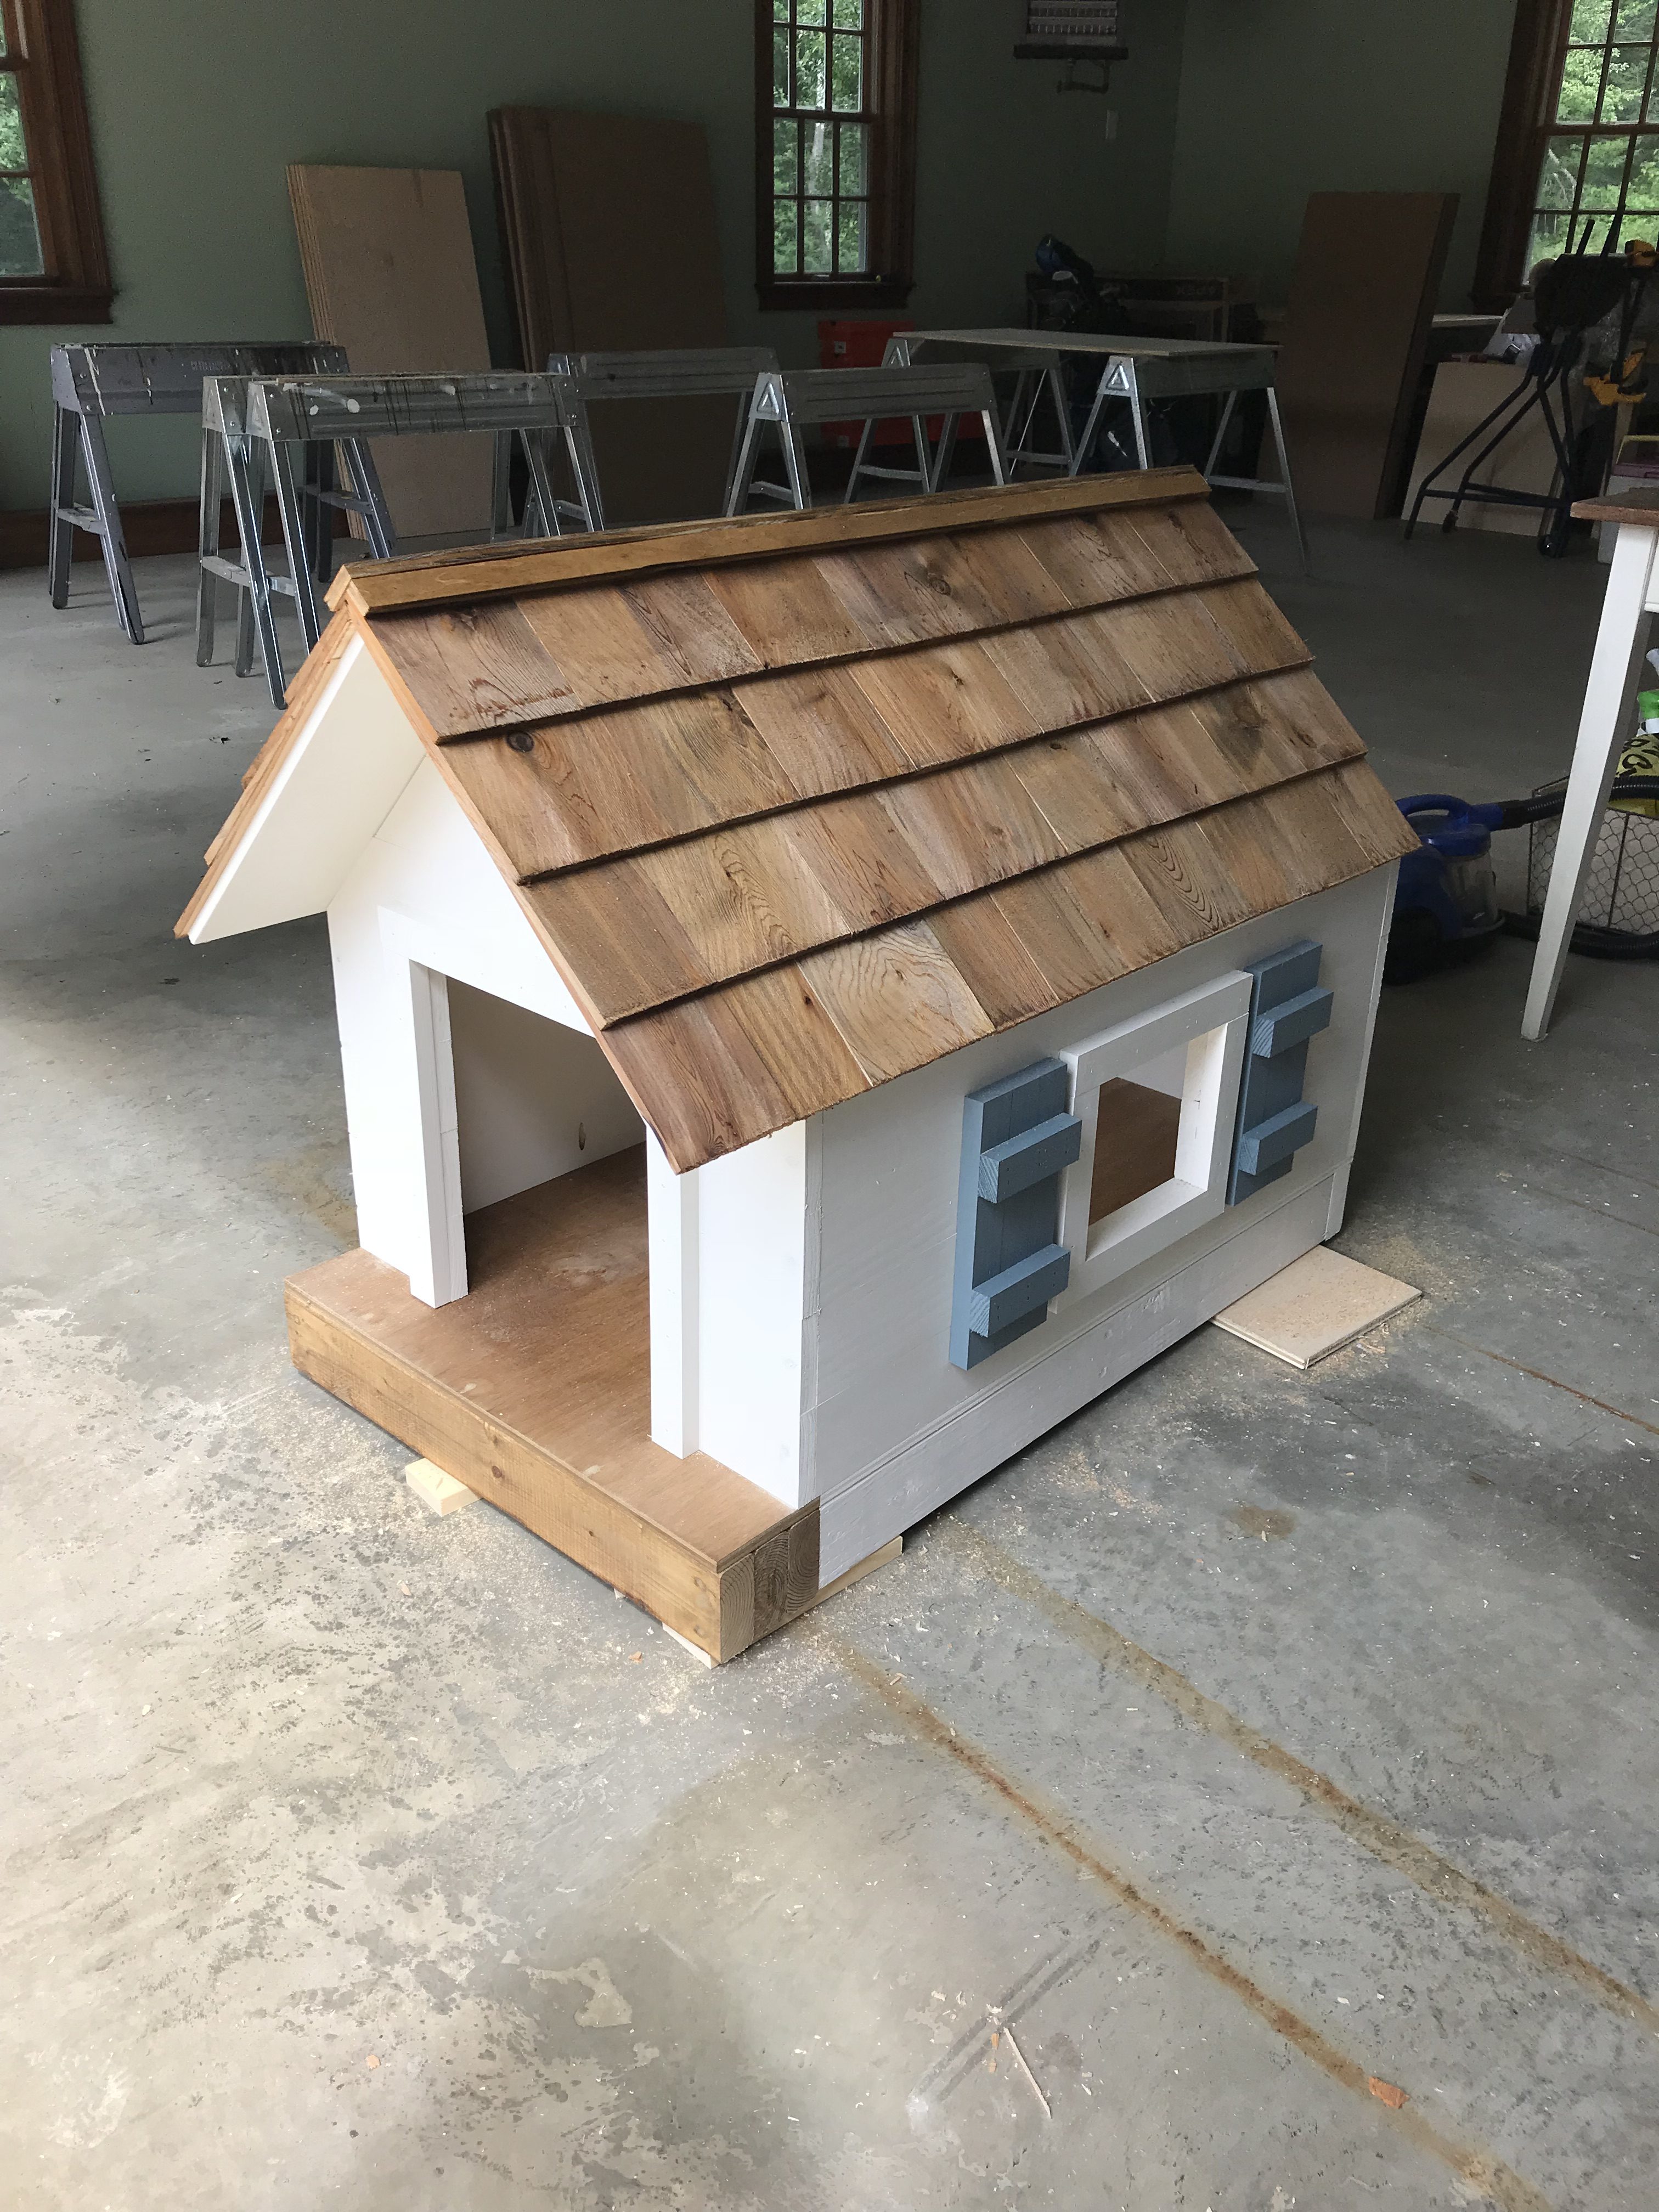
For the ridge cap we switched back to the 1.25″ Brad Nails and nailed in the 1.5×41.25″ plywood strip. We then used the 2×41.25″ on the other side to overlap it and cap it off. Lastly, we stained the entire roof with Minwax Golden Oak, and painted the rest of the foundation Ballet White by Benjamin Moore.
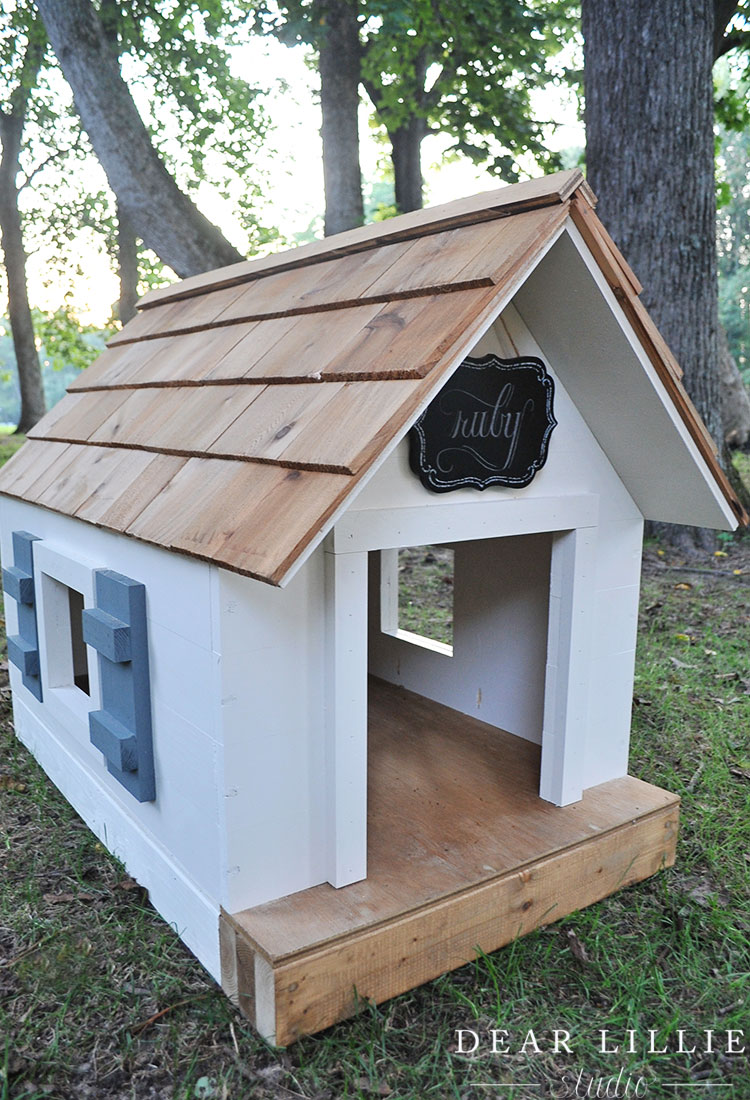
Jenni then added a little hanging chalkboard sign for a personal touch. And there you have it–Ruby’s handmade doghouse!
-Jason
Tools List:
Brad Nailer
Kreg Jig Kit
Miter Saw
Power Drill
Mouse Sander
Tape Measure
Pencil
Protective Gloves and Eyewear
Ear Protectors
Boxcutter
Paintbrush
Materials List:
3 – 24×48″ Sheets of 1/2″ Thick Plywood
3 – 6 Foot 2×4″ Pine Boards
8 – 6 Foot 1×4″ Pine Boards
4 – 6 Foot 1×2″ Pine Boards
1 – Bubble of White Cedar Shingles
1 – Golden Oak Stain by Minwax (Quart)
1 – Ballet White Paint by Benjamin Moore (Quart)
1 – Steep Cliff Gray Paint by Benjamin Moore (Quart)
1 – Container of Wood Filler (8 oz)
2 – 1.25″ Pocket Hole Screws (1oo Pack)
1 – 1.25″ Brad Nails Packet
1 – 5/8″ Brad Nails Packet
1 – Roll of Painter’s Tape


Maybe Jason could make another for Sheba…..
Haha! If he could figure out how to ship them I’m sure he would.
Darling Ruby is one lucky doggie! What a stylish cottage for a cute little puppy! Does she know what a FABULOUS uncle she has?
Thank you!
-Jason
As an animal person who adores puppy eyes and eagerness I would say you have earned a reward and I hope Ruby’s people know and show their appreciation as much as Ruby does.
Thanks, Karen! The girls were so excited when they saw it!
-Jason